Dovado USB Mobile Broadband Router Reference Manual
Usb mobile broadband router
Hide thumbs
Also See for USB Mobile Broadband Router:
- Reference manual (36 pages) ,
- Quick installation manual (20 pages) ,
- Reference manual (36 pages)

Related Manuals for Dovado USB Mobile Broadband Router


Summary of Contents for Dovado USB Mobile Broadband Router
- Page 1 USB Mobile Broadband Router Reference Manual & Quick User Guide The Mobile Choice for your Broadband Internet...
- Page 2 Other names of companies, products, or standards are the trademarks or registered trademarks of their respective owners.
-
Page 3: Table Of Contents
Table of Contents Introduction Package contents Additional required items Quick Installation Guide Hardware installation Reset button Connecting by Ethernet cable Connecting by Wireless LAN (WLAN/WiFi) Accessing the UMR Wizard Configuration Modem SMS Configuration Advanced Settings WLAN Settings LAN Settings System Settings Internet Upgrading the firmware Troubleshooting... -
Page 5: Introduction
Introduction Thank you for choosing the Dovado USB Mobile Broadband Router (UMR). This quick user guide will help you set up your UMR to access the Internet. Package contents Before continuing to the next section, make sure all of the listed items below are included in your package. -
Page 6: Quick Installation Guide
Quick Installation Guide With the Dovado UMR you can access the Internet wirelessly. In addition to the UMR you need a computer. The product can be set up using a common web browser. Hardware installation Before continuing, you will need to install the necessary hardware;... -
Page 7: Reset Button
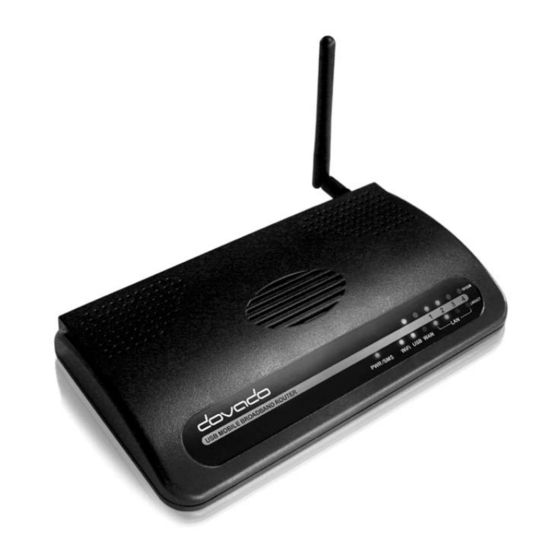
1. Wireless LAN (WLAN) antenna 4. USB ports 1-2 2. DC Power Input 5. LAN ports 1-4 3. Reset button 6. WAN port (reserved for future use) The reset button The location of the reset button is at the back of the UMR. If you need to erase all the inserted parameters and password, along with restoring the factory defaults settings, then hold down the reset button for approximately 8 seconds. -
Page 8: Connecting By Ethernet Cable
Wireless LAN network card). The Wireless LAN name (SSID) is DOVADO If these steps did not yield any results, then please verify that the network (LAN or WLAN) interface on your computer is using a dynamic (DHCP) IP address. -
Page 9: Accessing The Umr
Accessing the UMR Once you have connected a computer with either an Ethernet cable or by Wireless LAN, open your web browser and access the following website: Address: http://192.168.0.1/ Username: admin Password: password After clicking on , you will be taken to the page which will Login Home... -
Page 10: Wizard Configuration
Wizard Configuration Go to and then click on link to start the setup Home Start Wizard wizard. It will be opened in a new window. Follow the steps below to finish the installation. Welcome The welcome screen presents the steps that you will be guided through. Click on to continue. - Page 11 Set Password It is recommended that you now change the default password for the UMR configuration pages. Type in the new password and confirm it, then click on to continue. Next Here is a space to write down your new password: Quick Installation Guide...
- Page 12 Wireless LAN If you do not have any devices using Wireless LAN, choose disable for the Wireless LAN option, and then click on to continue (this will Next skip the encryption page). If you have a device using wireless LAN, enable Wireless LAN. You can also change the SSID, which is displayed in the client when a network search is performed.
- Page 13 Encryption Here you can activate encryption if you would like to restrict access of wireless users onto your private network. Choose to enable Enable encryption, it is recommended that you select 128 bits as Encryption and then type in a key. The key is needed by all Wireless LAN Strength clients to access your private network.
- Page 14 Configure Internet This section configures the mobile USB modem you are to use with the UMR. If the SIM card which you are using from your mobile operator came with a PIN code, then enter it into the (if any) Pin Code field.
- Page 15 Restart You have now finished the installation. Click on to save the Close changes and the UMR will restart in order for the changes to take effect. Quick Installation Guide...
-
Page 16: Modem
Modem On the page, you will be able to insert all Modem->Modem Settings the valid inputs in order to access the internet via your mobile operator. There are several relevant bits of information which are necessary in order to complete this task successfully: •... - Page 17 UMR. If your scenario is not available in this guide, then please visit for latest update. www.dovado.com/support Once the information has been inserted, the unit will automatically try to establish a connection to the operator’s network. A solid yellow light on the USB LED indicates a successful connection.
-
Page 18: Sms Configuration
SMS Configuration The UMR supports SMS on a selected range of USB-modems, please verify if your modem is supported on www.dovado.com/modems You will also need to verify that your mobile broadband subscription supports SMS. To activate, go to and click on... -
Page 19: Advanced Settings
Advanced Settings The Dovado UMR has a built-in firewall. In this section you will learn more about this and other security features. Besides password protecting the UMR configuration pages it is possible to restrict the Wireless LAN devices that may access your private network and the public Internet through the UMR. -
Page 20: Wlan Settings
(Service Set Identifier) is the name of the UMR that will appear SSID in other Wireless LAN clients when they perform a network search. Default value is DOVADO. enables or disables transmission of the SSID from the SSID Broadcast UMR. When disabled, other Wireless LAN clients will not find the UMR when they perform a network search. - Page 21 enables or disables the WLAN. If you do not use any Wireless Radio Wireless LAN devices it is recommended that you select disable. Click on and then for the changes to take Save WLAN Settings Restart effect. WLAN->Authentication: The encryption settings for your private Wireless LAN.
- Page 22 complexity and larger data overhead this option may decrease the performance of the network. Click on and then Restart for the changes Save Authentication Settings to take effect. WLAN->MAC Address Control: The settings for restricting access to your private network via white-listing of authorized clients. enables or disables the MAC address filtering on MAC Address Control the MAC addresses under...
-
Page 23: Lan Settings
LAN Settings LAN->LAN Settings: The network settings for the UMR. allows you to change the default IP address for your Network Settings UMR. However, in most cases you do not need to change this setting. Note that the IP address for the UMR is used on your private network only. - Page 24 Click on and then Restart for the changes Save DHCP Settings to take effect. LAN->Port Forwarding: The settings for manually unblocking certain communication ports in your private network. is a list of logical ports that cannot be used to access Reserved Ports your private network from the public Internet.
-
Page 25: System Settings
System Settings System->Security: Option for changing the default password of the UMR. Please enter the same password twice and press . The Save Password new password will take effect upon restart. : If you have misplaced or forgotten your password, you can reset it Note to “password”... - Page 26 In most cases, the operator which provides System->Dynamic DNS: the internet service towards your UMR is handing out a constantly- shifting (dynamic) IP address. The Dynamic DNS feature allows you to contact your UMR via an easily accessible hostname, such as ”umr. mydyndns.com”.
-
Page 27: Internet
Internet For Internet Connections, WAN Port Settings and Connection Tracker push and make your settings. Internet Internet Connections The UMR can also be used with a regular fixed broadband connection from an ADSL- or Cable-modem. To select your primary broadband connection, push and then select . - Page 28 WAN Port Settings The default setting is that your operator automatically will give you an IP address, should your operator have given you a static (specific) IP address than select and fill in the given information in Manual settings the relevant fields. Advanced settings...
- Page 29 Connection Tracker In order to ensure maximum internet availability you can use the Connection Tracker feature. When inserting a minimum of 2 IP addresses, these addresses will be ”pinged” with an interval that you specify in minutes in the field. Interval After entering the selected IP addresses, you can test the ping function to these addresses by pushing the button directly below the IP...
- Page 30 Should your internet connection drop, you have 3 options on how the UMR should react: Default • Redial only (in WAN Ethernet mode: Reinitialize interface). value that attempts to reestablish the broadband connection. • Redial and Restart (UMR restarts itself after 3 failed redial attempts). Using this option, your local area/wireless network will be unreachable for a short while during the restart of the UMR.
-
Page 31: Upgrading The Firmware
Upgrading the firmware The latest firmware is available on www.dovado.com/umrfirmware Do not remove the power or the USB modem during Warning! upgrading as this will break your UMR! There are two ways to upgrade the firmware: you can either upgrade the UMR via HTTP or via FTP. - Page 32 In order to use the FTP upgrade option, the FTP server which contains Note: the firmware image must be accessible via an anonymous FTP account. Close the web browser and wait until the UMR has restarted. The UMR is now ready to use. Advanced settings...
-
Page 33: Troubleshooting
Check that your UMR has identified the USB modem (Check the • under upon logging into the Reported Backhaul Technology Home UMR). If not, check if your USB modem is supported: www.dovado.com/modems Check the signal strength in the page. • Modem->Modem Status Verify that a correct and/or Username •... - Page 34 Q2: The USB LED on the front of the UMR is lit, yet I can’t surf! How come? Test to see if you can do the following (in listed order): Ping the UMR’s internal IP address. 1. In Windows, click on followed by and type in • Start Once the black command prompt is open, type in •...
-
Page 35: Support
Support Technical support for this product is available by email however the website offers Configuration scenarios along www.dovado.com/support with a Frequently Asked Questions (FAQ) section for troubleshooting. When contacting by email ( ), do not forget to support@dovado.com provide the following information (it can be found on the label at the... -
Page 36: Technical Specifications
Technical specifications Connectors • 2 x USB 2.0 • 4 x RJ45 Connector for LAN • 1 x RJ45 Connector for WAN • SMA Connector for WLAN antenna • Power supply jack (DC12V) Power supply • DC12V, 1.5A AC adapter (100-240V AC, 50/60Hz) WLAN Transmission power •... -
Page 37: Guidelines For Safe And Efficient Use
UMR as it contains small parts that could Do not be detached and create a choking hazard. original Dovado components and replacement parts. Failure to do so Use only may result in performance loss, damage to the product, fire, electric shock or injury, and will invalidate the warranty. -
Page 38: Limited Warranty
Limited Warranty Save your original receipt. You will need it for warranty/repair claims. Should your Dovado Product need warranty service, return it to the place of purchase or contact your local Dovado Call-Centre for further information. Dovado guarantees this Product to be free from defects in material Our warranty. - Page 39 All implied warranties, including, and without limitation, the implied warranties or merchantability or fitness for a particular purpose, are limited to the duration of this limited warranty. Dovado shall under no circumstances be liable for incidental or consequential damages of any nature whatsoever.
- Page 40 CE mark for European Harmonized Standards...
- Page 41 THE FCC REGULATION WARNING (for U.S.A) This equipment has been tested and found to comply with the limits for a Class B digital device, pursuant to Part 15 B of the FCC Rules. These limits are designed to provide reasonable protection against harmful interference in a residential installation. This equipment generates, uses, and can radiate radio frequency energy and, if not installed and used in accordance with the instructions, may cause harmful interference to radio communications.
- Page 42 You may obtain a complete corresponding machine-readable copy of the source code of such software under the GPL or LGPL at http://www.dovado.com/ Alternatively; Dovado offers to provide such source code to you on CD-ROM for a charge covering the cost of performing...
Need help?
Do you have a question about the USB Mobile Broadband Router and is the answer not in the manual?
Questions and answers