Table of Contents
Advertisement
Quick Links
Before you can use the machine, you must set up the hardware and install the driver. Please read
this 'Quick Setup Guide' for proper set up and installation instructions.
Installing the Driver & Software
Keep this 'Quick Setup Guide' and the supplied CD-ROM in a convenient place for quick and easy
reference at all times.
STEP 1
Setting Up the Machine
STEP 2
Setup is Complete!
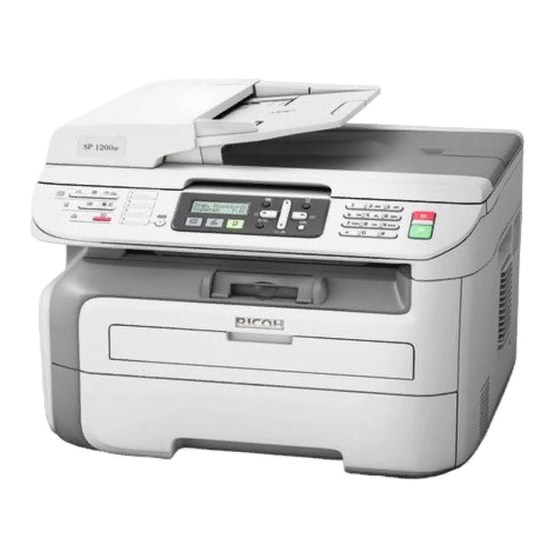
SP 1200S
Advertisement
Table of Contents

Related Manuals for Ricoh SP 1200S


Summary of Contents for Ricoh SP 1200S
- Page 1 SP 1200S Before you can use the machine, you must set up the hardware and install the driver. Please read this ‘Quick Setup Guide’ for proper set up and installation instructions. STEP 1 Setting Up the Machine STEP 2 Installing the Driver & Software Setup is Complete! Keep this ‘Quick Setup Guide’...
-
Page 2: Symbols Used In This Guide
Symbols used in this guide Caution Improper Setup Warning Warnings tell you what to do to prevent Cautions specify procedures you must Improper Setup icons alert you to possible personal injury. follow or avoid to prevent possible devices and operations that are not damage to the machine or other objects. -
Page 3: Table Of Contents
Supplied CD-ROM Supplied CD-ROMs for ‘SP 1200S’......................16 Drivers and Utilities for SP 1200S......................16 PaperPort™ 11SE and Documentation for SP 1200S ................16 STEP 2 – Installing the Driver & Software Installing TYPE 1200S Drivers and Utilities ....................18 ®... -
Page 4: Safety Precautions
Safety Precautions To use the machine safely Please keep these instructions for later reference and read them before attempting any maintenance. Warning Before cleaning the inside of the machine, first unplug the telephone line cord, and then the power cord from the electrical socket. DO NOT use flammable substances, any type of spray or organic solvent/liquids containing alcohol/ammonia to clean the inside or outside of... -
Page 5: Symbols For The Main Power Switch
Safety Precautions To prevent injuries, DO NOT put your fingers in the area shown in the illustrations. DO NOT use a vacuum cleaner to clean up scattered toner. Doing this might cause the toner dust to ignite inside the vacuum cleaner, potentially starting a fire. Please carefully clean the toner dust with a dry, lint-free cloth and dispose of it according to local regulations. -
Page 6: Regulations
The wires in the mains lead are coloured in line with ® As an ENERGY STAR Partner, Ricoh Company, the following code: Ltd. has determined that this product meets the Green and Yellow: Earth ®... -
Page 7: Important Information For Australia
Safety Precautions 11 DO NOT touch a document during printing. Important Information for 12 Never push objects of any kind into this product Australia through cabinet slots, since they may touch dangerous voltage points or short out parts resulting in a risk of fire or electric shock. Never spill liquid of any kind on the product. -
Page 8: Important Information For New Zealand
Safety Precautions If the product does not operate normally when Important Information for the operating instructions are followed. Adjust New Zealand only those controls that are covered by the operating instructions. Incorrect adjustment of other controls may result in damage and will often require extensive work by a qualified Important Safety Instructions technician to restore the product to normal... -
Page 9: Important Information For Some Countries
DO NOT connect it to a DC power source or equipment. inverter. If you are not sure, contact a qualified Ricoh cannot accept any financial or other electrician. responsibilities that may be the result of your use 9 This product is equipped with a 2-wire grounding... -
Page 10: Getting Started
Getting Started Carton components for EU Carton components may vary from one country to another. Save all packing materials and the carton in case for any reason you must ship your machine. Warning Plastic bags are used in the packaging of your machine. To avoid danger of suffocation, please keep these bags away from babies and children. -
Page 11: Carton Components For Asia/Oceania
Getting Started Carton components for Asia/Oceania Carton components may vary from one country to another. Save all packing materials and the carton in case for any reason you must ship your machine. Warning Plastic bags are used in the packaging of your machine. To avoid danger of suffocation, please keep these bags away from babies and children. -
Page 12: Control Panel (For Eu Model)
Getting Started Control panel (For EU model) For the details of the control panel, see Control panel overview in Chapter 1 of the User’s Guide. 4 LCD Print key Displays messages to help you set up and use your Job Cancel machine. -
Page 13: Control Panel (For Asia/Oceania Model)
Getting Started Control panel (For Asia/Oceania model) For the details of the control panel, see Control panel overview in Chapter 1 of the User’s Guide. 1 Print key 4 LCD Job Cancel Displays messages to help you set up and use your machine. -
Page 14: Step 1 Setting Up The Machine
STEP 1 Setting Up the Machine Put the drum unit and toner cartridge assembly Installing the drum unit and into the machine. toner cartridge assembly Improper Setup DO NOT connect the interface cable. Connecting the interface cable is done when installing the driver. -
Page 15: Loading Paper In The Paper Tray
Setting Up the Machine Fan the stack of paper well to avoid paper jams Loading paper in the paper and misfeeds. tray Pull the paper tray completely out of the machine. Put paper in the paper tray. Make sure that the paper is flat in the tray and below the maximum paper mark (1). -
Page 16: Install The Power Cord
STEP 1 Setting Up the Machine Install the power cord Selecting your language Make sure that the machine’s power switch is After turning the power switch on, the LCD off. Connect the AC power cord to the machine. shows: Select Language Press OK Key Press OK. -
Page 17: Setting The Lcd Contrast
Setting Up the Machine Setting the LCD contrast You can change the contrast to help the LCD look lighter or darker. Press Menu and to select 1.General Setup. Press OK. Press to select 5.LCD Contrast. Press OK. Press to increase the contrast. —OR—... -
Page 18: Supplied Cd-Rom
If an error occurred during the installation of the Documentation Multi-Function Suite, use this selection to automatically repair and re-install the You can view the manuals for SP 1200S in PDF Multi-Function Suite. format. The Quick Setup Guide, the User Guide and the Note Software User's Guide. -
Page 19: Step 2 Installing The Driver & Software
STEP 2 Installing the Driver & Software ® For USB Interface Cable Users (For Windows 2000 Professional/XP/7/ ® XP Professional x64 Edition/Windows Vista Installing TYPE 1200S Drivers and Utilities ..............18 ® Installing ScanSoft™ PaperPort™ 11SE for Windows ..........20 View and Installing the documentation ................ -
Page 20: Installing Type 1200S Drivers And Utilities
• Please update to the latest Windows Service Pack before installing Multi-Function Suite. • Be sure to use the CD-ROM titled “Drivers and Utilities for SP 1200S” Note ® • If this window does not appear, use Windows Turn off and unplug the machine from the AC Explorer to run the start.exe program from the... - Page 21 Installing the Driver & Software When the Multi-Function Suite Software Plug the AC power cord into an AC outlet. Turn License Agreement window appears, click Yes the power switch on. if you agree to the Software License Agreement. The installation of the drivers will automatically start.
-
Page 22: Installing Scansoft™ Paperport™ 11Se For Windows
TYPE 1200S Drivers and Utilities on pages 18 through 19. Note Be sure to use the CD-ROM titled “PaperPort™ 11SE and Documentation for SP 1200S” ® Put the supplied CD-ROM for Windows into your CD-ROM drive. If the model name screen After reading and accepting the ScanSoft™... -
Page 23: View And Installing The Documentation
Control Dialog box appears on your computor, click YES. The CD-ROM Top menu will appear. Click Documentation. You can view the manuals for SP 1200S in PDF format. The Quick Setup Guide, the User Guide and the Software User's Guide. The Software User's Guide includes instructions for features available when connected to a computer. -
Page 24: Consumables And Options
For more information about the consumables for your printer, contact your sales or service representative. Toner Cartridge Drum Unit Print Cartridge SP 1200E (for Europe) Drum Unit SP 1200 Print Cartridge SP 1200S (for Asia) (Approx. 12,000 pages A4/Letter pages) Approx. cartridge yield is declared in accordance with ISO/IEC 19752. - Page 25 Trademarks All brand and product names mentioned in this manual are registered trademarks of their respective companies. Copyright © 2011 Ricoh Co., Ltd. All Rights Reserved.
- Page 26 M086-6140 GB...
Need help?
Do you have a question about the SP 1200S and is the answer not in the manual?
Questions and answers