Table of Contents
Advertisement
NOTE:
The Trikke E2 must be traveling up to 3 mph before motor will engage. Kick
start up to 3 mph while applying the throttle to engage motor.
Owner's Manual
Read and understand this entire manual before
allowing child to use this product!
For assistance contact Razor. DO NOT RETURN TO STORE.
NOTE: Manual illustrations are for demonstration purposes only.
Illustrations may not reflect exact appearance of actual product.
Specifications subject to change without notice.
Please have your 19 character product I.D. code ready before
contacting Razor for warranty assistance and/or replacement parts.
Product I.D. Code: _____________ - ____________ - ____________
US_121210
Advertisement
Table of Contents

Related Manuals for Razor Trikke E2


Summary of Contents for Razor Trikke E2
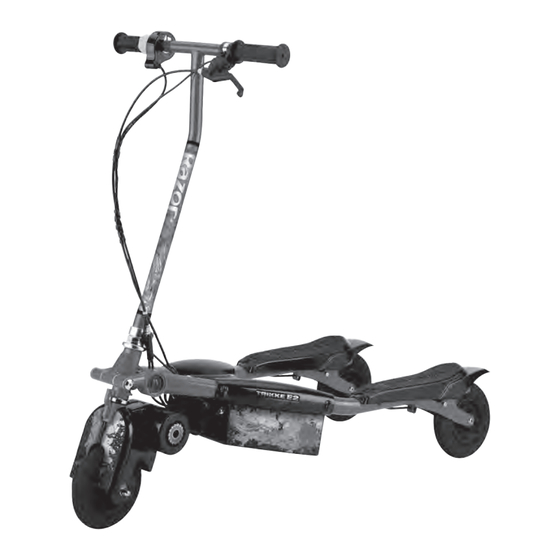
- Page 1 NOTE: The Trikke E2 must be traveling up to 3 mph before motor will engage. Kick start up to 3 mph while applying the throttle to engage motor. Owner’s Manual Read and understand this entire manual before allowing child to use this product! For assistance contact Razor.
-
Page 2: Table Of Contents
Do not ride the Razor Trikke E2 in wet or icy weather and never immerse it in inherent in its use, should not use or be permitted to use products inappropriate for water, as the electrical and drive components could be damaged by water or create their abilities. -
Page 3: Before You Begin
Need Help? Visit our website for replacement parts, product support and a list of authorized service centers at www.razor.com or call toll free 866-467-2967 Monday - Friday 8AM - 5PM Pacific Time. Please have the product I.D. code (located on the white label on your product or back of charger) available for better assistance. -
Page 4: Assembly And Setup
ASSEMBLY AND SET -UP q Attaching the Handlebars Tools Required: 5mm Allen wrench Using a 5mm Allen wrench, Center the handlebars onto the Align the holes on the handlebar remove the 2 bolts on the stem. Make sure the arc on the clamp with the holes on the stem handlebar clamp. -
Page 5: Assembly And Setup
ASSEMBLY AND SET -UP q Attaching the Stem Note: Make sure the cables/wires are out of the way before inserting Tools Required: 5mm Allen wrench the stem in the fork. WARNING: Failure to properly tighten the collar clamp may allow the handlebars to dislodge while riding and may cause you to lose control and fall. -
Page 6: Charging The Battery
Need Help? Visit our website for replacement parts, product support and a list of authorized service centers at www.razor.com or call toll free 866-467-2967 Monday - Friday 8AM - 5PM Pacific Time. Please have the product I.D. code (located on the white label on your product or back of charger) available for better assistance. -
Page 7: Pre-Ride Checklist/Usage
This is a motorized three-wheeled product and riders must familiarize themselves with the characteristics and proper Note: The Trikke E2 must be use of the product. It is not “just like a bicycle,” it is not “just like a scooter,” and it is not “just like a tricycle.” The... - Page 8 Always maintain firm control over the handlebars with both hands, never drive with just one hand or no hands. The Razor Trikke E2 required both hands on the handlebars at all times. Beginner riders have a tendency to apply excessive force on the handlebars, making sudden movements, throwing their weight from one side to another.
- Page 9 Riders who are accustomed to skiing or skating normally learn in minutes - and remember, the Razor Trikke E2 can be operated solely by relying on the electric power, so there is no rush to depend on trying to do too much, too soon.
-
Page 10: Repair And Maintenance
Need Help? Visit our website for replacement parts, product support and a list of authorized service centers at www.razor.com or call toll free 866-467-2967 Monday - Friday 8AM - 5PM Pacific Time. Please have the product I.D. code (located on the white label on your product or back of charger) available for better assistance. -
Page 11: Replacement Parts
Need Help? Visit our website for replacement parts, product support and a list of authorized service centers at www.razor.com or call toll free 866-467-2967 Monday - Friday 8AM - 5PM Pacific Time. Please have the product I.D. code (located on the white label on your product or back of charger) available for better assistance. -
Page 12: Trikke E2 Parts
TRIKKE E2 PARTS Keep your scooter running for years with genuine Razor parts. Visit our website or e-mail us for more information on spare part availability. (Specifications subject to change without notice.) 1. Handlebar Grips 10. Battery Bracket 19. Motor Cover 2. - Page 14 SB 1918 (CALIFORNIA) DECLARATION YOUR INSURANCE POLICIES MAY NOT PROVIDE COVERAGE FOR ACCIDENTS INVOLVING THE USE OF THIS SCOOTER/ELECTRIC RIDE-ON PRODUCT. TO DETERMINE IF COVERAGE IS PROVIDED, YOU SHOULD CONTACT YOUR INSURANCE COMPANY OR AGENT.
-
Page 15: Warranty
Need Help? Visit our website for replacement parts, product support and a list of authorized service centers at www.razor.com or call toll free 866-467-2967 Monday - Friday 8AM - 5PM Pacific Time. Please have the product I.D. code (located on the white label on your product or back of charger) available for better assistance.
Need help?
Do you have a question about the Trikke E2 and is the answer not in the manual?
Questions and answers