Table of Contents
Advertisement
Advertisement
Table of Contents

Related Manuals for Verilux vt20


Summary of Contents for Verilux vt20
- Page 1 Liberty Series ™ Natural Spectrum Energy Lamp ® Model: VT20...
- Page 2 Visit us on the web at www.verilux.com to request a free catalog and learn more about all of our quality Verilux products, or call our toll-free number: 1-800-454-4408. As a Verilux customer, your satisfaction means everything to us.
-
Page 3: Table Of Contents
Contents Important Safeguards ....... . . 4 Features ..........5 Benefits . -
Page 4: Important Safeguards
READ ALL INSTRUCTIONS BEFORE USING Important Safeguards DANGER: • To avoid electrocution, do not operate this device near water. WARNING: • Do not use with power supply voltage other than 120 VAC. • Do not defeat the safety purpose of the polarized plug. A polarized plug has two blades with one wider than the other. The wider blade is provided for your safety. If the provided plug does not fit in your outlet, consult an electrician for replacement of the obsolete outlet. -
Page 5: Features
• Dispose of bulbs per local regulations. For more information on clean-up and disposal, see www.lamprecycle.org. SAVE THESE INSTRUCTIONS Features Your new Verilux HappyLight Energy Lamp is a remarkable product with many features and benefits. It: • delivers Natural Spectrum Daylight to your home, office, dorm room or apartment ®... -
Page 6: Benefits
Unlike most artificial light, Verilux Natural Spectrum light illuminates in the broader scotopic range, stimulating more of the eyes’ photoreceptors without extreme brightness and glare. Like daylight, this scotopically enhanced light allows optimum visual stimulation without oversaturation. -
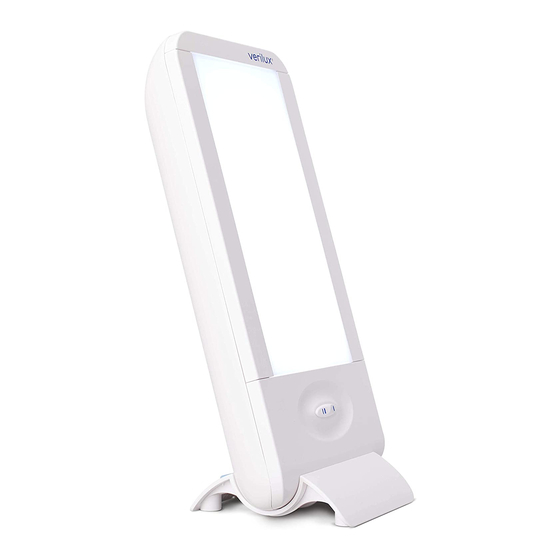
Page 7: Operation
Operation Selecting a Location • Place your Verilux HappyLight Energy Lamp on a table or other flat surface above, at or below eye level depending on your desired result. • For best performance, place the HappyLight as close as 6 inches but within 24 inches of your face. • If you have sensitive eyes or want to use the highest output settings and lens, you may find it preferable to place the lamp above you and use the tilt feature. -
Page 8: Recommended Program
If you have a pre-existing eye condition, contact your health care provider prior to use. Bulb Removal and Replacement Your HappyLight uses a bulb manufactured only by Verilux. To order a replacement bulb, please call Verilux, toll-free, at 1-800-454-4408. To Replace the Bulb: 1. -
Page 9: Using The Tilt And Wall Hanging Options
Bulb Removal and Replacement — continued Bulb Removal and Replacement — continued 4. Unscrew the two blue thumb screws that hold the black bulb holder and the bulb itself (C). 5. Gently pull up the black bulb holder to expose the base of the bulb (D). 6. Holding the bulb at its base, gently lift out the old bulb, pulling it slowly and gently away from the lamp body as you lift it upward (E). -
Page 10: Changing The Lenses/Lens Replacement
6 inches) between the device and the lamp. Your lenses will yellow over time and should be replaced annually. Contact Verilux customer service at 1-800-786-6850 or order online at www.verilux.com. Care and Cleaning Your lamp is made from high quality materials that will last for many years with minimum care. -
Page 11: Troubleshooting
Troubleshooting Before requesting service on your Verilux lamp, please: • Make sure all power connectors, cords and plugs are inserted fully and securely. • Be sure the bulb is securely seated in the socket. (See pages 8 and 9.) • Make sure there is power to the wall outlet, or try another outlet – one that is not connected to a dimmer. PROBLEM CHECK SOLUTION Has the plug come Insert plug securely into wall outlet. loose? Is the bulb old? Light Won’t Check bulb for blackening/darkening at bottom of spiral where it joins the Come On base (an indicator of bulb life) and replace bulb. -
Page 12: Warranty
Verilux warrants this product to be free from defects in material and workmanship for a period of one year from the date of the original retail purchase from Verilux or an authorized Verilux distributor. Proof of purchase is required for all warranty claims. During the limited warranty period, Verilux, Inc., will, at its option, repair or replace defective parts of...
Need help?
Do you have a question about the vt20 and is the answer not in the manual?
Questions and answers