
Related Manuals for RCA DRC300N


Summary of Contents for RCA DRC300N
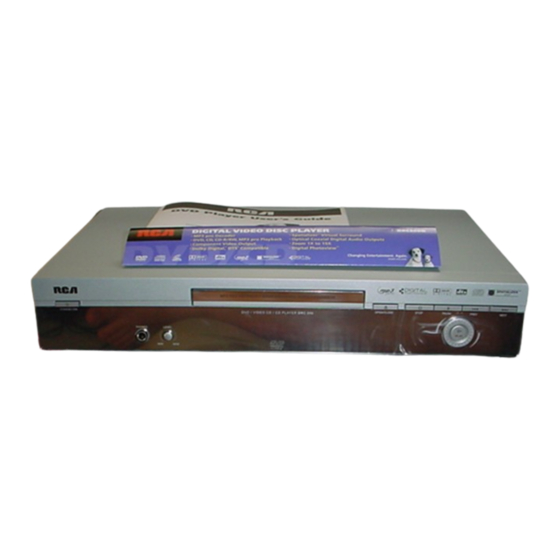
- Page 1 15909460/Cover 5/17/02 11:49 AM Page 1 DVD Player User’s Guide Changing entertainment. Again. DRC300N...
- Page 2 Keep your sales receipt to obtain warranty parts and service and for proof of purchase. Attach it here and record the serial andmodel numbers in case you need them. The numbers are located on the back of the player. LASER Model number: DRC300N Serial Number: Purchase date:...
-
Page 3: Table Of Contents
15909460 5/17/02 12:37 PM Page 1 Table of Contents Chapter 1: Setup and Connections Chapter 4: DVD Menu System Things to consider before you connect ..................2 General Explanation of the Menu System ................33 Choose your connection......................3 Play Mode menu........................34 Connection: DVD + TV + VCR..................4 Standard Play ........................34 Connection: DVD + TV ....................5 Random Play ........................34... -
Page 4: Chapter 1: Setup And Connections
15909460 5/17/02 12:37 PM Page 2 Chapter 1: Setup and Connections Things to consider before you connect Protect components from overheating • Don’t block ventilation holes on any of the components. Arrange the components so that air can circulate freely. •... -
Page 5: Choose Your Connection
15909460 5/17/02 12:37 PM Page 3 Chapter 1: Setup and Connections Choose Your Connection There are several ways to connect your DVD player. Please use the following chart to determine which connection is best for you. Turn to the appropriate page, and connect your DVD Player. Components Cables Needed Connection... -
Page 6: Connection: Dvd + Tv + Vcr
15909460 5/17/02 12:37 PM Page 4 Chapter 1: Setup and Connections Connection: DVD + TV + VCR Back of TV (example) 1. Connect the audio cables to the STEREO AUDIO OUT L (left – white) and R (right S-VIDEO AUDIO CABLE/ANTENNA VIDEO –... -
Page 7: Connection: Dvd + Tv
15909460 5/17/02 12:37 PM Page 5 Chapter 1: Setup and Connections Connection: DVD + TV Back of TV (example) CABLE 1. Connect the audio cables to the STEREO AUDIO OUT L (left – OFF-AIR SIGNAL white) and R (right – red) jacks on the back of your DVD S-VIDEO AUDIO CABLE/ANTENNA... -
Page 8: Connection: Dvd + Tv + Audio Receiver
15909460 5/17/02 12:37 PM Page 6 Chapter 1: Setup and Connections CABLE Connection: DVD + TV + Audio Receiver OFF-AIR SIGNAL Back of TV (example) Both Dolby Digital® and DTS® are audio formats used to record 5.1-channel audio signals onto the digital track of film (while the film is being made). - Page 9 15909460 5/17/02 12:37 PM Page 7 Chapter 1: Setup and Connections DVD Player + TV + Audio Receiver 1. Connect the left and right audio cables to your audio/video receiver and to the STEREO AUDIO OUT L (left – white) and R (right –...
-
Page 10: Install Batteries In The Remote Control
15909460 5/17/02 12:37 PM Page 8 Chapter 1: Setup and Connections Install Batteries in the Remote 1. Remove the battery compartment cover on the back of the remote. 2. Insert new batteries. Match the polarities (+ and –) on the batteries with the diagram on the remote. 3. - Page 11 15909460 5/17/02 12:37 PM Page 9 Chapter 1: Setup and Connections 3. The first time you turn on your DVD player, the Language menu appears. If you want the DVD player’s menus to appear in English, press the OK button on the remote control. If you prefer another language, press the arrow down button until that language is highlighted.
-
Page 12: Chapter 2: The Remote Control
DVD button to put the remote into DVD mode. The remote is also designed to operate AUDIO ANGLE most RCA, GE, and Proscan TVs — just press the TV button to put the remote into TV mode. The MENU descriptions that follow, describe how each button works when operating the DVD player. - Page 13 GO BACK MENU screen. INPUT In TV mode, changes the input of an RCA/GE TV. MENU Accesses the disc’s menu (disc guide) if one is available. MUTE MUTE In TV and DVD modes, lowers the volume to its minimum level. Press again to restore volume.
- Page 14 SUBTITLE Accesses the Subtitle part of the on-screen Info Display, and turns Subtitles on and off (if subtitles are available on the disc you’re playing. ON•OFF TV Used to operate your TV (this remote operates most models of RCA, GE, and Proscan brand INFO SUBTITLE...
-
Page 15: Find Out If The Remote Can Operate Your Tv
12:37 PM Page 13 Chapter 2: The Remote Control Find out if the remote can operate your TV ON•OFF This remote control is designed to operate most RCA, GE, and Proscan TVs. INFO SUBTITLE GUIDE 1. Press the TV button. -
Page 16: Chapter 3: Playing Discs
15909460 5/17/02 12:37 PM Page 14 Chapter 3: Playing Discs Regional Coding VIDEO CD Both the DVD Player and the discs are coded by region. These regional codes must match in order for the disc to play. If the codes don’t match, the disc won’t play. This DVD Player is capable of playing the following types of This player’s code is region 1. - Page 17 15909460 5/17/02 12:37 PM Page 15 Chapter 3: Playing Discs (DVDs) To Load and Play a DVD Disc Turn on the TV and your DVD Player (press ON•OFF on the remote or press the STANDBY/ON button on the DVD Player). 1.
-
Page 18: Search Options
15909460 5/17/02 12:37 PM Page 16 Chapter 3: Playing Discs (DVDs) Search Options To search a disc, you can use the FORWARD button or the REVERSE button. You can also utilize the following search features: Picture Scan — When you’re playing a disc, each time you press FORWARD or REVERSE, your DVD Player scans the disc faster until you reach the fastest scan speed. - Page 19 15909460 5/17/02 12:41 PM Page 17 Chapter 3: Playing Discs (DVDs) Scene Again™ 1. While you’re playing a disc, press the AGAIN button on the remote (the disc automatically repeats the last few seconds of the movie). Smart Resume When you load a disc that was viewed on the player, the player remembers the last three points when playback was stopped. As soon as the player reads the disc, the Smart Resume menu will appear.
-
Page 20: Using The On-Screen Info Display
15909460 5/17/02 12:37 PM Page 18 Chapter 3: Playing Discs (DVDs) Time display Chapter Audio Bookmark Title Subtitles Repeat Angle Text will appear here as you highlight different icons to help you use the Info Display. Using the On-Screen Info Display The on-screen Info Display contains many playback features. -
Page 21: Selecting A Title
15909460 5/17/02 12:37 PM Page 19 Chapter 3: Playing Discs (DVDs) Time Display This feature displays the time that has elapsed during playback. For DVD discs, the time displayed refers to the current title and acts as a Time Search feature. For example, if you like a particular scene in a movie, you can enter the elapsed time the scene plays and skip right to it. -
Page 22: Selecting A Chapter
15909460 5/17/02 12:37 PM Page 20 Chapter 3: Playing Discs (DVDs) Selecting a Chapter Because DVD discs use digital technology, a title can be divided into individual chapters (similar to tracks on a CD). You can skip to a specific chapter by using the Chapter feature in the Info Display. 1. -
Page 23: Changing The Audio Language
15909460 5/17/02 12:37 PM Page 21 Chapter 3: Playing Discs (DVDs) Changing the Audio Language If the disc was created with different language tracks (recorded in different languages), you can change the language while you’re playing the disc. 1. While a disc is playing, press INFO (the info display appears). 2. -
Page 24: Using The Repeat Feature
15909460 5/17/02 12:37 PM Page 22 Chapter 3: Playing Discs (DVDs) Using the Repeat Feature By default Repeat feature is Off. There are three Repeat options: • Title – repeats the title that is playing • Chapter – repeats the chapter that is playing •... - Page 25 15909460 5/17/02 12:37 PM Page 23 Chapter 3: Playing Discs (DVDs) 3. Allow the disc to play to the end of the segment you want to repeat. Don’t fast forward — you must let the disc play in standard playback mode to set the B point (the ending point of the segment). Press OK to set the B point (the segment you marked will play repeatedly until you turn off the Repeat feature).
- Page 26 15909460 5/17/02 12:37 PM Page 24 Chapter 3: Playing Discs (DVDs) 3. Make sure an unused (unmarked) bookmark is highlighted. When the disc reaches the scene you want to mark, press the OK button on the remote (the bookmark icon changes to two icons side-by-side: an arrow and a trash can). To play the disc from the bookmarked scene, highlight the arrow (the international symbol for playback) and press the OK button.
-
Page 27: Changing The Camera Angle
15909460 5/17/02 12:37 PM Page 25 Chapter 3: Playing Discs (DVDs) Clearing a Bookmark The bookmarks are erased each time you remove a disc from the player and/or when the power is turned off. 1. While you’re playing a disc, press the INFO button on the remote (the Info Display appears). 2. - Page 28 15909460 5/17/02 12:37 PM Page 26 Chapter 3: Playing Discs (Audio CDs) Audio CDs Your DVD Player has many of the same features as an audio CD player. The on-screen Info Display lets you choose various playback features. Time display Track Play Mode Repeat...
- Page 29 15909460 5/17/02 12:37 PM Page 27 Chapter 3: Playing Discs (Audio CDs) Standard: the tracks play in the same order as listed on the CD (starting with track 1). This is the default play mode. Random: the tracks on the CD play in a random order. Program: the tracks play in the order you designate.
- Page 30 15909460 5/17/02 12:37 PM Page 28 Chapter 3: Playing Discs (Audio CDs) Bookmarks The Bookmark feature lets you mark a point on the disc so that when you turn the player off and back on (without having ejected the disc), you can quickly start playing the disc from a bookmarked point. The Bookmark Feature is explained in the DVD part of this chapter (go to page 23 for instructions).
- Page 31 15909460 5/17/02 12:37 PM Page 29 Chapter 3: Playing Discs (Video CDs) Video CDs (VCDs) Video CDs contain audio and video content just like DVD discs, but they are created in a different format and don’t hold as much information as DVD discs. The picture quality on a VCD isn’t as high as the picture quality on a DVD disc. VCDs are divided into tracks and titles.
-
Page 32: Playing Mp3 Discs
15909460 5/17/02 12:37 PM Page 30 Chapter 3: Playing Discs (MP3s) Playing MP3 Discs MP3 (MPEG-3 is a format used to compress digital audio. Since the audio is compressed, it takes up less space. mp3PRO files Your DVD player uses NUON chip technology to play MP3PRO audio files. MP3PRO files are more compact than MP3 files and provide better sound quality at lower bit rates. - Page 33 15909460 5/17/02 12:37 PM Page 31 Chapter 3: Playing Discs (MP3s) The MP3 Display MP3 discs contain individual songs that can be organized into folders — similar to how you use your computer to put documents (files) into different folders when you burn them onto the CD.
- Page 34 15909460 5/17/02 12:37 PM Page 32 Chapter 3: Playing Discs (MP3s) Displaying JPEG files during MP3 Playback You can use the JPEG Slide Show function to display JPEG files during MP3 playback. The disc must have both MP3 and JPEG files on it. 1.
-
Page 35: Viewing Jpeg Files
15909460 5/17/02 12:37 PM Page 33 Chapter 3: Playing Discs (JPEG files) Viewing JPEG files This DVD Player can play discs with JPEG files on it. You can use the DVD Player to show the pictures in a slide show format. Slide Show The slide show feature displays pictures (JPEG files) in the order you have them on the disc, beginning with te picture you select from the file list. - Page 36 15909460 5/17/02 12:37 PM Page 34 Chapter 4: DVD Menu System The DVD Player Menu System The DVD player menu system is not the same as the disc menu or the Info Display. The DVD player menu comes up when there is no disc playing.
-
Page 37: Play Mode Menu
15909460 5/17/02 12:37 PM Page 35 Chapter 4: DVD Menu System Play Mode Discs are formatted to play chapters (or tracks on audio CDs) in a certain (standard) order. If you’d like to play chapters in a different order, you can use the Play Mode feature. -
Page 38: Program Play
15909460 5/17/02 12:37 PM Page 36 Chapter 4: DVD Menu System Program Play You must create your program (playlist) in the Edit Program menu before you can access the Program Play menu. By selecting Program Play in the Play Mode menu you’re telling the DVD Player to play the disc in the order you created in the Edit Program menu. Edit Program 1. -
Page 39: Lock Menu
15909460 5/17/02 12:37 PM Page 37 Chapter 4: DVD Menu System The Lock Menu You can set up ratings limits and lock your player in order to control the type of content people watch on your DVD Player. The padlock icon on the Lock menu indicates whether the player is locked or unlocked. -
Page 40: Changing Your Password
15909460 5/17/02 12:37 PM Page 38 Chapter 4: DVD Menu System Unlocking your DVD Player 1. If you’re playing a disc, press STOP (the DVD Player’s main menu appears). 2. Press the down arrow button until Lock is highlighted, and press OK (the Enter Password screen appears). 3. - Page 41 15909460 5/17/02 12:37 PM Page 39 Chapter 4: DVD Menu System Setting Ratings Limits The Rating Limits feature lets you determine what types of discs can be played in the player, and what types of discs will require a password to override the rating limit that you’ve set.
- Page 42 15909460 5/17/02 12:37 PM Page 40 Chapter 4: DVD Menu System Unrated Titles Some discs contain titles that don’t have a rating assigned to them. Sometimes, movies you might find the most explicit are unrated. You can restrict access by requiring a password for unrated titles, or allow free access.
-
Page 43: Display Menu
15909460 5/17/02 12:37 PM Page 41 Chapter 4: DVD Menu System The Display Menu The Display menu contains the settings that affect how a disc’s content looks on your TV and the brightness of the display that’s on the front of the DVD Player. TV Image The TV Image menu adjusts the way a movie appears on your TV. - Page 44 15909460 5/17/02 12:37 PM Page 42 Chapter 4: DVD Menu System 4 x 3 Letterbox – Choose this setting if you want to see movies in their original aspect ratio (height-to-width ratio). You’ll see the entire frame of the movie, but it will take up a smaller portion of the screen vertically.
-
Page 45: Front Display
15909460 5/17/02 12:37 PM Page 43 Chapter 4: DVD Menu System Front Display This feature lets you choose how the display on the front of your DVD Player appears. 1. From the Main Menu, (player on, no disc playing), highlight Display and press OK. -
Page 46: Sound Menu
15909460 5/17/02 12:37 PM Page 44 Chapter 4: DVD Menu System The Sound Menu The Sound menu lets you adjust the player’s settings to match the equipment that you connected to your DVD Player, and to use the Sound features of the player. Sound Logic The Sound Logic feature compresses the dynamic range (quietest sound to loudest sound) of a disc’s soundtrack. -
Page 47: Digital Output
15909460 5/17/02 12:37 PM Page 45 Chapter 4: DVD Menu System Digital Output If you connected your DVD player to a receiver via the DIGITAL AUDIO OUT jack (COAXIAL or OPTICAL) on the back of the player, choose the type of receiver (or decoder) you have. -
Page 48: Languages Menu
15909460 5/17/02 12:37 PM Page 46 Chapter 4: DVD Menu System Languages Menu The Languages menu enables you to set preferred language options for the DVD Player’s menu system, disc menus, the dialog (audio) of titles, and the subtitles. Player Menus You can change the language of the DVD player’s on-screen menus. - Page 49 15909460 5/17/02 12:37 PM Page 47 Chapter 4: DVD Player Menu System Audio You can set your language preference for movies (titles) you play in your DVD Player – the language in which you’ll hear the dialogue when you’re playing a movie. Notes: Discs are created differently.
- Page 50 15909460 5/17/02 12:37 PM Page 48 Chapter 5: Additional Information Troubleshooting Player won’t work • Reset the player: press and hold the NEXT button on the front of the DVD Player and press the STOP button on the remote at the same time — wait at least 3 seconds before you release both buttons.
- Page 51 • You might be in the wrong mode. To operate your DVD Player, press DVD on the remote before you press any other buttons. If you’re operating the TV, press the TV button first, etc. (this remote operates most RCA, GE, and Proscan TVs, and you can program it to operate other brands of televisions).
-
Page 52: Subtitles
15909460 5/17/02 12:37 PM Page 50 Chapter 5: Additional Information A screen saver appears on the TV • Your player is equipped with a screen saver that appears on the TV after your player has been idle for several minutes. To make it disappear, press STOP or CLEAR on the remote. - Page 53 15909460 5/17/02 12:37 PM Page 51 Chapter 5: Additional Information Disc tray won’t open • The tray lock feature might be set. To unlock the disc tray, press the STOP key on the front of the DVD player and press the ON•OFF button on the remote at the same time.
-
Page 54: Handling Cautions
15909460 5/17/02 12:37 PM Page 52 Chapter 5: Additional Information Handling Cautions • Before connecting other components to this player, be sure to turn all components off. • Don’t move the player while a disc is being played. The disc may get scratched or broken, and the player’s internal parts may be damaged. •... - Page 55 15909460 5/17/02 12:37 PM Page 53 Chapter 5: Additional Information Cleaning Discs • Dirty discs can cause reduced video and audio performance. Always keep discs clean by wiping them gently with a soft cloth from the inner edge toward the outer perimeter. •...
- Page 56 15909460 5/17/02 12:37 PM Page 54 Chapter 5: Additional Information COMPONENT VIDEO OUT STEREO AUDIO VIDEO DIGITAL AUDIO OUT COAXIAL OPTICAL S-VIDEO OUT Back of the DVD Player When connecting, make sure you connect Output jacks to Input jacks, Video to Video, Right Audio to Right Audio, etc. A description of each jack follows.
-
Page 57: Explanation Of Input Jacks And Cables
This section describes the jacks and cables you can use to make connections (only audio/video cables are packed with your DVD Player — you can purchase cables by calling 1-800-338-0376, details are on page 62, or order online at www.rca.com, or go to your local electronics store). - Page 58 DVD Player to the TV with an S-Video cable (not provided) for a better quality picture. S-VIDEO OUT Note: Remember to connect the left and right audio cables because the S-Video cable carries only the picture signal, not the sound. Audio/Video Jacks and Cables (RCA-type) STEREO AUDIO VIDEO Audio These jacks are used to send the audio from the disc you’re playing in the DVD Player to the TV.
-
Page 59: Limited Warranty
15909460 5/17/02 12:37 PM Page 57 Chapter 5: Additional Information Limited Warranty What your warranty covers: • Defect in materials or workmanship. For how long after your purchase: • 90 days from date of purchase - Unit exchange, which includes parts and labor. •... - Page 60 15909460 5/17/02 12:37 PM Page 58 Chapter 5: Additional Information Limited Warranty (continued) 3. If you return the unit to us within 14 days from the date you were provided a SR number, only items not covered by warranty will be charged to your account. If your unit is not received within 14 days, the suggested retail value of the unit will be charged to your credit card.
- Page 61 15909460 5/17/02 12:37 PM Page 59 Chapter 5: Additional Information • The representative will advise the address to mail a cashier’s check or money order for payment if there are any out of warranty labor or parts charges, and you elect not to use your credit card.
-
Page 62: How To Find Your Tv's Video Input Channel
15909460 5/17/02 12:37 PM Page 60 Chapter 5: Additional Information How to find your TV’s Video Input Channel In order to see what’s playing on your DVD Player, you need to tune the TV to the Video Input Channel that corresponds to the jacks you used to hook up the recorder to the TV. -
Page 63: Accessories
ZOOM AGAIN INPUT 1-800-338-0376 PLAY REVERSE FORWARD RECORD PAUSE STOP You can buy some OPEN•CLOSE accessories on-line at www.rca.com Remote Control (RCR110DA1) Optical Plug to Mini Plug part number 257221 3 feet (DV3M); price $15.95 6 feet (DV6M); price $19.95... - Page 64 5/17/02 12:37 PM Page 62 Visit our website at www.rca.com Please do not send any products to the Indianapolis address listed in this manual or on the carton. This will only add delays in service for your product. Thomson multimedia Inc.
Need help?
Do you have a question about the DRC300N and is the answer not in the manual?
Questions and answers