Canon CP-330 User Manual
Compact photo printer
Hide thumbs
Also See for CP-330:
- User manual (164 pages) ,
- Software manual (60 pages) ,
- Driver manual (54 pages)
Table of Contents
Advertisement
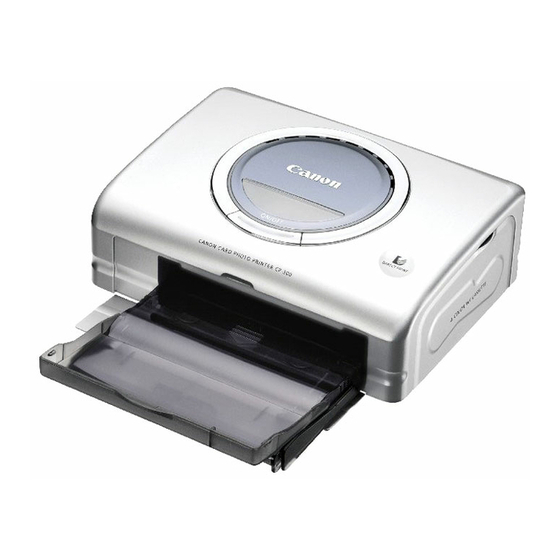
Canon
COMPAa PHOTO PRINTER
CP-330/CP-220
Canon Compact Photo Printer
User
Guide
Fotoimpresora compacta
Guia
del usuario
Imprimante Photo Compacte
Guide d'utilisation
Connecting
the
Printer to
Camera
and Printing
Conexi"n de 'a
impresora
a
la
camara e
impresion
Connexion de
I'imprimante
a
I'appareil photo
Connecting
the
Printer to a
Computer
and
Printing
Conexion
de
la
impresora a un ordenador e
impresi"n
Connexion de
I'imprimante
a
un ordinateur et
impression
NOTICE! Please be careful when installing the printer driver. Do not install with-
out reading the Printer Driver User Guide included on the CD-ROM as a PDF file.
jATENCION! Tenga cuidado al instalar el controlador de la impresora. No 10
instale sin leer el Manual del usuario del controlador de fa impresora incluido en
el CD-ROM como un archivo PDF.
ATTENTION! Avant I'installation du pilote de I'jmprimante,
i!
est imperatif de lire
attentivement Ie Guide d'utilisation du pilote de l'imprimante au format pdf qui se
trouve sur Ie CD-ROM.
r(
PictBridge
~
DPOF
ie
..J
DlREa
PRINT
Advertisement
Chapters
Table of Contents
Troubleshooting

Related Manuals for Canon CP-330


Summary of Contents for Canon CP-330
-
Page 64: User Guide
Compact Photo Printer CP-330/CP-220 Printer Driver User Guide Windows... - Page 65 Contents Safety Precautions ..................3 Read This First ..................4 About the Manuals ................4 Printing Flow Diagram ...............5 About the Connection Cable .............6 Installing the Printer Driver ..............7 Installing ....................7 Windows 98 .................8 Windows Me ................13 Windows 2000 ................17 Windows XP ................21 Troubleshooting the Printer Driver Installation (Windows 98/Me) ................
-
Page 66: Safety Precautions
• While every effort has been made to ensure that the information contained in this guide is accurate and complete, no liability can be accepted for any errors or omissions. Canon reserves the right to change the specifications of the hardware and software described herein at any time without prior notice. -
Page 67: Read This First
Provides printer handling notes, safety precautions, printer preparation, names of parts and other information necessary for operating the printer. Please read before Printer using the printer. (CP-330/CP-220) User Guide Describes how to connect the printer to a computer, printer driver installation, functions and operating procedures. -
Page 68: Printing Flow Diagram
Printing Flow Diagram Follow the steps outlined below to prepare the printer and install the necessary software on your computer to enable printing. Prepare the printer. Insert paper cassette and ink cassette. See the Printer User Guide. Install the necessary software on your computer. -
Page 69: About The Connection Cable
Printing. Print in a variety of layouts. Printing with Standard Sheets or Full Size Label Sheets (➡ p.32), Printing on 8-Label Sheets (➡ p.39) in this user guide. About the Connection Cable The printer can be connected to a computer using a standard USB cable. For details, see Specifications (Interface) in the Printer User Guide. -
Page 70: Installing The Printer Driver
Windows Me, see Troubleshooting the Printer Driver Installation (Windows 98/Me) (➡ p.23). The screen examples and descriptions given in this section are for the CP-330 connected to a computer. Install the printer driver for the CP-220 in the same way. -
Page 71: Windows 98
Windows 98 Close any programs that are running. Place the Canon CP Printer Solution Disk in the CD-ROM drive. When the installer panel appears, click [Exit] to close it. Turn the printer on. (➡ p.28) Connect the printer to your computer, using the USB cable. - Page 72 Select “Specify a location”. Click the [Browse] button to select the [\CP_DRV\7ENGLISH\WIN98\CP330] folder on the CD-ROM and click the [OK] button. Then click the [Next] button. For the CP-220, select the [\CP_DRV\7ENGLISH\WIN98\CP220] folder. Do not select “CD-ROM drive”. This displays the Browse for Folder dialog. Specify the [\CP_DRV\7ENGLISH\WIN98\CP330] folder or [\CP_DRV\7ENGLISH\WIN98\CP220] folder, and then click the [OK] button to enter the folder path at [Specify a location].
- Page 73 Click the [Next] button. The USB driver for the printer is installed. When the following message appears, click the [Finish] button. Now you can continue and install the printer driver. When the following message appears, click the [Next] button.
- Page 74 Select “Search for the best driver for your device (Recommended).” and then click the [Next] button. Because the folder specified in step 7 already appears here, simply click the [Next] button. Do not select “CD-ROM drive”. Click the [Next] button.
- Page 75 Adjust any necessary settings, and then click the [Finish] button. The printer driver is installed. When the following message appears, click the [Finish] button.
-
Page 76: Windows Me
Windows Me Close any programs that are running. Place the Canon CP Printer Solution Disk in the CD-ROM drive. When the installer panel appears, click [Exit] to close it. Turn the printer on. (➡ p.28) Connect the printer to your computer, using the USB cable. - Page 77 In the list of printer drivers, select [Canon CP-330] so that [\CP_DRV\7ENGLISH\WIN98\CP330\CNY330U.INF] appears in [Location], then click the [OK] button. For the CP-220, select [Canon CP-220] so that [\CP_DRV\7ENGLISH\WIN98\CP220\CNY220U.INF] appears. The USB driver for the printer is installed. When the following message appears, click the [Finish] button.
- Page 78 Select “Automatic search for a better driver (Recommended)” and then click the [Next] button. In the list of printer drivers, select [Canon CP-330] so that [\CP_DRV\7ENGLISH\WIN98\CP330\CNY3309X.INF] appears in [Location], then click the [OK] button. For the CP-220, select [Canon CP-220] so that...
- Page 79 Adjust any necessary settings, and then click the [Finish] button. The printer driver is installed. When the following message appears, click the [Finish] button.
-
Page 80: Windows 2000
Log on to Windows 2000 with administrator privileges before installing the software. Close any programs that are running. Place the Canon CP Printer Solution Disk in the CD-ROM drive. When the installer panel appears, click [Exit] to close it. Turn the printer on. (➡ p.28) Connect the printer to your computer, using the USB cable. - Page 81 Select “Search for a suitable driver for my device (recommended)” and then click the [Next] button. Select “Specify a location” and then click the [Next] button. Do not select “CD-ROM drives”.
- Page 82 Click the [Browse] button, select the [CNY3302k.inf] file in the [\CP_DRV\7ENGLISH\WIN2K\CP330] folder on the CD-ROM, click the [OPEN] button, then click the [OK] button. For the CP-220, select the [CNY2202k.inf] file in the [\CP_DRV\7ENGLISH\WIN2K\CP220] folder. This displays the Locate File dialog. Specify the [CNY3302k.inf] file in the [\CP_DRV\7ENGLISH\WIN2K\CP330] folder or the [CNY2202k.inf] file in the [\CP_DRV\7ENGLISH\WIN2K\CP220] folder, and then click the [Open] button to enter the folder path at [Copy...
- Page 83 Click the [Next] button. The printer driver is installed. When the following message appears, click the [Finish] button.
-
Page 84: Windows Xp
Log on to Windows XP with administrator privileges before installing the software. Close any programs that are running. Place the Canon CP Printer Solution Disk in the CD-ROM drive. When the installer panel appears, click [Exit] to close it. Turn the printer on. (➡ p.28) Connect the printer to your computer, using the USB cable. - Page 85 In the list of printer drivers, select [Canon CP-330] so that [\CP_DRV\7ENGLISH\WIN2K\CP330\CNY3302k.INF] appears in [Location], then click the [Next] button. For the CP-220, select [Canon CP-220] so that [\CP_DRV\7ENGLISH\WIN2K\CP220\CNY2202k.INF] appears. The printer driver is installed. When the following message appears, click the [Finish] button.
-
Page 86: Troubleshooting The Printer Driver Installation (Windows 98/Me)
Troubleshooting the Printer Driver Installation (Windows 98/Me) If you have problems with the printer driver installation (for example, the printer driver’s installation program stops during the installation), the USB driver may not be installed correctly. Use the following procedure to check the installation status of the USB driver, delete any unnecessary USB driver, and then install the printer driver again. - Page 87 Click the [Device Manager] tab. Following the examples shown below, select [Canon CP-330] or [Canon CP-220] under [Universal Serial Bus controllers] or [Other devices], and then click the [Remove] button. Use the following screen examples as a reference and make sure you select the correct device for deletion.
- Page 88 Example 2: When the confirmation message appears, click the [OK] button. Click the [OK] button to close the System Properties dialog. Close the Control Panel window. Disconnect the USB cable from your computer. Restart your computer. Reinstall the Printer Driver.
-
Page 89: Uninstalling
With Windows 2000 or Windows XP, be sure to log on with Administrator privileges. Close any programs that are running. Place the Canon CP Printer Solution Disk in the CD-ROM drive. When the installer panel appears, click [Exit]. Start Windows Explorer, and then double-click the [\CP_DRV\7ENGLISH\UNINST] folder on the CD-ROM drive to open the folder. - Page 90 If you are using the CP-220, select [Canon CP-220]. For Windows 98 or Windows Me If [Canon CP-330] or [Canon CP-220] does not appear, it was probably not installed correctly. In this case, perform the procedure described in Troubleshooting the Printer Driver Installation (Windows 98/Me) (➡...
-
Page 91: Turning On The Printer
When the printer is turned on, the printer’s indicator lights green. To Turn the Printer Off • With CP-330: Press the ON/OFF button, releasing it when the indicator turns off. • With CP-220: Unplug the Compact Power Adapter from the printer (the indicator turns off). -
Page 92: Connecting The Printer To Your Computer
Connecting the Printer to Your Computer Notes about connection • Using the USB cable, be sure to connect the printer directly to your computer. If you connect it via a USB hub, the printer may not function properly. • Do not use the printer together with other USB devices (except a USB mouse or keyboard);... - Page 93 Connect one end of the USB cable to the USB port on the printer, and the other end to a USB port on your computer. • There is no need to turn off the printer or your computer. • When connecting the printer to your computer, make sure the connectors on the ends of the USB cable match the ports on the printer and your computer.
-
Page 94: Printing
• Screen shots from Windows XP are used for illustration, but the procedure is the same with Windows 98/Me/2000. • The screens in this example appear when the CP-330 is connected, but the same operations are applicable to the CP-220. -
Page 95: Printing With Standard Sheets Or Full Size Label Sheets
Printing with Standard Sheets or Full Size Label Sheets Double-click the [ZoomBrowser EX] icon on the desktop. Or, click the [Start] button and select [Programs] ([All Programs] for Windows XP), [Canon Utilities], [ZoomBrowser EX], and [ZoomBrowser EX] to start the program. Click [Print]. Browser area... - Page 96 Click [Layout Print]. Select an image to print and click the [Next] button at the window’s bottom right.
- Page 97 Place a check mark beside the data you wish to include with the print (multiple selections are possible) and click [Finish]. Selecting this check mark enables you to add comments, a file name or date to printouts. To add a comment to an image, select it in ZoomBrowser EX and click [Properties].
- Page 98 Click [2 Select Printer & Album Type] and then select [Canon CP- 330] (or [Canon CP-220]) from [Printer]. Next, select [Album Type] to check the print image. The print image is displayed. When you select this check mark, the image is automatically adjusted to fit the album type.
- Page 99 Click [3 Select Paper], and select the paper size and print orientation. • Clicking [Decorate Album] allows you to change image design features such as the border or background. To change the design, Click the border or background you want to change. •...
- Page 100 Click [4 Print], check print settings such as the number of copies, and then click [Print]. If you stop printing while printing is in progress, paper is ejected to the paper handling slot and an error message may be displayed. This is not a malfunction, but a mechanism for protecting the print head.
- Page 101 When printing is finished, click the on the upper right of the window to close PhotoRecord. To save the album, click [Yes] or click [No] if you don’t want to save it. The ZoomBrowser EX screen returns after the album is saved. •...
-
Page 102: Printing On 8-Label Sheets
Printing on 8-Label Sheets In [2 Select Printer & Album Type], select “8-Sticker Label” from [Album Type]. Select an image. To make copies of an image, right-click over the screen and select [Make Copies]. Then, input the number of copies you want to make and click [OK] to create the specified number of image copies. -
Page 103: Merging Images To Print A Panorama
This operation is performed using the PhotoStitch software. When you use images captured with a Canon digital camera in Stitch Assist mode, PhotoStitch determines the order and direction of the composition automatically, facilitating the composition process. - Page 104 Merge the images following the instructions in the guidance panel at the top of the PhotoStitch window. Guidance Save your panoramic image, and then click the to close PhotoStitch. Print the panoramic image. To print the merged images, see Printing with Standard Sheets or Full Size Label Sheets (➡...
-
Page 105: Printing Part Of An Image (Trimming)
Printing Part of an Image (Trimming) You can select and then print a portion of an image. This is useful when you only want to print part of an image, or if the part you are most interested in is not at the center of the image. - Page 106 Select the area you want to print. Trimming area (The area for printing) [Clip] button • In [2 Select Printer & Album Type], when [8-Sticker Label] is selected for [Album Type], or the [Automatic Clipping] check box is selected The trimming area is set automatically, and the area aspect ratio cannot be modified or the trimming frame removed.
-
Page 107: Adjusting Color And Brightness (Image Quality Adjustment)
Adjusting Color and Brightness (Image Quality Adjustment) After selecting the printer in [2 Select Printer & Album Type], click [Properties]. Click the [Image Adjustment] tab and adjust the color and brightness for printing. For more details, click [?] or [Help] to display [Help]. Adjust the color of prints. -
Page 108: Appendices
Appendices About the Print Area and Pixels Print Area The shaded area ( ) in the following diagrams indicates the maximum printable area. Note that because the print area is larger than the actual paper size, a border is trimmed from the image when it is printed. (shown in millimeters) Postcard size sheet 148.0... - Page 109 L size sheet 119.0 Credit card size sheet/full-size label sheet 86.0...
-
Page 110: Number Of Pixels
Wide size sheet 200.0 Number of Pixels Total number of Effective number of Paper Type pixels (dots)* pixels (dots) × × Postcard size sheet 1232 1823 approx. 1180 1748 × × L size sheet 1100 1471 approx. 1050 1406 Credit card size sheet/ ×... -
Page 111: Troubleshooting
“Use Printer Offline” is selected, clear it. <Windows XP> 1. Click the [Start] button and select [Control Panel], [Printers and Other Hardware], and [Printers and Faxes]. 2. If the [Canon CP-330] or [Canon CP-220] is offline, right-click the printer icon, and then click “Use Printer Online”. - Page 112 <Windows 98/Me/2000> 1. Click the [Start] button and select [Settings], and [Printers]. 2. Right-click the [Canon CP-330] or [Canon CP-220] icon and select [Properties]. 3. Click the [Details] tab. Click the [Spool Settings] button and then click the [Restore defaults] button.
-
Page 113: Error Messages
• If the error does not go away after you have tried the recommended solutions, consult your nearest Canon Customer Support Help Desk. • Use the information in this section in conjunction with the Printer User Guide. - Page 114 Ink cassette is empty and must be replaced. Press [Resume] to resume, or [Cancel] to stop. Cause : There is no more ink in the ink cassette. Correction : Replace the ink cassette with a new one. Ink cassette not installed. You must insert an ink cassette before printing.
- Page 115 The paper cassette differs from the setup. Please check the paper cassette. Press [Resume] to resume, or [Cancel] to stop. Cause : The paper cassette in the printer is not suitable for the print settings. Correction : Insert the correct paper cassette. The specified Ink Cassette cannot be found.
- Page 116 Errors where printing is canceled If any of the following messages appear, printing is canceled. After using the recommended solution to clear the error, you need to start the print job over again. Paper jammed in printer. Clear the jam as follows, then try printing again. 1.
- Page 117 Correction : Remove paper from the paper cassette, and then make sure to load the correct amount of paper in the paper cassette. For messages caused by errors related to the operating environment of your computer, follow the messages on the screen. CDP-E © 2004 CANON INC.
Need help?
Do you have a question about the CP-330 and is the answer not in the manual?
Questions and answers