Table of Contents
Advertisement
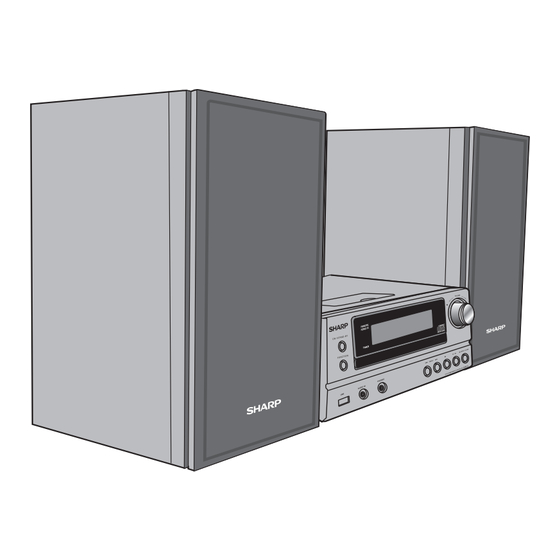
HI FI COMPONENT SYSTEM
MODEL
XL-DAB151PH(S)
XL-DAB151PH(BK)
Thank you for purchasing this SHARP product. To obtain the best performance from this product, please read this
manual carefully. It will guide you in operating your SHARP product.
●
XL-DAB151PH(S) Hi Fi Component System consisting of XL-DAB151PH(S) (main unit) and CP-HF151H (speaker
system).
●
XL-DAB151PH(BK) Hi Fi Component System consisting of XL-DAB151PH(BK) (main unit) and CP-HF151H (speaker
system).
CD/USB
RDS
DAB
OPERATION MANUAL
iPhone, iPod, iPod classic, iPod nano, and iPod
touch are trademarks of Apple Inc., registered in
the U.S. and other countries. iPad is a trademark
of Apple Inc.
Advertisement
Table of Contents
Troubleshooting

Related Manuals for Sharp XL-DAB151PH(S)


Summary of Contents for Sharp XL-DAB151PH(S)
-
Page 1: Operation Manual
XL-DAB151PH(S) XL-DAB151PH(BK) OPERATION MANUAL Thank you for purchasing this SHARP product. To obtain the best performance from this product, please read this manual carefully. It will guide you in operating your SHARP product. ● XL-DAB151PH(S) Hi Fi Component System consisting of XL-DAB151PH(S) (main unit) and CP-HF151H (speaker system). -
Page 2: Special Notes
SHARP is not in a position to authorise the copying or broadcasting of copyright materials and nothing in this OPERATION MANUAL should be implied as giving that authority. -
Page 3: Table Of Contents
Special Note Supply of this product does not convey a license nor imply any right to distribute content created with this product in revenue-generating broadcast systems (terrestrial, satellite, cable and/or other distribution channels), revenue-generating streaming applications (via Internet, intranets and/or other networks), other revenue-generating content distribution systems (pay-audio or audio-on-demand applications and the like) or on revenue-generating physical media (compact discs, digital versatile discs, semiconductor chips, hard drives, memory cards and the like). -
Page 4: Precautions
Using this product with a higher voltage other variation. than that which is specified is dangerous and may result ● Keep the unit away from direct sunlight, strong in a fire or other type of accident causing damage. SHARP magnetic fields, excessive... -
Page 5: Controls And Indicators
Controls and indicators (continued) ■ Remote control Page 1. Remote Control Transmitter ..... 7 2. On/Stand-by Button....8, 10, 11, 22 3. -
Page 6: System Connections
System connections Make sure to unplug the AC power lead before making any connections. Right speaker Video cable (not supplied) DAB/FM aerial To video input socket Left speaker BLACK Wall socket (AC 220 - 240 V ~ 50/60 Hz) MODEL NO. XL-DAB151PH(S) HI FI COMPONENT SYSTEM Label is located at the... -
Page 7: Remote Control
System connections Remote control (continued) ■ AC power connection ■ Battery installation After checking all the connections have been made Open the battery cover. correctly, plug the AC power lead of this unit into the wall Insert the supplied battery according to the direction socket. -
Page 8: General Control
General control ■ Bass control Press the BASS/TREBLE button to select “Bass”. Within 5 seconds, press the VOLUME (+ or –) button to adjust the bass. - 5 ↔ - 4 ..↔ + 4 ↔ + 5 ■ Treble control CD/USB Press the BASS/TREBLE button to select “Treble”. -
Page 9: Ipod, Iphone And Ipad
Setting the clock (Remote control ■ iPod, iPhone and iPad connection only) (continued) (USB only) Insert the connector to the iPod, iPhone or iPad. To adjust the hour, press the button iPad and then press the ENTER button. Press the button once to advance the time by 1 hour. - Page 10 Listening to the iPod, iPhone or iPad (continued) Adaptor iPhone Capacity Description iPhone 4GB & 8GB & 16GB iPhone 3G 8GB & 16GB iPhone 3GS 16GB & 32GB iPhone 4 16GB & 32GB ■ To insert adaptor for iPod or iPhone Open the docking station for iPod and iPhone by pulling CD/USB Insert the adaptor for iPod and iPhone into unit and...
-
Page 11: Listening To The Ipod, Iphone Or Ipad
Listening to the iPod, iPhone or iPad (continued) Main unit Remote control ■ Navigating the iPod, iPhone or iPad Operation Function Dock/USB Dock menus ____ iPod iPod Menu Press to view the iPod menu during Press the iPod MENU button to view the menu on iPod, iPod function. -
Page 12: Advanced Cd Or Mp3/Wma Disc Playback
Listening to a CD or MP3/WMA disc Advanced CD or MP3/WMA disc playback (continued) Press the OPEN/CLOSE button to close the disc tray. Press the / (CD/USB / ) button to start playback. After CD/USB the last track is played, the unit will stop automatically. Caution: ●... -
Page 13: Advanced Cd Or Mp3/Wma Disc Playback
Advanced CD or MP3/WMA disc playback (continued) ■ Random play ■ Programmed play (MP3/WMA) The tracks on the disc can be played in random order Whilst in the stop mode, press the MEMORY button to automatically. enter the programming save mode. To random play all tracks: Press RANDOM button on the remote control until “Random”... -
Page 14: Mp3/Wma Folder Mode (Only For Mp3/Wma Files)
MP3/WMA folder mode (only for MP3/WMA files) To play back MP3/WMA (Windows Media Audio) file There are many music sites on the internet that you can download MP3/WMA (Windows Media Audio) music files. Follow the instructions from the website on how to download the music files. -
Page 15: Listening To Usb Mass Storage Device/Mp3 Player
Notes: USB function. Connect the USB memory device that ● SHARP will not be held liable for the loss of data whilst has MP3/WMA format files on the unit. When the USB the USB memory device is connected to the audio memory is connected to the main unit, the device system. -
Page 16: Advanced Usb Playback
Advanced USB playback Listening to the radio The following functions are the same as CD operations: Page Direct track search ......12 Repeat play. -
Page 17: Using The Radio Data System (Rds)
Listening to the radio Using the Radio Data System (RDS) (continued) RDS is a broadcasting service which a growing ■ Memorising a station number of FM stations provide. These FM stations send additional signals along with their regular You can store 40 FM stations in memory and recall them programme signals. -
Page 18: Radio
Using the Radio Data System (RDS) (continued) Notes for radio text: ■ Using the Auto Station Programme ● The first 14 characters of the radio text will appear for Memory (ASPM) 4 seconds and then they will scroll across the display. ●... -
Page 19: Using The Radio Data System (Rds)
Using the Radio Data System (RDS) (continued) Descriptions of the PTY (Programme Type) codes PHONE IN Involving members public You can search for and receive the following PTY signals. expressing their views either by phone or at a public forum. NEWS Short accounts of facts, events and TRAVEL... -
Page 20: Listening To The Dab
Listening to the DAB+ ■ About DAB+ (Digital Audio Broadcasting) After the scan: The stations will be stored in alphanumeric order and the Digital Audio Broadcasting is a digital transmission system first station on the list will be selected and you will hear it where audio signals are converted to digital signals for through the speakers. -
Page 21: Changing The Information Display
Changing the information display You can switch DAB+ display information. ■ Memorising a station Press the DAB DISPLAY button. Each time the button is pressed, the information display You can store 40 DAB stations in memory and recall them changes in the following order. at the push of a button. -
Page 22: Timer And Sleep Operation (Remote Control Only)
Timer and sleep operation (Remote control only) ■ Timer playback Before setting timer: ● Check that the clock is set to the correct time (refer to page 8 - 9). If it is not set, you cannot use the timer function. - Page 23 Timer and sleep operation (Remote control only) (continued) ■ Sleep operation When the timer end time is reached, the system will enter the power stand-by mode automatically. The radio, compact disc, iPod, USB, Audio In and Line In Once timer: can all be turned off automatically.
-
Page 24: Enhancing Your System
Many potential problems can be resolved by the owner commercially available lead as shown below. without calling a service technician. If something is wrong with this product, check the following before calling your authorised SHARP dealer or service centre. ■ General Symptom Possible cause ●... -
Page 25: Troubleshooting Chart
Troubleshooting chart (continued) If such a problem occurs, do the following: ■ USB Set the unit to the stand-by mode and turn the power on again. If the unit is not restored in the previous operation, unplug Symptom Possible cause and plug in the unit again, and then turn the power on. -
Page 26: Specifications
Specifications As part of our policy of continuous improvement, SHARP ■ USB reserves the right to make design and specification changes for product improvement without prior notice. The USB host interface ● Complies with USB 1.1 (Full performance specification figures indicated are nominal Speed)/2.0 Mass Storage... - Page 27 VISIT OUR WEBSITE AT www.sharp.net.au OR CALL SHARP CUSTOMER CARE 1300 135 022 (LOCAL CALL COSTS APPLY WITHIN AUSTRALIA) SHARP CORPORATION OF AUSTRALIA PTY LTD FOR LOCATION ENQUIRIES WITHIN NEW ZEALAND REGARDING YOUR LOCAL SHARP APPROVED SERVICE CENTRE VISIT OUR WEBSITE AT www.sharp.net.nz...
- Page 28 Sharp. Please retain your sales documentation, as this should be produced to validate a warranty claim.
Need help?
Do you have a question about the XL-DAB151PH(S) and is the answer not in the manual?
Questions and answers