Heartland SweetHeart 2603 Installation And Operating Instructions Manual
Cookstoves with towel rack/reservoir
Hide thumbs
Also See for SweetHeart 2603:
- Cabinet installation instructions (10 pages) ,
- Product manual (9 pages)
Table of Contents
Advertisement
Available languages
Available languages
INSTALLATION
AND OPERATING
INSTRUCTIONS
SAVE THESE
INSTRUCTIONS
FOR FUTURE USE
Note: Please read these instructions
thoroughly before attempting to install
this unit.
SAFETY NOTICE: IF THIS STOVE IS NOT PROPERLY
INSTALLED, A HOUSE FIRE MAY RESULT. FOR YOUR
SAFETY, FOLLOW THE INSTALLATION DIRECTIONS.
CONTACT LOCAL BUILDING OR FIRE OFFICIALS
ABOUT RESTRICTIONS AND INSTALLATION
INSPECTION REQUIREMENTS IN YOUR AREA.
IMPORTANT: Check around oven chamber on a weekly
basis for soot and creosote accumulation. Clean the
chamber thoroughly from the top, side and bottom with
the rake (part #1425) provided. Burn the stove hot daily
to reduce creosote accumulation. Use only dry wood
aged for one year. Failure to do so could result in
OVERFIRING CAUTION:
will void warranty on this appliance.
See page 31 for details.
The temperature registered by the oven door
thermometer may not necessarily correspond with
the reading taken with the thermometer inside the
oven. For accurate oven temperatures, refer to the
interior oven thermometer.
W O O D C O O K S T O V E S
Manual #1705 110512
1260 E. VanDeinse, Greenville, MI 48838
Phone (800) 223-3900 Fax (616) 754-9690
The Oval and Sweetheart
cookstoves are listed to
CSA Standard B366.2M
ULC Standard S-627 & UL
1482 by Warnock Hersey
Professional Services Ltd.
NOTE: Warnock Hersey NBR
is 219.
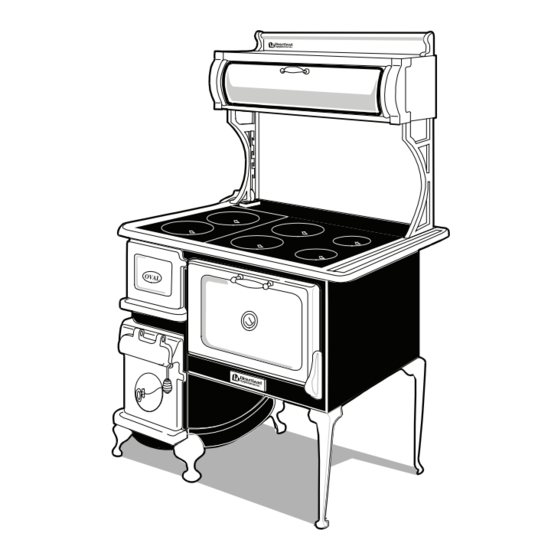
Oval
With Towel Rack
#1902
ATTENTION INSTALLER: Leave this manual with appliance
SweetHeart
SweetHeart
With Towel Rack
#2602
© 2010 AGA Marvel
1
Oval
With Reservoir
#1903
SweetHeart
With Reservoir
#2603
Advertisement
Chapters
Table of Contents

Related Manuals for Heartland SweetHeart 2603

Summary of Contents for Heartland SweetHeart 2603
- Page 1 With Reservoir #2602 the reading taken with the thermometer inside the #2603 oven. For accurate oven temperatures, refer to the © 2010 AGA Marvel interior oven thermometer. W O O D C O O K S T O V E S...
-
Page 2: For Your Safety
— FOR YOUR SAFETY— DO NOT STORE OR USE GASOLINE OR OTHER FLAMMABLE VAPOURS OR LIQUIDS IN THE VICINITY OF THIS STOVE. Stove Location - If the range must be located near a window, avoid using long curtains which could blow over the stove top, causing a fire hazard. - Page 3 Such parts will be repaired or replaced at the option of Heartland without charge, subject to the terms and conditions set out below.
-
Page 4: Table Of Contents
Using the Oven and Cooking Installation Instructions ......5 Surface ..........Unpacking..............5 Assembly ..............6 Stove Top Cooking ............ 22 Cabinet Installation ............7 Oven Cooking ............23 Water Reservoir ............24 Installation ............9 Trouble Shooting ......Clearances ..............9 Rough In for Oval Diagram ........ -
Page 5: Installation Instructions
— Welcome — Installation Instructions our Heartland Cookstove is a time proven design of North American heritage. Our cookstoves were first Preparing the installation site before moving the stove into it made in 1906 and many originals are still in use today. -
Page 6: Assembly
Assembly Oval / Sweetheart Warning: The stove is very heavy. Since the legs may dig into a soft floor, do not locate the stove, or even set it to rest, on a surface that could be imprinted. Before removing the oval stove from the skid, the flu body We recommend that 3 or 4 persons be available to assist must first be attached to the stove back. - Page 7 Cabinet Assembly to Stove Top Tool Rack- fasten to rear of cabinet using screws and nuts provided. Remove machine screws from the top (2 each side). Remove screws and washers from top back flange of top, 2 places on Sweetheart and 3 on Oval Machine Screw...
- Page 8 Once the cabinet has been assembled and installed, follow Oval and SweetHeart: these few remaining steps: 1. Assemble the bell dampers (Fig. 2) and thread into the three locations, one at the front in the ash pan door, and 1. Insert the lift handle( #1361) through the bracket and bolt it through the hole in the cooking surface with the screw and locknut.
-
Page 9: Installation
However, heat radiating in other directions will not be as Your Heartland cookstove has been tested for safe operation welcome if it results in overheating nearby walls, ceilings providing that these guidelines are followed. - Page 10 Oval Rough in and Dimension Diagrams These drawings are Combusti ble Wall for reference only, 8 5/8" (22 cm) with heat shield kit (from wall to center of pipe) 12 ½ " (32 cm) with 23" (59 cm) with out heat shield (from wall to center of pipe) heat shield showing approximate 27"...
- Page 11 SweetHeart Rough in and Dimension Diagrams These drawings are for Combusti ble Wall reference only, showing 9 1/2" (24 cm) with heat shield kit (from wall to center of pipe) 13" (33 cm) with 23" (59 cm) with out heat shield (from wall to center of pipe) heat shield approximate dimensions 27"...
-
Page 12: Chart Of Clearances
Chart of Clearances Status Model A B C D E F G H J Measure Centimeters SweetHeart Inches NO HEAT SHIELD Centimeters Oval Inches Centimeters SweetHeart 12½ Inches WITH HEAT SHIELD Centimeters Oval 17½ Inches *Note: A chimney approved to ULC standard S629 in Canada or UL 103HT in the U.S. must be used to connect the smokepipe at the top of the cabinet to maintain the 2”... -
Page 13: Clearance Reductions
Chimneys and Draft Clearance Reductions The chimney is the most important element of successful stove operation. (See also page 26 “Flue Pipes”) There are many alternate decorative methods to reduce clearances to combustible materials. See your dealer, Performance of your woodburning system depends more on the chimney than on any other single component. -
Page 14: Chimney Connection Requirements
Optional Accessories Stovepipe Chimney Accessories may be obtained from your dealer or call us Connection Requirements direct at 800-223-3900. Our office hours are from 8:30 a.m. to 5:00 p.m. est 1. The stovepipe chimney connector should be made of 24 gauge or thicker sheet metal and should be 6”... -
Page 15: Fresh Air Kit
Fresh Air Kit Installation is Easy The water jacket can be installed in the stove in less than a minute using only a slot screwdriver. The water jacket is a A fresh air kit enables you to use outside air, instead of room hollow baffled chamber that fits in the firebox. -
Page 16: Fuel
Understanding Combustion Water: Up to half the weight of Smoke (or flame): As the wood Charcoal: As the fire progresses and freshly cut logs is water. After heats up above the boiling point most of the gases have vaporized, of water, it starts to smoke. The proper seasoning only about 20% charcoal remains. -
Page 17: Getting Acquainted
Getting Acquainted may be lifted to access the wood grate pull without having to open the door. Burning skid wood or construction materials with nails is not The Sweetheart and Oval cookstove are time proven heating recommended as anything in the firebox that will not burn and cooking appliances. -
Page 18: Break In Fire
Break-In Fire (Refer to page 16 figure 7) The firebox of your stove is made of superior materials—cast iron and firebrick lining. Flu Gases Both materials could be broken by a sharp blow or thermal shock. A little extra care and thoughtfulness during the break- Oven Damper in period will help promote a long life for your stove. -
Page 19: Summer Burning
4. Reloading the stove—Stove tending time will be greatly Sweetheart: reduced if you reload your stove while the system is still To use the summer position in the SweetHeart you will need hot and there is plenty of hot embers to rekindle the fire to purchase the optional #4271 summer grate support. -
Page 20: Coal Burning
Coal Burning Do not burn coal on the wood grate. An optional coal grate kit is available for the Oval (#1500) and the SweetHeart (#4500) to burn coal. An installation and operating manual is packed with every Oval and Sweetheart Coal Kit. Extra copies may be obtained from your dealer or by contacting AGA Marvel. -
Page 21: Recharging The Fire
To Start a Coal Fire: NOTE: When burning coal, the firedoor damper must be kept open. The secondary air is required to aid in 1. Use paper and dry wood kindling to start the fire. burning off coal gases. The coal damper is not required 2. -
Page 22: Using The Oven And Cooking Surface
Using the Oven and Cooking Surface Stove top cooking The temperatures established on both the cooking surface and in the oven are determined by three primary things: The cast iron top provides an excellent large cooking area 1. The amount of draft the chimney has. As the bell dampers for griddling, frying, basting and simmering. -
Page 23: Oven Cooking
Oven Cooking 6. Ideally your stove will perform best if it is left running constantly, keeping the entire system warm. Depending on your wood and chimney conditions it would typically Learning how to most effectively control the oven temperature take three or four charges of cord wood to establish a takes some time and experience. -
Page 24: Water Reservoir
Helpful Hint: When lighting your stove from cold or when Water Reservoir the stove is relatively cool remember the water in the reservoir will be at the same temperature. The cold water will tend to absorb the heat that you are This section pertains to the water holding tank on the side of attempting to use to heat the chimney to start the stove. -
Page 25: Trouble Shooting
Trouble Shooting Chimneys and Draft Chimney Height The performance of your woodburning system depends Taller chimneys tend to produce stronger draft. We recommend more on the chimney than on any other single component. that the top of the chimney should be at least 36” (900 mm) The chimney ‘drives’... -
Page 26: Safety Practices
Here is a checklist to follow when installing or checking a flue Masonry chimneys should be checked for deterioration pipe assembly. It is based on the requirements found in the including damaged bricks, crumbling and missing mortar, Canadian Standards Association’s Installation Code for Solid cracks in the drip cap at the top of the chimney, and loose Fuel Burning Appliances and Equipment (Standard B365). -
Page 27: Maintenance
Maintenance Oven Flue Passage As heat, smoke and gases travel around the oven, fly ash and often creosote are left behind. The frequency of cleaning of the oven flue will depend on your use, burning habits and the wood you burn. If a ‘fly ash’ which is very fine and light in colour, is what is left behind in the oven flue chamber, it is a good indication you are burning your stove well. -
Page 28: Flue Boot Inspection
Flue Boot Inspection on the condition of the chimney. Referrals are the best way to select a chimney sweep. Check with your neighbours to Remove the cover plate on the flue boot, located at the back see if they are satisfied with the sweeping services they have of the range. -
Page 29: Door Gaskets
If the gasket comes loose but is still usable, it can be reseated using a good high temperature silicon. Replacement An adjustment* can be made to the oven door thermometer gasketing and adhesive can be ordered from Heartland or to allow a more representative temperature reading your dealer. -
Page 30: Terms Of Reference And Function
Terms of Reference and Function Backdrafting—The emission of smoke and/or air through gases either directly out through the flue or around the oven. the stove when a flow reversal occurs in the chimney, caused When ‘open’ the smoke, heat and gases will exhaust directly by wind conditions or negative pressure within the building. -
Page 31: Over Firing-Caution
Overfiring — Caution! Overfiring of your woodburning appliance represents a serious fire hazard. Overfiring can also warp your stove, break welds, permanently discolour the plating and cause premature burnout of your stove. Repeated overfirings will void the warranty of this appliance. To prevent overfiring: 1. -
Page 33: Oval Parts Diagram
Oval Cookstove Parts Diagram See page 36 for part description 1600 1595 3599 15451 1592 1575 1609 16071 1588 1536 1570 1556 1521 1551 1184 1236 1361 1380 1674 1289 1672 1376 1297 1287 4405 1307 1045 1300 1107 6029 1040 1025 1120... -
Page 34: Sweetheart Parts Diagram
SweetHeart Cookstove Parts Diagram See page 36 for part description 1595 1600 3599 45451 1592 4575 1609 46071 1588 4570 4536 1556 4523 1551 4369 1236 1361 4405 1674 4289 4672 4370 4297 4286 1391 4305 4045 4300 4041 4107 6029 4120 1631... -
Page 35: Replacement Parts Diagram
Replacement Parts Diagram See page 36 for part description 1440 1361 4271 1415 1420 1460 4277 4465 1425 1277 1255 1127 1237 4221 4222 8452 1258 4223 Sweetheart Fire Brick 1232 Kit #4220 1270 1232 9449 1258 Oval Fire Brick Kit #1234 4449 4445 8449... -
Page 36: Cookstove Parts List
1297 Reservoir curved band (#3 Oval only) 01752 Almond porcelain repair kit 60505 Reservoir front 1300 Firedoor panel 3599 Heartland nameplate w/clips 60522 Reservoir front insert panel 1307 Firedoor panel frame 4012 Adjustable Base leg 8452 Oven rack (Oval) 1310... - Page 37 If you have any questions or you need replacement parts, contact your dealer or call us direct at 800-223-3900. Our office hours are from 8:30 a.m. to 5:00 p.m. est Add on kits that are available for the Wood-burning cookstoves: Water Jacket Kit Can be used to supplement your existing hot water heater! Oval Water Jacket Kit- #1506...
- Page 39 Voir page #2602 #2603 31 pour les détails. VEUILLEZ NOTER: Les spécifications dans ce manuel sont sujets à des changements sans préavis. C U I S I N I È R E S Manual #1706.110512...
- Page 40 - POUR VOTRE SÉCURITÉ - NE PAS PLACER OU UTILISER DE L ’ESSENCE OU AUTRE V APEURS INFLAMMABLES OU LIQUIDES PRÈS DE CET APPAREIL. Emplacement de la cuisinière - Si la cuisinière doit être près d’une fenêtre, éviter les rideaux longs qui pourraient toucher le dessus et prendre en feu.
- Page 41 à ni en porcelaine émaillée et des surfaces plaquées. Ces pièces seront réparées ou remplacées gratuitement au gré de Heartland, sous réserve des conditions stipulées ci-dessous. La période de garantie contre les défauts des surfaces peintes, plaquées ou à ni en porcelaine émaillée est de 90 jours à partir de la date d’achat initial.
- Page 42 T T T ABLE DES MA T ÈR UTILISATION DU FOUR ET INSTRUCTIONS D’INSTALLATION ......... Déballage ..............5 DE LA SURFACE DE CUISSON ........22 Assemblage ............6 Cuisson sur la surface..........22 Installation du cabinet ..........7 Cuisson au four ............23 Chemise d’eau ............
-
Page 43: Instructions D'installation
— BIENVENUE — otre cuisinière Heartland a garder son charme et sa Après quelques semaines d’opération avec votre cuisinière, beauté d’antan étant un héritage nord américain. Nos relire ce manuel. Plusieurs des procédures seront plus claires premières cuisinières ont été fabriquées en 1906 et plusieurs après que vous avez eu de l’expérience avec votre cuisinière. -
Page 44: Assemblage
Assemblage Oval Avertissement: La cuisinière est très lourde. Les pattes Le corps du conduit de fumée doit être assemblé à la cuisinière avant de le détacher de la palette. peuvent laissé des marques dans un plancher mou, ne pas placer la cuisinière, ou même la reposer sur une surface qui 1) Dévisser le corps du conduit de fumée de la palette et pourrait laisser des empreintes. - Page 45 Montage en armoire à dessus de la cuisinière Outil rack fixer au boîtier par des vis et des écrous fournis enlever les vis retirer les vis et rondelles, 2 ou 3 sur sweetheart sur ovale mécanique Support Enlevez les rondelles et les vis situés près du bord arrière du dessus de la cuisinière (2 sur Sweetheart, 3 sur Oval), ainsi que les 4 vis mécaniques du dessus de la cuisinière.
- Page 46 Après que le cabinet est monté et installé, suivre les quelques Oval et SweetHeart: étapes suivantes: 1. Insérer le 1361 la poignée dans le support, le boulonner 1. Assembler les registres en forme de cloche (voir figure 2) dans le trou dans la surface de cuisson avec l‘écrou et le et visser dans les trois endroits, une à...
-
Page 47: Installation
Une cuisinière à bois donne de la chaleur dans toutes les Votre cuisinière Heartland a été éprouvée pour un directions. La chaleur dirigée vers l’avant de la cuisinière est fonctionnement sécuritaire pourvu que ces indications soient presque toujours la bienvenue. -
Page 48: T R
Oval - Diagramme d’ebauche et de dimensions Ces dessins sont pour mur combustible Com bu st i ble Wa ll mur combustible Espace de 12 1/2” références 8" w ith he at sh ield kit (from w all to cente r of p ipe ) 11 ½... - Page 49 SweetHeart - Diagramme d’ebauche et de dimensions Ces dessins sont pour Com bu st i ble Wa ll références 11 ½ " w ith 23 “ (59cm) sans écran (du mur au milieu du tuyau) Espace de 13 (33cm) 8 " w ith h e a t sh ield kit (from w all to c en te r of p ip e ) h ea t sh ie ld 9 1/2”...
- Page 50 Tableau des espaces libres Status Model A B C D E F G H J Measure SweetHeart NO HEAT SHIELD Oval SweetHeart 12½ WITH HEAT SHIELD Oval 17½ *Nota: Une cheminée approuvée au ULC standard S629 au Canada ou UL103HT au É-U doit être utilisée pour connecter le conduit de fumée au-dessus du cabinet afin de garder 2 po d’espace libre aux combustibles.
-
Page 51: Protection Du Plancher
Réductions d’espace libre Cheminée et courant d’air Il y a plusieurs méthodes décoratives afin de réduire les La cheminée est l’élément le plus important dans le espaces libres aux matériaux combustibles. Voir votre fonctionnement de votre cuisinière. (voir aussi page 22 “Tuyaux détaillant, ou les inspecteurs d’incendies afin d’assurer que de cheminée”... -
Page 52: Raccordements De Cheminée Requis
12. Durant un feu de cheminée, le raccordement de cheminée Oval et SweetHeart. Des copies additionnelles peuvent être peut vibrer terriblement. Le raccordement doit être fixer obtenues de votre détaillant ou en contactant Heartland solidement au tuyau et la cheminée, et les sections Appliances Inc. -
Page 53: Trousse D'air Frais
Oval et SweetHeart. Des copies additionnelles peuvent être obtenues de votre détaillant ou en contactant à Heartland Appliances Inc. Une famille en général a dépensé un quart de leur service Nota: Toutes les chemises d’eau doivent être installées publique l’an dernier. -
Page 54: Combustible
Comprendre la combustion Fumée (ou flamme): Lorsque le bois chauffe Charbon de bois: Comme le feu progresse L’eau: La moitié du poids du bois fraîchement au-dessus de l’ébullition de l’eau, il commence et la plupart des gaz sont évaporés, le coupé... - Page 55 Apprenez à connaître votre cuisinière Vous remarquerez qu’avec la porte du cendrier fermée, le panneau du cendrier peut être lever pour accéder la grille sans Les cuisinières SweetHeart et Oval sont des appareils de ouvrir la porte. cuisson et de chauffage qui ont été prouvés avec le temps. Brûler du bois de palette ou des matériaux de construction Prenez le temps de connaître les principes du fonctionnement avec des clous, n’est pas recommandé...
-
Page 56: Le Feu Initial
Le feu initial Gaz du tuyau (voir page 13 figure 7) Le foyer de votre cuisinière est fabriqué de matériaux supérieurs - en fonte et revêtement en brique réfractaire. Registre du four Un coup dur ou un choc thermique pourraient casser ces deux matériaux. - Page 57 4. La recharge du four - la surveillance du four sera réduite SweetHeart: énormément si vous rechargez le four lorsque le système Pour utiliser la position d’été sur La cuisinière est encore chaud et qu’il y a beaucoup de braise pour SWEETHEART ;...
-
Page 58: Brûlage Du Charbon
être obtenues de votre détaillant ou en contactant I l l u s t r a t i o n Heartland Appliances Inc. Ci-dessous une description brève d é m o n t r a n t de l’installation de la trousse à charbon. -
Page 59: Rechargement Du Feu
2. Lorsque le petit bois brûle chaudement, ajouter des Nota: Lorsque vous brûlez du charbon, le registre doit petits morceaux de bois durs. Garder le registre principal rester ouvert. L’air secondaire est requise pour brûler les complètement ouvert afin d’établir un feu chaud gaz du charbon. -
Page 60: Utilisation Du Four Et
Utilisation du four et de la surface de cuisson Cuisson sur la surface La surface en fonte vous donne un endroit assez grand pour les 1. Le montant d’air qui qu’il y a dans la cheminée. Comme crêpes, la friture, l’arrosage, et le mijotage. vous ouvrez les registres en forme de cloche, plus d’air entre dans le foyer et est tiré... -
Page 61: Cuisson Au Four
La cuisson au four Apprendre effectivement comment contrôler la température 8. Une surveillance et même un brassage occasionnel peut prend du temps et de l’expérience. Comme règle générale, le être requis. Rappelez-vous de ces règles et avec un peu charbon devrait être au stage de combustion avant que le four d’expérience, vous trouverez que la cuisson sera facile et soit prêt pour la cuisson. - Page 62 Suggestions utiles: Lorsque vous allumez un four froid ou L’intérieur du réservoir est fabriqué de cuivre, pour un nettoyage facile et les joints sont soudés avec une soudure d’argent sans lorsqu’il est relativement froid, n’oubliez pas que l’eau dans le plomb.
-
Page 63: Guide De Dépannage
GUIDE DE DÉPANNAGE Cheminèes et courant d’air lentement. Ce mouvement trop lent permet aux gaz de refroidir La performance de votre système de brûlage dépend plus sur et de perdre sa flottabilité. Des revêtements trop grands sont la cheminée que tout autre composant. La cheminée crée un la raison que plusieurs poêles raccordés à... -
Page 64: Vérification D'une Cheminée Existante
Vérification d’une cheminée existante de l’appareil à la cheminée. Le montage du tuyau de la Inspecter minutieusement la cheminée existante avant de cheminée est une partie extrêmement importante de votre l’utiliser pour ventiler votre nouvelle cuisinière. À cause de système de brûlage et devrait être planifié et installé avec soin. plusieurs facteurs qui devront être considéré, un professionnel Suivre la liste de contrôle lorsque vous installez ou vérifier le qualifié... -
Page 65: Entretien
Entretien Cavité du carneau Comme la chaleur, la fumée et les gaz font leur course autour du four, des cendres volantes et souvent de la créosote sont laissées derrière. La é r é u ’ l s i l û r “... -
Page 66: Inspection Du Soufflet De Protection
Inspection du soufflet de protection du être très ajustée à la cheminée pour qu’elle puisse enlever les dépôts. La plupart des tiges sont fabriquées de fibre de verre tuyau avec raccords filetés à chaque bout. Plusieurs passes avec la brosse est nécessaire pour un bon nettoyage. Plusieurs Enlever la plaque protectrice sur le soufflet de protection située préfèrent contacter un ramoneur plutôt que de monter sur le à... -
Page 67: Garnitures Des Portes
Vous pouvez commander des garnitures de remplacement chez Lorsque le thermomètre atteint 375°F, vérifiez le thermomètre Heartland ou votre détaillant. de la porte. Si la température varie plus de 50°, un ajustement est requis. -
Page 68: Termes De Références Et Fonctions
Termes De Références Et Fonctions Émanation de fumée - l’échappement de la fumée par les Couvercle - Les rondelles en fonte sur le dessus de la ouvertures de la cuisinière lorsque l’oxygène entre dans un feu cuisinière. Elles peuvent être enlevées pour permettre l’accès manquant d’oxygène. - Page 69 SURCHAUFFE - A TTENTION! Le SURCHAUFFE d’un appareil à bois représente de sérieux dangers. Le SURCHAUFFE peut gondolé votre cuisinière, cassé des soudures, une décoloration permanente du plaqué et causera un grillage prématuré de votre cuisinière. Des surchau es répétées de votre appareil annulera cette garantie . Pour prévenir le SURCHAUFFE: 1.
- Page 71 DIAGRAMME DES PIÈCES - CUISINIÈRE OV AL voir page 30 pour la description des pièces 1595 1600 1546 1545 1592 1575 1609 1607 1588 1536 1570 1556 1521 1551 1184 1236 1361 1380 1674 1289 1672 1376 1297 1287 4405 1307 1045 1300...
- Page 72 DIAGRAMME DES PIÈCES - CUISINIÈRE SWEETHEART voir page 32 pour la description des pièces 1595 1600 1546 4545 1592 4575 1609 4607 1588 4570 4536 1556 4523 1551 4369 1236 1361 4405 1674 4289 4672 4370 4297 4286 1391 4305 4045 4300 4041...
-
Page 73: Diagramme De Pièces De Remplacement
DIAGRAMME DES PIÈCES DE REMPLACEMENT 1440 1361 1437 4271 1415 1420 1455 4277 1425 4454 1277 1255 4221 1265 4222 1258 8452 4223 1232 1232 1270 9449 1258 4449 1445 4445 8449 4225 1228 4228 1224... - Page 74 8449 support à grille - 3 positions 1536 corps du cabinet de réchaud 8452 grille du four - nickel (Oval seulement) 1545 panneau de couronnement 9449 support à grille - 4 positions (Oval seulement) 1546 plaque Heartland et agrafes...
- Page 75 Contacter votre détaillant ou appellez nous directement au 800-223-3900 si vous avez questions ou vous avez besoin de pièces de remplacement. Nos heures de bureau sont de 8:30 a.m. à 17:00. Des trousses facultatives sont disponibles pour les cuisinières à bois: Trousse de chemise d’eau Peut être utilisé...
Need help?
Do you have a question about the SweetHeart 2603 and is the answer not in the manual?
Questions and answers