Table of Contents
Advertisement
Advertisement
Table of Contents

Related Manuals for Baby Lock Tiara II BLTR16-2


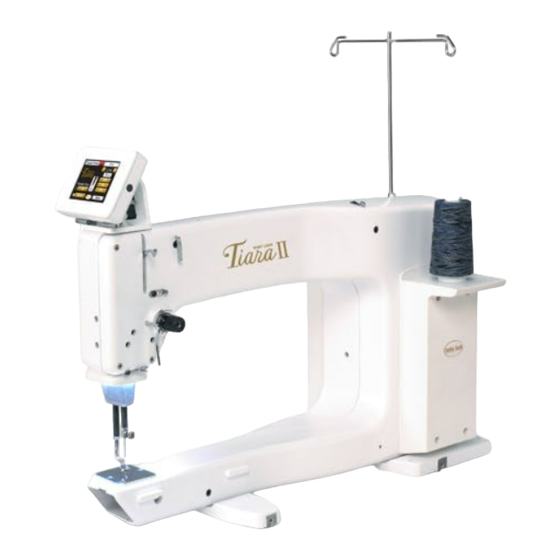
Summary of Contents for Baby Lock Tiara II BLTR16-2
-
Page 2: Table Of Contents
Table of Contents Congratulations on Your Baby Lock Tiara II Purchase ����������������������������������������� 2 Baby Lock Tiara II Important Information ������������������������������������������������������������ 3 Regulations ��������������������������������������������������������������������������������������������������������� 3 Important Safety Instructions ���������������������������������������������������������������������������� 4 How to Pack/Unpack Machine ��������������������������������������������������������������������������� 5 Instructions Before Using Machine ������������������������������������������������������������������� 5 Grounding �����������������������������������������������������������������������������������������������������������... -
Page 3: Congratulations On Your Baby Lock Tiara Ii Purchase
Congratulations on your purchase of the Baby Lock Tiara II You haven’t just purchased a quilting machine, Remember, if you ever have questions, your you’ve joined the Baby Lock family and we authorized Baby Lock retailer can help you� If welcome you�... -
Page 4: Baby Lock Tiara Ii Important Information
Product Name: Baby Lock Tiara II Model BLTR16-2 complies with Part 15 of the FCC Rules. Operation is subject to the following two conditions: (1) this device may not cause harmful interference, and (2) this device must accept any interference received, including interference that may cause undesired operation. -
Page 5: Important Safety Instructions
This machine is intended for household use� Disclaimer Baby Lock and its authorized retailers are in no way legally responsible or liable for damage to the Baby Lock Tiara II when used improperly or not in accordance with the guidelines stated in this manual or when used on machine quilting tables not recommended by Baby Lock�... -
Page 6: How To Pack/Unpack Machine
Keep the carton and packing materials. You will need them in the event that you need to return the machine to your authorized Baby Lock retailer or send it for repair. If you do not pack the machine properly or if you do not use the correct packaging materials, the machine could be damaged. -
Page 7: Grounding
Note: In Canada, the use of a temporary adapter is not permitted by the Canadian Electric Code. Page 6 Baby Lock Tiara II Instruction Manual... -
Page 8: Safety Section
Kluber Lube, permanent Lubrication of hook: Velocite 10, Texaco 22 8. The Baby Lock Tiara II should not be stored or used in extreme temperatures. 9. Use the Baby Lock Tiara II only for its intended use as described in this manual. -
Page 9: Package Contents/Included Accessories
2.5mm Allen Wrench QM10286 3.0mm Allen Wrench JW010287 5.0mm Allen Wrench JW010289 8mm Open Wrench QM40235 Open-Toe Hopping Foot QM10510 Bobbin Winder Box Variable-Speed Bobbin Winder BLQBW Table Box Tiara II Quilting Table BLTRT16 Page 8 Baby Lock Tiara II Instruction Manual... -
Page 10: Optional Accessories
Optional Accessories (available from your authorized Baby Lock retailer) Tiara II 18” Quilting Table Extension Tiara II Quilting Table Overlay (BLTRT16-E) (BLTRT16-O) Horizontal Spool Pin TruStitch Stitch Regulator for Tiara II (BLJ18-HS) (BLTRTS) Couching Feet Set (BLQ-CCF) Babylock.com Page 9... -
Page 11: Baby Lock Tiara Ii Components
2� Thread Guide A 3� Three-Hole Thread Guide B 4� Thread Guide C 5� Top Thread Tension Assembly 6� Stirrup Thread Guide E 7� Take-Up Lever 8� Thread Guide F 9� Front Casing/Frame 10� Handwheel Page 10 Baby Lock Tiara II Instruction Manual... -
Page 12: Back Side View
Back Side View 19� Front Threaded Display Mounting Holes 11� Needle Bar 20� Front Base 12� Needle Bar Clamp Thumb Screw 21� Back Casing/Frame 13� Needle Bar Thread Guide 22� Rear Base 14� Needle 23� Color Touch-Screen Display Connector 15� Hopping Foot 24�... -
Page 13: Rear And Front Views
33� Power Pod (P-Pod) 27� Accessory Power Connector 34� Spool Pin 2 28� Foot Pedal Connector 29� Spool Pin 1 30� Electronic Control Pod (C-Pod) 31� Bobbin Assembly Detail Rear Front Figure 3 Page 12 Baby Lock Tiara II Instruction Manual... -
Page 14: Setting Up The Table (And Taking Down For Storage)
Setting Up the Table (and Taking it Installing the Power Cord Down for Storage) The Baby Lock Tiara II table has been designed to accom- modate the Baby Lock Tiara II machine. It has folding legs that are height-adjustable and is heavy enough to provide stabilization for quilting at high speeds. -
Page 15: Installing Thread Antennae
NOTE: The eyelets of the thread antennae MUST be cen- tered over the spool pins. This ensures that the thread cone will not pull, turn or tilt, which will cause thread tension problems (see Figure 5). Page 14 Baby Lock Tiara II Instruction Manual... -
Page 16: Inserting (Or Changing) Needle
20 minutes of testing. It is possi- ble that it could be damaged in shipping or as you remove the machine from the box. For these reasons, Baby Lock recommends that you replace the needle before beginning to quilt with your new machine. -
Page 17: Changing Hopping Foot
2.5mm Allen wrench. If it isn’t properly centered, loosen the lock nut; center the foot with the needle; hold the foot in position; and firmly tighten the lock nut (Figure 9). Figure 9 Page 16 Baby Lock Tiara II Instruction Manual... -
Page 18: Threading The Machine
Threading the Machine Threading the Machine TAKE UP SPRING Take Up Spring BACK TENSION ASSEMBLY FRONT BACK Tension Assembly FRONT DETAIL 2 Figure 11 Figure 10 1. Place a cone or spool of thread on the spool pin. Pass the thread through the thread-mast eyelet from 1. - Page 19 This is not the case with the Baby Lock Tiara II quilting machine where the top tension is always tight and the tension discs are never open.
-
Page 20: Bobbin Case And Bobbin Thread Tension Adjustments
Bobbin Case and Bobbin Thread Tension Adjustments Inserting the Bobbin into Bobbin Case NOTE: To prevent personal injury always turn off the power switch while inserting and removing the bobbin case or anytime your hands are near the needle area. TENSION SPRING Figure 15... -
Page 21: Top Thread Tension Adjustment
Check the bobbin tension every time a new bobbin is inserted� Tighten Top Thread Tension To adjust the top tension tighter, turn the top thread ten- sion knob (page 10, Figure 1, #5) clockwise. Page 20 Baby Lock Tiara II Instruction Manual... -
Page 22: Maintenance
Cleaning the Touch-Screen Display Only use good quality light sewing machine oil in the Baby Lock Tiara II. Internal oiling is not necessary on the Use a soft clean cloth dampened with isopropyl alcohol Baby Lock Tiara II except when the machine is taken to to gently wipe the display and remove any marks. -
Page 23: Using The Touch-Screen Displays
Using the Touch Screen Displays Display Menus The Baby Lock Tiara II has a color touch-screen display Check Pedal on the front of the machine. Settings are changed using this display. Speed Main Screen Button Functions (Figure 20) Foot Pedal Status... - Page 24 Basting Mode Pedal 2 Second The Tiara II has a basting mode that causes a stitch to be formed at a specified time interval – every half second, Delay every three/quarters of a second, every second, every 1.5 second, or every two seconds. (Figure 23) Touch the basting icon (Figure 24) to activate basting mode.
-
Page 25: System Information
(Figure 27). Figure 27 More Menu (Figure 29) The More screen allows access to other functions available on the Baby Lock Tiara II. (Figure 28) More Low Bobbin The Tiara II includes a low bobbin capability so you can estimate how soon your bobbin thread will run out. - Page 26 Low Bobbin Solid beep for 1/3 of a stitch cycle, Low Bobbin no beep for the rest of the cycle. The Tiara II includes a low bobbin capability so you can � Bobbin Thread Capacity This Low estimate how soon your bobbin thread will run out Bobbin Capacity is based on an estimate of how much of a 100.0 Yards particular thread can fit on a bobbin, in combination with...
- Page 27 Press the “Main” button to return to Main menu screen or the “Back” button to return to the “More” menu screen. Page 26 Baby Lock Tiara II Instruction Manual...
- Page 28 Back The “Motor” Sensor test can help you determine whether Main they may be a problem with the Baby Lock Tiara II motor. Slowly rotating the handwheel should result in an audible Figure 35 “beep.” If you get a constant solid “beep” or no “beep” at all, this indicates a failed test and the machine should be inspected by your authorized Baby Lock retailer.
- Page 29 Diagnostics The “Speed” Sensor test can help you determine whether Motor Speed Sensor Test or not there is a problem with the Baby Lock Tiara II speed sensor. Before performing this test, remove the Remove bobbin case and top thread.
-
Page 30: Preparing To Quilt
With any quilting machine, it is important to under- touch on the fabric� Gripping the fabric too tightly may stand the basics of free motion quilting. The Baby Lock cause body tension resulting in poor quilting quality and Tiara II does not have feed dogs like domestic machines;... -
Page 31: Troubleshooting
• Replace the needle often, normally once or twice per day for continuous bent, or installed improperly quilting or at least once per quilt. Use Baby Lock Tiara II recommended nee- dles. • Always change the needle if the needle has struck any hard object such as a straight pin, etc. - Page 32 Troubleshooting Stitch Quality is Poor Corrective Measure • Tension is not balanced • Adjust the tension of the needle thread after ensuring the bobbin tension is adjusted correctly (see pages 20-21). • Bobbin case is damaged, cor- • Since thread slides over the surface of the bobbin case at a high speed, make roded, dirty, et cetera sure the case is free of any lint or foreign matter that could impede thread passage through the machine.
- Page 33 Gently rub with metal cloth to remove the sharp edge. Consult your author- other place along the thread ized Baby Lock retailer to polish any hard to reach or delicate areas, or if the path burr is inside the hole.
Need help?
Do you have a question about the Tiara II BLTR16-2 and is the answer not in the manual?
Questions and answers