Table of Contents
Advertisement
Advertisement
Table of Contents

Subscribe to Our Youtube Channel
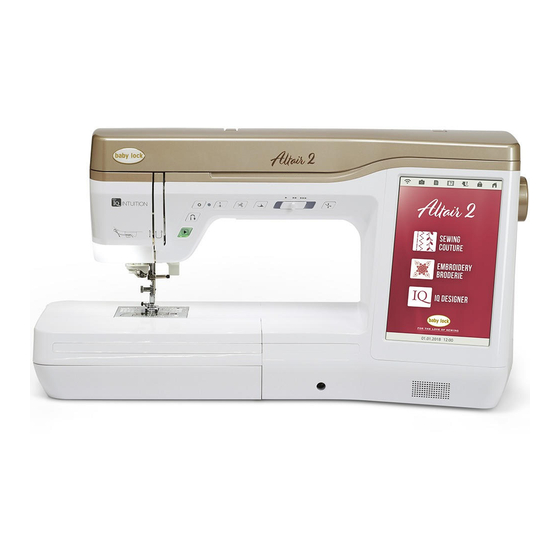
Related Manuals for Baby Lock Altair 2


Summary of Contents for Baby Lock Altair 2
- Page 3 Electrical Hazards: INTRODUCTION • This machine should be connected to an AC power Thank you for purchasing this machine. Before using this source within the range indicated on the rating machine, carefully read the “IMPORTANT SAFETY label. Do not connect it to a DC power source or INSTRUCTIONS”, and then study this manual for the inverter.
- Page 4 • If the light unit is damaged, it must be replaced by safe way and understand the hazards an authorized Baby Lock retailer. involved. Children shall not play with • In the event a malfunction occurs or adjustment is required, first follow the troubleshooting table in the the appliance.
- Page 5 IMPORTANT • Consult the authorized Baby Lock retailer or an • In the event of replacing the plug fuse, use a fuse experienced radio/TV technician for help. approved by ASTA to BS 1362, i.e. carrying the •...
- Page 6 For Users in Canada Laser Notices (For U.S.A. This device complies with Industry Canada’s licence-exempt only) RSSs. Operation is subject to the following two conditions: (1) This device may not cause interference; and Laser Safety (2) This device must accept any interference, including interference that may cause undesired operation of the This sewing machine is certified as a Class 1 laser product device.
- Page 7 WPA™ and WPA2™ are trademarks of Wi-Fi Alliance®. Any trade names and product names of companies appearing on Baby Lock products, related documents and any other materials are all trademarks or registered trademarks of those respective companies.
- Page 8 PRECAUTION FOR WIRELESS CONNECTION Make sure you use a router or firewall when connecting your machine to the Internet to protect it against unauthorized access from the Internet.
-
Page 9: Table Of Contents
CONTENTS CONTENTS Chapter 1 GETTING READY Overcasting ................76 Quilting................77 NAMES OF MACHINE PARTS........ 9 Blind Hem Stitches ............... 83 INCLUDED ACCESSORIES ......... 11 Shell Tuck Stitches ............... 85 Included Accessories ............11 Scallop Stitches ..............85 Options................15 Smocking Stitches .............. - Page 10 CONTENTS Chapter 5 ADVANCED EMBROIDERY 145 List of Symptoms..............190 ERROR MESSAGES........... 194 VARIOUS EMBROIDERING FUNCTIONS..145 SPECIFICATIONS..........196 Basting Embroidery ............145 UPDATING YOUR MACHINE’S SOFTWARE... 198 Creating an Appliqué Piece ..........146 Update Procedure Using USB Media ......... 198 MAKING EMBROIDERY ADJUSTMENTS ..
-
Page 11: Chapter 1 Getting Ready
NAMES OF MACHINE PARTS GETTING READY Chapter C Flat bed attachment with accessory compartment Note (page 11) D Thread cutter (page 42) • Be sure to install the latest software. E Thread guide plate (page 38) Refer to “UPDATING YOUR MACHINE’S F Connector for the presser foot (page 51, page 106) SOFTWARE”... - Page 12 NAMES OF MACHINE PARTS Operation Buttons Measurements on the needle plate and the bobbin cover (with mark) The measurements on the bobbin cover and needle plate are references for stitch patterns with a left or middle (center) needle position. 1 “Start/Stop”...
-
Page 13: Included Accessories
Included Accessories After opening the box, check that the following accessories are included. If any item is missing or damaged, contact your authorized Baby Lock retailer. Part Name Part Code Zigzag foot “J” (on machine) 1 Presser foot storage tray... - Page 14 INCLUDED ACCESSORIES Part Name Part Name Part Code Part Code Yarn guide for embroidery couching Compact digital dual feed foot XH3803-001 BLSA-DDF Yarn threader Regular sole for digital dual feed foot (on compact digital dual feed foot) XF7187-001 XF4419-101 Adapter Straight stitch foot XF3613-001 XD0826-051...
- Page 15 INCLUDED ACCESSORIES Part Name Part Name Part Code Part Code Cleaning brush Spool felt (on machine) X59476-051 X57045-051 Eyelet punch Spool net × 2 XG7791-001 XA5523-050 Screwdriver (small) Embroidery needle plate cover X55468-051 XE5131-001 Screwdriver (large) Touch pen (stylus) XC4237-021 XA9940-051 Disc-shaped screwdriver Knee lifter...
- Page 16 INCLUDED ACCESSORIES Part Name Part Name Part Code Part Code Bobbin cover (with mark) (on machine) Chalk pencil D02T27-001 XE8568-001 Bobbin cover (on straight stitch needle plate) Bobbin center pin and instruction sheet D02T26-001 XF5048-001 Embroidery frame with decal set 36 cm (H) ×...
-
Page 17: Options
Embroidery Design Guide. Options BLMA-TS The following are available as optional accessories to be purchased separately from your authorized Baby Lock retailer. * These embroidery frames can be used for general embroidery but cannot be used with the application (IQ Intuition). - Page 18 BLSA-WFS Memo • To obtain optional accessories or parts, contact Quilting guide your authorized Baby Lock retailer or visit our site www.babylock.com. • All specifications are correct at the time of printing. BLG-QG Please be aware that some specifications may change without notice.
-
Page 19: Using The Multi-Purpose Screwdriver
INCLUDED ACCESSORIES Using the Multi-Purpose Screwdriver IMPORTANT Since the screwdriver can be changed to three different • Do not lift the handle of the machine while the positions, it can be extremely useful for the various machine spool stand is installed. preparations. - Page 20 INCLUDED ACCESSORIES How To Remove Firmly insert the two spool pins into the two holes in the spool support. Pull the spool stand up to remove it from the machine. Open the upper cover of the machine, and then pull Attach the upper cover to the machine.
-
Page 21: Turning The Machine On/Off
If the cord or plug time/date to your language and local time/date. is damaged, take the machine to your authorized Baby Lock retailer for repairs Touch to set your local language and then before continuing use. - Page 22 TURNING THE MACHINE ON/OFF The message screen, confirming if you want to set time/date, appears. Touch Touch to set time/date. And then touch 1 Select [ON] to display time/date on the screen. 2 Touch to select the date display format. 3 Set the year (YYYY), month (MM) and date (DD).
-
Page 23: Lcd Screen
LCD SCREEN Display LCD SCREEN Explanation Page Name Change the needle stop position, Touch the LCD screen or a key with your finger or the adjust the pattern or screen, and included touch pen to select a machine function. Machine change other machine settings. - Page 24 LCD SCREEN Utility Stitch Screen Character/Decorative Stitch Screen Display Name Explanation Page Utility stitch key Select a straight stitch, zigzag stitch, buttonhole, blind hem stitch, or other stitch (utility stitch) commonly used in garment making. Character/Decorative Select character or decorative stitch patterns. stitch key Needle position Shows single or twin needle mode setting, and the needle stop position.
- Page 25 LCD SCREEN Key Functions Memo • Some editing functions cannot be used with certain stitch patterns. Only the functions for the displayed keys are available when a stitch pattern is selected. • The machine default setting is highlighted. Display Name Explanation Page...
- Page 26 LCD SCREEN Display Name Explanation Page “L/R Shift” key Touch to shift the stitch pattern to the right or touch to shift the stitch pattern to the left. This feature is not available for all stitch patterns. Only those applicable will be shifted. Stitch width and Shows the zigzag width and stitch length settings of the currently selected stitch length key...
-
Page 27: Using The Machine Settings Key
LCD SCREEN Using the Machine Settings Key Touch to change the default machine settings (needle stop position, embroidery speed, opening display, etc.). To display the different settings screens, touch for “Sewing settings”, for “General settings”, for “Embroidery settings” or for “Wireless LAN settings”. Note •... - Page 28 D Shows the total number of stitches sewn on this machine, which is a reminder to take your machine in for regular servicing. (Contact your authorized Baby Lock retailer for details.) E Shows the internal machine number for this machine.
- Page 29 LCD SCREEN Embroidery Settings Wireless LAN Settings 1 Enable/Disable the wireless LAN function (page 32). 1 Select the embroidery frame to be used. 2 Shows the connected SSID. 2 Select the center point marker or grid lines. 3 Set the machine to connect wireless LAN function. 3 Select the thread color display on the embroidery 4 Shows the machine name used on the wireless network.
- Page 30 LCD SCREEN Setting the [Eco Mode] and the [Shutoff Connect the USB media that contains your personal image to the USB port of the machine. Support Mode] You can save the machine power by setting the [Eco Touch to select the first image. Mode] and the [Shutoff Support Mode].
-
Page 31: Using The Machine Help
LCD SCREEN Using the Operation Guide Function Using the Machine Help Touch to display the screen shown below. Categories are displayed at the top of the screen. Touch to display the machine help screen. Functions Touch a key to see more information about that category. are available from the screen shown below. - Page 32 LCD SCREEN Playing MPEG-4 (MP4) Videos Touch Your MP4 videos can be played from USB media. In addition, the MP4 video can be saved to the machine so Select the category and the tutorial video. that a tutorial video on creating a project, for example, can be viewed at any time.
-
Page 33: Using The Stitch Pattern Explanation Function
WIRELESS NETWORK CONNECTION FUNCTIONS Using the Stitch Pattern Explanation WIRELESS NETWORK Function CONNECTION FUNCTIONS If you want to know more about the uses of a stitch pattern, Operations Available with a Wireless select the pattern and touch and then Network Connection to see an explanation of the stitch selection. -
Page 34: Enabling A Wireless Network Connection
WIRELESS NETWORK CONNECTION FUNCTIONS • Wirelessly transfer an embroidery pattern from your Enabling a Wireless Network Connection computer to the machine by using the dedicated Windows application (Design Database Transfer). The application can be downloaded from the The machine can be connected to your wireless network. following URL. - Page 35 WIRELESS NETWORK CONNECTION FUNCTIONS Touch beside [Wireless LAN Setup Wizard]. Enter the network key (password) that was noted, and then touch A list of available SSIDs appears. 1 Text input area Touch beside the SSID that was noted. 2 Character keys 3 Caps key 4 Space key 5 Letters/numbers/symbols key...
-
Page 36: Connecting The Accessory To The Machine
CONNECTING THE ACCESSORY TO THE MACHINE Touch to exit the setup. CONNECTING THE ACCESSORY TO THE MACHINE Using a USB Mouse A USB mouse, connected to the machine, can be used to perform a variety of operations in the screens. Connect a USB mouse to the USB port. -
Page 37: Winding/Installing The Bobbin
WINDING/INSTALLING THE BOBBIN Slide the spool cap onto the spool pin as far as possible WINDING/INSTALLING THE to the right, with the rounded side on the left. BOBBIN IMPORTANT Winding the Bobbin • If the spool or the spool cap is not installed correctly, the thread may become tangled around the spool pin, and the machine may be IMPORTANT... - Page 38 WINDING/INSTALLING THE BOBBIN Pass the thread around the pretension disk making sure • When using thread that winds off quickly, such as that the thread is under the pretension disk. transparent nylon thread or metallic thread, place the spool net over the spool before placing the spool of thread onto the spool pin.
- Page 39 WINDING/INSTALLING THE BOBBIN Set the bobbin winding switch to the left, until it clicks After bobbin winding is finished, cut the thread with into place. scissors and remove the bobbin. 1 Bobbin winding switch The bobbin winding window appears. IMPORTANT Touch •...
- Page 40 WINDING/INSTALLING THE BOBBIN Using the Spool Stand Slide the spool cap onto the spool pin as far as possible to the right, with the rounded side on the left. To wind thread on the bobbin while the spool stand is installed, pass the thread from the spool through the While holding the thread with both hands, pass the thread guide on the telescopic thread guide, and then...
-
Page 41: Setting The Bobbin
WINDING/INSTALLING THE BOBBIN Lightly hold down the bobbin with your right hand, Setting the Bobbin and then guide the end of the thread around the tab of the needle plate with your left hand. CAUTION • Use a bobbin that has been correctly wound with thread, otherwise the thread tension may be incorrect and the needle may break, causing injuries. -
Page 42: Pulling Up The Bobbin Thread
WINDING/INSTALLING THE BOBBIN Pull up the bobbin thread, pass it under the presser Touch to unlock all keys and buttons. foot and pull it about 10 cm (approx. 4 inches) toward the back of the machine, making it even with the upper Memo thread. -
Page 43: Upper Threading
UPPER THREADING Turn the main power to ON. UPPER THREADING Press (Presser foot lifter button) to raise the presser foot. Upper Threading The upper thread shutter opens so the machine can be threaded. CAUTION • Be sure to thread the machine properly. Improper threading can cause the thread to tangle and break the needle, leading to injury. - Page 44 UPPER THREADING While holding the thread with both hands, pass the Pass the thread through the notch in the thread guide. thread through grooves of the thread guide plate. Then firmly pull the thread from front to back into the slit of the thread guide disk (marked “7”).
-
Page 45: Using The Twin Needle Mode
• Twin needle (part code XE4963-001) is was not passed through the needle bar thread recommended for this machine. Contact your guides, perform the procedure again starting from authorized Baby Lock retailer for replacement step needles (size 2/11 is recommended). Note Note •... - Page 46 UPPER THREADING Thread the machine for the first needle according to While holding the thread from the spool, pull the the procedure for threading a single needle (“Upper thread through the lower notch in the thread guide Threading” on page 41). plate, then through the upper notch.
-
Page 47: Using The Spool Stand
UPPER THREADING Start sewing. Attach the spool stand to the machine. (page 17) Memo • To change direction when sewing with the twin needle, raise the needle from the fabric, raise the presser foot lever, and then turn the fabric. Using the Spool Stand The included spool stand is useful when using thread on Place the spool of thread on the spool pin so that the... -
Page 48: Changing The Needle
CHANGING THE NEEDLE Pull the thread off the spool. Pass the thread from the CHANGING THE NEEDLE back to the front through the thread guides at the top. When using thread that quickly feeds off the spool, such as metallic thread, use the enclosed ring to prevent the thread from becoming entangled. - Page 49 CHANGING THE NEEDLE Remove the presser foot. (page 49) Use the disc-shaped screwdriver to turn the needle clamp screw toward you (counterclockwise) to loosen the screw. Remove the needle. With the flat side of the needle facing the back, insert the new needle all the way to the top of the needle stopper (viewing window) in the needle clamp.
-
Page 50: Fabric/Thread/Needle Combinations
FABRIC/THREAD/NEEDLE COMBINATIONS FABRIC/THREAD/NEEDLE COMBINATIONS • Needles that can be used with this machine: Home sewing machine needles (size 65/9 - 100/16) * The larger the number, the larger the needle. As the numbers decrease, the needles get finer. • Thread that can be used with this machine: 30 - 90 weight * Never use thread of 20 weight or lower. -
Page 51: Changing The Presser Foot
CHANGING THE PRESSER FOOT Raise the presser foot lever to check that the presser CHANGING THE PRESSER FOOT foot is securely attached. CAUTION • Always touch on the screen to lock all keys and buttons before changing the presser foot. If is not touched and the “Start/ Stop”... -
Page 52: Using The Compact Digital Dual Feed Foot
CHANGING THE PRESSER FOOT Remove the screw of the presser foot completely from Lower the presser foot lever. Insert the screw, and the presser foot shaft. tighten the screw securely with the screwdriver. Set the adapter on the presser foot bar, aligning the flat CAUTION side of the adapter opening with the flat side of the presser bar. - Page 53 CHANGING THE PRESSER FOOT Position the compact digital dual feed foot to the Be sure that the feed position lever is pushed down and presser foot bar by aligning the notch of the compact the compact digital dual feed foot is ready to sew. digital dual feed foot to the large screw.
- Page 54 CHANGING THE PRESSER FOOT Adjusting the Amount of Fabric Feeding from the Compact Digital Dual Feed Foot The dual feed mechanism pulls the top fabric according to the set stitch length. With troublesome fabrics, fine tune the set length, by changing [Dual Feed Feed Adjustment] in the settings screen.
-
Page 55: Chapter 2 Sewing Basics
SEWING SEWING BASICS Chapter Character/Decorative Stitches SEWING CAUTION • To avoid injury, pay special attention to the needle while the machine is in operation. Keep your hands away from moving parts while the machine is in operation. • Do not stretch or pull the fabric during sewing. - Page 56 SEWING Select the category you want. Lower the presser foot. You do not have to pull up the bobbin thread. Adjust the sewing speed with the speed control slide. You can use this slide to adjust sewing speed during sewing. 1 Slow 2 Fast Press the “Start/Stop”...
-
Page 57: Using Advanced Multi-Function Foot Controller
SEWING Note • When cutting thread thicker than #30, nylon monofilament thread, or other decorative threads, use the thread cutter on the side of the machine. When the needle has stopped moving, raise the presser foot and remove the fabric. Part Name Main foot controller Using Advanced Multi-Function Foot... - Page 58 SEWING Adjust the spacing between the main foot controller Turn on the machine. And then touch and side pedal. display page 2 of the settings screen. Use the markings on the mounting plate as a Memo convenient guide to adjust the spacing. •...
-
Page 59: Combining Stitch Patterns
SEWING Adjusting the Length of the Cord for the Main Touch Foot Controller Sew trial stitches and confirm that the settings are as Unwind the cord for the main foot controller. desired. Pressing down on the main foot controller increases the Guide the cord between the tabs. - Page 60 SEWING Example: If you want to sew the stitch pattern continuously, touch Touch The stitch pattern turns continuous. Memo • When sewing is completed, trim any excess thread between characters. Select the following stitch pattern (8-35). Inserting Stitch Patterns Touch to select the stitch pattern at the position where a new stitch pattern will be added.
-
Page 61: Sewing Reverse Stitches/Reinforcement Stitches
SEWING The key will display as Sewing Reverse Stitches/Reinforcement Stitches Set the needle in the start position and press the “Start/ Stop” button to start sewing. Reverse/reinforcement stitches are generally necessary at the beginning and end of sewing. You can use (Reverse stitch button) to sew reverse/reinforcement stitches. - Page 62 SEWING The operation performed when the button is pressed differs depending on the selected stitch pattern. Refer to the following table for details on the operation that is performed (Reverse stitch (Reinforcement when the button is pressed. button) stitch button) Machine sews Machine sews with a stitch...
-
Page 63: Automatic Presser Foot Lowering Function And Thread Cutting Function
STITCH SETTINGS Automatic Presser Foot Lowering Function STITCH SETTINGS and Thread Cutting Function Setting the Stitch Width/Stitch Length/“L/R By setting the machine to automatically raise and lower the presser foot, sewing operations can be performed more Shift” smoothly. When you select a stitch, your machine automatically selects the appropriate stitch width, stitch length, and L/R Shift. -
Page 64: Setting The Thread Tension
STITCH SETTINGS Setting the Stitch Length bobbin thread should be visible from the wrong side of the fabric. Follow the steps below when you want to change the stitch pattern length. 1 Wrong side 2 Surface 3 Upper thread 4 Bobbin thread Memo •... -
Page 65: Saving Your Stitch Settings
STITCH SETTINGS The selected settings are retrieved, and the original Saving Your Stitch Settings screen automatically appears. Memo The settings for the zigzag stitch width, stitch length, thread tension, etc., are preset in the machine for each stitch. • To save new settings when there are already 5 sets However, if you have specific settings that you wish to reuse of settings saved for a stitch, touch . -
Page 66: Useful Functions
USEFUL FUNCTIONS Adjusting the Needle Drop Point with the USEFUL FUNCTIONS Guideline Marker Automatic Thread Cutting The red guideline marker indicates the sewing position on the fabric. You can adjust the sewing position by moving the guideline marker while checking the guideline marker on the After selecting a stitch pattern, turn on the automatic thread fabric. -
Page 67: Pivoting
USEFUL FUNCTIONS Adjusting the Guideline Marker Position Pivoting If the guideline marker indicates the position incorrectly in the center needle position, adjust the initial position in the If the pivot function is selected, the machine stops with the settings screen. needle lowered (in the fabric) and the presser foot is Touch automatically raised to an appropriate height when the “Start/... -
Page 68: Using The Knee Lifter
USEFUL FUNCTIONS Place the fabric under the presser foot with the needle Automatic Fabric Sensor System (Automatic at the starting point of the stitching, and then press the “Start/Stop” button. The machine will begin sewing. Presser Foot Pressure) Press the “Start/Stop” button to stop the machine at The thickness of the fabric is automatically detected and the the point where the sewing direction changes. -
Page 69: Using The Straight Stitch Needle Plate And The Straight Stitch Foot
USEFUL FUNCTIONS [Needle Position - Stitch Placement] is [OFF] Insert the multi-purpose screwdriver into the hole, and tilt the multi-purpose screwdriver to the left and then to the back, as shown in the illustration. Using the Straight Stitch Needle Plate and the Straight Stitch Foot The straight stitch needle plate and the straight stitch foot can only be used for straight stitches (middle needle position... -
Page 70: Useful Sewing Tips
USEFUL SEWING TIPS Insert needle and attach the straight stitch foot. USEFUL SEWING TIPS 1 Notch 2 Pin Sewing Tips Trial Sewing Before starting your sewing project, we recommend sewing trial stitches using thread and scrap fabric that are the same as those used for your project. -
Page 71: Sewing Various Fabrics
USEFUL SEWING TIPS If the Fabric does not Feed Sewing Various Fabrics When sewing thick fabric such as denim or quilting layers, the fabric may not feed at the start of sewing if the presser foot is not level, as shown below. In this case, use the ... -
Page 72: Sewing Decorative Stitch Patterns
USEFUL SEWING TIPS Sewing Lightweight Fabrics Sewing Decorative Stitch Patterns Place thin paper or tear away embroidery stabilizer under thin fabrics to make sewing easier. Gently tear off the paper or the stabilizer after sewing. Fabric When sewing on stretch fabrics, lightweight 1 Thin paper fabrics, or fabrics with coarse weaves, attach stabilizer on the wrong side of the fabric. -
Page 73: Chapter 3 Various Stitches
UTILITY STITCHES VARIOUS STITCHES Chapter Example: Left/Middle needle position stitches UTILITY STITCHES CAUTION • Before replacing the presser foot, be sure to touch to lock all keys and buttons, otherwise injuries may occur if the “Start/ Stop” button or any other button is pressed and the machine starts. - Page 74 UTILITY STITCHES Aligning the Fabric with a Mark on the Needle Basting Plate or Bobbin Cover (with Mark) While sewing, align the edge of the fabric with the 5/8 Select and attach presser foot “J”. inch (approx. 1.6 cm) mark on the needle plate or bobbin cover (with mark) depending on the needle position (left or middle (center) needle position stitches only).
- Page 75 UTILITY STITCHES Dart Seam Gathering Use on waists of skirts, sleeves of shirts, etc. Select and attach presser foot “J”. Select a straight stitch and attach presser foot “J”. Sew a reverse stitch at the beginning of the dart and then sew from the wide end to the other end without stretching the fabric.
- Page 76 UTILITY STITCHES Smooth the gathers by ironing them. Lay both seam allowances on the side of the shorter seam (cut seam) and iron them. Sew on the seam line and remove the basting stitch. 1 Wrong side Flat Fell Seam Fold the longer seam allowance around the shorter Use for reinforcing seams and finishing edges neatly.
-
Page 77: Zigzag Stitches
UTILITY STITCHES Turn the fabric and iron the folded parts only. Zigzag Stitches Cord Guide Bobbin Cover (Using a Zigzag Stitch) Remove the bobbin cover from the machine (page 39). Thread the gimp thread through the hole in the cord guide bobbin cover from bottom to top. -
Page 78: Overcasting
UTILITY STITCHES Lower the presser foot and start sewing to make a Overcasting decorative finish. Sew overcasting stitches along the edges of cut fabric to prevent them from fraying. Memo • For details on stitch patterns, refer to “STITCH SETTING CHART” on page 199. ... -
Page 79: Quilting
UTILITY STITCHES Sew with the edge of the fabric against the presser foot Quilting guide. 1 Needle drop point You can make beautiful quilts quickly and easily with this machine. When making a quilt, you will find it convenient to use the knee lifter and foot controller to free your hands for other tasks (“Using Advanced Multi-Function Foot Controller”... - Page 80 UTILITY STITCHES Align the edge of the fabric with the edge of the presser Use the guide and marks on the presser foot to sew foot, and start sewing. accurate seam allowances. To sew a 6.5 mm (approx. 1/4 inch) seam Piecing a 1/4 inch seam allowance allowance along the right edge of the presser foot Sew keeping the edge of the fabrics against the guide.
- Page 81 UTILITY STITCHES Quilting with Satin Stitches Select a stitch. For better fabric control, use the foot controller to sew with satin stitches. Set the speed control slide to control the stitch width to make subtle changes in the stitch width during sewing.
- Page 82 UTILITY STITCHES Free Motion Quilting Attach the straight stitch needle plate (page 67). With free motion quilting, the feed dogs can be lowered 1 Round hole by touching , so that the fabric can be moved freely in any direction. For free motion quilting, use free motion quilting foot “C”...
- Page 83 UTILITY STITCHES Using free motion open toe quilting foot “O” Hold the free motion quilting foot “C” in place with your right hand, and tighten the presser foot holder The free motion open toe quilting foot “O” is used for free screw using the disc-shaped screwdriver with your left motion quilting with zigzag or decorative stitches or for hand.
- Page 84 UTILITY STITCHES Hold the free motion open toe quilting foot “O” in Free motion echo quilting foot “E” measurements place with your right hand, and tighten the presser foot 1 6.4 mm (approx. 1/4 holder screw using the disc-shaped screwdriver with inch) your left hand.
-
Page 85: Blind Hem Stitches
UTILITY STITCHES Using the measurement on the free motion echo Blind Hem Stitches quilting foot “E” as a guide, sew echo quilting around the motif. Secure the lower edge of skirts and pants with a blind hem. Memo • When the size of cylindrical pieces is too small to slide onto the arm or the length is too short, the fabric will not feed and desired results may not be achieved. - Page 86 UTILITY STITCHES Unfold the edge of fabric, and position the fabric with When you change the needle drop point, raise the the wrong side facing up. needle, and then use to decide the needle drop point. (The stitch width setting is in 1 Wrong side of fabric neither millimeters nor inches.) 2 Right side of fabric...
-
Page 87: Shell Tuck Stitches
UTILITY STITCHES Stitch along the edge of the fabric, making sure not to Shell Tuck Stitches sew directly on the edge of the fabric. The gathers that look like shells are called “shell tucks”. They are used to decorate trims, the front of blouses or cuffs made of thin fabrics. -
Page 88: Fagoting
UTILITY STITCHES Stitch between the straight stitches and pull out the Attaching Tape or Elastic threads for the straight stitches. Memo • For details on stitch patterns, refer to “STITCH SETTING CHART” on page 199. Select a straight stitch and attach presser foot “J”. Set the stitch length to 4.0 mm (approx. -
Page 89: Heirloom
UTILITY STITCHES Sew over the tape (or elastic). Select a stitch and attach advanced monogramming foot “N+”. CAUTION • Be sure the needle does not strike a basting pin, or any other objects, during sewing. The thread could tangle or the needle could break, causing injury. -
Page 90: One-Step Buttonholes
UTILITY STITCHES Mark the position and length of the buttonhole on the One-Step Buttonholes fabric. With one-step buttonholes, you can make buttonholes 1 Marks on fabric appropriate to the size of your button. 2 Buttonhole sewing One-step buttonholes are sewn from the front of the presser foot to the back, as shown below. - Page 91 UTILITY STITCHES Lower the buttonhole lever so that it is positioned Memo behind the metal bracket on the buttonhole foot. • For keyhole buttonholes, use the eyelet punch to make a hole in the rounded end of the buttonhole. Then insert a pin along the inside of one of the bar tacks, insert a seam ripper into the hole made with the eyelet punch, and cut towards the pin.
-
Page 92: Four-Step Buttonholes
UTILITY STITCHES Odd Shaped Buttons/Buttons that Do Not Fit Mark the position and length of the buttonhole on the fabric. into the Button Holder Plate Add together the diameter and thickness of the button, and then set the button holder plate to the calculated length. - Page 93 UTILITY STITCHES Darning Select stitch to sew the bar tack and then press the Use darning stitches for mending and other applications. Darning is performed by sewing from the front of the “Start/Stop” button. presser foot to the back as shown below. ...
-
Page 94: Bar Tacks
UTILITY STITCHES Check that the needle drops at the desired position and Bar Tacks lower the presser foot, making sure the upper thread passes underneath the buttonhole foot. Use bar tacks to reinforce areas that will be subject to strain, such as pocket corners. -
Page 95: Button Sewing
UTILITY STITCHES Lower the buttonhole lever so that it is positioned Button Sewing behind the metal bracket on the buttonhole foot. Buttons with 2 or 4 holes can be attached, using the machine. Memo • For details on stitch patterns, refer to “STITCH SETTING CHART”... -
Page 96: Eyelet
UTILITY STITCHES From the wrong side of the fabric, pull the end of the Eyelet bobbin thread to pull the upper thread through to the wrong side of the fabric. Tie the two thread ends together and cut the threads. Use this stitch for making belt holes and other similar applications. -
Page 97: Multi-Directional Sewing (Straight Stitch And Zigzag Stitch)
UTILITY STITCHES Multi-directional Sewing (Straight Stitch and Select and sew seam “3” as shown. Zigzag Stitch) Use these stitch patterns to attach patches or emblems to pant legs, shirt sleeves, etc. Memo • For details on stitch patterns, refer to “STITCH SETTING CHART”... - Page 98 UTILITY STITCHES Press the seam allowance open and attach the zipper Attach presser foot “J” and sew straight stitches up to with a basting stitch in the middle of each side of the the zipper opening. Change to a basting stitch and sew zipper tape.
-
Page 99: Changing The Start And End Angles Of The Stitch Pattern (Stitch Tapering Function)
UTILITY STITCHES Close the zipper, turn the fabric over, and sew a Changing the Start and End Angles of the basting stitch. Stitch Pattern (Stitch Tapering Function) 1 Front of the skirt (wrong side of The angles of the start and end of stitch patterns can be fabric) changed. - Page 100 UTILITY STITCHES If necessary, change the stitch width and stitch length. Select the method for finishing sewing. For this example, since the angle at the end of sewing will Touch begin changing when (Reverse stitch button) is pressed, select Touch , select the angle settings for the start and 1 Press end of sewing, and then touch...
- Page 101 UTILITY STITCHES Method 2: Sewing a Specified Number of Saving Settings Stitch Patterns Specified angles for start and end, finish tapering method, and stitch settings can be saved in machine’s memory. With this method, the number of stitch patterns (including those used to change the angle) are specified.
-
Page 102: Making Adjustments
MAKING ADJUSTMENTS If the stitch pattern is bunched: MAKING ADJUSTMENTS Touch in the [Fine Adjust Verti.] display. The displayed value increases each time the button is Your stitch pattern may sometimes turn out poorly, touched and the stitch pattern will lengthen. depending on the type or thickness of fabric, the stabilizer material used, sewing speed, etc. -
Page 103: Making Step Stitch Patterns (For 7Mm Satin Stitch Patterns Only)
MAKING STEP STITCH PATTERNS (FOR 7MM SATIN STITCH PATTERNS ONLY) Touch MAKING STEP STITCH PATTERNS (FOR 7MM SATIN STITCH PATTERNS ONLY) You can use keys to create a step effect, also called step stitch patterns. • Touch to move the stitch pattern a distance equal to half of the stitch pattern’s size to ... -
Page 104: Using The Memory Function
USING THE MEMORY FUNCTION Retrieving Stitch Patterns USING THE MEMORY FUNCTION Retrieve stitch patterns saved in the machine's memory or USB media. Memo • For more information about the memory function, When retrieving stitch patterns from a USB media, refer to “SPECIFICATIONS” on page 196. insert the USB media into the USB port on the machine. - Page 105 USING THE MEMORY FUNCTION Select the desired stitch pattern, and then touch Note • When you touch , the selected stitch pattern will be deleted permanently.
- Page 106 USING THE MEMORY FUNCTION...
-
Page 107: Chapter 4 Basic Embroidery
BEFORE EMBROIDERING BASIC EMBROIDERY Chapter Attaching Embroidery Foot “W+” with LED BEFORE EMBROIDERING Pointer Embroidery Step by Step CAUTION Follow the steps below to prepare the machine for embroidery. • When attaching an embroidery foot, always touch on the screen. You may Step 9 Step 6, 8 accidentally press the “Start/Stop”... -
Page 108: About The Embroidery Unit
BEFORE EMBROIDERING Plug the connector of the embroidery foot “W+” with Note LED pointer into the jack on the back left side of your machine. • To avoid distorting your embroidery design, do not touch the embroidery carriage and frame when the machine is embroidering. -
Page 109: Selecting Patterns
“Embroidery Design Guide” for a full summary of patterns away from the machine. in the machine’s memory or visit www.babylock.com). You can also use patterns sold separately. 1 Baby Lock “Exclusives” 2 Embroidery patterns 3 Character patterns 4 Decorative alphabet patterns... -
Page 110: Selecting Embroidery Patterns
SELECTING PATTERNS Touch to set the pattern. Selecting Embroidery Patterns Touch the category tab and then touch the pattern type selection key or pattern key you want to embroider. Touch to darken the background color for the pattern image with bright thread colors, to get a clearer image. -
Page 111: Selecting Character Patterns
SELECTING PATTERNS Touch to edit the pattern before Selecting Character Patterns embroidering. (page 126) To return to the edit screen, touch Touch Touch the key of the font you want to embroider. Start embroidering. (page 140) : View the next page. : View the previous page. - Page 112 SELECTING PATTERNS Character Pattern Input Keys Display Explanation Name Memo Switch alignment. This function is available • If a key display is grayed out, you cannot use that when multiple lines of characters are input. function with the selected pattern. Alignment key •...
-
Page 113: Selecting Frame Patterns
SELECTING PATTERNS Selecting Frame Patterns Combining Patterns Example: Touch Touch the key of the frame shape you want to embroider in the top part of the screen. Select a pattern and then touch Touch 1 Frame shapes 2 Frame patterns ... - Page 114 SELECTING PATTERNS Selecting Multiple Patterns at the Same Time Touch Multiple patterns can easily be edited, for example, when moving patterns, if they are all selected together. Touch to change the color of the characters. Touch (page 122) Touch each pattern to be selected. Touch When all editing is finished, touch Memo...
-
Page 115: Editing Patterns
EDITING PATTERNS Grouping Patterns EDITING PATTERNS If the multiple patterns are grouped, they can be edited as a single pattern. Using these keys, you can edit the pattern as you like. Select patterns you want to group. (page 112) Memo •... - Page 116 EDITING PATTERNS Display Display Explanation Page Explanation Page Name Name Display the pattern sizing window. Separate the continuous character — patterns to adjust the spacing or • : Decrease the pattern Size key edit separately afterwards. Separate key proportionately. • : Select where the •...
-
Page 117: Previewing The Pattern
EDITING PATTERNS Display Previewing the Pattern Explanation Page Name — Touch • : Magnify the image. Magnify keys scroll through the display in any direction. An image of the pattern as it will be embroidered • : Demagnify the image appears. -
Page 118: Changing The Size And The Density Of The Pattern
EDITING PATTERNS Select the direction in which to change the pattern Touch to return to the embroidery frame size. selection screen. Touch Changing the Size and the Density of the Pattern is selected, you can change the pattern size while maintaining the thread density. - Page 119 EDITING PATTERNS Repeating Patterns Using the Matrix Copy Vertical direction Place the pattern repeatedly throughout the embroidery area. Touch Touch 1 Repeating and deleting keys 2 Spacing keys 3 Key to cancel pattern repeating Horizontal direction The repeated pattern is displayed positioned throughout the area.
- Page 120 EDITING PATTERNS Repeating One Element of a Repeated Pattern Touch You can select one element of a repeated pattern and repeat only that single element. This function allows you to create complex repeated patterns. Touch Choose the direction in which the repeated pattern will be cut.
- Page 121 EDITING PATTERNS Color Sorting Repeated Patterns Assigning Thread Marks By sewing thread marks, you can easily align patterns Touch to automatically change the embroidering when rehooping the fabric to embroider a series. When order of colors in combined border embroidery patterns so embroidering is finished on a pattern, a thread mark in the that the same color can be continuously embroidered.
-
Page 122: Embroidering The Pattern Repeatedly
EDITING PATTERNS Note Embroidering the Pattern Repeatedly • Adjust the position of the fabric so that the After creating the repeated pattern, rehoop the embroidery embroidering area for the next pattern is within the frame and keep embroidering for the next pattern. embroidering area. -
Page 123: Deselect Region Setting (No Sew Setting)
EDITING PATTERNS From the thread color sequence display, select the thread color that will not be embroidered. Touch to move the embroidery frame until The selected thread color is highlighted in blue. the thread mark on the fabric is aligned with the light of the LED pointer. -
Page 124: Editing Colors
EDITING COLORS If necessary, repeat steps for all thread EDITING COLORS colors that will not be embroidered. After specifying the desired settings, touch Changing the Thread Color Touch and then touch to check an enlarged You can change the thread color by moving the color to be image of the finished embroidery. -
Page 125: Finding New Color Schemes With The Color Visualizer Function
EDITING COLORS Select a new color from the thread color palette, and Finding New Color Schemes with the Color then touch Visualizer Function To return to the original color, touch . If With the color visualizer function, the machine suggests new multiple colors have been changed, this command color schemes for the embroidery pattern that you have will return all colors to their original colors. - Page 126 EDITING COLORS [Manual] setting for [Gradient] Touch to set and specify the thread You can select one color to be used in the [Gradient] effect. color to use in the effect. The effect will be created with a color you select. If you don’t need to specify the thread color, just set 1 Select a color from the palette.
-
Page 127: Thread Color Sorting
EDITING COLORS Touch in the embroidery screen. Memo • To temporarily register your favorite schemes, touch (to release your favorite schemes, touch again). 9 color schemes can be added. Touch to check the registered favorite schemes. To cancel the registration, touch Touch •... -
Page 128: Viewing The Embroidery Screen
VIEWING THE EMBROIDERY SCREEN Key Functions VIEWING THE EMBROIDERY Using these keys, you can move or rotate pattern, etc. SCREEN Touch to display the editing window. Note This screen appears when embroidery starts. • Some operations or functions are not available for 1 The presser foot symbol certain patterns. - Page 129 VIEWING THE EMBROIDERY SCREEN Display Display Explanation Page Explanation Page Name Name Change the setting to embroider — Return to the edit screen. — the pattern with a single color. Uninterrupted Touch the key again to return to Return key embroidery the original setting.
-
Page 130: Preparing The Fabric
PREPARING THE FABRIC Memo PREPARING THE FABRIC • When embroidering small pieces of fabric that cannot be hooped in an embroidery frame, use stabilizer material as a base. After lightly ironing the CAUTION fabric to the stabilizer material, hoop it in the embroidery frame. -
Page 131: Hooping The Fabric In The Embroidery Frame
Check with your authorized Baby Lock retailer for frame compatibility. Select a frame that matches the pattern size. Available frame options are displayed on the LCD. - Page 132 PREPARING THE FABRIC Tighten the frame adjustment screw to keep the fabric Place the embroidery sheet on the inner frame. Align from loosening while stitching. the guide lines on the embroidery sheet with the mark you made on the fabric. Return the frame adjustment screw to its initial position.
-
Page 133: Attaching The Embroidery Frame
ATTACHING THE EMBROIDERY FRAME Removing the Embroidery Frame ATTACHING THE EMBROIDERY Press (Presser foot lifter button) to raise the FRAME presser foot. Raise the frame-securing lever. Note • Wind embroidery bobbin thread and insert the bobbin before attaching the embroidery frame. Check that there is enough thread in the bobbin. -
Page 134: Confirming The Pattern Position
CONFIRMING THE PATTERN POSITION Display [Embroidery Foot with LED Pointer CONFIRMING THE PATTERN Adjustment] in the embroidery setting screen. POSITION The pattern is normally positioned in the center of the Note embroidery frame. If the pattern needs to be repositioned for better placement on the garment, you can check the •... -
Page 135: Displaying A Background Image
CONFIRMING THE PATTERN POSITION Calibrating the Position of the Background Displaying a Background Image Image By calibrating the position of the background image Using a special application downloaded to a smartphone or transferred to the machine, the pattern can be positioned tablet, you can transfer a photo of the hooped fabric to be more accurately. -
Page 136: Checking The Pattern Position
CONFIRMING THE PATTERN POSITION Aligning the Embroidering Position Touch Calibrate the position of the background image. (page 133) Touch When the following message appears, touch Memo • The orientation of the pattern will change depending on the orientation of the embroidery positioning sticker. -
Page 137: The 2-Point Embroidery Positioning Function
THE 2-POINT EMBROIDERY POSITIONING FUNCTION THE 2-POINT EMBROIDERY From , touch the key for the position that you POSITIONING FUNCTION want to check. By using the 2-point embroidery positioning function with a LED pointer, the embroidering position can easily be aligned. This is useful when embroidering in an area where it is necessary to align the pattern, as shown below. - Page 138 THE 2-POINT EMBROIDERY POSITIONING FUNCTION Select the pattern. Touch Touch to display the embroidery screen. Select the direction (from the reference point) to be used as a reference for aligning the pattern. For this example, select the arrow pointing to the right Touch and then touch as the reference direction.
- Page 139 THE 2-POINT EMBROIDERY POSITIONING FUNCTION Note Note • Set the position of the LED pointer to a position • If is displayed to the left of the positioning keys, that is not too close to the first reference point. If it the LED pointer has shifted from its initial position.
- Page 140 THE 2-POINT EMBROIDERY POSITIONING FUNCTION Hoop the fabric in the embroidery frame. Touch Select the direction (from the reference point) to be used as a reference for aligning the pattern. For this example, select the arrow pointing upward as the reference direction. Select the pattern.
-
Page 141: Embroidering A Pattern
EMBROIDERING A PATTERN Touch EMBROIDERING A PATTERN Touch the positioning keys to move the embroidery frame until the position of the LED pointer and the Embroidering Attractive Finishes center of the second mark are aligned. Many factors are involved in achieving a beautiful embroidery result. -
Page 142: Embroidering Patterns
EMBROIDERING A PATTERN Embroidering Patterns CAUTION Prepare embroidery threads of the colors shown on the • When embroidering on large items (especially screen. jackets or quilts), do not let the fabric hang off of the table. Otherwise, the embroidery unit cannot move freely and the embroidery frame may strike the needle, causing the needle to break and possibly causing injury. -
Page 143: Using Appliqués
EMBROIDERING A PATTERN Memo Memo • If you want to get more attractive finishes, try the • The thread trimming function is originally set to trim procedures below; excess thread jumps (threads linking parts of the - After 5-6 stitches, press the “Start/Stop” button pattern, etc.). - Page 144 EMBROIDERING A PATTERN 1. Creating an Appliqué Piece 3. Affixing the Appliqué Piece to the Base Fabric Attach stabilizer material to the wrong side of the fabric for the appliqué piece. Lightly apply fabric glue or temporary spray adhesive to the back of the appliqué...
-
Page 145: Adjustments During The Embroidery Process
ADJUSTMENTS DURING THE EMBROIDERY PROCESS 4. Embroidering the Remainder of the Pattern ADJUSTMENTS DURING THE Change the embroidery thread according to the EMBROIDERY PROCESS embroidery color order display, and then finish embroidering the remainder of the pattern. If the Thread Breaks or the Bobbin Runs out of Thread During Embroidering Redo the upper threading or replace the bobbin. -
Page 146: Resuming Embroidery After Turning Off The Power
ADJUSTMENTS DURING THE EMBROIDERY PROCESS Lower the presser foot and press the “Start/Stop” button to continue embroidering. Resuming Embroidery after Turning off the Power The current color and stitch number are saved when embroidery is stopped. The next time the machine is turned on, you have the option to continue or delete the pattern. -
Page 147: Chapter 5 Advanced Embroidery
VARIOUS EMBROIDERING FUNCTIONS ADVANCED Chapter EMBROIDERY Touch , and then touch to select the VARIOUS EMBROIDERING basting setting. FUNCTIONS Basting Embroidery Before embroidering, basting stitches can be sewn along the outline of the pattern. This is useful for embroidering fabric that cannot have stabilizer material affixed with an iron or adhesive. -
Page 148: Creating An Appliqué Piece
VARIOUS EMBROIDERING FUNCTIONS Note Creating an Appliqué Piece • Finish combining and editing the pattern before Creating an appliqué piece is convenient for fabrics that selecting the appliqué setting. If the pattern is cannot be embroidered or when you wish to attach an edited after selecting the appliqué... - Page 149 VARIOUS EMBROIDERING FUNCTIONS Touch Fuse or stick a piece of stabilizer to the back of the felt or denim fabric to be used as the appliqué piece. The steps for creating the appliqué piece are added to the embroidering order. Hoop the fabric for the appliqué...
- Page 150 VARIOUS EMBROIDERING FUNCTIONS Use two layers of adhesive water soluble stabilizer With the machine threaded using the thread for the material with their sticky sides together, and then hoop outline from step , embroider the outline them in the embroidery frame. (APPLIQUE).
-
Page 151: Making Embroidery Adjustments
MAKING EMBROIDERY ADJUSTMENTS Correct Thread Tension MAKING EMBROIDERY The pattern can be seen from the wrong side of the fabric. If the thread tension is not set correctly, the pattern will ADJUSTMENTS not finish well. The fabric may pucker or the thread may break. -
Page 152: Adjusting The Alternate Bobbin Case
MAKING EMBROIDERY ADJUSTMENTS Upper Thread Is Too Loose Adjusting the Alternate Bobbin Case (with The tension of the upper thread is too loose, resulting in a No Color on the Screw) loose upper thread, loose thread locks, or loops appearing on the right side of the fabric. -
Page 153: Using The Automatic Thread Cutting Function
MAKING EMBROIDERY ADJUSTMENTS Bobbin Thread Is Too Tight Using the Automatic Thread Cutting Upper thread on the right side of fabric seems to be lifting/ Function (End Color Trim) looping and bobbin thread is not seen on the wrong side of fabric. -
Page 154: Using The Thread Trimming Function (Jump Stitch Trim)
MAKING EMBROIDERY ADJUSTMENTS For example: Touch to select 25 mm (approx. 1 Using the Thread Trimming Function inch) and the machine will not trim a jump stitch of 25 mm or less before moving to the next stitching. (Jump Stitch Trim) The thread trimming function will automatically trim any excess thread jumps within the color. -
Page 155: Changing The Thread Color Display
MAKING EMBROIDERY ADJUSTMENTS Mark the embroidery start position on the fabric, as Changing the Thread Color Display shown. You can display the name of the thread colors or embroidery thread number. Memo • Colors on the screen may vary slightly from actual spool colors. -
Page 156: Embroidering Linked Characters
MAKING EMBROIDERY ADJUSTMENTS Touch Embroidering Linked Characters Follow the procedure described below to embroider linked characters in a single row when the entire pattern extends beyond the embroidery frame. Example: Linking “FG” to the characters “ABCDE” Select the character patterns for “ABCDE”. Touch Touch to turn off the thread cutting function... -
Page 157: Using The Memory Function
USING THE MEMORY FUNCTION Touch USING THE MEMORY FUNCTION The needle is positioned in the lower-left corner of the pattern. The carriage moves so that the needle is Saving Embroidery Patterns positioned correctly. Note Touch , then and use to align •... -
Page 158: Retrieving Embroidery Patterns
USING THE MEMORY FUNCTION Memo Retrieving Embroidery Patterns • If the embroidery pattern to be retrieved is in a folder of the USB media, touch the key for that When retrieving the embroidery patterns from a USB flash drive, insert the USB flash drive into the USB port folder. -
Page 159: Embroidery Applications
EMBROIDERY APPLICATIONS Select the satin stitch frame pattern of the same shape EMBROIDERY APPLICATIONS as the appliqué. Embroider over the fabric for the appliqué piece and base fabric from step to create the appliqué. Using a Frame Pattern To Make an Appliqué Note •... -
Page 160: Embroidering Couching Patterns
EMBROIDERY APPLICATIONS Remove the embroidery frame from the embroidery Embroidering Couching Patterns unit, and cut around the outside of the stitches of the fabric for the appliqué piece. And then, reattach the embroidery frame to the embroidery unit. Couching patterns can be embroidered using yarn. CAUTION •... - Page 161 EMBROIDERY APPLICATIONS Select the desired pattern from the desired category. Attach the spool stand to the machine. At this time, do not raise the telescopic thread guide And then touch shaft. 1 Couching patterns 2 Fill couching embroidery font Touch to lock all keys and buttons, and then raise the presser foot lever.
- Page 162 EMBROIDERY APPLICATIONS Pass the yarn through the guide on embroidery While holding the yarn in your hand in front of you, couching foot “Y”. press the “Start/Stop” button. CAUTION Thread the yarn through embroidery couching foot • Pulling the yarn upwards may cause it to catch “Y”.
-
Page 163: Creating Stippling, Echo Quilting, Or Decorative Fill Patterns Around A Design
EMBROIDERY APPLICATIONS After specifying the stitch settings for the stippling, Creating Stippling, Echo Quilting, or touch , and then touch Decorative Fill Patterns around a Design Stippling, echo quilting, and decorative fill patterns can be created around the machine’s built-in patterns or original embroidery data without using IQ Designer. -
Page 164: Embroidering Split Embroidery Patterns
EMBROIDERY APPLICATIONS Touch Embroidering Split Embroidery Patterns Split embroidery patterns created with Palette Ver. 7 or later can be embroidered. With split embroidery patterns, embroidery patterns larger than the embroidery frame are divided into multiple sections, which combine to create a single pattern after each section is embroidered. -
Page 165: Chapter 6 Iq Designer
ABOUT IQ DESIGNER IQ DESIGNER Chapter ABOUT IQ DESIGNER PATTERN DRAWING SCREEN With IQ Designer, you can use the functions listed below: • Hand-drawn functions - creating embroidery patterns by drawing on the LCD screen • Loading functions - creating embroidery patterns by transferring data from the application or USB media. - Page 166 PATTERN DRAWING SCREEN Key Functions Display Explanation Page Name Erase lines and shapes that have been drawn. You can select the Erase key size/shape of the eraser. Select the stamp shape for pattern drawing. Stamp key Select a section for moving, copying, deleting, changing size Select key and rotating lines and shapes that...
-
Page 167: Before Creating Designs
PATTERN DRAWING SCREEN Setting the Line Types, Stitch Types and Colors Before Creating Designs You can set or change the line types, stitch types and colors anytime. You can also specify the line types, stitch The pattern preview displays the design smaller than the types and colors before drawing lines. -
Page 168: Drawing Regions
PATTERN DRAWING SCREEN Stitch types Drawing Regions Zigzag stitch Touch and draw with brush. Running stitch Triple stitch Candlewicking stitch Chain stitch E stitch Setting the Brush Types, Fill Patterns and Fill Colors V stitch Select motif stitches Touch to set the brush types, fill patterns and fill Displays motif stitch selection screen, where colors. -
Page 169: Using The Stamp Key
PATTERN DRAWING SCREEN Select decorative fill patterns Using the Stamp Key Displays a fill pattern selection screen, where can be touched to select a pattern. Touch Select when you don’t want fill stitch. Touch to return to the pattern drawing screen. ... -
Page 170: Using The Erase Key
PATTERN DRAWING SCREEN Saved outlines Using the Select Key Embroidery pattern outlines can be registered as stamp shapes. When registering stamp You can select the part of the design to move and/or edit. shapes, select from the last 20 embroidery Some keys are available only after you select the part. -
Page 171: Stitch Settings Screen
STITCH SETTINGS SCREEN Candlewicking Stitch STITCH SETTINGS SCREEN [Size] Increases/reduces the size of the stitch. Specifies the spacing of the stitch. After creating the pattern drawing data (.pm9) in the [Spacing] drawing screen (page 163), you will have an opportunity Chain stitch •... -
Page 172: Specifying Global Stitch Settings
STITCH SETTINGS SCREEN Specifying Global Stitch Settings Fill stitch settings Specifies the embroidering direction. Select The same stitch settings can be changed at the same time for [Direction] multiple patterns of the same type. to change to the desired direction of fill stitch. -
Page 173: Loading The Background Image
STITCH SETTINGS SCREEN When the following message appears, touch Loading the Background Image Prepare the data file of your favorite picture so that you can create an embroidery pattern. Load the image file from the application “IQ INTUITION- POSITIONING APP” on page 181 or a USB media. -
Page 174: Line Conversion
LINE CONVERSION The selected image is displayed transparently in the LINE CONVERSION pattern drawing area. Custom patterns can be created from drawings. You can create patterns by loading an image on the application “IQ INTUITION- POSITIONING APP” on page 181 or a USB media. - Page 175 LINE CONVERSION Select the device you saved the data to. In the screen for confirming the converted image, you can adjust the [Gray-Scale Detection level] again, if necessary. Select the data, and then touch 1 The settings for the lines to be embroidered appear. If you do not know how the settings should be changed, first continue the operation without specifying settings and check the results.
-
Page 176: Illustration Conversion
ILLUSTRATION CONVERSION Select the data, and then touch ILLUSTRATION CONVERSION Custom patterns can be created from color illustrations. You can create patterns by loading an image on the application “IQ INTUITION- POSITIONING APP” on page 181 or a USB media. Recommended illustrations for Illustration Conversion •... - Page 177 ILLUSTRATION CONVERSION If necessary, edit the loaded image. Memo • Touch to detect the outline. Line thickness can be specified from 1.0 mm (approx. 1/16 inch) to 5.0 mm (approx. 3/16 inch). • Touch to select the outline color. Select by touching the color, or moving icon using in the color selection screen.
-
Page 178: Stippling
STIPPLING Touch STIPPLING Basic Stippling with IQ Designer Create a stippling design with the basic procedure. Example: Touch Select the heart shape, and then touch Select the square shape, and then touch Touch... - Page 179 STIPPLING Touch until the heart shape fits in the square Touch shape, and then touch Touch , and then touch Adjust the stippling stitch settings to create the desired effect, and then touch Touch , and then select the stitch color. Touch For details, refer to “Specifying Individual Stitch after setting the color.
-
Page 180: Decorative Stitching Around A Pattern In Embroidery (A Quilting Function)
STIPPLING Touch to convert into embroidery. Decorative Stitching around a Pattern in Embroidery (a Quilting Function) Memo • For best results, reduce the embroidery speed. (page 27) • For best results, hoop the stabilizer and fabric and embroider the design prior to adding the batting and backing under the hoop for quilting. - Page 181 STIPPLING Use a stamp or rectangular frame to determine the Touch to continue to the embroidery screen, region to be stitched. and then embroider the pattern at the center. Note Remove the embroidery frame from the carriage. • If the region is to be drawn by hand, be sure to draw a completely closed shape.
-
Page 182: Iq Intuition- Monitoring App
IQ INTUITION- MONITORING APP If you select the stamp shapes to determine the region IQ INTUITION- MONITORING APP on step , touch for the line tool keys to select . Touch , then select the frame outline, and With the IQ Intuition- Monitoring App installed on your smart then touch device and the machine and smart device connected to the same wireless network, you can check the operating status of... -
Page 183: Iq Intuition- Positioning App
IQ INTUITION- POSITIONING APP Monitoring IQ INTUITION- POSITIONING APP Memo • The app will be updated from time to time. The With IQ Intuition-Positioning app, you can position your following descriptions may differ from the actual embroidery designs on the fabric, by capturing image of the screens and operations. - Page 184 IQ INTUITION- POSITIONING APP...
-
Page 185: Chapter 7 Appendix
Slide out the needle plate with your right hand to an unusual noise, immediately stop using the machine, and remove it. contact your authorized Baby Lock retailer. Precautions on Storing the Machine Do not store the machine in any of the locations described below, otherwise damage to the machine may result, for example, rust caused by condensation. -
Page 186: Cleaning The Bobbin Case
Otherwise the upper thread may become tangled, and the needle may break and cause injury. For a new bobbin case, contact your nearest authorized Baby Lock retailer. 1 Tension plate base • Be sure that the bobbin case is correctly... -
Page 187: Cleaning The Cutter In The Bobbin Case Area
BEFORE LENDING OR DISPOSING OF THE PRODUCT Use the cleaning brush to remove any lint and dust BEFORE LENDING OR DISPOSING from inside the bobbin case. OF THE PRODUCT Replace the bobbin case and needle plate. Please be sure to reset the settings of your machine to Cleaning the Cutter in the Bobbin Case Area delete the following data. -
Page 188: Adjusting The Screen
If the screen does not respond correctly when you touch a key Visit us at www.babylock.com. (the machine does not perform the operation or performs a If the problem persists, contact your authorized Baby Lock different operation), follow the steps below to make the retailer. -
Page 189: Tangled Thread On Wrong Side Of Fabric
TROUBLESHOOTING Cause Incorrect Thread Tension Incorrect bobbin threading If the bobbin thread is incorrectly threaded, instead of the appropriate tension being applied to the bobbin thread, it Symptoms is pulled through the fabric when the upper thread is pulled up. -
Page 190: Fabric Is Caught In The Machine And Cannot Be Removed
Baby Lock retailer. Turn on the machine. Removing the Fabric From the Machine Select Straight stitch (Middle). -
Page 191: If The Thread Becomes Tangled Under The Bobbin Winder Seat
TROUBLESHOOTING Correctly thread the machine. Push the bobbin winder switch to the right, and then remove the bobbin from the shaft and cut the thread For details on the machine, refer to “UPPER leading to the bobbin in order to be able to completely THREADING”... -
Page 192: List Of Symptoms
Check the following possible problems before requesting service. If the reference page is “*”, contact your Needle is turned, bent or the point is dull. authorized Baby Lock retailer. Bobbin is set incorrectly. Getting Ready Machine does not operate... - Page 193 TROUBLESHOOTING While Operating Symptom, Cause/solution Reference Symptom, Cause/solution Reference Stabilizer is not attached to fabric being embroidered. Machine does not operate. Bobbin thread is incorrectly wound. “Start/Stop” button was not pressed. Upper thread breaks. There is no stitch pattern selected. Presser foot is not lowered.
- Page 194 Thin or stretch fabrics are being sewn. smoothly or the needle that fell into the machine cannot be removed, consult your authorized Baby Lock retailer. No stitching The handwheel feels sluggish when it is turned. Needle is turned, bent or the point is dull.
- Page 195 TROUBLESHOOTING After Sewing Symptom, Cause/solution Reference The pattern is not embroidered correctly. Symptom, Cause/solution Reference Thread is twisted. — Thread tension is incorrect. Thread tension is set incorrectly. 62, 149 Upper threading is incorrect. Fabric was not inserted into the frame correctly Bobbin is set incorrectly.
-
Page 196: Error Messages
This message is displayed when the machine needs to be maintained. Once this message appears, it is recommended to take your machine to an authorized Baby Lock retailer for a regular maintenance check. Although this message will disappear and the machine will continue to function once you... - Page 197 Is the thread tangled? activating the safety device. Wait until the temperature decreases. If the error persists, contact your nearest authorized Baby Lock retailer. The safety device was activated since the main This message is displayed when the motor locks due to tangled thread or for shaft motor seized.
-
Page 198: Specifications
SPECIFICATIONS SPECIFICATIONS Item Specification Dimensions of machine Approx. 662 mm (W) × 348 mm (H) × 321 mm (D) (approx. 26-1/16 inches (W) × 13-11/16 inches (H) × 12-5/8 inches (D)) Weight of machine Approx. 17 kg (approx. 37.5 lb) Dimensions of machine with Approx. - Page 199 SPECIFICATIONS Some USB media may not be usable with this machine. Please visit our website www.babylock.com for more details. Please be aware that some specifications may change without notice. Note • We recommend using the 26 letters of the alphabet (uppercase and lowercase), the numbers 0 through 9, “-”, and “_” for the name of the file/folder.
-
Page 200: Updating Your Machine's Software
UPDATING YOUR MACHINE’S SOFTWARE Update Procedure Using Wireless LAN UPDATING YOUR MACHINE’S Connection SOFTWARE If the machine is connected to a wireless network with a You can update your machine’s software using the strong, reliable connection, update files can be downloaded following two procedures. -
Page 201: Stitch Setting Chart
STITCH SETTING CHART Touch STITCH SETTING CHART Memo • When any of the following stitches (reverse stitch patterns and reinforcement stitch patterns) are selected, pressing (Reverse stitch button) will sew reverse stitches. Touch to update the machine. Do not turn off the machine during the update. Memo •... - Page 202 STITCH SETTING CHART Stitch Stitch Stitch Stitch width length width length Presser Stitch name/ Presser Stitch name/ Stitch Stitch (inch)) (inch)) (inch)) (inch)) foot Applications foot Applications Auto. Auto. Auto. Auto. Manual Manual Manual Manual Triple stretch stitch Overcasting stitch 0.0 (0) 2.5 (3/32) 4.0 (3/16)
- Page 203 STITCH SETTING CHART Stitch Stitch Stitch Stitch width length width length Presser Stitch name/ Presser Stitch name/ Stitch Stitch (inch)) (inch)) (inch)) (inch)) foot Applications foot Applications Auto. Auto. Auto. Auto. Manual Manual Manual Manual Quilting appliqué stitch Ladder stitch 4.0 (3/16) 3.0 (1/8) 1.5 (1/16)
- Page 204 STITCH SETTING CHART Stitch Stitch Stitch Stitch width length width length Presser Stitch name/ Presser Stitch name/ Stitch Stitch (inch)) (inch)) (inch)) (inch)) foot Applications foot Applications Auto. Auto. Auto. Auto. Manual Manual Manual Manual Honeycomb stitch Round ended 5.0 (3/16) 2.5 (3/32) Heirloom, decorative buttonhole...
- Page 205 STITCH SETTING CHART Stitch Stitch Stitch Stitch width length width length Presser Stitch name/ Presser Stitch name/ Stitch Stitch (inch)) (inch)) (inch)) (inch)) foot Applications foot Applications Auto. Auto. Auto. Auto. Manual Manual Manual Manual 4 steps buttonhole 4 Sideways to left (Zigzag) 5.0 (3/16) 0.4 (1/64) Bar tack of 4 step...
- Page 206 STITCH SETTING CHART Stitch Stitch Stitch Stitch width length width length Presser Stitch name/ Presser Stitch name/ Stitch Stitch (inch)) (inch)) (inch)) (inch)) foot Applications foot Applications Auto. Auto. Auto. Auto. Manual Manual Manual Manual Shell tuck edge Appliqué stitch 4.00 (3/16) 2.5 (3/32) 3.00 (1/8)
- Page 207 STITCH SETTING CHART Stitch Stitch Stitch Stitch width length width length Presser Stitch name/ Presser Stitch name/ Stitch Stitch (inch)) (inch)) (inch)) (inch)) foot Applications foot Applications Auto. Auto. Auto. Auto. Manual Manual Manual Manual Tapering stitch Tapering stitch 7.0 (1/4) 2.0 (1/16) 7.0 (1/4) 2.5 (3/32)
-
Page 208: Index
INDEX INDEX Accessories Echo quilting ..............82 included accessories ..............11 Eco mode ..................28 options ..................15 Editing Accessory compartment ............... 11 embroidery edit ..............113 Adjustments Embroidery screen ..................186 2-point embroidery positioning function ........ 135 Advanced multi-function foot controller ........55 adjusting the speed .............. - Page 209 INDEX daisy stitch ................87 with satin stitches ..............79 Home page screen ............... 21 Race ..................183 Image key .................. 115 Reinforcement stitch ..............59 IQ Designer ................163 Reinforcement stitch button ............10 IQ Intuition- Monitoring App ............. 180 Repeated patterns ..............
- Page 210 INDEX Trial key ..................134 Troubleshooting ................. 186 Tutorial video ................29 Twin needle ................. 43 Updating ..................198 Upper thread ................48 Upper threading twin needle mode ..............43 using the Automatic threading button ........41 USB mouse .................. 34 USB port ..................
- Page 212 English 882-W74 D02M47-001...
Need help?
Do you have a question about the Altair 2 and is the answer not in the manual?
Questions and answers