dbx DriveRack 480 User Manual
Complete equalization & loudspeaker management system
Hide thumbs
Also See for DriveRack 480:
- User manual (141 pages) ,
- Specifications (2 pages) ,
- Monitor application manual (32 pages)

Related Manuals for dbx DriveRack 480


Summary of Contents for dbx DriveRack 480
- Page 1 ® Complete Equalization & Loudspeaker Management System Completo sistema de ecualización y gestión de altavoces 480R ® User manual/Manual de Instrucciones...
-
Page 2: Important Safety Instructions
IMPORTANT SAFETY INSTRUCTIONS INSTRUCCIONES IMPORT ANTES DE SEGURIDAD WARNING FOR YOUR PROTECTION C A U T I O N PLEASE READ THE FOLLOWING: R I S K O F E L E C T R I C S H O C K D O N O T O P E N KEEP THESE INSTRUCTIONS. - Page 3 Sandy, Utah 84070, USA 15 de marzo de 2000 March 15, 2000 Contacto en Europa: Su vendedor local dbx y servicio técnico oficial o European Contact: Your Local dbx Sales and Service Office or Harman Music Group Harman Music Group...
-
Page 4: Table Of Contents
™ DriveRack Table of Contents/Indice Introduction/Introducción 3.7 Selecting and Moving Crossovers/Selección y desplazamiento de crossovers ....................29 1.1 Defining the DriveRack™ System/Definición del Sistema 3.8 Saving Configuration Changes/Almacenamiento de cambios de DriveRack™ ....................ii configuración....................30 1.2 Service Contact Info/Información de contacto para reparaciones ..iv 1.3 Warranty/Garantía ................iv Section 4 - Detailed Parameters/Sección 4 - Parámetros detallados... -
Page 5: Driverack
™ DriveRack Table of Contents/Indice 6.14 Mic Pre Set up/Ajuste del previo de micrófono ......55 A.9 Input and Output Section Diagrams/Diagramas de sección de 6.15 Redundancy Enable/Activación de redundancia ......56 entrada y salida ..................106 6.16 CUE AFL/CUE AFL ................56 A.10 “Pinking” a Room/Añadir ruido rosa a una sala ......107 A.11 Wire Diagrams/Diagramas de cableado........108 Section 7 - Network Functions/Sección 7 - Funciones de red 7.1 Network Connections (Specs)/Conexiones de red... - Page 7 Sect/Secc i ™ DriveRack INTRODUCTION/INTRODUCCION INTRO CUSTOMER SERVICE INFO Defining the DriveRack WARRANTY INFO INTRO INFORMACION DE CONTACTO PARA REPARACIONES Definición del DriveRack GARANTIA ®...
- Page 8 1.1 Defining the DriveRack™ System 1.1 Definición del Sistema DriveRack™ The dbx DriveRack™ is the most effective way to manage all aspects of El dbx DriveRack™ es la forma más eficaz de gestionar todos los aspectos post mix processing and signal routing. The following are just some of the del procesado post-mezcla y del direccionamiento de señal.
- Page 9 ™ DriveRack Sect/Secc i Introduction/Introducción • Time Alignment and Transducer Alignment Delays • Retardos de alineación de tiempo y de alineación de transductor • Compressor/Limiter on every output • Compresor/limitador en cada salida • Speaker Compensation EQ (post crossover) • Ecualizador de compensación de altavoz (post-crossover) •...
-
Page 10: Service Contact Info/Información De Contacto Para Reparaciones
Sea cual sea el caso, deberá enviar el aparato a fábrica a portes pagados. dbx se lo devolverá también a portes pagados si la unidad está todavía en Use the original packing material if it is available. Mark the package with garantía. - Page 11 4. dbx reserves the right to make changes in design or make additions to or improvements upon this product without incurring any obligation to 4. dbx se reserva el derecho de realizar cambios en el diseño o mejoras en install the same additions or improvements on products previously el producto sin por ello incurrir en ninguna obligación de instalar las...
- Page 12 ™ DriveRack Sect/Secc Introduction/Introducción ® DriveRack™ User Manual/Manual de instrucciones...
- Page 13 Sect/Secc 1 ™ DriveRack Getting Started/Inicio ®...
-
Page 14: Rear Panel Connections (480)/Conexiones Del Panel Trasero
™ DriveRack Sect/Secc 1 Getting Started/Inicio 1.1 Rear Panel Connections (480) 1.1 Conexiones del panel trasero (480) 35 WATTS EC Power Cord Receptacle Conector de cable de alimentación IEC The 480 comes with an International power supply that will accept El 480 viene con una fuente de alimentación Internacional que admite un voltages ranging from 100V-240V at frequencies from 50Hz-60Hz. -
Page 15: Front Panel (480)/Panel Frontal (480)
™ DriveRack Sect/Secc 1 Getting Started/Inicio Inputs 1-4 Entradas 1-4 The input section of the 480 DriveRack™ offers four electronically La sección de entrada del DriveRack™ 480 consta de cuatro conectores balanced XLR connectors. Inputs 3 and 4 offer Line/RTA switches that XLR balanceados electrónicamente. -
Page 16: Rear Panel Connections (481)/Conexiones Del Panel Trasero
Power Switch Anulaciones de salida Turns the 480 DriveRack™ on and off. Note: dbx Professional Products Los ocho botones de anulación de salida sirven para anular de forma recommends that power amps connected to the DriveRack™, should be independiente cada una de las ocho salidas del DriveRack™... -
Page 17: Front Panel (481)/Panel Frontal (481)
™ DriveRack Sect/Secc 1 Getting Started/Inicio RS485 Control Bus Input (RJ-45 connector type) Entrada de bus de control RS485 (conector tipo RJ-45) This input network connection is used to receive information being sent Esta conexión de entrada de red sirve para recibir la información enviada from other units in the DriveRack™... -
Page 18: Rear Panel Connections (482)/Conexiones Del Panel Trasero
+22dBu de los puentes de Power Switch ganancia. Turns the 481 DriveRack™ on and off. Note: dbx Professional Products recommends that power amps connected to the DriveRack™ should be Interruptor de encendido powered down prior to cycling the DriveRack™... -
Page 19: Front Panel (482)/Panel Frontal (482)
™ DriveRack Sect/Secc 1 Getting Started/Inicio RS485 Control Thru Bus (DB-9 connector type) Control de bus thru RS485 (conector tipo DB-9) This Thru network connection is used to pass information to other units in Esta conexión de red Thru se usa para enviar información a otras unidades the DriveRack™... - Page 20 Los ocho botones de anulación de salida se utilizan para anular de forma independiente cada una de las salidas del DriveRack 482. Power Switch Turns the 482 DriveRack™ on and off. Note: dbx Professional Products Interruptor de encendido recommends that power amps connected to the DriveRack™ should be Enciende y apaga el DriveRack 482.
- Page 21 Sect/Secc 2 ™ DriveRack Editing Functions Funciones de edición EDITING FUNCTIONS FUNCIONES EDICIÓN ®...
-
Page 22: Basic Navigation Modes/Modos Básicos De Navegación
™ DriveRack Sect/Secc 2 Editing Functions/Funciones de edición EDITING FUNCTIONS FUNCIONES DE EDICION The 480 DriveRack™ has been carefully designed and engineered to El DriveRack™ 480 ha sido cuidadosamente diseñado y fabricado para ensure that all aspects of operation are intuitive and logical. Simply stated, garantizar que todos los aspectos de funcionamiento sean intuitivos y the 480 DriveRack™... - Page 23 ™ DriveRack Sect/Secc 2 Editing Functions/Funciones de edición 2.2 FX Button Array Overview (cont.) 2.2 Botones de efectos (continuación) PREVIOUS PAGE - Moves to the previous page in the PREVIOUS PAGE - Le traslada a la página anterior del currently selected effect menu. menú...
-
Page 24: Preciso De Los Mandos Giratorios De Parámetros
™ DriveRack Sect/Secc 2 Editing Functions/Funciones de edición 2.3 Parameter Knob Encoders Coarse/Fine 2.3 Funcionamiento amplio/preciso de los mandos Operation giratorios de parámetros The parameter knob encoders of the 480 and 480R DriveRack™ Remote Los mandos giratorios de parámetros del DriveRack™ 480 y del Control provide the user with the option of coarse or fine performance modes. -
Page 25: Navigating The Eq Sections/Navegación Por Las Secciones Del
™ DriveRack Sect/Secc 2 Editing Functions/Funciones de edición 2.5 Navigating the EQ Sections 2.5 Navegación por las secciones del ecualizador Navigating the "EQ and Notch Filter Sections" Navegación por las "Secciones de ecualización y de filtro de muesca" To edit the parameters of the EQs and Notch Filters used in a selected program, simply use the following procedure. From program mode, either press the EQ button or use the Parameter 2 or 3 knobs to move to EQ module to be edited. -
Page 26: Crossover
™ DriveRack Sect/Secc 2 Editing Functions/Funciones de edición 2.6 Navigating the XOVER 2.6 Navegación por la sección de crossover Navigating the "X-OVER Section" Navegación por la "Sección de X-OVER" To edit the parameters of the Crossover used in a selected program, simply use the following procedure. From program mode, either press the X-OVER button or use the Parameter 2 or 3 knobs to move to Crossover module. -
Page 27: Navigating The Rta Section/Navegación Por La Sección De Rta
™ DriveRack Sect/Secc 2 Editing Functions/Funciones de edición 2.7 Navigating the RTA 2.7 Navegación por la sección de RTA Navigating the "RTA" Section Navegación por la Sección de "RTA" To edit the parameters of the Real Time Audio Analyzer used in a selected program, simply use the following procedure. From program mode, either press the RTA button or use the Parameter 2 or 3 knobs to move to RTA module. -
Page 28: Navigating The Delay Section/Navegación Por La Sección De Retardo
™ DriveRack Sect/Secc 2 Editing Functions/Funciones de edición 2.8 Navigating the Delay 2.8 Navegación por la sección de retardo Navigating the "Delay" Section Navegación por la Sección de "Retardo" To edit the parameters of the Delay and Speaker Alignment Delay used in a selected program, simply use the following procedure. From program mode, either press the DELAY button or use the Parameter 2 or 3 knobs to move to Delay module to be edited. -
Page 29: Navigating The Dynamics Section/Navegación Por La Sección De
™ DriveRack Sect/Secc 2 Editing Functions/Funciones de edición 2.9 Navigating the Dynamics Section 2.9 Navegación por la sección de dinamismo Navigating the "Dynamics" Section Navegación por la Sección de "Dinamismo" To edit the parameters of the Dynamics module used in a selected program, simply use the following procedure. From program mode, either press the X-OVER button or use the Parameter 2 or 3 knobs to move to the Dynamics module. -
Page 30: Navigating The Other Section/Navegación Por Las Otras
™ DriveRack Sect/Secc 2 Editing Functions/Funciones de edición 2.10 Navigating the Other Section 2.10 Navegación por la sección de otros Navigating the Other (Input and Output) Sections Navegación por las Secciones Otros (Entrada y Salida) To edit the parameters of the Input and Ouptuts used in a selected program, simply use the following procedure. From program mode, either press the OTHER button or use the Parameter 2 or 3 knobs to move to Input or Output modules. -
Page 31: Navigating The Utility Section/Navegación Por La Sección De Utilidades
™ DriveRack Sect/Secc 2 Editing Functions/Funciones de edición 2.11 Navigating the Utility Section 2.11 Navegación por la sección de utilidades Navigating the "Utility" Section Navegación por la Sección "Utility" Navigate through the Pages by depressing the "Next Page" or "Prev Page"buttons successively until arriving at the desired Page. Desplácese por las distintas páginas pulsando los botones "Next Page"... - Page 32 ™ DriveRack Sect/Secc 2 Editing Functions/Funciones de edición ® DriveRack™ User Manual/Manual de instrucciones...
- Page 33 Sect/Secc 3 ™ DriveRack SOFTWARE/SOFTWARE CONFIGURATION FUNCTIONS FUNCIONES DE CONFIGURACION ®...
-
Page 34: Configuración Del Driverack
™ DriveRack Sect/Secc 3 Configuring the DriveRack™/Configuración del DriveRack™ The Configuring section of the 480, 481 and 482 DriveRack™ units will La sección de Configuración de las unidades DriveRack™ 480, 481 y 482 be your key to successful navigation of the configuration functions of the será... - Page 35 ™ DriveRack Sect/Secc 3 Configuring the DriveRack™/Configuracion del DriveRack™ Navigation Modes Modos de navegación Once you have selected a program that utilizes a configuration that Una vez que haya elegido un programa que utilice una configuración accommodates your application, the DriveRack™ offers different modes of adecuada para su aplicación, el DriveRack™...
-
Page 36: Editing Factory Programs/Edición De Los Programas De Fábrica
™ DriveRack Sect/Secc 3 Configuring the DriveRack™/Configuracion del DriveRack™ 3.3 Editing Factory Programs 3.3 Edición de los programas de fábrica Once you have reached the module that you wish to edit, simply use the Una vez que haya alcanzado el módulo que desee editar, simplemente use PREV PG and NEXT PG buttons to move through the pages within the los botones PREV PG y NEXT PG para moverse por las páginas dentro module. - Page 37 ™ DriveRack Sect/Secc 3 Configuring the DriveRack™/Configuración del Driverack™ • Once you are satisfied with the selected name press, the STORE button • Una vez que esté satisfecho con el nombre que haya elegido pulse de again and the screen will appear something like this: nuevo el botón STORE y la pantalla mostrará...
-
Page 38: Creating A User Configuration/Creación De Una Configuración
™ DriveRack Sect/Secc 3 Configuring the DriveRack™/Configuracion del DriveRack™ 3.5 Creating a User Configuration 3.5 Creación de una configuración de usuario User Configuration creation is an ideal feature available in the DriveRack™ La creación de una configuración de usuario es una función ideal line. - Page 39 ™ DriveRack Sect/Secc 3 Configuring the DriveRack™/Configuración del DriveRack™ o desde todas. Las opciones para seleccionar y numerar las entradas Input names 1-4 and M. incluyen: nombres de entrada 1-4 y M. 3.5- B Pre Crossover EQ At the pre crossover section of the signal path, the DriveRack™ units give 3.5- B Ecualizador pre-crossover you the option of utilizing either a 31 band graphic or 9 band parametric En la sección pre-crossover de la ruta de señal, las unidades DriveRack™...
-
Page 40: Linking Modules/Enlace De Módulos
™ DriveRack Sect/Secc 3 Configuring the DriveRack™/Configuración del DriveRack™ 3.5- H Driver Alignment Delay 3.5- H Retardo de alineación de motor The second Delay section of the DriveRack™ units is used to fine tune La segunda sección de retardo de las unidades DriveRack™ se usa para delay times within an enclosed speaker or an array of speakers. -
Page 41: Selecting And Moving Crossovers/Selección Y Desplazamiento De Crossovers
™ DriveRack Sect/Secc 3 Configuring the DriveRack™/Configuración del DriveRack™ CONFIGURATION MODE:Normal Parameter 1 Parameter 1 Quad Graphic EQ Parameter 2 Parameter 2 Pre EQ Parameter 3 Parameter 3 Channel 1 Nota: El enlace de módulos más allá de la sección de crossover vendrá Note: Linking modules past the crossover section will be dictated by the determinado por el tipo de crossover elegido. -
Page 42: Saving Configuration Changes/Almacenamiento De Cambios De
™ DriveRack Sect/Secc 3 Configuring the DriveRack™/Configuración del DriveRack™ • Now use the PARAMETER 3 knob to move the crossover module to • Después use el mando PARAMETER 3 para desplazar el módulo the desired position. crossover a la posición deseada. •... - Page 43 Sect/Secc 4 ™ DriveRack PARAMETERS/PARAMETROS DETAILED PARAMETERS PARAMETROS DETALLADOS ®...
-
Page 44: Input Routing/Direccionamiento De Entrada
™ DriveRack Sect/Secc 4 Detailed Parameters/Paràmetros detallados The DriveRack™ units (480, 481 and 482) offer complete editing flexibility, Las unidades DriveRack™ (480, 481 y 482) le ofrecen una total flexibilidad by offering in-depth control over every parameter within each effect de edición, permitiéndole un control completo de cada uno de los module. -
Page 45: Pre-Crossover (Gráfico De 31 Bandas). Escenario Y Estudio
™ DriveRack Sect/Secc 4 Detailed Parameters/Paràmetros detallados Level (nivel) –12 hasta +12 dB Level -12 to +12 dB This parameter allows you to adjust the level of any one of the 31 bands Este parámetro le permite ajustar el nivel de cualquiera de las 31 bandas of the GEQ in .5 dB increments. -
Page 46: Rta/Rta
™ DriveRack Sect/Secc 4 Detailed Parameters/Paràmetros detallados Flat Set/Undo Flat (plano) Set/Undo This parameter either flattens (set) or restores (undo) all bands to their Este parámetro ajusta a plano (set) o restaura (undo) todas las bandas a original settings. su forma original. Band 1 Frequency 20 to 20kHz (Low Shelf) Band 1 Frequency (frecuencia de la banda 1) 20Hz Selects the frequency of the low pass shelf parametric EQ. -
Page 47: Notch Filter/Filtro De Muesca
™ DriveRack Sect/Secc 4 Detailed Parameters/Paràmetros detallados Scale 62dB or 24db Scale (escala) 62dB o 24dB The scale parameter is used to select the resolution and range of the El parámetro de escala se usa para elegir la resolución y rango de la display. - Page 48 ™ DriveRack Sect/Secc 4 Detailed Parameters/Paràmetros detallados The Dual filter is a case that splits the signal with a filter on each channel. dual es un caso que divide la señal con un filtro en cada canal. Las The Crossover options are grouped into 2, 3 or 4 band categories. Each opciones de crossover están agrupadas en 2, 3 o 4 categorías de bandas.
- Page 49 ™ DriveRack Sect/Secc 4 Detailed Parameters/Paràmetros detallados Highpass 2 - 20Hz to 20kHz Highpass 2 –20Hz a 20KHz Selects the desired Highpass crossover frequency. Elige la frecuencia de crossover pasa-altos deseada. Low Slope 2 - 6-24dB/Octave Low Slope 2 (pendiente graves 2) – 6-24dB/Octava Sets the Lowpass slope of the crossover filter.
- Page 50 ™ DriveRack Sect/Secc 4 Detailed Parameters/Paràmetros detallados High Slope 1 - 6-24dB/Octave (BW, Bessel) 12- High Slope 1 (pendiente agudos 1) – 6-24dB/Octava 48dB/Octave (L-R) (BW, Bessel), 12-48dB/Octava (L-R) Sets the Highpass slope of the crossover filter. Ajusta la pendiente de pasa-altos del filtro crossover. Low Fc 2 - 20Hz to 20kHz Low Fc 2 (Fc graves 2) –...
-
Page 51: Post-Crossover
™ DriveRack Sect/Secc 4 Detailed Parameters/Paràmetros detallados Type 2 - Butterworth (BW), Bessel and Linkwitz- Type 2 (tipo 2) – Butterworth (BW), Bessel y Linkwitz- Riley(L-R) Riley (L-R) Selects the desired crossover filter type. Elige el tipo de filtro crossover deseado. Low Slope 2 - 6-24dB/Octave (BW, Bessel) 12- Low Slope 2 (pendiente graves 2) –... -
Page 52: Compressor/Limiter (Dynamics)/Compresor/Limitador (Dinamismo)
™ DriveRack Sect/Secc 4 Detailed Parameters/Paràmetros detallados Flat Set/Undo Flat (plano) Set/Undo This parameter either flattens the PEQ or restores the PEQ to its original Este parámetro ajusta a plano (set) o restaura (undo) el PEQ a su forma shape. original. -
Page 53: Speaker Alignment Delay/Retardo De Alineación De Altavoces
™ DriveRack Sect/Secc 4 Detailed Parameters/Paràmetros detallados OverEasy® (soft knee as it is sometimes called) is when the volume of the presión de "codo duro". El modo OverEasy® (o de "codo suave" como se sound is compressed gradually. OverEasy® compression starts to compress le suele llamar a veces) es cuando el volumen del sonido es comprimido before the level of the signal reaches the threshold and reaches full de forma gradual. -
Page 54: Output Routing/Direccionamiento De Salida
4.9 Direccionamiento de salida The output section 480, 481 and 482 DriveRack™ units provide the user La sección de salida de las unidades DriveRack 480, 481 y 482 le permiten with the ability to control output levels of the unit and adjust phase al usuario controlar los niveles de salida de la unidad y ajustar la compensation of loudspeakers within the signal path. -
Page 55: De Cambios
Sect/Secc 5 ™ DriveRack Storing Programs Almacenamiento de programas STORING PROGRAM CHANGES ALMACENAMIENTO DE CAMBIOS DE PROGRAMAS ®... -
Page 56: Sobre Los Programas De Fábrica
™ DriveRack Sect/Secc 5 Storing Changes/Almacenamiento de cambios Once program editing functions have been made to programs in the 480, Una vez que se haya realizado las funciones de edición sobre los 481 or 482 DriveRack™ units, you will need to save any changes that have programas de las unidades DriveRack™... - Page 57 ™ DriveRack Sect/Secc 5 Storing Changes/Almacenamiento de cambios Choose Place In The USER PROGRAM LIBRARY To Insert The New STORE Program. Press <STORE> To Save Replace Old Program. 4-Way FOH w/RTA • Use the PARAMETER 3 knob to select the USER program to be •...
-
Page 58: Saving Configuration Changes/Almacenamiento De Los Cambios De
™ DriveRack Sect/Secc 5 Storing Changes/Almacenamiento de cambios 5.2 Saving Configuration Changes 5.2 Almacenamiento de los cambios de configuración From Configuration mode, once changes have been made to the current Desde el modo de Configuración, una vez que haya realizado los cambios Configuration, changes can be saved by pressing the NEXT PG button que quiera en la Configuración activa, podrá... - Page 59 Sect/Secc 6 ™ DriveRack Utilities/Utilitidades UTILITIES SECTION SECCION UTILIDADES ®...
-
Page 60: Network Id/Identificación De Red
™ DriveRack Sect/Secc 6 Utilities/Utilidades The Utility section of the 480, 481 and 482 DriveRack™ units, contain La sección de utilidades de las unidades DriveRack™ 480, 481 y 482 many important functions. The Utility section gives you with the ability to contiene muchas funciones importantes. -
Page 61: Security Passwords/Contraseña De Seguridad
™ DriveRack Sect/Secc 6 Utilities/Utilidades UTILITY p2:11 Set Security Levels Parameter 1 Item Program Parameter 2 Level • The PARAMETER 1 knob is used to select modules and functions • El mando PARAMETER 1 se usa para elegir módulos y funciones a los which are available for adding security levels to. -
Page 62: Entering Security Password/Introducción De La Contraseña De
™ DriveRack Sect/Secc 6 Utilities/Utilidades Whll: Character Select Whl2: Cursor Position Btn2: Character Shift UTILITY p3:11 Password Parameter 1 Password: Parameter 2 Name Parameter 3 • Rotate the PARAMETER 2 knob to set the cursor position and rotate • Gire el mando PARAMETER 2 para ajustar la posición del cursor y the PARAMETER 1 wheel to select characters. -
Page 63: Program List/Lista De Programas
™ DriveRack Sect/Secc 6 Utilities/Utilidades • At this point, rotate the PARAMETER 1 knob and the screen will • En este punto, gire el mando PARAMETER 1 y la pantalla mostrará lo appear as follows: siguiente: Whll: Character Select Whl2: Cursor Position Btn2: Character Shift UTILITY p3:11... -
Page 64: Program Change Mode/Modo De Cambio De Programa
™ DriveRack Sect/Secc 6 Utilities/Utilidades • Rotate the PARAMETER 1 knob to set the length of the Program list • Gire el mando PARAMETER 1 para ajustar la longitud de la lista de size. The program list size can be any number from 1-10. programa. -
Page 65: Contrast Adjustment/Ajuste De Contraste
™ DriveRack Sect/Secc 6 Utilities/Utilidades 6.7 Contrast Adjustment 6.7 Ajuste de contraste Contrast Adjustment Ajuste de contraste Since venues and applications vary, the 480 and 480R DriveRack™ units Como los entornos de trabajo y las aplicaciones varían, las unidades provide you with the option of changing the contrast of the large custom DriveRack™... -
Page 66: Power-Up (Mutes/Saved)/Encendido (Anulación/Grabación)
™ DriveRack Sect/Secc 6 Utilities/Utilidades • At this point, to toggle between MIDI and RS232 modes, press the • En este punto, para cambiar entre el modo MIDI y RS232, pulse el PARAMETER 2 knob. mando PARAMETER 2. 6.9 Power Up (Mutes On/Saved) 6.9 Encendido (anulaciones activadas/almacenado) Dentro del menú... -
Page 67: Sysex Dump/Volcado Sysex
™ DriveRack Sect/Secc 6 Utilities/Utilidades • Once the desired program has been selected, press the PARAMETER 3 • Una vez elegido el programa deseado, pulse el mando PARAMETER 3 knob to execute the program dump. para realizar el volcado del programa. 6.12 SYSEX Dump 6.12 Volcado SYSEX The BULK DUMP option allows a complete system exclusive dump of the... -
Page 68: Redundancy Enable/Activación De Redundancia
™ DriveRack Sect/Secc 6 Utilities/Utilidades • Use the PARAMETER 3 knob to select the desired microphone input. • Use el mando PARAMETER 3 para elegir la entrada de micrófono Mic input options include: Ch3, Ch4 and Ch3 and 4 simultaneously. deseada. - Page 69 Sect/Secc 7 ™ DriveRack Network functions Funciones de red NETWORK FUNCTIONS FINCIONES DE RED ®...
- Page 70 ™ DriveRack Sect/Secc 7 Network Functions/Funciones de red The Network Function section of this manual will provide you with La sección de funciones de red de este manual le ofrecerá información detailed information for establishing and maintaining a communication detallada sobre cómo establecer y mantener una red de comunicación network between the 480, 481 , 482 and 480R DriveRacks™, and a PC, entre las unidades DriveRack™...
-
Page 71: Network Connections (Specs)/Conexiones De Red
Red RS485 (tipo RJ-45) – Cable RJ-45. Los cables de red son CAT-5 UTP de calibre 24. Cable Lengths 480R to 480P - 250 feet max. 500 feet with dbx proprietary cable. Longitudes de cable 480P to Network - Up to 4000 feet. -
Page 72: Network Connections (Applications)/Conexiones De Red (Aplicaciones)
™ DriveRack Sect/Secc 7 Network Functions/Funciones de red 7.2 Network Connections (Applications) 7.2 Conexiones de red (aplicaciones) Backbone Connections Conexiones de red principal The network system of the DriveRack™ has been configured to allow the El sistema de red del DriveRack™ ha sido configurado para permitir que units within a multiple unit network configuration communicate through a las unidades que están dentro de un montaje de red de varias unidades se Back bone type connection. - Page 73 ™ DriveRack Sect/Secc 7 Network Functions/Funciones de red Connection to the 480R Conexión al 480R When the 480R Remote Controller is used in a network system, networking Cuando se usa el control remoto 480R en un sistema de red, la conexión connection to the 480R Remote Controller must be accessed through the a red del control remoto 480R ha de realizarse por medio de la fuente de 480P power supply unit which included with the 480R.
- Page 74 ™ DriveRack Sect/Secc 7 Network Functions/Funciones de red Connection to the GUI Interface: Conexión al interface GUI: If you elect to utilize the included GUI PC interface, either the 480, 481 or Si elige utilizar el interface GUI para PC que se incluye con todas las 482 can act as the master unit that interfaces with the PC.
- Page 75 ™ DriveRack Sect/Secc 7 Network Functions/Funciones de red Termination: Terminación: In order to run your DriveRack™ system in the most effective and efficient Para que su sistema DriveRack™ funcione de la forma más efectiva y manner, it is recommended that you utilize the included network directa, recomendamos que utilice los conectores de terminación de red terminator connectors.
-
Page 76: Master/Slave Assignments/Asignaciones Maestro/Esclavo
™ DriveRack Sect/Secc 7 Network Functions/Funciones de red 7.3 Master/Slave Assignments 7.3 Asignaciones maestro/esclavo The key element to establishing a DriveRack™ network system, is El elemento clave para establecer un sistema de red DriveRack™ es distinguishing a Master controller unit from the slaves units. Every unit in diferenciar la unidad controladora o maestra de las unidades esclavas. - Page 77 ™ DriveRack Sect/Secc 7 Network Functions/Funciones de red 7.3 Master/Slave Assignments cont’d 7.3 Asignaciones maestro/esclavo (continuación) 480R DriveRack™ DriveRack™ 480R • Using the previous procedure for the master unit, you now • Cuando esté usando el procedimiento anterior en la unidad need to enter the ID number for the master (0) on the keypad controladora, deberá...
- Page 78 ™ DriveRack Sect/Secc 7 Network Functions/Funciones de red • Use the PARAMETER 2 knob to set the Target ID. This simply means • Use le mando PARAMETER 2 para elegir el ID de la unidad destino that you are asking the 480 DriveRack™ to call up the device ID of any del control.
-
Page 79: Redundancy/Redundancia
™ DriveRack Sect/Secc 7 Network Functions/Funciones de red 7.4 Redundancy 7.4 Redundancia The Redundancy function of the 480, 481, and 482 DriveRack™ units is the La función de redundancia de las unidades DriveRack™ 480, 481 y 482 se very definition of the old saying that you can never be too safe. This puede entender como aquel viejo dicho de que "nunca se está... -
Page 80: Network Trouble Shooting/Resolución De Problemas De La Red
Professional Products Customer Service - In the unfortunate event that networking problems persist, please contact us directly at: Servicio de atención al cliente de dbx Professional Products - Para el 801.568.7760 or on-line at: support@dbxpro.com. improbable caso de que los problemas de red persistan, contacte con... - Page 81 7.6 PC GUI Installation 7.6 Instalación del interface gráfico de usuario de PC To make operation of the DriveRack™ units even more convenient, dbx Para facilitar el funcionamiento con las unidades DriveRack™, dbx professional products includes the DriveRack™ PC GUI software with Professional Products incluye con cada unidad un programa de software every unit shipped.
- Page 82 ™ DriveRack Sect/Secc 7 Network Functions/Funciones de red Basic VENUE View Vista básica VENUE • At this point, the DriveRack™ icons represent each unit that is • En este punto, los iconos DriveRack™ representan cada unidad que currently setup to operate in the Network. To edit any unit in the está...
- Page 83 ™ DriveRack Sect/Secc 7 Network Functions/Funciones de red • To customize the mode of operation to best suit your needs, it is • Para personalizar el modo operativo y adecuarlo a sus necesidades, recommended that at this point, you set your desired preferences in recomendamos que en este punto ajuste su preferencias en la carpeta the preference folder, which can be accessed in the file menu and will preferences, a la que se puede acceder desde el menú...
- Page 84 ™ DriveRack Sect/Secc 7 Network Functions/Funciones de red Edit View Vista Edit • Notice that you can have as many windows open as required by your • Tenga en cuenta que puede tener tantas ventanas abiertas según application. The intuitive interface of the DriveRack™ GUI allows you necesite para su aplicación.
-
Page 85: Remoto
™ Sect/Secc 8 DriveRack 480R Remote Controller Control remoto 480R ®... -
Page 86: Rear Panel Connections/Conexiones Del Panel Trasero
DriveRack™ units in the network system via the 480P. Cable información desde otras unidades DriveRack™ en el sistema de red a lengths 480R to 480P - 300 feet max. 500 feet with dbx proprietary cable. través de la 480P. Las longitudes de cables son: 480R a 480P – 91.44 480P to Network - Up to 4000 feet. -
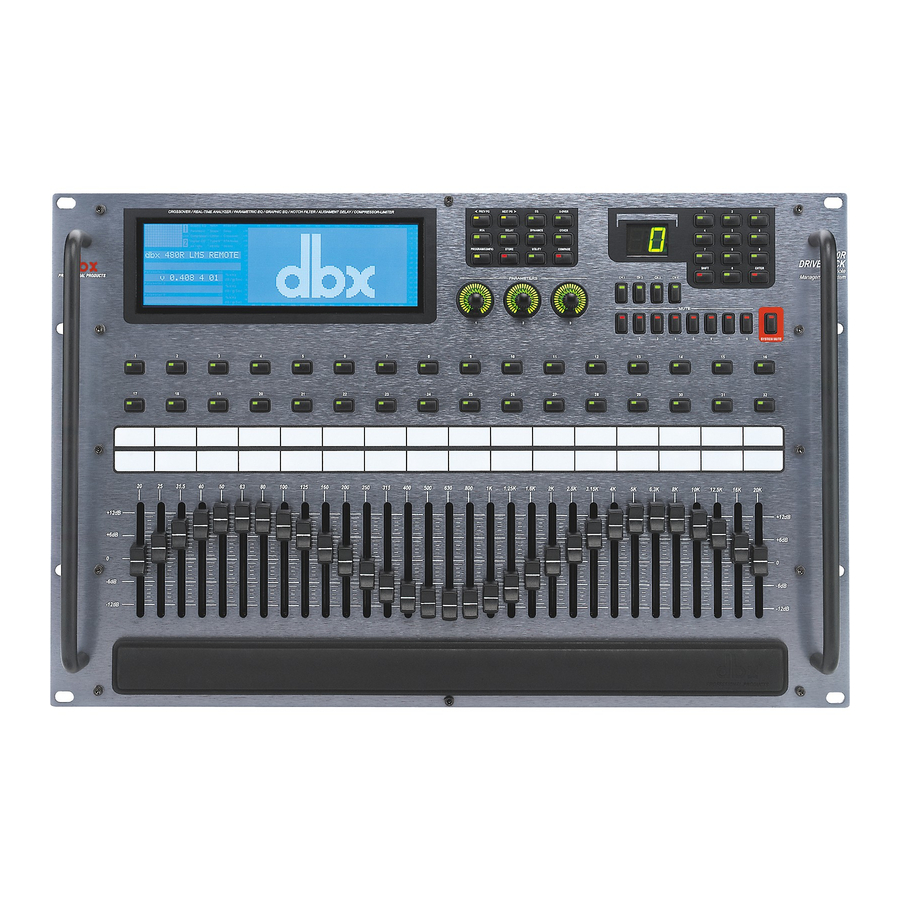
Page 87: Front Panel Connections/Conexiones Del Panel Frontal
™ DriveRack Sect/Secc 8 480R Remote Controller/Control remoto 480R 8.2 Front Panel (480R) 8.2 Conexiones del panel frontal (480R) LCD Display Pantalla LCD The large LCD display of the 480R DriveRack™ provides the user with all La gran pantalla LCD del DriveRack™ 480R le ofrece al usuario toda la of the vital processing information of the DriveRack™... -
Page 88: Rear Panel Connections (480P)/Conexiones Del Panel Trasero
™ DriveRack Sect/Secc 8 480R Remote 480R/Control remoto 480R Parameter Knobs Mandos de parámetros The parameter knobs of the 480R allow the user to edit parameters of Los mandos de parámetros del 480R permiten que el usuario edite selected effects of the selected DriveRack™. The parameter knobs also parámetros de los efectos elegidos en la unidad DriveRack™... -
Page 89: Front Panel (480P)/Panel Frontal (480P)
This connector is used to connect to the 480R. Cable lengths 480R to 480P longitudes de los cables 480R a 480P – 91.44 metros máximo, 152.4 - 300 feet max. 500 feet with dbx proprietary cable. metros con cable dbx. -
Page 90: Using The Rta/Uso Del Rta
™ DriveRack Sect/Secc 8 480R Remote Controller/Control remoto 480R 8.5 Using the RTA 8.5 Uso del RTA A built-In Real Time Audio Analyzer is included as just one of the many Se incluye un analizador de audio en tiempo real incorporado como una added features of the 480R DriveRack™. -
Page 91: Hot Key Assignments/Asignación De Teclas Rápidas
™ DriveRack Sect/Secc 8 480R Remote Controller/Control remoto 480R For information about Pink Noise and “pinking” a room, please see Para más información acerca del ruido rosa y de cómo "aplicar ruido section A.10 of the Appendix. rosa" a una sala, vea la sección A.10 del Apéndice. 8.6 Hot Key Assignments 8.6 Asignación de teclas rápidas The 480R offers 32 “Hot Key”... - Page 92 ™ DriveRack Sect/Secc 8 480R Remote Controller/Control remoto 480R • Repeat the previous procedure when you wish to call up another • Repita el proceso anterior cuando quiera comunicarse y controlar otra device in the system. unidad de la red. ®...
- Page 93 ™ Sect/Secc 9 DriveRack APPLICATION GUIDE GUÍA DE APLICACIÓN ®...
-
Page 94: Section 9 - Application Guide/Sección 9 - Guía De Aplicación 9.1 Four Way Foh/Foh De Cuatro Vías
™ DriveRack Sect/Secc 9 Application Guide/Guía de aplicación This Application guide section is provided to offer suggested installation Incluimos esta guía de aplicación para que conozca las sugerencias de applications of the DriveRack™ units that will allow you to optimize peak aplicaciones de instalación para las unidades DriveRack™... -
Page 95: Front Of House W/Delay 3-Way Towers/Torres Foh Con Retardo De Tres Vías
™ DriveRack Sect/Secc 9 Application Guide/Guía de aplicación 9.2 Front of House w/Delay 3-Way Towers 9.2 Torres de 3 vías de unidad FOH con retardo Hardware Hardware Make sure that all outputs are muted on the DriveRack™ prior Asegúrese de que todas las salidas están anuladas en el Note Nota to adding power to any devices in the signal path (pre and post... -
Page 96: Trasero
™ DriveRack Sect/Secc 9 Application Guide/Guía de aplicación 9.3 L-C-R + Sub + Rear 9.3 Izquierdo-central-derecho + subwoofer + trasero Hardware Hardware Note Make sure that all outputs are muted on the DriveRack™ prior to Nota Asegúrese de que todas las salidas están anuladas en el adding power to any devices in the signal path (pre and post DriveRack™... -
Page 97: Bi-Amp & In-Ear/Bi-Amplificación Y Monitores Cercanos
™ DriveRack Sect/Secc 9 Application Guide/Guía de aplicación 9.4 - BiAmp & In-Ear 9.4 - Bi-amplificación y monitores cercanos Hardware Hardware Note Make sure that all outputs are muted on the DriveRack™ prior Nota Asegúrese de que todas las salidas están anuladas en el to adding power to any devices in the signal path (pre and post DriveRack™... -
Page 98: Dedicated Foh Crossover/Crossover Foh Específico
™ DriveRack Sect/Secc 9 Application Guide/Guía de aplicación 9.5 Dedicated FOH Crossover 9.5 Crossover FOH específico Hardware Hardware Note Make sure that all outputs are muted on the DriveRack™ prior to Nota Asegúrese de que todas las salidas están anuladas en el adding power to any devices in the signal path (pre and post DriveRack™... -
Page 99: Stand-Alone Monitor Eq/Ecualizador De Monitorización Independiente
™ DriveRack Sect/Secc 9 Application Guide/Guía de aplicación 9.6 - Stand Alone Monitor EQ 9.6 - Solo como ecualizador de monitorización Hardware Hardware Note Make sure that all outputs are muted on the DriveRack™ prior Nota Asegúrese de que todas las salidas están anuladas en el to adding power to any devices in the signal path (pre and post DriveRack™... - Page 100 ™ DriveRack Sect/Secc 9 Application Guide/Guía de aplicación ® DriveRack™ User Manual/Manual de instrucciones...
- Page 101 ™ DriveRack Appendix/Apéndices ®...
-
Page 102: Midi Sysex/Midi Sysex
A.1.2 Procedimientos SYSEX header. The System Exclusive header starts with the System Exclusive status byte, and includes all bytes through the dbx Product ID. F7(h) is the En la siguiente sección, SYS-HEAD hace referencia a una cabecera válida System Exclusive 'Message End' byte. All SYSEX numbers in the format de Sistema Exclusivo. - Page 103 ™ DriveRack App/Apénd A Receive One Program (42h) Recepción de un programa (42h) SYS_HEAD 42(h), vv(1)1, vv(1)2, vv(2)1, vv(2)2, xx1, xx2, yy1, yy2, SYS_HEAD 42(h), vv(1)1, vv(1)2, vv(2)1, vv(2)2, xx1, xx2, yy1, yy2, zz(1)1, zz(1)2, zz(2)1, zz(2)2, dd(1st)1,dd(1st)2, dd(nth)1, dd(nth)2, zz(1)1, zz(1)2, zz(2)1, zz(2)2, dd(primero)1, dd(primero)2, dd(n- F7(h) simo)1, dd(n-simo)2, F7(h)
- Page 104 ™ DriveRack App/Apénd A <<Program Dump Version>> <<Versión de volcado de programa>> 00 01 00 00 00 01 00 00 <<Program Bank and Program Number>> <<Banco de programa y número de programa>> 00 00 00 00 00 00 00 00 <<Program Transmit Count...Lo Bytes, Hi Bytes>>...
-
Page 105: Factory Reset/Reinicialización A Los Valores De Fábrica
™ DriveRack App/Apénd A A.2 Factory Reset A.2 Reset a valores de fábrica In the unfortunate event that a reset is required, the DriveRack™ units offer you the Para el improbable caso de que sea necesaria una reinicialización, las unidades DriveRack™... -
Page 106: Flash Downloads/Volcados Rápidos
™ DriveRack App/Apénd A 482 Toggle RS-232/MIDI. Conmutación RS-232/MIDI en el 482. Press and hold <ID UP> and <ID DOWN> at power-up until "232" Mantenga pulsado <ID UP> y <ID DOWN> durante el encendido hasta appears in the 7-Seg Display. que en la pantalla de 7 segmentos aparezca "232". -
Page 107: Specifications/Especificaciones
+22dBu a 600Ω Max Output Level: +25.5dBu into 1kΩ +22dBu into 600Ω Rendimiento A/D Tipo: sistema de conversión dbx Type IV™ A/D Performance Línea de rango dinámico: >112dB sin medición, 115dB medición A Type: dbx Type IV™ Conversion System Rango dinámico Type IV™:... - Page 108 +22dBu a 600Ω A/D Performance Type: dbx Type IV™ Conversion System Rendimiento A/D Dynamic Tipo: sistema de conversión dbx Type IV™ Range line: >112 dB unweighted, 115 dB A- Línea de rango dinámico: >112dB sin medición, 115dB medición weighted Type IV™...
- Page 109 GUI: RS-232 interface for computer display and Red: Propia RS-485 red principal o backbone GUI: Interface RS-232 para visualización y edición en PC configuration Remoto: dbx 480R opcional Remote: Optional dbx 480R Micrófono RTA: Opcional RTA Microphone: Optional Actualización ROM: Actualizable a través de RS-232...
- Page 110 +22dBu a 600Ω Max Output Level: +25.5dBu into 1kΩ +22dBu into 600Ω Rendimiento A/D Tipo: sistema de conversión dbx Type IV™ A/D Performance Línea de rango dinámico: >112dB sin medición, 115dB medición A Type: dbx Type IV™ Conversion System Rango dinámico Type IV™:...
- Page 111 ™ DriveRack App/Apénd A Dynamics Dinamismo Tipo: Compresor/limitador con PeakStopPlus™ Type: Compressor/Limiter with PeakStopPlus™ Ataque/salida: Dependiente del programa Attack/Release: Program Dependent Enlace: Las 8 bandas son enlazables Linking: All 8 bands are linkable Post retardo (alineación de altavoces) Post Delay (Driver Alignment) Duración: 170ms por canal de salida Length:...
-
Page 112: Crossover Diagrams/Diagramas De Crossover
™ DriveRack App/Apénd A A.7 Crossover Diagrams/Diagramas de crossover 1X1(1-band/ 1X2(2-band/ 1X3(3-band/ 1X4(4-band/ 1 banda) 2 bandas) 3 bandas) 4 bandas) Dual Filter(1-band) Filtro dual (1 banda) 2X2 (1-band/ Filter 1 1 banda) 2X3 (2-band/ 2 bandas) Filter 2 HP - High Pass Filter Filtro pasa-altos BP - Band Pass Filter Filtro pasabandas... - Page 113 ™ DriveRack App/Apénd A 2X5 (3-band/ 2X6 (3-band/ 2X6 w/Dual Sub (4-band) 3 bandas) 3 bandas) 2x6 con sub dual (4 bandas) L or Sub Sub-Sub 2X7 (4-band/ 2X8 (4-band/ 4 bandas) 4 bandas) HP - High Pass Filter LP - Low Pass Filter BP - Band Pass Filter Filtro pasa-altos Filtro pasa-bajos...
- Page 114 ™ DriveRack App/Apénd A 3X5 (3-band/ 3X4 (2-band/ 3X3 (1-band/ 3 bandas) 2 bandas) 1 banda) Sub-Sub (2-band/ 3X7 (3-band/ 3X6 w/Sub (3-band) 2 bandas) 3 bandas) 3x6 con sub (3 bandas) HP - High Pass Filter BP - Band Pass Filter LP - Low Pass Filter Filtro pasa-altos Filtro pasabandas...
- Page 115 ™ DriveRack App/Apénd A 3X7 w/dual subs 3X8 (3-band/ 3X8 w/dual subs (3-band) (4-band) 3 bandas) 3x8 con subs dual (3 bandas) 3X7 con subs dual (4 bandas) Sub-Sub Sub-Sub 4X4 (1-band/1 banda) HP - High Pass Filter Filtro pasa-altos BP - Band Pass Filter Filtro pasabandas LP - Low Pass Filter...
- Page 116 ™ DriveRack App/Apénd A (2-band/2 bandas) HP - High Pass Filter Filtro pasa-altos BP - Band Pass Filter Filtro pasabandas LP - Low Pass Filter Filtro pasabajos ® DriveRack™ User Manual/Manual de instrucciones...
-
Page 117: Gain Jumper Warning/Advertencia De Puente De Ganancia
™ DriveRack App/Apénd A A.8 Gain Level Jumpers A.8 Puentes de nivel de ganancia CAUTION: These servicing instructions are for use by qualified service personnel only. To reduce the risk of electric shock, do not perform any servicing other than that contained in the operating instructions unless you are qualified to do so. -
Page 118: Entrada Y Salida
™ DriveRack App/Apénd A A.9 Input and Output Diagrams/Diagramas de sección de entrada y salida INPUT DIAGRAM (repeat for each DSP input) DIAGRAMA DE ENTRADA (repetido para cada entrada DSP) Router Mode (1-4)/Modo de direccionamiento (1-4) Input Routing Entrada de Input Meter direccionamiento Level Pink Off/... -
Page 119: Pinking" A Room/Añadir Ruido Rosa A Una Sala
™ DriveRack App/Apénd A A.10 “Pinking” A Room A.10 “ Aplicación de ruido rosa" a una sala To optimize sound performance in a live application, you may wish to Para optimizar el rendimiento del sonido en una aplicación de directo, “Pink”... -
Page 120: Wire Diagrams/Diagramas De Cableado
™ DriveRack App/Apénd A A.11 Wire Diagrams/Diagramas de cableado Cable Specification: Cat 5 Cable - 4-Twisted Pairs of 24 AWG wire Especificación de cable: Cable Cat 5 – 4 pares trenzados de cable 24 AWG Pin Configuration/Configuración de puntas RJ-45 RJ-45 DB-9 Male DB-9 Male... - Page 121 ® 8760 South Sandy Parkway 8760 South Sandy Parkway Sandy, Utah 84070 Sandy, Utah 84070 Phone: (801) 568-7660 Teléfono: (801) 568-7660 Fax (801) 568-7662 Fax (801) 568-7662 Int’l Fax: (219) 462-4596 Fax internacional: (219) 462-4596 Questions or comments? ¿Tiene preguntas o quiere sugerir algo? E-mail us at: customer@dbxpro.com Envíenos un e-mail a la dirección: customer@dbxpro.com or visit our World Wide Web home page at:...
Need help?
Do you have a question about the DriveRack 480 and is the answer not in the manual?
Questions and answers