HP OmniBook 900 Service Manual
Hewlett-packard omnibook service manual
Hide thumbs
Also See for HP OmniBook 900:
- Evaluation manual (134 pages) ,
- User handbook manual (114 pages) ,
- User manual (76 pages)
Table of Contents
Advertisement
Advertisement
Table of Contents
Troubleshooting

Related Manuals for HP HP OmniBook 900


Summary of Contents for HP HP OmniBook 900
-
Page 1: Service Manual
® HP OmniBook 900 Service Manual... -
Page 2: Edition History
Intel Corporation. TrackPoint is a U.S. registered trademark of International Business Machines. All certifications may not be completed at product introduction. Check with your HP reseller for certification status. This equipment is subject to FCC rules. It will comply with the appropriate FCC rules before final delivery to the buyer. -
Page 3: Table Of Contents
Removing the Display Assembly (HP Authorized Service Providers Only)... 2-16 Removing the Top Case (HP Authorized Service Providers Only)... 2-18 Removing the Motherboard or Bottom Case (HP Authorized Service Providers Only) ... 2-20 Removing the BIOS IC (HP Authorized Service Providers Only)... 2-24 Removing Other Components (HP Authorized Service Providers Only)... - Page 4 Table 2-5. Hard Disk Drive Replacement Part Numbers ...2-6 Table 2-6. Replacing Small Parts (User-Replaceable) ...2-9 Table 2-7. Display Component Compatibility...2-10 Table 2-8. Removing Display Components ...2-27 Table 3-1. Scope of Diagnostic Tools ...3-4 Table 3-2. Troubleshooting Suggestions...3-5 Table 3-3. OmniBook Diagnostic Error Codes ...3-14 HP OmniBook 900...
- Page 5 Table 4-1. OmniBook Replaceable Parts ... 4-3 Table 4-2. Assembly-Component Breakdown... 4-7 Table 4-3. Accessory Replaceable Parts... 4-7 Table 4-4. Part Number Reference ... 4-9 Table 5-1. OmniBook 900 LCD Guidelines (TFT) ... 5-3 Table 5-2. Obsolete Repair Parts... 5-5 HP OmniBook 900...
- Page 6 Introduction This service manual provides reference information for the HP OmniBook 900. It is intended to be used by HP-authorized service personnel in the installation, servicing, and repair of these products. The manual is designed to be self-contained. It is intended that you can follow this manual without having equipment available.
-
Page 7: Product Information
The HP OmniBook 900 provides desktop-quality performance and expandability in a highly portable form. It uses high-performance component technologies that make it capable of serving as a desktop computer that you can conveniently take anywhere. OmniBook CPU ** Display Product *... -
Page 8: Table 1-2. Product Comparisons
Zoomed Video enabled. Windows 95, Operating Windows 98, or System Windows NT 4.0 preinstalled. DMI 2.0. Desktop HP TopTools 3.0 to Management 4.5. Interface Power APM 1.2. ACPI compliant. Management Power States On, Standby, Suspend, Hibernate, Off. Intel Mobile Pentium, Mobile Pentium II, or Mobile Pentium III processor. -
Page 9: Features And Operation
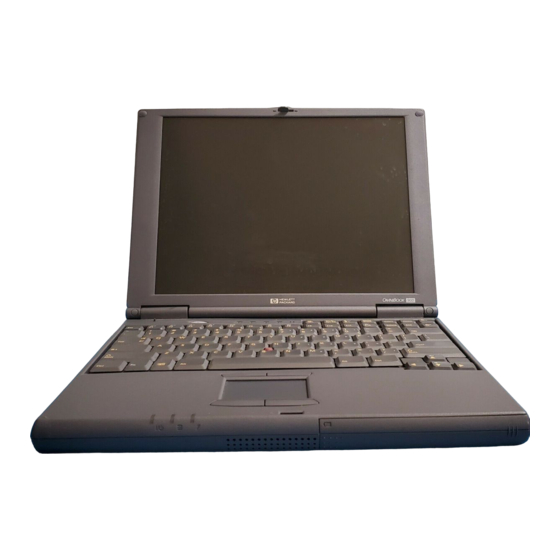
System-off button Infrared port Audio jacks Hard disk drive Kensington Serial lock slot port HP OmniBook 900 Microphone PC Card slots PC Card eject buttons Figure 1-1. OmniBook - Front View Main status lights Figure 1-2. OmniBook - Side View Parallel... -
Page 10: Turning The Omnibook On And Off
("Instant-On"). Press blue power button to display the current session ("Instant-On"). Press blue power button to restart and restore the previous session. Press blue power button to restart with a new session. HP OmniBook 900... -
Page 11: Checking The Status Of The Omnibook
In addition, the battery module has five lights that indicate its charge level. To view the lights, you have to remove the battery and press the pad on the back next to the connector. The number of lights that turn on indicates the charge. HP OmniBook 900 Product Information... -
Page 12: Using Fn Hot Keys
You select the CD-ROM or DVD drive as the boot device. You can do this during reboot by pressing ESC to cancel the OmniBook screen, then ESC to display the boot-device menu for a one-time selection. Product Information Table 1-6. Fn Hot Keys HP OmniBook 900... -
Page 13: System Resources
** Valid uses for memory addresses CC000-DBFFF or D0000-DBFFF: Upper memory blocks (UMBs). PC card memory windows. † Models called 900† in this manual have no marking in the serial number, whereas models called 900B have 900 B after the serial number. HP OmniBook 900 Product Information... -
Page 14: Table 1-9. System Input/Output Addresses (100-3Ff)
Floppy drive LPT1 (ECP parallel port) Cascade Free Free Free † Models called 900† in this manual have no marking in the serial number, whereas models called 900B have 900 B after the serial number. Product Information HP OmniBook 900... -
Page 15: Specifications
87/88-key touch-type QWERTY keyboard with 101/102 key emulation. Embedded numeric keypad. Pointing Device 12 function (Fn) keys. Two pointing devices: pointing stick (TrackPoint technology licensed from IBM) and touch pad. HP OmniBook 900 Table 1-11. OmniBook 900 Specifications Product Information... - Page 16 Windows 95/Windows 98-compatible Plug-and-Play. Windows NT 4.0 and PC Card Plug-and-Play. Advanced Power Management (APM). DMI with HP TopTools. Adobe Acrobat Reader. Agaté Tioman for HP (Hot Swap). DiagTools. VirusScan. Online Reference Guide . OmniBook Recovery CD included. Centralized worldwide BIOS and driver update service User and administrator passwords.
-
Page 17: Table 1-12. Omnibook 900 Accessories
F1626A 10/100-Mbps Ethernet PC Card by 3Com F1627A 56-Kbps US modem PC Card by Xircom F1643A Realport 10/100-Mbps Ethernet + 56-Kbps modem PC Card by Xircom HP OmniBook 900 Table 1-12. OmniBook 900 Accessories OmniBook 900B Compatibility 900† 4150 2100/7100... - Page 18 Docking system and monitor stand (tall) (tray: page 4-7) † Models called 900† in this manual have no marking in the serial number, whereas models called 900B have 900 B after the serial number. 1-12 Product Information OmniBook Compatibility 900B 900† 4150 2100/7100 HP OmniBook 900...
-
Page 19: Internal Design
1-14—it lists the roles that the replaceable modules play in each of the functional subsystems. Top Case (microphone) Module Board Hard Disk Drive HP OmniBook 900 LCD Module Touch BIOS PCMCIA Socket Motherboard Battery... -
Page 20: Table 1-13. Functional Structure
Keyboard controller, main LEDs, keyboard LEDs. I/O controller, serial connector. I/O controller, parallel connector. I/O controller, infrared transmitter/receiver. Keyboard controller, PS/2 processor, PS/2 connector. Bus controller (South Bridge), USB connector. Docking logic, docking connector. PCMCIA controller. PCMCIA connectors. HP OmniBook 900... -
Page 21: Removal And Replacement
Caution Always provide proper grounding when performing repairs. Without proper grounding, an electrostatic discharge may damage the OmniBook and its components. HP OmniBook 900 Removal and Replacement Table 2-1. Removal Cross-Reference Foot (page 2-9) Heatsink (table starting on page 2-28) -
Page 22: Table 2-2. Required Equipment
3.0 – 3.5 2.0 – 2.5 3.5 – 4.0 4.0 – 4.5 2.0 – 2.5 Torque (lbf•in) 0.8 – 1.0 1.3 – 1.7 2.6 – 3.0 1.7 – 2.2 3.0 – 3.4 3.4 – 3.9 1.7 – 2.2 HP OmniBook 900... -
Page 23: Removing The Battery (User-Replaceable)
Required Equipment None. Removal Procedure 1. Unplug the ac adapter, if present. 2. Slide the battery’s front panel to the right. 3. Pull the battery out of the bay. HP OmniBook 900 Figure 2-1. Removing the Battery Removal and Replacement... -
Page 24: Figure 2-2. Installing A Battery Panel
Make sure the front panel of the battery is open before inserting the battery. Removal and Replacement Figure 2-2. Installing a Battery Panel HP OmniBook 900... -
Page 25: Removing A Ram Board (User-Replaceable)
Do not touch the heatsink until it has cooled. It could be hot if the computer was running recently. 6. Release the two latches at the sides of the RAM board, so the free edge of the board pops up. 7. Pull the board out of the connector. HP OmniBook 900 Part Number Exchange... -
Page 26: Removing The Hard Disk Drive (User-Replaceable)
Removing the Hard Disk Drive (User-Replaceable) Exchange Information When returning a bad hard disk drive to HP, describe the symptoms on a piece of paper and attach it to the part—do not use tape. Table 2-5. Hard Disk Drive Replacement Part Numbers Description Drive, hard disk (4.3GB, 9.5mm, IBM) *... -
Page 27: Figure 2-4. Removing The Hard Disk Drive
Screw, M3×4mm Hard disk drive Figure 2-5. Installing a Hard Drive in the Cover HP OmniBook 900 Figure 2-4. Removing the Hard Disk Drive HDD cover kit Small tabs on connector face down in this view. - Page 28 2. Plug in the ac adapter. 3. Insert the Recovery CD in the CD-ROM drive. 4. Shut down and restart the computer—when you see the HP logo, press ESC two times. 5. Select the CD-ROM drive as the boot device.
-
Page 29: Replacing Small Parts (User-Replaceable)
Open the door about 45° and flex the door until one side tab releases. Door, hard disk Insert a small flat-blade screwdriver under the foot and pry it loose. To replace, firmly Foot press the adhesive side of the foot into the recess. HP OmniBook 900 Removal and Replacement... -
Page 30: Removing The Lcd Module (Hp Authorized Service Providers Only)
Removing the LCD Module (HP Authorized Service Providers Only) Exchange Information When returning a bad LCD module to HP, describe the symptoms on a piece of paper and attach it to the part—do not use tape. Table 2-7. Display Component Compatibility... -
Page 31: Figure 2-6. Removing The Lcd Module
Screw, M3×4mm LCD module LCD flex cable Note: 12-inch display shown. For a 13-inch display, the flex cable and mountings differ. HP OmniBook 900 Figure 2-6. Removing the LCD Module Removal and Replacement Bumper (oval) Screw, M2.5×5mm Bezel Display case... -
Page 32: Removing The Keyboard (Hp Authorized Service Providers Only)
For the 13-inch display, make sure the power wire is return to its original position. Where the wire passes around the hinge cover opening, it tucks behind the LCD module. Removing the Keyboard (HP Authorized Service Providers Only) Required Equipment Small Phillips screwdriver. -
Page 33: Figure 2-7. Removing The Keyboard
Fold the keyboard back into place. Slip its front tabs into the slots, then snap the back edge into place. Push the keyboard toward the back as you tighten the two screws. This helps engage the tab at the back-center of the keyboard. HP OmniBook 900 Figure 2-7. Removing the Keyboard Removal and Replacement Keyboard-screw... -
Page 34: Removing The Cpu Module (Hp Authorized Service Providers Only)
Removing the CPU Module (HP Authorized Service Providers Only) Required Equipment Small Phillips screwdriver. Small plastic blade for prying, such as an angled plastic tweezers (OmniBook 900† only). Small flat-blade screwdriver: 4.0-4.5 mm blade (OmniBook 900B only). Removal Procedure Warning Do not touch the heatsink until it has cooled. -
Page 35: Figure 2-8. Removing The Cpu Module
Install or replace thermal pads on the heatsink that are missing or damaged. Do not install screws in the middle area of the heatsink. The only screws in the CPU area are at the four corners of the CPU module. HP OmniBook 900 Figure 2-8. Removing the CPU Module Removal and Replacement Screw, M2×5mm (8) -
Page 36: Removing The Display Assembly (Hp Authorized Service Providers Only)
Use only enough force to lock the CPU module. The CPU connector may be damaged if too much force is used. Install or replace thermal pads on the heatsink that are missing or damaged. Removing the Display Assembly (HP Authorized Service Providers Only) Required Equipment Small Phillips screwdriver. Removal Procedure 1. -
Page 37: Figure 2-9. Removing The Display Assembly
For a 12-inch display, the flex cable wraps around the post only about 1/2 turn. For a 12- or 13-inch display, insert the display power wires into the notch in the top case before installing the hinge cover. HP OmniBook 900 Hinge covers (2) Display power cable Screw, M2.5×4mm... -
Page 38: Removing The Top Case (Hp Authorized Service Providers Only)
Removing the Top Case (HP Authorized Service Providers Only) Required Equipment Small Phillips screwdriver. Removal Procedure 1. Unplug the ac adapter, if present, and remove the battery. 2. Remove these additional assemblies: Hard disk drive (page 2-6) Keyboard (page 2-12). -
Page 39: Figure 2-10. Removing The Top Case
It may be easier to plug in the touch pad flex cable while you are lowering the top case onto the bottom case—rather than waiting until after the top case is fully installed. HP OmniBook 900 Figure 2-10. Removing the Top Case Removal and Replacement Screw, M2×5mm... -
Page 40: Removing The Motherboard Or Bottom Case (Hp Authorized Service Providers Only)
Removing the Motherboard or Bottom Case (HP Authorized Service Providers Only) Exchange Information When returning a bad motherboard to HP, describe the symptoms on a piece of paper and attach it to the part—do not use tape. Required Equipment Small Phillips screwdriver. -
Page 41: Figure 2-11. Removing The Motherboard
Standoff, M2 Screw, M2.5×4mm Mylar insulator Bottom case CPU support (OB 900B only) Infrared lens Fan cable Hard drive door HP OmniBook 900 Figure 2-11. Removing the Motherboard Screw, M2.5×4mm PCMCIA socket Motherboard Screw, M2.5×8mm Right hinge support Speaker cable Speaker... - Page 42 If the bottom case does not have such a pad in the hard disk slot, it is an old bottom case, and you should replace the top case, bottom case, and install a HDD bracket above the hard disk slot. (Service note 900-14.) 2-22 Removal and Replacement HP OmniBook 900...
-
Page 43: Figure 2-12. Installing Pcmcia Doors
If you are prompted for the serial number, type the serial number shown on the bottom of the case. If a serial number has already been stored, you must call an HP support center to change it. 4. Run KYB_SEL.EXE from one of these sources: ... -
Page 44: Removing The Bios Ic (Hp Authorized Service Providers Only)
Figure 2-13. Example of Serial Number Label Removing the BIOS IC (HP Authorized Service Providers Only) Note A replacement BIOS IC contains only enough basic programming to boot the OmniBook. After installing the IC, you must reprogram it. Hewlett-Packard prefers that you program the IC with the latest BIOS. -
Page 45: Figure 2-14. Removing The Bios Ic
Push the keyboard toward the back as you tighten the two screws. This helps engage the tab at the back-center of the keyboard. Reprogram the IC by programming the BIOS—see the note above. HP OmniBook 900 Figure 2-14. Removing the BIOS IC Removal and Replacement... -
Page 46: Removing Other Components (Hp Authorized Service Providers Only)
Removing Other Components (HP Authorized Service Providers Only) Required Equipment Small Phillips screwdriver. Pointed knife or probe (for display components). Small flat-blade screwdriver (for display components). 4.0-4.5 mm flat-blade screwdriver (for OmniBook 900B CPU only). Fine Phillips screwdriver (for display latch only). -
Page 47: Table 2-8. Removing Display Components
Display (page 2-16). Latch, display See page 2-10. LCD module HP OmniBook 900 Additional Steps (See figure on page 4-6) Remove the display bezel (see page 2-10). 1. Unsnap the flex cable tube from the display case. 2. Remove the screw holding the left hinge arm and release the flex cable grounding strap. - Page 48 2. Remove the two screws (12-inch display) or one screw (13-inch display) holding the fan. 3. Unplug the fan cable from the motherboard and lift out the fan. Reassembly Notes: The opening in the side of the fan faces the vent in the bottom case. HP OmniBook 900...
- Page 49 Support, hinge (left) Keyboard (page 2-12). Display (page 2-16). Top case (page 2-18). HP OmniBook 900 Additional Steps (See figure on page 4-2) Remove the eight screws (OmniBook 900†) or six screws and two springs (OmniBook 900B) from the heatsink and lift off the heatsink.
- Page 50 Keyboard (page 2-12). Display (page 2-16). Top case (page 2-18). 2-30 Removal and Replacement Additional Steps (See figure on page 4-2) Remove the screw holding the right hinge support near the back-right corner, then lift out the support. HP OmniBook 900...
-
Page 51: Troubleshooting And Diagnostics
Sycard PCCtest 450 PC Card (page 3-21). Desktop Management Interface (page 3-22). BIOS Setup utility (page 3-24). Caution Do not unnecessarily remove the CPU module from the motherboard. The CPU connector is easily damaged during removal and insertion. HP OmniBook 900 Troubleshooting and Diagnostics... -
Page 52: Troubleshooting
Troubleshooting The suggestions in this section can help isolate and repair the cause of a problem. To ensure quality repair, HP recommends that you follow the basic troubleshooting steps shown in the illustration below. Check the customer’s description of the problem and any supporting information. -
Page 53: Verifying The Repair
Run tests that check the repaired function, such as in the OmniBook diagnostic program (page 3-12). –and– Run any other tests that failed during troubleshooting. Failed Tests. HP OmniBook 900 Run the basic test of the OmniBook diagnostic program (page 3-12). Troubleshooting and Diagnostics... -
Page 54: Suggestions For Troubleshooting
Describes (AssetTools) Describes Configures (AssetTools) Describes Describes (AssetTools) Describes (AssetTools) Describes Configures (AssetTools) Configures Describes Configures (AssetTools) Describes Configures (AssetTools) Describes Configures (AssetTools) Describes (AssetTools) Describes (AssetTools) Status (AssetTools) Status Configures (AssetTools) Describes Configures (AssetTools) Describes (AssetTools) HP OmniBook 900... -
Page 55: Table 3-2. Troubleshooting Suggestions
“Invalid drive. system disk” or Remove and reinsert hard “Auto IDE error” drive. Check boot order in BIOS Setup. HP OmniBook 900 Table 3-2. Troubleshooting Suggestions Repair Center: Likely Causes AC adapter. RAM board. CPU module. Motherboard. BIOS IC. - Page 56 Battery. Try cycling the battery charge. Press F6 during boot Motherboard. to cycle the battery charge. LCD module If an external monitor (backlight). displays no image, replace the motherboard. LCD flex cable, power cable, or connections. Motherboard. HP OmniBook 900...
- Page 57 Try using alternate connection (with accessory floppy cable or external module bay). Check settings in BIOS Setup. HP OmniBook 900 Repair Center: Repair Center: Likely Causes Comments LCD module. Motherboard. LCD flex cable or Make sure the LCD module connections.
- Page 58 Try reinserting the flex cable in the connector on the Motherboard. motherboard. Keyboard assembly. Motherboard. Touch pad. Top case. Motherboard. Touch pad (or top case). Motherboard. Touch pad (or top case). Motherboard. Touch pad. Top case. Motherboard. HP OmniBook 900...
- Page 59 (they use different drivers). For fast-IrDA, check for DMA conflict with ECP parallel port. General problems USB is not supported in Windows NT 4.0. HP OmniBook 900 Repair Center: Repair Center: Likely Causes Comments Speaker. Check operation using headphones or external Motherboard.
- Page 60 Motherboard. replaced. Motherboard. Charge backup battery. Fan. Check the fan. (Do not press or spin the blade with your Thermal connections. finger.) Heatsink damage. Check for proper contact between heatsink, thermal pads, CPU, and Northbridge HP OmniBook 900...
- Page 61 You can run BIOS Setup and change the hard disk time- out to match the Suspend time-out. Certain background operations (such as HP COE virus scans) can affect performance while they’re running. Some file browsers may be unresponsive while they’re...
-
Page 62: Diagnostic Tools
If TopTools is installed, check whether the DiagTools page can create the disk. On any computer with World Wide Web access, download the diagnostic software package from the OmniBook website (see page vi), then follow the instructions. 3-12 Troubleshooting and Diagnostics diaginst is in this directory, run it. HP OmniBook 900... - Page 63 Optional: Check the log. and errors.Run C:\Dmi\Hpdiags\Hpsuppt.exe to retrieve the log file to this directory and open it in Notepad—or, if you are using a diagnostic floppy, the log file Hpsuppt.txt is on the floppy disk. HP OmniBook 900 Cache memory Main memory IDE drives Press F2 to open the advanced test screen.
-
Page 64: Figure 3-3. Serial And Parallel Loopback Connectors
Above that, replace the RAM board (each 01000000h represents 16MB). 0160h Address bus short. Remove any RAM board and rerun the test. Check the CPU module for shorts. Replace the motherboard. 0170h - Replace the motherboard. 0172h HP OmniBook 900 =30-400V) - Page 65 Replace the hard disk. 0296h 02AAh Check internal and external hard disk connectors and motherboard connector. Replace the hard disk. HP OmniBook 900 Code Suggestions 02CCh Run BIOS Setup and check the hard disk type. Replace the hard disk or the motherboard.
- Page 66 120 drive. Check the connectors on the LS-120 drive, external module bay, and motherboard. Replace the LS-120 drive. 0F09h Replace the LS-120 drive. TI CardBus Tests 1201h Memory space not available. Remove any attached ISA or PCI cards. HP OmniBook 900...
- Page 67 For the two- unit test, make sure the IR ports on the reflector and test computers are lined up, replace the motherboard. HP OmniBook 900 Code Suggestions 900Ah Rerun the test. For the two-unit test, make sure the IR ports on the reflector and test computers are lined up.
-
Page 68: Power-On Self-Test
Fixed disk is not working or not configured properly. Check to see if fixed disk is attached properly. Run Setup. Find out if the fixed-disk type is correctly identified. 0210 Stuck key Stuck key on keyboard. 3-18 Troubleshooting and Diagnostics Table 3-5. POST Messages HP OmniBook 900... - Page 69 Address Conflict Address conflict for specified device. Allocation Error for: device Run ISA or EISA Configuration Utility to resolve resource conflict for the specified device. CD ROM Drive CD ROM Drive identified. HP OmniBook 900 Troubleshooting and Diagnostics 3-19...
- Page 70 Displays the address nnnn of the upper limit of Upper Memory Blocks, indicating released segments of the BIOS which can be reclaimed by a virtual memory manager. Video BIOS shadowed Video BIOS copied to shadow RAM. 3-20 Troubleshooting and Diagnostics HP OmniBook 900...
-
Page 71: Sycard Pcctest 450 Cardbus Card (Optional)
CardBus (32-bit) test, TESTCB (version 2.05). Requires the CardBus configuration header. Run the test for the Texas Instruments PCI1225 socket controller—suggested commands Upper slot: TESTCB -b69 -1 -v -jsd000 Lower slot: TESTCB -b69 -0 -v -jsd000 -k6 HP OmniBook 900 Troubleshooting and Diagnostics 3-21... -
Page 72: Desktop Management Interface (Dmi)
To install the DMI preloaded on the hard disk: 1. Start Windows, if it is not already running. 2. Click Start, Programs, HP TopTools or HP DMI, Setup. To install the DMI from the OmniBook Recovery CD or from floppy disks: 1. - Page 73 Hewlett-Packard, to define a standard method of managing the physical and logical components of personal computers. Hewlett-Packard has developed a number of extensions to DMI to allow the enhanced features of HP OmniBook computer to be managed with DMI, including features such as passwords and tattooing (identifying a computer using a unique string of characters).
-
Page 74: Bios Setup Utility
For a processor with a serial number, makes the processor serial number available to software. 3-24 Troubleshooting and Diagnostics Default English. Detected automatically. Detected and set automatically. Detected and set automatically. Enabled Auto Disabled Auto 640KB Detected automatically. Enabled HP OmniBook 900... - Page 75 If boot security is enabled, sets whether a password is required when resuming from a suspended state. Undock If boot security is enabled, sets whether a password is required when undocking the OmniBook. HP OmniBook 900 Default Auto Both Enabled...
- Page 76 Max Power Savings OB 900B: On OB 900†: Off 2 minutes 4 minutes 4 hours 2 minutes Disabled Suspend Turn Off LCD Enabled Disabled When Lid Closed Enabled Default 1. Removable Device 2. Hard drive 3. CD-ROM/DVD drive HP OmniBook 900...
-
Page 77: Replaceable Parts
Replaceable Parts This chapter contains an exploded view of the OmniBook and the following lists of parts: OmniBook replaceable parts (page 4-3). Assembly-component breakout (page 4-7) Accessory replacement parts (page 4-7). Part number reference (page 4-9). HP OmniBook 900 Replaceable Parts... -
Page 78: Figure 4-1. Exploded View
Display components (see page 4-5). Figure 4-1. Exploded View Replaceable Parts HP OmniBook 900... -
Page 79: Table 4-1. Omnibook Replaceable Parts
17 Drive, hard disk (6.0GB, 9.5mm, IBM) ** 17 Drive, hard disk (6.4GB, 9.5mm, IBM) ** 17 Drive, hard disk (12GB, 9.5mm, IBM) ** 18 Fan (12") HP OmniBook 900 Table 4-1. OmniBook Replaceable Parts Part Number Exchange Part Number... - Page 80 5182-5172 5182-5171 5182-5173 5182-5165 F1711-60929 F1711-60979 F1770-60901 F1711-60939 F1711-69039 F1711-60972 F1711-69072 F1770-60921 F1770-69021 F1770-60920 F1770-69020 F1711-60928 7121-7525 F1711-60959 F1769-60911 F1711-60925 F1711-69025 F1769-60908 F1769-69008 F1711-60934 F1443-60921 F1460-60990 F1460-60984 F1440-60987 F1629-60911 F1580-60956 F1711-60924 F1711-60974 F1711-60923 F1769-60906 OmniBook 900B 900† HP OmniBook 900...
- Page 81 HDD-01. † Models called 900† in this manual have no marking in the serial number, whereas models called 900B have 900B after the serial number. HP OmniBook 900 Part Number Exchange User Part Number Repl.
-
Page 82: Figure 4-2. Display Components
Note: 12-inch display shown. For a 13-inch display, the flex cable and mountings differ. Figure 4-2. Display Components Replaceable Parts HP OmniBook 900... -
Page 83: Table 4-2. Assembly-Component Breakdown
Drive, CD-ROM module Drive, DVD module Drive, floppy disk module (no cable) Drive, LS-120 module Drive, second HDD housing Mini dock HP OmniBook 900 Components Door, HDD (12”) Door, module bay connector Doors, PCMCIA w/spring Feet (4) Insulator, bottom case... - Page 84 Tray, docking “D” (OB900 with docking system) Tray, standard “D” (OB900 with port replicator, mini dock) Replaceable Parts Part Number Exchange User Part Number Repl. F1453-60901 F1477-60936 F1451-60901 1818-7950 1818-7951 F1660-69103 Yes 1818-7952 F1660-69104 Yes F1477-60958 F1452-60909 HP OmniBook 900 OmniBook 900B 900†...
-
Page 85: Table 4-4. Part Number Reference
Power cord, replacement (UK, Singapore, Hong Kong) F1320-60971 Cap, pointing stick F1391-60953 Standoff, 4-11258-2 (docking) F1391-60963 Tape, Kapton roll F1440-60987 Screw, M2.5×8mm F1443-60921 Screw, M2×5mm HP OmniBook 900 Table 4-4. Part Number Reference User OmniBook Repl. 900B 900† Replaceable Parts... - Page 86 Touch pad (with cable) F1711-60923 Speaker (with foam pads) F1711-60924 Socket, PCMCIA F1711-60925 F1711-69025 PCA, motherboard F1711-60927 IC, BIOS F1711-60928 Lens, infrared F1711-60929 Label, regulatory F1711-60931 Foot F1711-60932 Heatsink (with thermal pads) 4-10 Replaceable Parts User OmniBook Repl. 900B 900† HP OmniBook 900...
- Page 87 F1760-60948 Recovery CD, Danish (OB900 NT4) F1760-60949 Recovery CD, Italian (OB900 NT4) F1760-60950 Recovery CD, Czechoslovakia (OB900 NT4) F1769-60902 Heatsink (with thermal pads) F1769-60904 Spring, Heatsink F1769-60906 Speaker (12") HP OmniBook 900 User OmniBook Repl. 900B 900† Replaceable Parts 4-11...
- Page 88 Hinge, display (left, right pair, 13") F1770-60910 Cable, display flex (13", Unipac) F1770-60912 Cable, display power (13") F1770-60913 Case, top (13") F1770-60914 Support, hinge (left, 13") F1770-60915 Support, hinge (right, 13") F1770-60916 Speaker (13") 4-12 Replaceable Parts User OmniBook Repl. 900B 900† HP OmniBook 900...
- Page 89 For current information about preferred and approved drives for these products, see the latest version of service note HDD-01. † Models called 900† in this manual have no marking in the serial number, whereas models called 900B have 900B after the serial number. HP OmniBook 900 User OmniBook Repl. 900B 900†...
-
Page 91: Reference Information
The statement can be a fax copy of the document. The fact that the unit is in the hands of an HP representative on behalf of the customer is not evidence of ownership. -
Page 92: Hewlett-Packard Display Quality Statement
These cosmetic imperfections may be visible to the customer under varying display conditions and can appear as bright, dim, or dark spots. This issue is common across all vendors supplying TFT displays in their products and is not specific to the HP OmniBook display. -
Page 93: Table 5-1. Omnibook 900 Lcd Guidelines (Tft)
Mechanical Imperfections: Spots Lines Polarizer scratches Polarizer dents, bubbles HP OmniBook 900 6 or more single bright dots. 6 or more single dark dots. 10 or more total bright and dark dots. Any occurrence of double bright dots. 2 or more double dark dots. - Page 94 4 or more lines 0-3 mm long. 7 or more scratches 0-30 mm long. 7 or more dents 0-0.5 mm avg. dia. Any spot or dent over 0.5 mm avg. dia. Any line over 3 mm long. Any scratch over 30 mm long HP OmniBook 900...
-
Page 95: Obsolete Parts
F1769-60907 Fan (12”) F1711-60937 F1770-60902 Cover, hinge (left, right pair) For exchange part numbers, see Table 4-4. HP OmniBook 900 Table 5-2. Obsolete Repair Parts Comments New part has two front panels. New part requires new top case. Reference Information... - Page 98 1. Product Information 2. Removal and Replacement 3. Troubleshooting and Diagnostics 4. Replaceable Parts 5. Reference Information Part Number Printed in U.S.A. 12/99 F1770-90001...
Need help?
Do you have a question about the HP OmniBook 900 and is the answer not in the manual?
Questions and answers