Table of Contents
Advertisement
I N F O
INSTALLATION
INSTRUCTIONS POUR L'INSTALLATION
INSTALLATIE
INSTALLATION
KÜHL- GEFRIERSCHRANK
REFRIGERATEUR - CONGELATEUR
TWEEDEURS - KOELKAST
FRIDGE - FREEZER
2222 215-91
-
UND
GEBRAUCHSANWEISUNGEN
-
EN
GEBRUIKSAANWIJZINGEN
AND
INSTRUCTION
ET
L'EMPLOI
MANUAL
ER 8124 I
ER 8124 I
ER 8124 I
ER 8124 I
Advertisement
Table of Contents

Related Manuals for Electrolux ER 8124 I


Summary of Contents for Electrolux ER 8124 I
- Page 1 I N F O INSTALLATION GEBRAUCHSANWEISUNGEN INSTRUCTIONS POUR L’INSTALLATION L’EMPLOI INSTALLATIE GEBRUIKSAANWIJZINGEN INSTALLATION INSTRUCTION MANUAL KÜHL- GEFRIERSCHRANK ER 8124 I REFRIGERATEUR - CONGELATEUR ER 8124 I TWEEDEURS - KOELKAST ER 8124 I FRIDGE - FREEZER ER 8124 I 2222 215-91...
- Page 2 WARNINGS It is most important that this instruction book should be retained with the appliance for future reference. Should the appliance be sold or transferred to another owner, or should you move house and leave the appliance, always ensure that the book is supplied with the appliance in order that the new owner can be acquainted with the functioning of the appliance and the relevant warnings.
-
Page 3: Table Of Contents
Environment Protection Installation During normal operation, the condenser and This appliance does not contain gasses compressor at the back of the appliance heat which could damage the ozone layer, in up considerably. For safety reasons, minimum either its refrigerant circuit or insulation ventilation must be as shown in the relevant materials. -
Page 4: Installation
INSTALLATION Cleaning the interior If this appliance featuring magnetic door seals is to replace an older appliance Before using the appliance for the first time, having a spring lock (latch) on the door or wash the interior and all internal accessories lid, be sure to make that spring lock with lukewarm water and some neutral soap unusable before you discard the old... -
Page 5: Instructions For Totally Built-In
I nstructions for totally built-in appliances Door reversibility (Fig. 1) D337 Left opening Right opening Remove (P) from both sides and the door. Remove the pins (P) and (P1) Remove (A) from the left side and (B-C-D) from the right side. Refit (B-C-D)on the left side and (A) on the right side. - Page 6 If after having carried out the previously Fig. 4 described operation there is still some space left between the appliance and the kitchen unit, fit the trimming provided together with the appliance on the stop strip (A). D265 Fig. 5 Open the door and push the appliance against the side of the kitchen unit opposite to that of appliance hinges.
-
Page 7: Electrical Connection
Open both the appliance door and that of the Fig. 9 kitchen unit to approx. 90°. Place the little plates over the runners. Hold the doors of the appli- ance and the unit together and mark the holes. PR34 Remove the little plates and make the holes with a diam. -
Page 8: Use
This freezer has been marked with the symbol, which means that it is suited to the freezing of fresh foods, the conservation of frozen foods and the production of ice-cubes. The control panel SUPER ALARM A. Thermostat knob Under normal circumstances, to freeze fresh foods it is not necessary to change the setting of B. -
Page 9: Thawing
Storage of frozen food Important To obtain the best performance from this appliance, we strongly recommend that you If the ambient temperature is high, the make sure that the commercially frozen thermostat knob is on the coldest setting (higher foodstuffs were adequately stored by the retailer numbers) and the appliance is fully loaded, the and, furthermore, be sure that these frozen compressor may run continuously, causing frost... -
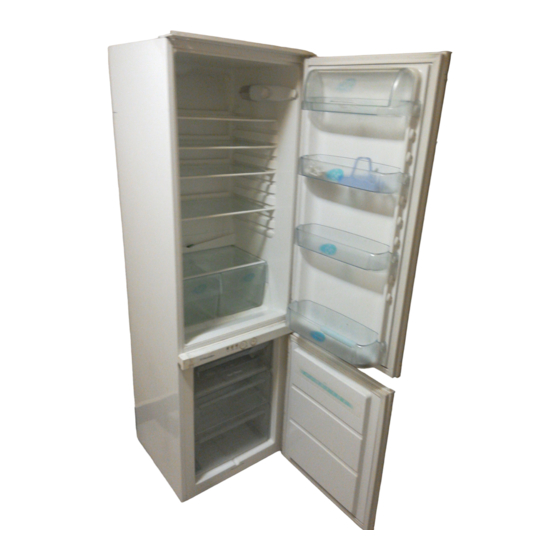
Page 10: Positioning The Door Shelves
Positioning the door shelves Fig. 13 To permit storage of food packages of various sizes, the door shelves can be adjusted in height.To make these adjustments proceed as follows: Gradually pull the shelf in the direction of the arrows until it comes off, then reposition as required. -
Page 11: Maintenance
MAINTENANCE Interior light Unplug the appliance before carrying out any maintenance operation. The light inside the refrigerator compartment is Warning easy to get at through the opening in the light holder. If the light does not go on when the door This appliance contains hydrocarbons in its is open, check that it is screwed into place cooling unit maintenance and recharging must...
Need help?
Do you have a question about the ER 8124 I and is the answer not in the manual?
Questions and answers