Table of Contents
Advertisement
Advertisement
Table of Contents
Troubleshooting

Related Manuals for HP p1230


Summary of Contents for HP p1230
- Page 1 User’s Guide CRT Monitor p1230 Document Part Number: 346682-001 October 2003...
- Page 2 Microsoft, MS-DOS, Windows, and Windows NT are trademarks of Microsoft Corporation in the U.S. and other countries. The only warranties for HP products and services are set forth in the express warranty statements accompanying such products and services. Nothing herein should be construed as constituting an additional warranty.
-
Page 3: Table Of Contents
B Specifications CRT Monitor p1230......B–1 Recognizing Preset Display Resolutions..B–2 Entering User Modes . - Page 4 Power Cord Set Requirements ..... C–5 HP Recycling Program ..... . . C–6...
-
Page 5: Product Features
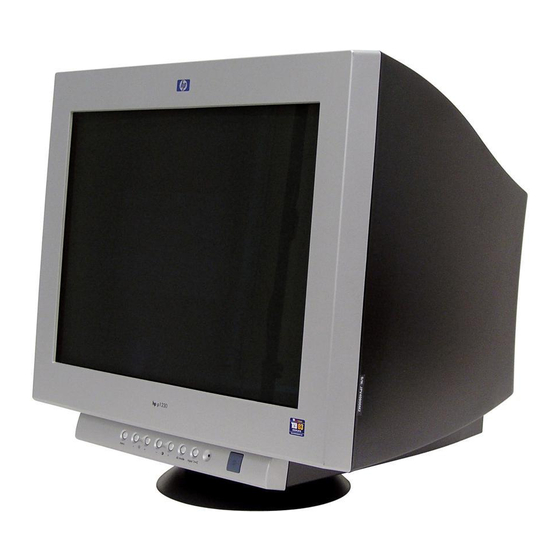
The CRT monitor p1230 features include: ■ Large 20-inch (51 cm) viewable area display. ■ 1600 × 1200 or 1280 x 1024 @85 Hz are recommended resolutions. ■ Flat aperture grille CRT delivers an unparalleled viewing experience with a virtually flat image, eliminating distortion and reducing glare so that what you see on-screen is what you get on your printed output. - Page 6 ■ Software and Reference Library CD includes an information file (INF), Image Color Matching file (ICM), and product documentation. 1–2 www.hp.com User’s Guide...
- Page 7 Energy Saver feature for Energy Star compliance. ■ AssetControl ■ Compliant with the following regulated specifications: ❏ EPA ENERGY STAR ❏ European Union CE Directives ❏ Swedish MPR II 1990 ❏ Swedish TCO ‘03 Requirements User’s Guide www.hp.com Product Features 1–3...
-
Page 8: Safety And Maintenance Guidelines
Safety and Maintenance Important Safety Information A power cord is included with your monitor. If another cord is used, use only a power source and connection appropriate for this monitor. For information on the correct power cord set to use with your monitor, refer to the “Power Cord Set Requirements”... -
Page 9: Maintenance Guidelines
Do not open your monitor cabinet or attempt to service this product yourself. Adjust only those controls that are covered in the operating instructions. If your monitor is not operating properly or has been dropped or damaged, contact your HP authorized dealer, reseller, or service provider. ■... -
Page 10: Cleaning The Monitor
■ Unplug your monitor from the wall outlet before cleaning. Do not use liquid cleaners or aerosol cleaners. Use a damp cloth for cleaning. If the screen requires additional cleaning, use an antistatic screen cleaner. ■ Slots and openings in the cabinet are provided for ventilation. These openings must not be blocked or covered. -
Page 11: Setting Up The Monitor
3. Connect the power cable to the back of the monitor, and the other end of the power cable to an electrical wall outlet. User’s Guide www.hp.com 3–1... - Page 12 To avoid burn-in image damage on your monitor screen, you should always activate a screen saver application or turn off the monitor when it is not in use for a prolonged period of time. 3–2 www.hp.com User’s Guide...
-
Page 13: Operating The Monitor
To install these files on your computer, insert the Software and Reference Library CD in your computer CD-ROM drive. When the CD menu launches, select “Install INF and ICM Files” and follow the on-screen instructions. User’s Guide Operating the Monitor http://www.hp.com/support www.hp.com and selecting the 4–1... -
Page 14: Front Panel Components
When the OSD menu is off, it can function as a Hot key for Brightness Adjustment Decreases or increases OSD buttons adjustments When the OSD menu is off, it can function as a Hot key for Image Contrast www.hp.com Function User’s Guide... -
Page 15: Adjusting Monitor Settings
Use the left, right, up, and down arrow keys to make your adjustments within the menu. User’s Guide Control SuperBright www.hp.com Operating the Monitor Function Opens OSD sub-menu When the OSD is off, acts as the SuperBright (SB) function key.*... - Page 16 The following table shows the menus and their functions at each level: Menu Level 1 Brightness/ Contrast Size and Position 4–4 OSD Menu Levels Menu Level 2 Brightness Contrast Degauss Constant Brightness Auto Adjust Left/Right Down/Up Narrow/Wide Short/Tall www.hp.com Menu Level 3 User’s Guide...
- Page 17 Correction Top Balance Bottom Corner Correction Bottom Balance Moire Canceler Convergence Horizontal Convergence Vertical Convergence Vertical www.hp.com Operating the Monitor Menu Level 3 Color temperature Red, Green, Blue Color temperature Red, Green, Blue Color temperature Red, Green, Blue Color temperature Red, Green, Blue 4–5...
- Page 18 Right) Corner Purity (Bottom Left) Corner Purity (Bottom Right) Purity (Left/Right) Language OSD Position OSD Turn Off OSD Lock Out Off Mode Clamp Pulse Position Control Hot Key www.hp.com Menu Level 3 English German French Spanish Italian Japanese User’s Guide...
-
Page 19: Identifying Special Osd Messages
■ Power Save—Indicates the screen display is entering a sleep mode. User’s Guide OSD Menu Levels Menu Level 2 Factory Preset Display Mode Monitor Info www.hp.com Operating the Monitor Menu Level 3 4–7... -
Page 20: Troubleshooting
Solving Common Problems The following table lists possible problems, the possible cause of each problem, and the recommended solutions. Problem No picture. Image is scrolling or unstable. LED on monitor is not lit. Picture is fuzzy or color looks blotchy. User’s Guide Troubleshooting Possible Cause... - Page 21 Troubleshooting Problem Picture bounces or a wavy pattern is present in the picture. A–2 Possible Cause Electrical interference. Solution If picture is fuzzy, adjust the Moire Canceler control. If color is blotchy, adjust the Brightness, Contrast, or Corner Purity controls. Use the Clamp Pulse Position control to change modes.
- Page 22 Problem Edges of the display image are not square. Thin horizontal lines appear on your screen. Black vertical lines are visible on the screen. User’s Guide Possible Cause Geometry settings are not adjusted correctly. Thin horizontal lines are normal for an aperture grille CRT and are not a malfunction.
-
Page 23: Using The Worldwide Web
Troubleshooting Using the Worldwide Web Before contacting customer services, refer to the support Web site http://www.hp.com/support Preparing to call Technical Support If you cannot solve a problem using the troubleshooting tips in this section, you may need to call technical support. Have the following information available when you call: ■... -
Page 24: Specifications
CRT Monitor p1230 Display Type Viewable Image Size Maximum Weight (Unpacked) Dimensions (includes pedestal) Height Depth Width Maximum Graphics Resolution Recommended Text Modes Stripe Pitch Horizontal Frequency Vertical Refresh Rate Environmental Requirements Temperature Operating Temperature Non-operating Temperature User’s Guide Specifications... -
Page 25: Recognizing Preset Display Resolutions
Specifications CRT Monitor p1230 Relative Humidity Operating Non-Operating Altitude (Operating) Power Source Power Consumption Dual Video Input Terminals Color Display Values Blue Green White Chromaticity (6500 (9300 K) Gamma: 2.2 * Commission International d’Eclairage, 1931 Standard. Recognizing Preset Display Resolutions The display resolutions listed below are the most commonly used modes and are set as factory defaults. -
Page 26: Factory Preset Display Modes
Factory Preset Display Modes Pixel Preset Format 640 x 480 640 x 480 720 x 400 800 x 600 800 x 600 1024 x 768 1024.768 1152 x 870 1280 x 1024 1280 x 1024 1280 x 1024 1600 x 1200 1600 x 1200 Primary 1792 x 1344... -
Page 27: Entering User Modes
Specifications Entering User Modes The video controller signal may occasionally call for a mode that is not preset if: ■ You are not using a Hewlett Packard standard graphics adapter. ■ You are not using a preset mode. If this occurs, you may need to readjust the parameters of the monitor screen by using the on-screen display. - Page 28 Specifications ✎ The above energy saver feature only works when connected to computers that have energy saver features. By selecting settings in the Microsoft Windows Energy Saver utility, you can also program the monitor to enter into the reduced power state at a predetermined time. When the monitor’s Energy Saver utility causes the monitor to enter the reduced power state, the Power light illuminates amber.
-
Page 29: C Agency Regulatory Notices
Agency Regulatory Notices Federal Communications Commission Notice This equipment has been tested and found to comply with the limits for a Class B digital device, pursuant to Part 15 of the FCC Rules. These limits are designed to provide reasonable protection against harmful interference in a residential installation. -
Page 30: Modifications
Agency Regulatory Notices Modifications The FCC requires the user to be notified that any changes or modifications made to this device that are not expressly approved by Hewlett Packard may void the user's authority to operate the equipment. Cables Connections to this device must be made with shielded cables with metallic RFI/EMI connector hoods to maintain compliance with FCC Rules and Regulations. -
Page 31: Canadian Notice
To identify this product, refer to the Part, Series, or Model number found on the product. Canadian Notice This Class B digital apparatus meets all requirements of the Canadian Interference-Causing Equipment Regulations. Avis Canadien Cet appareil numérique de la classe B respecte toutes les exigences du Règlement sur le matériel brouilleur du Canada. -
Page 32: Japanese Notice
Agency Regulatory Notices Japanese Notice Korean Notice EPA Energy Star Compliance Monitors that are marked with the Energy Star Logo meet the requirements of the EPA Energy Star program. As an Energy Star Partner, Hewlett Packard has determined that this product meets the Energy Star guidelines for energy efficiency. -
Page 33: Power Cord Set Requirements
18AWG, and the length of the cord must be between 6 feet (1.8 m) and 12 feet (3.6 m). If you have questions about the type of power cord to use, contact your HP authorized service provider. A power cord should be routed so that it is not likely to be walked on or pinched by items placed upon it or against it. -
Page 34: Hp Recycling Program
Agency Regulatory Notices HP Recycling Program HP offers product end-of-life return programs for HP and other manufacturers’ hardware in several geographic areas. The terms and availability of these programs vary by geography because of differences in regulatory requirements and local customer demand.
Need help?
Do you have a question about the p1230 and is the answer not in the manual?
Questions and answers