Table of Contents
Advertisement
Advertisement
Table of Contents
Troubleshooting

Subscribe to Our Youtube Channel
Related Manuals for AG Neovo U Series


Summary of Contents for AG Neovo U Series
-
Page 3: Table Of Contents
TABLE OF CONTENTS SAFETY INFORMATION FCC Declaimers ..............................v TCO ..................................v WEEE...................................vii PRECAUTIONS Notice...................................vii Cautions When Setting Up ...........................vii Cautions When Using............................viii Cleaning and Maintenance ..........................viii Notice for the LCD Display ............................ix Transporting the LCD Display..........................x CHAPTER 1: PRODUCT DESCRIPTION 1.1 Package Contents ............................ - Page 4 4.6 Other Setting ..............................28 4.7 OSD Lock ..............................29 CHAPTER 5: WARNINGS AND TROUBLESHOOTING 5.1 Warning Messages ............................30 5.2 Troubleshooting ............................. 31 CHAPTER 6: SPECIFICATIONS 6.1 Display Specification............................32 6.2 Display Dimensions ............................33...
-
Page 5: Safety Information
SAFETY INFORMATION This FCC Class-B compliant digital device complies with the Interference-Causing Equipment Regulations of Canada. Regulations FCC Declaimers This device complies with Section 15 of the FCC listing. The operation procedures must meet the following conditions: (1) this device must not cause any damaging interference; and (2) this device must accept any received interference, including any unpredictable interference that may possibly occur. -
Page 6: Weee
PRECAUTIONS SAFETY INFORMATION WEEE Information for users applicable in European Union countries The symbol on the product or its packaging signifies that this product has to be disposed separately from ordinary household wastes at its end of life. Please kindly be aware that this is your responsibility to dispose electronic equipment at recycling centers so as to help conserve natural resources. -
Page 7: Precautions
PRECAUTIONS PRECAUTIONS Symbols used in this manual This icon indicates the existence of a potential hazard that could result in personal injury or damage to the product. This icon indicates important operating and servicing information. Notice • Read this User Manual carefully before using the LCD display and keep it for future reference. •... -
Page 8: Cautions When Using
PRECAUTIONS PRECAUTIONS Cautions When Using Use only the power cord supplied with the LCD display. The power outlet should be installed near the LCD display and be easily accessible. If an extension cord is used with the LCD display, ensure that the total current consumption plugged into the power outlet does not exceed the ampere rating. -
Page 9: Notice For The Lcd Display
PRECAUTIONS PRECAUTIONS Notice for the LCD Display In order to maintain the stable luminous performance, it is recommended to use low brightness setting. Due to the lifespan of the lamp, it is normal that the brightness quality of the LCD display may decrease with time. When static images are displayed for long periods of time, the image may cause an imprint on the LCD display. -
Page 10: Transporting The Lcd Display
PRECAUTIONS PRECAUTIONS Transporting the LCD Display To transport the LCD display for repair or shipment, place the display in its original packaging box. 1. Remove the base stand. • Lay the LCD display face down on a towel or cloth. •... -
Page 11: Chapter 1: Product Description
CHAPTER 1: PRODUCT DESCRIPTION 1.1 Package Contents When unpacking, check if the following items are included in the package. If any of them is missing or damaged, contact your dealer. LCD display Stand D-Sub 15-pin signal cable Power cord CD-ROM Audio cable Note: The above pictures are for reference only. -
Page 12: Installation
PRECAUTIONS PRODUCT DESCRIPTION 1.2 Installation 1.2.1 Installing the Stand Place the stand on an even surface. Attach the LCD display to the stand. • Grasp the LCD display by the sides. • Install the LCD display by securing the 3-sided retaining clips to the stand. •... -
Page 13: Wall Mounting
Note: Take measures to prevent the LCD display from falling down and lessen possible injury and damage to the display in case of earthquakes or other disasters. • Use only the 100 x 100 mm wall mount kit recommended by AG Neovo. All AG Neovo wall mount kits comply with VESA standard. •... -
Page 14: Control Buttons
PRECAUTIONS PRODUCT DESCRIPTION 1.3 Control Buttons Button Description LED Indicator LED lights green during normal operation and lights amber when on standby mode. Power ON/OFF • Touch once to turn the display ON. • Touch again to turn the display OFF. Note: Using the Power button does not turn off power completely. -
Page 15: Overview
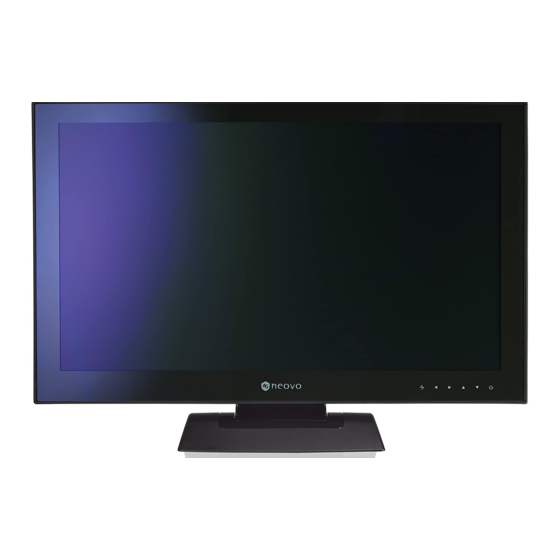
PRECAUTIONS PRODUCT DESCRIPTION 1.4 Overview 1.4.1 Front View Display screen The LCD display screen is protected by NeoV™ Optical Glass. Control buttons Touch the buttons to perform its function. For more information about each button, refer to page 14. 1.4.2 Side View Headphone jack Use to connect a headphone. -
Page 16: Rear View
PRECAUTIONS PRODUCT DESCRIPTION 1.4.3 Rear View AC Power Input Use to connect the power cord. HDMI connector Use to connect an HDMI cable for digital input signal. DVI connector Use to connect a DVI cable for digital input signal. VGA connector Use to connect a VGA cable for analogue input signal. -
Page 17: Chapter 2: Making Connections
CHAPTER 2: MAKING CONNECTIONS CAUTION: Make sure that the LCD display is not connected to the power outlet before making any connections. Connecting cables while the power is ON may cause possible electric shock or personal injury. 2.1 Connecting the AC Power Connect the power cord to the AC power input at the rear of the LCD display. -
Page 18: Connecting Input Source Signals
PRECAUTIONS MAKING CONNECTIONS 2.2 Connecting Input Source Signals Input source signals can be connected with either of the following cables: • Connect one end of a D-sub 15-pin cable to the VGA connector of the LCD display and the other end to the D-sub connector of the computer. -
Page 19: Connecting Audio Devices
PRECAUTIONS MAKING CONNECTIONS 2.3 Connecting Audio Devices Connect one end of an audio cable to the audio port at the rear of the LCD display and the other end to the audio out port of the computer. Connect a headphone to the headphone jack on the left side of the LCD display. 2.4 Connecting USB Devices Connect the mini USB cable to the mini USB port at the rear of the display and the other end to the USB port of the computer. -
Page 20: Chapter 3: On Screen Display (Osd) Menu
CHAPTER 3: ON SCREEN DISPLAY MENU 3.1 Using the OSD Touch the ▼ or ▲ buttons to call out the OSD window. Main Menu Submenu IMAGE SETTING is disabled and grayed out during DVI input and HDMI (without InfroFrame). Navigation Window Touch the ▼... -
Page 21: Osd Menu Tree
PRECAUTIONS ON SCREEN DISPLAY MENU 3.2 OSD Menu Tree Main Menu Submenu Reference Brightness Brightness Refer to page 22. Contrast Colour Setting Colour Temperature Refer to page 23. Sharpness Phase Image Setting * Refer to page 24. Clock (for VGA input) H. -
Page 22: Chapter 4: Adjusting The Lcd Display
CHAPTER 4: ADJUSTING THE LCD DISPLAY 4.1 Brightness Setting Note: As the value of each submenu setting is adjusted, the LCD display changes synchronously. Touch the ▼ or ▲ buttons to call out the OSD window. Select BRIGHTNESS menu, then touch the ► button. -
Page 23: Colour Setting
PRECAUTIONS ADJUSTING THE LCD DISPLAY 4.2 Colour Setting Note: • AUTO COLOUR is only available in VGA input. During DVI and HDMI input, AUTO COLOUR is disabled and grayed out. • As the value of each submenu setting is adjusted, the LCD display changes synchronously. Touch the ▼... -
Page 24: Image Setting
PRECAUTIONS ADJUSTING THE LCD DISPLAY 4.3 Image Setting Note: • IMAGE SETTING menu is only available in VGA and HDMI (with InfoFrame) input. The parameters vary depending on the input signal and the type of device connected via HDMI. • As the value of each submenu setting is adjusted, the LCD display changes synchronously. -
Page 25: Image Setting (Hdmi With Infoframe)
PRECAUTIONS ADJUSTING THE LCD DISPLAY 4.3.2 Image Setting (HDMI with InfoFrame) Some devices such as DVD players or cameras send out signals via HDMI with InfoFrame. InfoFrame contains the data of aspect ratio, overscan or underscan modes, and colour settings. Note: IMAGE SETTING menu is automatically enabled when the LCD display receives data with InfoFrame. -
Page 26: Osd Setting
PRECAUTIONS ADJUSTING THE LCD DISPLAY 4.4 OSD Setting The OSD SETTING menu determines how the OSD window is displayed on screen. Note: As the value of each submenu setting is adjusted, the LCD display changes synchronously. Touch the ▼ or ▲ buttons to call out the OSD window. -
Page 27: Audio Setting
PRECAUTIONS ADJUSTING THE LCD DISPLAY 4.5 Audio Setting Touch the ▼ or ▲ buttons to call out the OSD window. Select AUDIO SETTING menu, then touch the ► button. Touch the ▼ or ▲ buttons to select an option. Item Function Operation Range... -
Page 28: Other Setting
PRECAUTIONS ADJUSTING THE LCD DISPLAY 4.6 Other Setting Touch the ▼ or ▲ buttons to call out the OSD window. Select OTHER SETTING menu, then touch the ► button. Touch the ▼ or ▲ buttons to select an option. Item Function Operation Range... -
Page 29: Osd Lock
PRECAUTIONS ADJUSTING THE LCD DISPLAY 4.7 OSD Lock Lock the OSD to protect from unauthorised users or accidentally touching the control buttons. To lock the OSD, touch and hold the buttons (listed on the table below) for 5 seconds or until the message appears. -
Page 30: Chapter 5: Warnings And Troubleshooting
CHAPTER 5: WARNINGS AND TROUBLESHOOTING 5.1 Warning Messages When any of these warning messages appear, check the following items. Warning Message Cause Solution The resolution or the refresh rate of √ Change the resolution or the the graphics card is set too high. refresh rate of the graphics card. -
Page 31: Troubleshooting
PRECAUTIONS WARNINGS AND TROUBLESHOOTING 5.2 Troubleshooting Problems Possible Cause and Solution • No picture. Check if the LCD display is turned ON. • • Power LED is off. Check if the power cord is properly connected to the LCD display. •... -
Page 32: Chapter 6: Specifications
CHAPTER 6: SPECIFICATIONS 6.1 Display Specification Electrical Characteristics Screen size 23.0” (584 mm) diagonal Resolution 1920 x 1080 Display Colour Number 16.7 M colours Display Type a-Si TFT active-matrix Contrast Ratio 1000:1 typical Brightness 250cd/m typical Response Time 5 ms typical Pixel Pitch 0.2655 mm (H) x 0.2655 mm (W) Backlight... -
Page 33: Display Dimensions
PRECAUTIONS SPECIFICATIONS 6.2 Display Dimensions 100mm 100mm HDMI...
Need help?
Do you have a question about the U Series and is the answer not in the manual?
Questions and answers