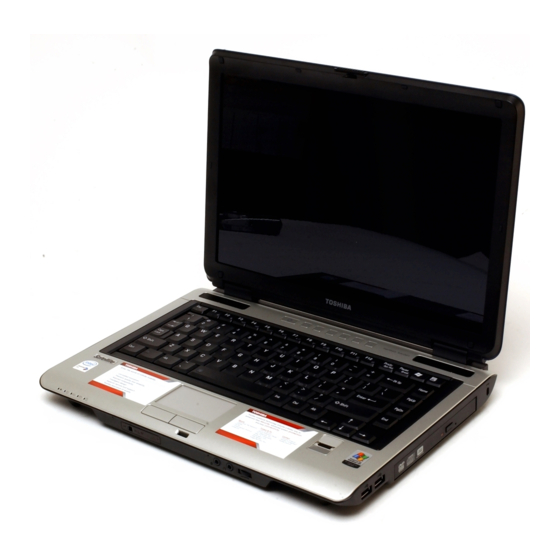
Toshiba Satellite M100 Series User Manual
Hide thumbs
Also See for Satellite M100 Series:
- Maintenance manual (268 pages) ,
- User manual (262 pages) ,
- Specifications (2 pages)
Table of Contents
Advertisement
Quick Links
Advertisement
Table of Contents

Related Manuals for Toshiba Satellite M100 Series


Summary of Contents for Toshiba Satellite M100 Series
- Page 1 Satellite M100 TOSHIBA Satellite M100 Series User's Manual...
- Page 2 © 2006 by TOSHIBA Corporation. All rights reserved. Under copyright law, this manual cannot be reproduced in any form without the prior written permission of TOSHIBA. No patent liability is assumed, with respect to the use of the information contained herein.
-
Page 3: Safety Instructions
Other trademarks and registered trademarks not listed above may be used in this manual. TruSurround XT, WOW HD, Circle Surround Xtract, SRS and symbol are trademarks of SRS Labs, Inc. TruSurround XT, WOW HD, Circle Surround Xtract, TruBass, SRS 3D, Definition and FOCUS technologies are incorporated under license from SRS Labs, Inc. - Page 4 ■ Before you connect the computer to a power source, ensure that the voltage rating of the AC adapter matches that of the available power source. 115 V/60Hz in most of North and South America and some Far Eastern countries such as Taiwan. 100 V/50Hz in eastern Japan and 100 V/60Hz in western Japan.
- Page 5 To reduce the risk of fire, use only No. 26 AWG or larger telecommunication line cord. Use only the battery pack that came with the computer or an optional battery pack. Use of the wrong battery could damage your computer. TOSHIBA assumes no liability for any damage in such case. Satellite M100...
-
Page 6: Fcc Information
Only peripherals complying with the FCC class B limits may be attached to this equipment. Operation with non-compliant peripherals or peripherals not recommended by TOSHIBA is likely to result in interference to radio and TV reception. Shielded cables must be used between the external devices and the computer's or expansion unit's external monitor port, parallel port, USB port and microphone jack. - Page 7 EU Declaration of Conformity TOSHIBA declares, that the product: Satellite M100 conforms to the following Standards: This product is labelled with the CE Mark in accordance with the related European Directives, notably Electromagnetic Compatibility Directive 89/ 336/EEC for the notebook and the electronic accessories including the...
- Page 8 DVD Super Multi UJ-841 tions Co., LTD. Hitachi LG Data Storage, DVD Super Multi GMA-4082N Inc. Pioneer DVD Super Multi DVR-K16TBS TOSHIBA Samsung Stor- DVD-ROM SDC 2732 age Technology TEAC DVD Super Multi DV-W28EB DVD Super Multi ND-7550 TOSHIBA Samsung...
- Page 9 International precautions ■ This drive employs a laser system. To ensure proper use of this product, please read this instruction manual carefully and retain for future reference. Should the unit ever require maintenance, contact an authorized service location. ■ Use of controls, adjustments or the performance of procedures other than those specified may result in hazardous radiation exposure.
- Page 10 VORSICHT: Dieses Gerät enthält ein Laser- System und ist als "LASERSCHUTZKLASSE 1 PRODUKT" klassifiziert. Für den richtigen Gebrauch dieses Modells lesen Sie bitte die Bedienungsanleitung sorgfältig durch und bewahren diese bitte als Referenz auf. Falls Probleme mit diesem Modell auftreten, benachrichtigen Sie bitte die nächste "autorisierte Service-Vertretung".
-
Page 11: Region Selection
Modem warning notice Conformity Statement The equipment has been approved to [Commission Decision "CTR21"] for pan- European single terminal connection to the Public Switched Telephone Network (PSTN). However, due to differences between the individual PSTNs provided in different countries/regions the approval does not, of itself, give an unconditional assurance of successful operation on every PSTN network termination point. -
Page 12: Type Of Service
Redial Up to two redial attempts can be made. If more than two redial attempts are made, the modem will return Black Listed. If you are experiencing problems with the Black Listed code, set the interval between redials at one minute or longer. -
Page 13: If Problems Arise
When you are notified, you will be given the opportunity to correct the problem and informed of your right to file a complaint with the FCC. In the event repairs are ever needed on your modem, they should be performed by TOSHIBA Corporation or an authorized representative of TOSHIBA Corporation. Disconnection... - Page 14 Instructions for IC CS-03 certified equipment 1. NOTICE: The Industry Canada label identifies certified equipment. This certification means that the equipment meets certain telecommunications network protective, operational and safety requirements as prescribed in the appropriate Terminal Equipment Technical Requirements document(s). The Department does not guarantee the equipment will operate to the user's satisfaction.
- Page 15 Notes for Users in Australia and New Zealand Modem warning notice for Australia Modems connected to the Australian telecoms network must have a valid Austel permit. This modem has been designed to specifically configure to ensure compliance with Austel standards when the country/region selection is set to Australia.
- Page 16 Notes for use of this device in New Zealand ■ The grant of a Telepermit for a device in no way indicates Telecom acceptance of responsibility for the correct operation of that device under all operating conditions. In particular the higher speeds at which this modem is capable of operating depend on a specific network implementation which is only one of many ways of delivering high quality voice telephony to customers.
-
Page 17: General Conditions
■ The preferred method of dialing is to use DTMF tones (ATDT...) as this is faster and more reliable than pulse (decadic) dialing. If for some reason you must use decadic dialing, your communications program must be set up to record numbers using the following translation table as this modem does not implement the New Zealand "Reverse Dialing"... -
Page 18: Important Notice
General Precautions TOSHIBA computers are designed to optimize safety, minimize strain and withstand the rigors of portability. However, certain precautions should be observed to further reduce the risk of personal injury or damage to the computer. - Page 19 This product and the supplied accessories are designed to observe the related EMC (Electromagnetic Compatibility) and safety standards. However, TOSHIBA cannot guarantee that this product still observes these EMC standards if accessories or cables not manufactured / distributed by TOSHIBA are connected or implemented. To avoid in general EMC problems, the following advice should be observed: ■...
-
Page 20: Working Environment
Any consequences resulting from the use of this product in working environments that are not approved or the use is restricted are not the responsibility of Toshiba Corporation. The consequences of the use of this product in those working environments may be: ■... -
Page 21: Wireless Lan And Your Health
Because Wireless LAN products operate within the guidelines found in radio frequency safety standards and recommendations, TOSHIBA believes Wireless LAN is safe for use by consumers. These standards and recommendations reflect the consensus of the scientific community and result from deliberations of panels and committees of scientists who continually review and interpret the extensive research literature. - Page 22 Usage Restrictions Do not use the Wireless Products for controlling the following equipment: ■ Equipment directly linked with human life corresponding to the following. ■ Medical equipment such as life support systems, equipment used in operations, etc. ■ Exhaust systems for gases such as poisonous gas etc. and exhaust systems for smoke.
- Page 23 Warning Turn OFF the Wireless Communication switch of wireless products in a congested place, such as a crowded commuter train. Keep this product away from a cardiac pacemaker at least 22cm. Radio waves can potentially affect cardiac pacemaker operation, thereby causing respiratory troubles.
- Page 24 xxiv Satellite M100...
-
Page 25: Table Of Contents
Satellite M100 Table of Contents Preface Manual contents ........xxx Conventions . - Page 26 RecordNow! Basic for TOSHIBA ......4-33 DLA for TOSHIBA ........4-34 Media Care.
- Page 27 Hardware and system checklist......9-3 TOSHIBA support ........9-19 Chapter 10 Disclaimers CPU .
- Page 28 xxviii Satellite M100...
- Page 29 Satellite M100 Preface Congratulations on your purchase of the Satellite M100 computer. This powerful notebook computer provides excellent expansion capability, including multimedia devices, and it is designed to provide years of reliable, high-performance computing. This manual tells how to set up and begin using your Satellite M100 computer.
-
Page 30: Preface
Chapter 6, Power and Power-Up Modes, gives details on the computer's power resources. Chapter 7, HW Setup, introduces you to the TOSHIBA Hardware Setup program. Chapter 8, Optional Devices, describes the optional hardware available. Chapter 9, Troubleshooting, provides helpful information on how to perform some diagnostic tests, and suggests courses of action if the computer doesn't seem to be working properly. -
Page 31: Conventions
Preface Conventions This manual uses the following formats to describe, identify, and highlight terms and operating procedures. Abbreviations On first appearance, and whenever necessary for clarity, abbreviations are enclosed in parentheses following their definition. For example: Read Only Memory (ROM). Acronyms are also defined in the Glossary. Icons Icons identify ports, dials, and other parts of your computer. -
Page 32: Equipment Checklist
Carefully unpack your computer. Save the box and packing materials for future use. Check to make sure you have all the following items: Hardware ■ Satellite M100 Series Portable Personal Computer ■ Universal AC Adapter and Power Cord ■ USB Floppy Disk Drive (provided with some models) ■... - Page 33 TOSHIBA Touch and Launch ■ TOSHIBA TouchPad On/Off Utility ■ RecordNow! Basic for TOSHIBA ■ DLA for TOSHIBA ■ TOSHIBA Zooming Utility ■ TOSHIBA CD/DVD Drive Acoustic Silencer ■ TOSHIBA Hardware Setup ■ TOSHIBA Fn-esse ■ TOSHIBA Accessibility ■ TOSHIBA Virtual Sound ■...
- Page 34 Preface Documentation ■ Your computer's documentation: ■ Satellite M100 Series Personal Computer User's Manual ® ® ■ Microsoft Windows XP manual package (provided with some models) ■ International Limited Warranty (ILW) Instruction (This instruction is included only with computers sold in ILW supported areas.) If any of the items are missing or damaged, contact your dealer immediately.
-
Page 35: Chapter 1 Satellite M100 Features
Basic features are described in a separate pamphlet. Some of the features described in this manual may not function properly if you use an operating system that was not preinstalled by TOSHIBA. Features The Satellite M100 Series computer uses TOSHIBA's advanced Large Scale... -
Page 36: Chip Set
Satellite M100 Features Chip Set ® Intel 945PM Express Chipset or ® Intel 945GM Express Chipset Realtek 861 Audio codec TI PCI7412 for Multiple Digital Media Card Slot, IEEE 1394 and PCMCIA controller. ® Intel 82562GZ for 10/100Mbps LAN controller ®... - Page 37 Satellite M100 Features Video RAM Depending on the model you purchased: Up to 128MB integrated solution and shared with ® main memory for Mobile Intel 945GM Express Chipset 128MB,256MB or512MB HyperMemory™ (64MB or 128MB for local cache) for ATI Mobility™ ®...
- Page 38 Satellite M100 Features Power Battery Pack 6-cell Lithium Ion smart battery pack with 43.2 watt capacity (10.8V/4000mAH) or 9-cell Lithium Ion smart battery pack with 64.8 watt capacity (10.8V/6000mAH) or 12-cell Lithium Ion smart battery pack with 92.88 watt capacity (10.8V/8600mAH) (Battery type depends on the model purchased.) Approximately 12 hours or longer charging time to 100% battery capacity with system switched...
- Page 39 Satellite M100 Features Display 14.1” WXGA TFT screen with a resolution of 1280 horizontal x 800 vertical pixels 14.1" WXGA+ TFT screen with a resolution of 1440 horizontal x 900 vertical pixels Disclaimer (LCD) For more information on the Disclaimer regarding LCD, please refer to the Disclaimers section in Chapter 10.
- Page 40 Satellite M100 Features Disclaimer (HDD Drive Capacity) For more information on the Disclaimer regarding HDD Drive Capacity, please refer to the Disclaimers section in Chapter 10. CD-RW/DVD-ROM Some models are equipped with a full-size CD- drive RW/DVD-ROM module that lets you record data to rewritable CD/CD-RWs as well as run either 12cm (4.72") or 8cm (3.15") CD/DVDs without using an adapter.
- Page 41 Satellite M100 Features DVD Super Multi Some models are equipped with a full-size DVD drive with double Super Multi drive module with double layer layer disc recording support that lets you record data to rewritable CD/ support DVDs as well as run either 12cm (4.72") or 8cm (3.15") CD/DVDs without using an adapter.
- Page 42 Satellite M100 Features Ports (depending on configuration) External monitor 15-pin analog VGA port supports VESA DDC2B compatible functions. Universal Serial Bus The computer has 4 Universal Serial Bus (USB) ports that comply with the USB 2.0 standard, which enables data transfer speeds more than 40 times faster than USB 1.1 (which this computer also supports).
-
Page 43: Special Features
Special features The following features are either unique to TOSHIBA computers or are advanced features, which make the computer more convenient to use. Hotkeys Key combinations that let you quickly modify the system configuration directly from the keyboard without running a system configuration program. - Page 44 You can specify the time period and select either System Standby or System Hibernate in the TOSHIBA Power Saver utility. Keypad Overlay A ten-key pad is integrated into the keyboard.
-
Page 45: Utilities
Maintenance TOSHIBA Power Saver If Control Panel is in Classic View: Start Control Panel TOSHIBA Power Saver TOSHIBA Assist TOSHIBA Assist is a graphical user interface that provides easy access to help and services. TOSHIBA PC TOSHIBA PC Diagnostic Tool displays the basic Diagnostic Tool information on the computer’s configuration and... - Page 46 Satellite M100 Features TOSHIBA ConfigFree ConfigFree is a suite of utilities to allow easy control of communication devices and network connections. ConfigFree also allows you to find communication problems and create profiles for easy switching between location and communication networks.
- Page 47 This program lets you define your own "shortcut" keys to quickly launch applications and speed your work in Windows. To start the utility, click Start, point to All Programs, point to TOSHIBA, point to Utilities and click Fn-esse. TOSHIBA This utility lets you make the Fn key sticky, that is,...
-
Page 48: Options
Use either PC4200 or PC5400 compatible memory modules. See your TOSHIBA dealer for details Battery Pack An additional battery pack can be purchased from your TOSHIBA dealer. Use it as a spare or replacement. High capacity battery An additional battery pack can be purchased from pack your TOSHIBA dealer. - Page 49 Satellite M100 Features Battery charger The battery charger lets you charge extra batteries outside the computer. USB Floppy Disk Lets you attach a floppy disk drive to your Drive computer by means of a USB cable. Satellite M100 1-15...
- Page 50 Satellite M100 Features 1-16 Satellite M100...
-
Page 51: Chapter 2 The Grand Tour
Satellite M100 Chapter 2 The Grand Tour This chapter identifies the various components of your computer. Become familiar with each component before you operate the computer. Certain types of notebook chassis are designed to accommodate all possible configurations for an entire product series. Your selected model may not have all the features and specifications corresponding to all of the icons or switches shown on the notebook chassis, unless you have selected all those features. - Page 52 The Grand Tour DC IN LED The DC IN LED indicates the computer is connected to the AC adapter and it is plugged into an AC power source. Power LED In normal operating mode, the Power LED is blue. If the system is in Standby Mode the LED will flash amber, while the LED will be off when the computer is turned off or is in Hibernation Mode.
-
Page 53: Right Side
The Grand Tour Right side The following figure shows the computer's right side. NIVERSAL ERIAL PTICAL RIVE (USB) P ORTS ECURITY PTICAL RIVE The right side of the computer Universal Serial Bus The Universal Serial Bus (USB 2.0 and 1.1 (USB) Ports compatible) ports enable USB-equipped devices such as keyboards, mice, hard drives, scanners,... -
Page 54: Left Side
The Grand Tour Left side The following figure shows the computer's left side. RGB (M .LINK (IEEE 1394) P ONITOR ENTS ULTIPLE IGITAL EDIA NIVERSAL ERIAL (USB) P PC C TV O The left side of the computer * The availability of this feature is dependant on the model you purchased. RGB (Monitor) Port This 15-pin port lets you connect an external video display to the computer. -
Page 55: Back Side
The Grand Tour Back side The following figure shows the computer back panel. ODEM NIVERSAL ERIAL (USB) P DC-IN 15V J ORTS LAN J The back side of the computer Modem Jack In regions where an internal modem is installed as standard equipment, this jack lets you use a modular cable to connect the modem directly to a telephone line. -
Page 56: Underside
The Grand Tour Underside The following figure shows the underside of the computer. Make sure the display is closed before turning over your computer. ATTERY ATTERY ATCH ATTERY XPANSION EMORY OCKET The bottom of the computer Battery Pack The battery pack powers the computer when the AC adapter is not connected. -
Page 57: Front With The Display Open
The Grand Tour Front with the display open The following figure shows the front of the computer with the display open. To open the display, push the latch on the front of the display and lift it up. Position the display at a comfortable viewing angle. ISPLAY CREEN AUSE... - Page 58 Windows Media Player or WinDVD is launched. The button setting can be changed in TOSHIBA Controls properties. To access the TOSHIBA Controls properties, click start, click the Control Panel, click Printers and Other Hardware and select the TOSHIBA Controls icon.
- Page 59 The Grand Tour Stop/Eject Button Stops playing the CD, DVD or digital audio. Also ejects a disc from the tray. (The availability of this function depends on the model you purchased.) Previous Button Skips backwards to the previous track, chapter or digital file.
-
Page 60: Keyboard Indicators
The Grand Tour Keyboard Indicators Arrow Mode When the Arrow mode icon lights blue, you can use the keypad overlay (light gray labeled keys) as cursor keys. Refer to the Keypad overlay section in Chapter 5, The Keyboard. Numeric Mode You can use the keypad overlay (light gray labeled keys) for numeric input when the Numeric mode icon lights blue. -
Page 61: Writable Discs
The Grand Tour Writable discs This section describes the types of writable discs. Check the specifications for your drive to for the type of discs it can write. Use Record Now! to write compact discs. Refer to Chapter 4, Operating Basics. ■... - Page 62 The Grand Tour DVD Super Multi drive with double layer disc recording support The full-size DVD super multi drive module lets you record data to rewritable discs as well as run either 12cm (4.72") or 8cm (3.15") discs without using an adapter.
- Page 63 See Chapter 6, Power and Power-Up Modes, for details. The AC adapter Use of the wrong adapter could damage your computer. TOSHIBA assumes no liability for any damage in such case. The output rating for the computer is 15 volts DC.
- Page 64 The Grand Tour 2-14 Satellite M100...
-
Page 65: Chapter 3 Getting Started
Satellite M100 Chapter 3 Getting Started This chapter provides basic information to get you started using your computer. It covers the following topics: ■ Setting up your work space - for your health and safety Be sure also to read Instruction Manual for Safety & Comfort. This guide, which is included with the computer, explains product liability. -
Page 66: Placement Of Computer
Getting Started General conditions In general, if you are comfortable, so is your computer, but read the following to make sure your work site provides a proper environment. ■ Make sure there is adequate space around the computer for proper ventilation. -
Page 67: Seating And Posture
Getting Started Seating and posture The height of your chair in relation to the computer and keyboard as well as the support it gives your body are primary factors in reducing work strain. Posture and positioning of the computer ■ Place your chair so that the keyboard is at or slightly below the level of your elbow. -
Page 68: Work Habits
Getting Started Work habits A key to avoiding discomfort or injury from repetitive strain is to vary your activities. If possible, schedule a variety of tasks into your work day. If you must spend long periods at the computer, finding ways to break up the routine can reduce stress and improve your efficiency. -
Page 69: Connecting The Ac Adapter
100 to 240 volts and 50 or 60 hertz. For details on using the AC adapter to charge the battery pack, refer to Chapter 6, Power and Power-Up Modes. Use of the wrong adapter could damage your computer. TOSHIBA assumes no liability for any damage in such case. The output rating for the computer is 15 volts DC. -
Page 70: Opening The Display
Getting Started Opening the display The display panel can be rotated in a wide range of angles for optimal viewing. 1. Push the display latch on the front of the computer. Opening the display 2. Lift the panel up and adjust it to the best viewing angle for you. Use reasonable care when opening and closing the display panel. -
Page 71: Starting Up For The First Time
Getting Started Turning on the power Starting up for the first time When you first turn on the power, the computer's initial screen is the ® Windows XP Startup Screen Logo. Follow the on-screen directions for each screen. During setup, you can click the Back button to return to the previous screen. -
Page 72: Hibernation Mode
For the computer to shut down in hibernation mode, the hibernation feature must be enabled in two places in Power Options: Hibernate tab and TOSHIBA Power Saver: Basic Setup tab. Otherwise, the computer will shut down in Standby mode. If battery power becomes depleted, data saved in Standby will be lost. -
Page 73: Starting Hibernation
2. Open Performance and Maintenance and open Power Options. 3. Select the Hibernation tab. 4. Select Enable Hibernate, then click OK button. 5. Open Toshiba Power Saver. 6. Select Setup Action tab. 7. Enable the desired Hibernation settings for When I press the power button and When I close the lid of my portable computer. -
Page 74: Standby Mode
15 or 30 minutes when the AC adapter is connected, it will automatically enter Standby Mode. This function is the default setting within the TOSHIBA Power Saver utility. ■ To restore operation, press the power button. -
Page 75: Restarting The Computer
1. Click Start, then Shut Down and then Stand by. 2. Close the display panel. This feature must be enabled. Refer to the Setup Action tab in TOSHIBA Power Saver Utility described in the Control Panel. 3. Press the power button. This feature must be enabled. Refer to the Setup Action tab in TOSHIBA Power Saver Utility described in the Control Panel. -
Page 76: Creating An Express Media Player Recovery Cd
2. Switch on the computer and, when the In Touch with Tomorrow TOSHIBA prompt appears, press the F12 key to display the Boot Menu. 3. Use the up or down cursor key to select the CD-ROM/DVD drive in the display menu. -
Page 77: Chapter 4 Operating Basics
Satellite M100 Chapter 4 Operating Basics This chapter gives information on basic operations including using the TouchPad, optical disc drives, the internal modem, LAN and wireless LAN. It also provides tips on caring for your computer and on heat dispersal. Using the TouchPad To use the TouchPad, simply move your finger tip across it in the direction you want the on-screen pointer to go. -
Page 78: Using The Fingerprint Sensor
Operating Basics Press the left button to select a menu item or to manipulate text or graphics designated by the pointer. Press the right button to display a menu or other function depending on the software you are using. Do not press on the TouchPad too hard or press a sharp object such as a ball point pen against it. -
Page 79: Points To Note About The Fingerprint Sensor
Operating Basics Points to note about the Fingerprint Sensor Failure to follow these guidelines might result in (1) damage to the sensor or cause sensor failure, (2) finger recognition problems, or lower finger recognition success rate. ■ Do not scratch or poke the sensor with your nails or any hard or sharp objects. -
Page 80: Points To Note About The Fingerprint Utility
Toshiba does not guarantee that the fingerprint sensor will recognize the enrolled user or accurately screen out unauthorized users at all times. Toshiba is not liable for any failure or damage that might arise out of the use of this fingerprint recognition software or utility. -
Page 81: Set Up Procedure
Operating Basics ■ You can back up the fingerprint data or the information registerd to Password Bank. Please use Import or Export User Data menu on Fingerprint Software Management. Please note the files in Mysafe is not backed up with this menu. ■... -
Page 82: Window Logon Via Fingerprint Authentication
Operating Basics 7. The User’s Fingers screen is displayed. Based on the illustration, select the finger to be recognized, and then click Next. Previously enrolled fingerprints would have green check marks. The fingerprint being enrolled now would have a red check mark. If any of the previously enrolled fingerprints is selected again, the latest information will be enrolled and previous information over-written. -
Page 83: Fingerprint System Boot Authentication
■ It is necessary to register the User Password before using the Fingerprint Power-on Security and its extended function, the Fingerprint Single Sign-On Feature. Please use TOSHIBA Password Utility to register the User Password. ■ When swiping, please do it slowly and at a constant speed. If this does not improve the authentication rate, please adjust the speed. -
Page 84: Fingerprint Utility Limitations
TOSHIBA does not guarantee that the Fingerprint utility will accurately screen out unauthorized users at all times. TOSHIBA is not liable for any failure or damage that might arise out of the use of the fingerprint software or utility. -
Page 85: How The Swipe The Finger
Operating Basics How the Swipe the Finger Using the following steps when swiping fingers for fingerprint registration or authentication will help to minimize authentication failures: 1. Align the first joint of the finger to the center of the sensor. Lightly touch the sensor and swipe finger levelly towards you. -
Page 86: Using The Internal Modem
1. Open the Modem Region Select application. It is located on the Programs menu at TOSHIBA > Networking. Do not use the Country/Region Select function in the Modem setup utility in the Control Panel if the function is available. If you change the Country/ Region in the Control Panel, the change may not take effect. -
Page 87: Properties Menu
Operating Basics 3. Click the icon with the primary mouse button to display a list of regions that the modem supports. A sub menu for telephony location information will also be displayed. A check will appear next to the currently selected region and telephony location. -
Page 88: Modem Selection
If you find that the modem speed is low or communication is interrupted when you are using the modem, please set the CPU speed to Maximum within the TOSHIBA Power Saver utility. 4-12 Satellite M100... -
Page 89: Lan
Operating Basics Disconnecting To disconnect the internal modem cable, follow the steps below. 1. Pinch the lever on the connector in the telephone jack and pull out the connector. 2. Disconnect the cable from the computer in the same manner. The computer is equipped with networking hardware that supports Ethernet LAN (10megabits per second, 10BASE-T), Fast Ethernet LAN (100 megabits per second and Gigabit Ethernet LAN (1000BASE-T). -
Page 90: Wireless Lan
Internet is an open invitation for outsiders to abuse your ISP account and privileges. 2. TOSHIBA is not liable for the eavesdropping on your data due to the use of the wireless LAN connection and any damage that may occur thereof. - Page 91 Please refer also to the electronic information which is included with each software. This Bluetooth™ Stack is based on Bluetooth™ Version 1.1/1.2/2.0+EDR specification. TOSHIBA cannot confirm compatibility between any PC products and/or other electronic devices that use Bluetooth™ other than TOSHIBA mobile PCs.
-
Page 92: Using Optical Disc Drives
The latest information regarding Operating System support, Language Support or available upgrades can be found on our web site http:// www.toshiba-europe.com/computers/tnt/bluetooth.htm in Europe or www.pcsupport.toshiba.com in the United States. Wireless communication switch You can enable or disable the wireless LAN function with the on/off switch. - Page 93 Operating Basics Loading optical disc media To load a disc, follow the steps below. 1. Turn on the power. 2. a. Press the eject button to open the drawer slightly. JECT BUTTON Pressing the eject button b. Pressing the eject button will not open the drawer when the computer's power is off.
- Page 94 Operating Basics 3. Grasp the drawer gently and pull until it is fully open. Pulling the drawer open 4. Lay the disc, label side up, in the drawer. Inserting a disc Be careful not to touch the lens or the area around it. Doing so could cause the drive to malfunction.
-
Page 95: Removing Compact Discs
Operating Basics Closing the drive drawer Removing compact discs To remove the disc, follow the steps below. Do not press the eject button while the computer is accessing the disc drive. Wait for the optical disc indicator to go out before you open the drawer. Also, if the disc is spinning when you open it, wait for it to stop before you remove it. - Page 96 Operating Basics Buttons The Internet button and the CD/DVD button can be assigned functions and applications in the TOSHIBA Controls Properties. CD/DVD play control buttons In addition to the power button, the following four buttons control functions relating to the playback of optical media and digital audio data:...
-
Page 97: Express Media Player
Operating Basics Express Media Player Express Media Player is a quick play feature that enables users to perform DVD and CD playback without loading Windows. Notes for Express Media Player Express Media Player (CD) and Express Media Player (DVD) Usage ■... -
Page 98: Express Media Player Settings
Operating Basics Express Media Player Settings There are a few settings that need to be made in order to use the Express Media Player functions for the first time. These are as follows: Initial settings When Express Media Player is first started or the recovery CD is used, the screen for carrying out the initial settings of the Express Media Player is displayed. - Page 99 Operating Basics Keyboard Code Keyboard Code US English Portuguese UK English Russian Spanish Swedish French Turkish Canadian- Arabic French Italian Belgian Hebrew Danish Japanese German Korean Swiss-German Norwegian Greek Polish Table 2 Keyboard Code Functions via the Front operation panel and the keyboard in the Express Media Player mode This list shows how the functions available from the keyboard correspond to those available from the Front operation panel.
- Page 100 Operating Basics Select track 7 Select chapter 7 Select track 8 Select chapter 8 Select track 9 Select chapter 9 Normally Normally functions as “0” functions as “0” DVD Menu Displays the top menu Displays the menu Move the cursor Move the cursor ...
-
Page 101: Writing Cds On A Cd-Rw/Dvd-Rom Drive
Operating Basics Ctrl + Space Stop Stop Ctrl + R Repeat Ctrl + S Shuffle Changes the Changes the screen screen Changes the angle Changes the subtitle Changes the audio channel Select the title Slow play Display the Display the keyguide keyguide Eject... -
Page 102: Before Writing Or Rewriting
Hitachi Maxell Ltd. CD-RW: MITSUBISHI CHEMICAL CORPORATION RICOH Co., Ltd. TOSHIBA has confirmed the operation of CD-R and CD-RW media of the manufacturers above. Operation of other media cannot be guaranteed. ■ CD-RW can generally be rewritten about 1,000 times. However, the actual number of rewrites is affected by the quality of the media and the way it is used. -
Page 103: Writing Cds/Dvds On A Dvd Super Multi Drive Supporting Double Layer Disc Recording
Operating Basics ■ Write from the computer's hard disk drive to the CD. Do not try to write from shared devices such as a LAN server or any other network device. ■ Writing with software other than Sonic RecordNow! has not been confirmed. - Page 104 Based on TOSHIBA's limited compatibility testing, we suggest the following manufacturers of CD-R/RW and DVD-R/+R/-RW/+RW/-RAM media. However, in no event does TOSHIBA guarantee the operation, quality or performance of any disc. Disc quality can affect write or rewrite success rates.
- Page 105 Operating Basics *DVD-RAM: DVD Specifications for DVD-RAM Disc for Version 2.0, Version 2.1 or Version 2.2 Matsushita Electric Industrial Co., Ltd. Hitachi Maxell Ltd. *DVD Multi drive and DVD Super Multi can use DVD- RAM. DVD+R (Double MITSUBISHI CHEMICAL CORPORATION Layer): DVD-R (Dual MITSUBISHI CHEMICAL COPRORATION...
-
Page 106: When Writing Or Rewriting
Operating Basics ■ When multiple drives that can write data to discs are connected, be careful not to write to the wrong drive. ■ Be sure to connect the universal AC adapter before you write or rewrite. ■ Before you enter standby/hibernation mode, be sure to finish DVD-RAM writing. -
Page 107: When Using Windvd Creator 2 Platinum
Operating Basics When Using WinDVD Creator 2 Platinum How to make a DVD-Video Simplified steps for making a DVD-Video from video data captured from a DV-Camcorder: 1. Click Start -> All Programs -> InterVideo WinDVD Creator2 -> InterVideo WinDVD Creator to launch WinDVD Creator. 2. - Page 108 Operating Basics ■ When recording to a DV-Camcorder, to ensure you capture all of your data, let the camcorder record for a few seconds before you begin recording your actual data. ■ CD recorder, JPEG functions, DVD-Audio, mini DVD and Video CD functions are not supported in this version.
-
Page 109: Recordnow! Basic For Toshiba
WinDVD software application. ■ If you use an over-used rewritable disc, the full formatting might be locked. Please use a brand new disc. RecordNow! Basic for TOSHIBA Note the following limitations when you use RecordNow!: ■ DVD-Video cannot be created using RecordNow! ■... -
Page 110: Dla For Toshiba
3. Mark the Verify data written to the disc after burning check box in the Data Options. 4. Click the OK button. DLA for TOSHIBA Note the following limitations when you use DLA: ■ This software supports only rewritable discs (DVD+RW, DVD-RW, and CD-RW). -
Page 111: Media Care
Operating Basics Media Care This section provides tips on protecting data stored on your discs and disks. Handle your media with care. The following simple precautions will increase the lifetime of your media and protect the data stored on it: 1. -
Page 112: Tv-Out
Operating Basics TV-Out Use the TV-Out port to connect to a television. Be sure to use a 4 pin type S-video cable. For more details, see Appendix B. TV O Setting up more than one display You can set up your computer to utilize more than one display, effectively spreading a single desktop screen across two monitors. -
Page 113: Cleaning The Computer
Operating Basics If an external display will not be connected next time you use your computer, you should cancel any extended desktop or clone display settings before shutting down your computer. Clone display settings are those where more than one device has been selected and is simultaneously applicable. - Page 114 Operating Basics 4-38 Satellite M100...
-
Page 115: Chapter 5 The Keyboard
Satellite M100 Chapter 5 The Keyboard The computer's keyboard layouts are compatible with a 101/102-key enhanced keyboard. By pressing some keys in combination, all the 101/ 102-key keyboard functions can be executed on the computer. The number of keys on your keyboard depends on which country/region's keyboard layout your computer is configured with. -
Page 116: F1 ... F12 Function Keys
Soft keys: Fn key combinations The Fn (function) is unique to TOSHIBA computers and is used in combination with other keys to form soft keys. Soft keys are key combinations that enable, disable or configure specific features. -
Page 117: Hotkeys
The Keyboard Press Fn + Ctrl to simulate the enhanced keyboard's right Ctrl key. Hotkeys Fn + ESC Volume Mute Turns the volume on and off. Fn + F1 Instant Security Enters screen saver mode and blanks the screen. To restore your desktop, press any key or use the TouchPad. -
Page 118: Windows Special Keys
Rotate Screen Allows you to change the orientation of your on-screen workspace. Before using Fn+1 and Fn+2, you must install the TOSHIBA Zooming Utility. Please be aware that this 'zooming' function is only available within Microsoft Internet Explorer, Microsoft Office, Windows Media Player and Adobe Reader, and for the icons on the desktop. -
Page 119: Turning On The Overlays
The Keyboard Turning on the overlays The numeric keypad overlay can be used for numeric data input or cursor and page control. Arrow mode To turn on the Arrow mode, press Fn + F10 (Arrow mode indicator lights). Now try cursor and page control using the keys shown in the disagram below. -
Page 120: Generating Ascii Characters
The Keyboard Temporarily using normal keyboard (overlay on) While using the overlay, you can temporarily access the normal keyboard without turning off the overlay: 1. Hold down Fn and press any other key. All keys will operate as if the overlay were off. -
Page 121: Chapter 6 Power And Power-Up Modes
Satellite M100 Chapter 6 Power and Power-Up Modes The computer's power resources include the AC adapter and internal batteries. This chapter gives details on making the most effective use of these resources including charging and changing batteries, tips for saving battery power, and power up modes. - Page 122 • LED: Battery flashes amber DC IN off Battery Computer goes into capacity Hibernation or shuts down exhausted (depending on the TOSHIBA Power Saver setting) No battery • No operation installed • LED: Battery off DC IN off Satellite M100...
-
Page 123: Power Indicators
Power and Power-Up Modes Power indicators As shown in the above table, the Battery, DC IN and Power indicators alert you to the computer's operating capability and battery charge status Battery indicator Check the Battery indicator to determine the status of the battery. The following indicator lights indicate the battery status. -
Page 124: Battery Types
Press <F1> to resume, <F2> to Setup. The computer's RTC battery is a lithium battery and should be replaced only by your dealer or by a TOSHIBA service representative. The battery can explode if not properly replaced, used, handled or disposed of. Dispose of the battery as required by local ordinances or regulations. -
Page 125: Care And Use Of The Battery Pack
3. Set correct time and date. If you still see the error message after performing the above actions, please contact your TOSHIBA service representative. Care and use of the battery pack The battery pack is a vital component of portable computing. Taking proper care of it will help ensure longer operating time on battery power as well as a longer life for your battery pack. - Page 126 Never use the computer again until it has been checked by a TOSHIBA service provider. It might generate smoke or fire, or the battery pack might rupture.
-
Page 127: Charging The Batteries
Power and Power-Up Modes 5. Charge the battery pack only in an ambient temperature between 5 and 30 degrees Celsius. Otherwise, the electrolyte solution might leak, battery pack performance might deteriorate and the battery life might be shortened. 6. Be sure to monitor the remaining battery power. If the battery pack or real time clock battery discharge completely, Standby Mode will not function, and data in memory will be lost, and the computer might register an incorrect time and date. -
Page 128: Battery Charging Notice
Power and Power-Up Modes Time The following table shows the time required to fully charge a discharged battery. Charging time (hours) Battery type Power on Power off Battery pack about 12 or longer about 4 or longer RTC battery about 24 about 24 with AC or Battery pack The charging time when the computer is on is affected by ambient... -
Page 129: Monitoring Battery Capacity
Monitoring battery capacity Remaining battery power can be monitored by the TOSHIBA Power Saver. Refer to Utilities in Chapter 1, Satellite M100 Features. ■... -
Page 130: Replacing The Battery Pack
Power and Power-Up Modes Retaining data with power off (standby mode) When you turn off your computer with fully charged batteries, the batteries retain data/charge for the following approximate time periods: Battery Approximately 2 days (Standby mode, 12-cell) Approximately 1.5 days (Standby mode, 9-cell) Approximately 1 days (Standby mode, 6-cell) Approximately 1 month (Shut down mode, all) RTC battery... - Page 131 Power and Power-Up Modes 6. Unlock the Battery Pack Lock. Removing the battery pack-1 7. Slide the battery pack latch to the left, then pull the battery out of the battery bay. Removing the battery pack-2 Satellite M100 6-11...
-
Page 132: Installing The Battery Pack
The battery pack is a lithium ion battery, which can explode if not properly replaced, used, handled or disposed of. Dispose of the battery as required by local ordinances or regulations. Use only batteries recommended by TOSHIBA as replacements. 1. Turn the computer's power off. 2. Disconnect all cables connected to the computer. -
Page 133: Toshiba Password Utility
Power and Power-Up Modes TOSHIBA Password Utility The TOSHIBA Password Utility provides two levels of password security: User and Supervisor. Passwords set in TOSHIBA Password Utility are different from the ® Windows login password. User Password To start the utility, point to or click the following items:... -
Page 134: Power-Up Modes
Power and Power-Up Modes To enter a password manually, follow these steps: 1. Turn on the power as described in Chapter 3, Getting Started. The following message will appear in the LCD: Enter Password [xxxxxxxx] At this point, the hotkeys Fn + F1 to F9 do not work. They will function after you enter the password. -
Page 135: Chapter 7 Hw Setup
Satellite M100 Chapter 7 HW Setup This chapter explains how to use the TOSHIBA HW Setup utility to configure your computer. TOSHIBA HW Setup lets you configure settings for various hardware devices through a number of tabs titled General, Password, Display, CPU, Boot Priority, Keyboard, LAN, and USB. - Page 136 HW Setup General This window displays the BIOS version and contains two buttons: Default Return all HW Setup values to the factory settings. About Display the HW Setup version. Setup This field displays BIOS Version and date. Password This tab allows you to set or reset the user password for power on. Display This tab lets you customize your computer's display settings for either the internal LCD screen or for an external monitor.
-
Page 137: Boot Priority
HW Setup Boot Priority Boot Priority Options This option sets the priority for booting the computer. You can override the settings and manually select a boot device by pressing one of the following keys while the computer is booting: Selects the USB floppy disk drive. Selects the Network. - Page 138 HW Setup Wake-up on LAN This feature lets the computer's power be turned on when it receives a wake- up signal from the LAN. Enabled Enables Wake-up on LAN. Disabled Disables Wake-up on LAN (Default). The Wake-up LAN function support AC adapter mode only, before you plan to use this function please make sure your AC power source is connected to system properly.
-
Page 139: Chapter 8 Optional Devices
Satellite M100 Chapter 8 Optional Devices Optional devices can expand the computer's capabilities and its versatility. This chapter describes connection or installation of the following types of devices, which are available from your TOSHIBA dealer: Cards/Memory ■ PC card ■... -
Page 140: Pc Card
The computer is equipped with a PC Card expansion slot that can accommodate one 5 mm Type II card. Any PC Card that meets industry standards (manufactured by TOSHIBA or other vendor) can be installed. The slots support 16-bit PC Cards, including PC Card 16's multifunction card and CardBus PC Cards. -
Page 141: Removing A Pc Card
Optional Devices Removing a PC card 1. Click the Safely Remove Hardware icon on the Task Bar. 2. Click the PC Card you want to remove. 3. Press the eject button of the PC Card to extend it. 4. Press the extended eject button to pop the card out slightly. 5. -
Page 142: Sd/Mmc/Ms/Ms Pro/Xd Memory Cards
Optional Devices SD/MMC/MS/MS Pro/xD Memory cards The computer is equipped with a multiple digital media card slot that can accommodate SD/MMC/MS/MS Pro/xD memory cards. These memory cards let you easily transfer data from devices, such as digital cameras and Personal Digital Assistants, which use flash-memory. Card Type Capacities 8MB, 16MB, 32MB, 64MB, 128MB, 256MB, 512MB,... -
Page 143: Installing A Memory Card
Optional Devices Installing a memory card To install a memory card: 1. Insert the memory card. 2. Press gently to ensure a firm connection. Inserting a memory card Be sure the memory card is oriented properly before you insert it. ®... -
Page 144: Removing A Memory Card
Optional Devices Removing a memory card To remove a memory card, follow the steps below: 1. Click the Safely Remove Hardware icon on the Taskbar. 2. Select a device, then click the Stop button. A confirmation dialog may appear, depending on how the device is registered with the system; if so, confirm that you want to remove the device. -
Page 145: Memory Expansion
In this case the computer will issue a warning. Satellite M100 series: There will be a long beep, 3 short beeps, 3 more short beeps and then a long beep when you turn the power on. In this case, shut down the power and remove the incompatible memory module. -
Page 146: Installing A Memory Module
Optional Devices Installing a memory module If you use the computer for a long time, the memory modules will become hot. In this case, let the memory modules cool to room temperature before you replace them. Follow these steps to install a memory module: 1. -
Page 147: Removing A Memory Module
Optional Devices Installing a module 8. Seat the cover and secure it with the screw. 9. Replace the battery pack as described in Chapter 6, Power and Power- Up Modes. 10. Turn the power on and make sure the added memory is recognized. Removing a memory module If you use the computer for a long time, the memory modules will become hot. -
Page 148: Additional Battery Pack
Optional Devices Removing the memory module 6. Seat the cover and secure its screw. 7. Replace the battery. Additional battery pack You can increase the portability of the computer with additional battery packs. If you're away from an AC power source and your battery runs low, you can replace it with a freshly charged battery. -
Page 149: External Monitor
Optional Devices External monitor An external analog monitor can be connected to the external monitor port on the computer. To connect a monitor, follow the steps below. 1. Turn the computer off. 2. Connect the monitor to the external monitor port. 3. - Page 150 Optional Devices For Intel 1. Click Start >Control Panel > Appearance and Themes. 2. Choose Display to open the Display Properties dialog box. 3. Click the Settings tab. 4. Click the Advanced button. The Intel Plug and Play Monitor dialogue box opens.
- Page 151 Optional Devices 5. Click the Graphics Properties button. 6. In the subsequent dialogue box, click Display Devices and then set up your television and notebook displays. Satellite M100 8-13...
- Page 152 Optional Devices For ATI 1. Click Start >Control Panel > Appearance and Themes. 2. Choose Display to open the Display Properties dialog box. 3. Click the Settings tab. 8-14 Satellite M100...
-
Page 153: I.link (Ieee1394)
Optional Devices 4. Click the ATI Catalyst Control Center button. 5. Setup your television and notebook displays. i.LINK (IEEE1394) i.LINK (IEEE1394) is used for high-speed data transfer for a range of compatible devices such as: ■ Digital video cameras ■ Hard disk drives ■... -
Page 154: Security Lock
Optional Devices Connecting 1. Make sure the connectors are properly aligned and plug the i.LINK (IEEE1394) cable into the computer. 2. Plug the other end of the cable into the device. Note the following when you use i.LINK: ■ You may need to install drivers for your i.LINK devices. ■... -
Page 155: Chapter 9 Troubleshooting
Satellite M100 Chapter 9 Troubleshooting TOSHIBA designed the computer for durability. However, should problems occur, following the procedures in this chapter can help to determine the cause. All readers should become familiar with this chapter. Knowing what might go wrong can help prevent problems from occurring. -
Page 156: Preliminary Checklist
Troubleshooting Preliminary checklist Consider the simplest solution first. The items in this checklist are easy to fix and yet can cause what appears to be a serious problem. ■ Make sure you turn on all peripheral devices before you turn on the computer. -
Page 157: Hardware And System Checklist
Troubleshooting Software The problems may be caused by your software. If you cannot load a software package, the media may be damaged or the program might be corrupted. Try loading another copy of the software. If an error message appears while you are using a software package, check the software documentation. -
Page 158: Self Test
If any of the following conditions are present, the self test failed: ■ The computer stops and does not proceed to display information or messages except the TOSHIBA logo. ■ Random characters appear on the screen, and the system does not function normally. -
Page 159: Overheating Power Down
Troubleshooting Power When the computer is not plugged into an AC outlet, the battery pack is the primary power source. However, your computer has a number of other power resources, including an intelligent power supply and Real Time Clock battery. These resources are interrelated and any one could affect apparent power problems. - Page 160 Battery doesn't power Check the power consumption settings in the the computer as long as TOSHIBA Power Saver Utility. Consider using a expected. power saving mode. Keyboard Keyboard problems can be caused by your setup configuration. For more information refer to Chapter 5, The Keyboard.
-
Page 161: Lcd Panel
Troubleshooting Problem Procedure Some letter keys Check that the numeric keypad overlay is not produce numbers. selected. Press Fn + F10 and try typing again. Output to screen is Make sure the software you are using is not garbled. remapping the keyboard. Remapping involves reassigning the meaning of each key. - Page 162 Troubleshooting Password Problem Procedure Cannot enter Refer to Chapter 6, Power and Power-Up Modes. password i.LINK (IEEE1394) Problem Procedure i.LINK device does not Make sure the cable is securely connected to the function computer and to the device. Make sure the device's power is turned on. Reinstall the drivers.
-
Page 163: Sound System
Troubleshooting Monitor Refer also to Chapter 8, Optional Devices, and to your monitor’s documentation. Problem Procedure Monitor does not turn on Make sure that the external monitor's power switch is on. Confirm that the external monitor's power cable is plugged into a working power outlet. -
Page 164: Pointing Device
Troubleshooting Pointing device If you are using a USB mouse, also refer to the USB section in this chapter and to your mouse documentation. TouchPad Problem Procedure On-screen pointer does The system might be busy. If the pointer is shaped not respond to Pad as an hourglass, wait for it to resume its normal operation... -
Page 165: Tv Output Signal
Troubleshooting Problem Procedure The mouse pointer Try changing the speed setting in the mouse moves too fast or too control utility. slow 1. Open the Control Panel, select the Mouse icon and press Enter. 2. Click the Pointer Options tab. 3. - Page 166 Troubleshooting Problem Procedure Cannot access LAN or Check for a firm cable connection between the the Wake up on LAN LAN hub. feature does not work Make sure the AC adapter is connected. You cannot access a LAN using the computer's battery power.
- Page 167 Troubleshooting Modem Problem Procedure Communication Make sure the computer's internal modem software can't initialize settings are correct. Refer to Phone and Modem the modem Options Properties in the Control Panel. You can hear a dial tone If the call is going through a PBX machine, make but can't make a call sure the communication application's tone dial detection feature is disabled.
- Page 168 Troubleshooting CD-RW/DVD-ROM drive For more information, refer to Chapter 4, Operating Basics. Problem Procedure You cannot access a Make sure the drive's drawer is securely closed. disc in the drive Press gently until it clicks into place. Open the drawer and make sure the disc is properly seated.
- Page 169 Procedure Cannot write correctly If you have trouble writing, make sure you are observing the following precautions: ■ Use only media recommended by TOSHIBA. ■ Do not use the mouse or keyboard during writing. ■ Use only the software supplied with the computer for recording.
- Page 170 Troubleshooting Problem Procedure Some discs run The software or hardware configuration may be correctly, but others do causing a problem. Make sure the hardware configuration matches your software's needs. Check the disc's documentation. Check the type of disc you are using. The drive supports: DVD-ROM: DVD-ROM, DVD-Video...
-
Page 171: Disk Drive
DVD Super Multi drive. Cannot write correctly If you have trouble writing, make sure you are observing the following precautions: ■ Use only media recommended by TOSHIBA. ■ Do not use the mouse or keyboard during writing. ■... -
Page 172: Real Time Clock
1. Make sure you have enroll finger in windows Fingerprint Power on account. Security does not work 2. Set the User Password by using TOSHIBA Password Utility and restart the system. 3. Make sure place a checkmark in Replace the power-on and hard drive passwords with the fingerprint reader on the Protector Suite QL setting. -
Page 173: Toshiba Support
Troubleshooting TOSHIBA support If you require any additional help using your computer or if you are having problems operating the computer, you may need to contact TOSHIBA for additional technical assistance. Before you call Some problems you experience may be related to software or the operating system, it is important to investigate other sources of assistance first. -
Page 174: Where To Write
Troubleshooting Where to write If you are still unable to solve the problem and suspect that it is hardware related, write to TOSHIBA at the nearest location listed below: Outside of Europe In Europe Australia Germany & Austria TOSHIBA (Australia) Pty, Ltd. -
Page 175: Chapter 10 Disclaimers
For optimum performance, use your computer product only under recommended conditions. Read additional restrictions in your product documentation. Contact Toshiba technical service and support, refer to TOSHIBA support section in Chapter 9 Troubleshooting for more information. User’s Manual... -
Page 176: Memory (Main System)
Published battery life numbers are achieved on select models and configurations tested by Toshiba at the time of publication. Recharge time varies depending on usage. Battery may not charge while computer is consuming full power. -
Page 177: Graphics Processor Unit ("Gpu")
Disclaimers Graphics Processor Unit (“GPU”) Graphics processor unit ("GPU") performance may vary depending on product model, design configuration, applications, power management settings and features utilized. GPU performance is only optimized when operating in AC power mode and may decrease considerably when operating in battery power mode. - Page 178 Disclaimers 10-4 Satellite M100...
-
Page 179: Specifications
Satellite M100 Appendix A Specifications This appendix summarizes the computer's technical specifications. Dimensions 343mm x 242mm x 38mm 36.5mm 242mm 29.8mm 29.8mm 38mm 36.5mm User’s Manual... -
Page 180: Environmental Requirements
Specifications Weight Starting at 2.36kg/5.20lbs* * Weight may vary depending on product configuration, vendor components, manufacturing variability and options selected. Environmental Requirements Conditions Ambient temperature Relative humidity 5°C to 35°C 20% to 80% Operating Non-operating -20°C to 65°C Conditions Altitude (from sea level) Operating -30 to 10,000 feet Non-operating... - Page 181 Specifications Built-in Modem Network control unit (NCU) Type of NCU Type of line Telephone line (analog only) Type of dialing Pulse Tone Control command AT commands EIA-578 commands Monitor function Computer's speaker Communication specifications Communication Data: Full duplex System Fax: Half duplex Communication Data:...
- Page 182 Specifications Satellite M100...
-
Page 183: Display Modes
Satellite M100 Appendix B Display Modes This appendix contains a table listing all the display modes when the display is set to an external monitor. CRT Display Color Depth Refresh Rate Resolution (bpp) (Hz) 800 x 600 16 bpp 60, 75, 85, 100 32 bpp 60, 75, 85, 100 1024 x 768... -
Page 184: Displaying Movies On A Tv Or Crt
Display Modes Displaying movies on a TV or CRT This section describes how to set up your system to display movies simultaneously on your computer's LCD and on an external TV or CRT monitor. To connect a television, follow the steps below. 1. - Page 185 Display Modes 4. Click the Advanced button. The Intel Plug and Play Monitor dialogue box opens. 5. Click the Graphics Properties button. Satellite M100...
- Page 186 Display Modes 6. In the subsequent dialogue box, click Display Devices and then set up your television and notebook displays. Satellite M100...
- Page 187 Display Modes For ATI 1. Click Start >Control Panel > Appearance and Themes. 2. Choose Display to open the Display Properties dialog box. 3. Click the Settings tab. 4. Click the ATI Catalyst Control Center button. 5. Setup your television and notebook displays. Satellite M100...
- Page 188 Display Modes Satellite M100...
-
Page 189: Ac Power Cord And Connectors
Satellite M100 Appendix C AC Power Cord and Connectors The power cord's AC input plug must be compatible with the various international AC power outlets and the cord must meet the standards for the country/region in which it is used. All cords must meet the following specifications: Minimum 2 meters Length:... - Page 190 AC Power Cord and Connectors In Europe, two conductors power cord must be VDE type, H05VVH2-F or H03VVH2-F and for three conductors power cord must be VDE type, H05VV-F. For the United States and Canada, two pin plug configuration must be a 2- 15P (250V) or 1-15P (125V) and three pin plug coniguration must be 6-15P (250V) or 5-15P (125V) as designated in the U.
- Page 191 Satellite M100 Appendix D Express Media Player Supported Languages Enter one of the following codes to switch the Express Media Player's language settings for Audio language, Sub title language and disc menu language at DVD Setup menu. Code Language Code Language Code Language...
- Page 192 Express Media Player Supported Languages Code Language Code Language Code Language Occitan; Georgian Swedish Provencal Oromo; Afan Kazakh Swahili; Kiswahili Oromo; Galla Greenlandic; Oriya Tamil Kalaallisut Khmer; Punjabi; Panjabi Telugu Cambodian Kannada Polish Tajiki Korean Pashto; Pushto Thai Kashmiri Portuguese Tigrinya Kurdish Quechua...
- Page 193 Satellite M100 Glossary The terms in this glossary cover topics related to this manual. Alternate naming is included for reference. Abbreviations AC: alternating current AGP: accelerated graphics port BIOS: basic input output system CD-ROM: Compact Disc-Read Only Memory CD-RW: Compact Disc-Read/Write CMOS: complementary metal-oxide semiconductor CPU: central processing unit CRT: cathode ray tube...
- Page 194 Glossary SCSI: small computer system interface TFT: thin-film transistor USB: Universal Serial Bus VESA: Video Electronic Standards Association VGA: video graphics array WXGA: wide extended graphics array adaptor: A device that provides an interface between two dissimilar electronic devices. For example, the AC adaptor modifies the power from a wall outlet for use by the computer.
- Page 195 Glossary capacity: The amount of data that can be stored on a magnetic storage device such as a floppy disk or hard disk. It is usually described in terms of kilobytes (KB), where one KB = 1024 bytes and megabytes (MB), where one MB = 1024 KB.
- Page 196 Glossary DC: Direct Current. Electric current that flows in one direction. This type of power is usually supplied by batteries. default: The parameter value automatically selected by the system when you or the program do not provide instructions. Also called a preset value.
- Page 197 Glossary gigabyte (GB): A unit of data storage equal to 1024 megabytes. See also megabyte. graphics: Drawings, pictures, or other images, such as charts or graphs, to present information. hard disk: A non-removable disk usually referred to as drive C. The factory installs this disk and only a trained engineer can remove it for servicing.
- Page 198 Glossary Liquid Crystal Display (LCD): Liquid crystal sealed between two sheets of glass coated with transparent conducting material. The viewing- side coating is etched into character forming segments with leads that extend to the edge of the glass. Applying a voltage between the glass sheets alters the brightness of the liquid crystal.
- Page 199 Glossary parity: 1) The symmetrical relationship between two parameter values (integers) both of which are either on or off; odd or even; 0 or 1. 2) In serial communications, an error detection bit that is added to a group of data bits making the sum of the bits even or odd. Parity can be set to none, odd, or even.
- Page 200 TFT display: A liquid crystal display (LCD) made from an array of liquid crystal cells using active-matrix technology with thin film transistor (TFT) to drive each cell. TouchPad: A pointing device integrated into the TOSHIBA computer palm rest. Universal Serial Bus: This serial interface lets you communicate with several devices connected in a chain to a single port on the computer.
Need help?
Do you have a question about the Satellite M100 Series and is the answer not in the manual?
Questions and answers