
Related Manuals for Chicco NextFit


Summary of Contents for Chicco NextFit
- Page 1 Convertible Car Seat User Guide For future use, STORE USER GUIDE in compartment at rear of base. IS20140226.E ©2013 Artsana USA, Inc.
- Page 2 If you have any problems with your Chicco Child Restraint, or any questions regarding installation or use, please call: Chicco Customer Service 1-877-424-4226 Please have Model and Serial Number available when you call. These are located on a label on the bottom of the Child Restraint.
-
Page 3: Table Of Contents
TABLE OF CONTENTS Registration and Recall REAR-FACING INSTALLATION Child Guidelines Rear-Facing Setup Safe Use Checklist Install Using LATCH Important Warnings Install Using LAP-SHOULDER BELT Best Practices Install Using LAP BELT ONLY Need Help? FORWARD-FACING INSTALLATION CHILD RESTRAINT OVERVIEW Forward-Facing Setup Child Restraint Components Install Using LATCH LATCH and Tether Components... -
Page 4: Registration And Recall
REGISTRATION AND RECALL Please complete the Registration Card that came with your Child Restraint and mail it promptly. Child Restraints could be recalled for safety reasons. You must register this restraint to be reached in a recall. Send your name, address, e-mail address if available, and the restraint’s model number and manufacturing date to: Artsana USA, Inc. - Page 5 REGISTRATION AND RECALL PAGE INTENTIONALLY LEFT BLANK...
-
Page 6: Child Guidelines
CHILD GUIDELINES This Child Restraint is designed for children ages Birth to 6 years old. ONLY use this Child Restraint if the child meets BOTH of the following Weight and Height requirements: • Weight is between 5 and 65 pounds (2.2 and 29.4 kg). • Height is 49 inches (1245 mm) or less. - Page 7 CHILD GUIDELINES See Select Rear-Facing on page 22. REAR - FACING NEWBORN INSERT 5 lbs. 11 lbs. 22 lbs. 40 lbs. 65 lbs. (2.2 kg) (5 kg) (10 kg) (18 kg) (29.4 kg) NO LATCH FORWARD - FACING See Select Forward-Facing on page 24.
-
Page 8: Safe Use Checklist
SAFE USE CHECKLIST YOUR CHILD’S SAFETY DEPENDS ON YOU! You MUST follow the detailed instructions in this User Guide to ensure the steps below are performed correctly! Make sure your child meets the age, weight, and height requirements: Refer to the “Child Guidelines” section on page 4. Choose the proper Child Restraint configuration: REAR-FACING requirements on page 22... - Page 9 SAFE USE CHECKLIST Ensure that the Child Restraint is properly leveled when installed: REAR-FACING requirements on page 40 FORWARD-FACING requirements on page 58 Check Child Restraint for a snug fit in your car: While holding Child Restraint near belt path used, pull side to side and forward. Belt should remain tight and Child Restraint should not move more than 1”...
-
Page 10: Important Warnings
IMPORTANT WARNINGS WARNING DEATH or SERIOUS INJURY CAN OCCUR FAILURE TO FOLLOW THESE INSTRUCTIONS AND THE PRODUCT LABELS CAN RESULT IN SERIOUS INJURY OR DEATH TO YOUR CHILD. Take Time to Read This User Guide • Carefully read and understand all instructions and warnings in this User Guide. Your child’s safety depends on you knowing how to setup, install and use this Child Restraint properly. - Page 11 IMPORTANT WARNINGS WARNING DEATH or SERIOUS INJURY CAN OCCUR Secure Child Properly • Snugly adjust the harness around your child. A loose harness could cause the child to be ejected in a sudden stop or crash, resulting in serious injury or death. A snug strap should not allow any slack.
- Page 12 IMPORTANT WARNINGS WARNING DEATH or SERIOUS INJURY CAN OCCUR Install Child Restraint Correctly • WHEN USING THIS CHILD RESTRAINT REAR-FACING, DO NOT PLACE THIS CHILD RESTRAINT IN VEHICLE SEATING LOCATION WITH A FRONTAL AIR BAG, UNLESS THE AIR BAG CAN BE TURNED OFF.
- Page 13 IMPORTANT WARNINGS WARNING DEATH or SERIOUS INJURY CAN OCCUR Install Child Restraint Correctly • ALWAYS use the top tether strap on this child restraint when installed FORWARD-FACING, if a tether anchor is available. • NEVER use Child Restraint in a vehicle seating position where it cannot be secured tightly. A loosely installed child restraint will not protect your child in a crash.
- Page 14 • DO NOT use any accessories, pads or products not included with this Child Restraint, unless approved by Chicco USA. Doing so will void the warranty of this Child Restraint. • You MUST replace this Child Restraint if it has been involved in a crash, even if you cannot see visible damage.
- Page 15 IMPORTANT WARNINGS PAGE INTENTIONALLY LEFT BLANK...
-
Page 16: Best Practices
BEST PRACTICES • Ensure all vehicle occupants are properly restrained before traveling. Unrestrained occupants can be thrown around and may be seriously injured or seriously injure other occupants in a sharp turn, sudden stop or crash. • Do not leave loose objects, such as books, bags, etc., in the back of the vehicle. In the event of a sharp turn, sudden stop, or crash, loose objects can be thrown around and possibly cause serious injury to vehicle occupants. -
Page 17: Need Help
The following sources are available to help ensure your Child Restraint is properly installed: • Contact Chicco, USA by visiting our website at www.chiccousa.com or calling our Customer Service 1-877-424-4226. Please have Model and Serial Number available when you call. These are located on a label on the bottom of the Child Restraint. -
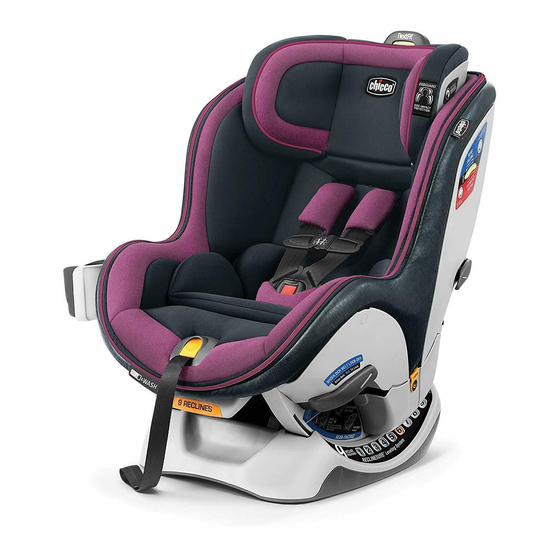
Page 18: Child Restraint Components
CHILD RESTRAINT COMPONENTS Adjustment Handle Newborn (Head Rest) Chest Insert Clip Bubble Level Harness Indicator Strap (Each Side) Shoulder Crotch Pads Strap Harness Harness Buckle Release Button Recline Position Harness Indicator Adjustment Rear Facing Recline Strap Adjustment Lock-Off (Each Side) Handle... - Page 19 CHILD RESTRAINT COMPONENTS Tether Tether Strap Storage Forward Forward Facing Facing Lock-Off Lock-Off LATCH Connector LATCH Connector Storage Storage LATCH Adjuster SuperCinch ™ (PULL 1 st ) LATCH Tightener PULL 2 nd) Instruction Manual Storage...
-
Page 20: Latch And Tether Components
LATCH AND TETHER COMPONENTS TETHER: Tether Strap Tether Strap Adjuster Tether Hook LATCH: LATCH Adjuster (PULL 1 st ) SuperCinch LATCH Tightener (PULL 2 nd ) LATCH Strap LATCH Connectors... - Page 21 LATCH AND TETHER COMPONENTS Tether LATCH PULL PULL PULL...
-
Page 22: Latch And Tether Storage
LATCH AND TETHER STORAGE Always make sure LATCH Components are properly stored in the compartments when not in use. LATCH STORAGE: Store each LATCH strap in the compartments located on either side of the Child Restraint base when not in use. Make sure LATCH Connector Storage compartments are properly closed. - Page 23 LATCH AND TETHER STORAGE...
- Page 24 FORWARD-FACING guidelines on page 24. • Chicco and the American Academy of Pediatrics recommend all children ride REAR-FACING until age 2 or they reach the weight/ height limits of this seat.
- Page 25 SELECT REAR FACING POSITION REAR-FACING: REAR - FACING 5 – 40 lbs (2.2 – 18 kg) NEWBORN INSERT REAR-FACING with children: 5 lbs. 11 lbs. 40 lbs. • Who weigh between 5 and 40 lbs (2.2 kg) (5 kg) (18 kg) (2.2 –18 kg).
- Page 26 If the child is not within these requirements because the child is too small, review the REAR-FACING guidelines on page 22. • Chicco and the American Academy of Pediatrics recommend that children ride REAR FACING for as long as possible. For the best protection, keep the child rear-facing until the child no longer meets the requirements for REAR-FACING.
- Page 27 SELECT FORWARD FACING POSITION FORWARD-FACING: FORWARD - FACING 22 – 65 lbs (10 – 29.4 kg) NO LATCH FORWARD-FACING with children: 22 lbs. 40 lbs. 65 lbs. (10 kg) (18 kg) (29.4 kg) • Who are at least one year old. • Who weigh between 22 and 65 lbs (10 –29.4 kg).
-
Page 28: Adjusting Crotch Strap
ADJUSTING CROTCH STRAP Adjust Crotch Strap if strap is underneath child. Lift up on the back padding. Unsnap each side of the back padding and pull forward on the seat padding. Slide the button on the Crotch Strap lock while pulling up on the Crotch Strap to open the compartment (a, b). - Page 29 ADJUSTING CROTCH STRAP...
-
Page 30: Newborn Insert
5 and 11 lbs (2.2 and 5 kg). To ensure a better fit for smaller infants the Newborn Insert may be needed. Do NOT use any other infant insert or pillows. Only use the one provided by Chicco for this Child Restraint. - Page 31 NEWBORN INSERT...
-
Page 32: Vehicle Seating Positions
VEHICLE SEATING POSITIONS WARNING! WHEN USING THIS CHILD RESTRAINT REAR-FACING, DO NOT PLACE THIS CHILD RESTRAINT IN A VEHICLE SEATING LOCATION WITH A FRONTAL AIR BAG, UNLESS THE AIR BAG CAN BE TURNED OFF. The back seat is the safest place for children 12 and under. See your vehicle owner’s manual for Child Restraint installation and instructions. - Page 33 VEHICLE SEATING POSITIONS Some vehicles have no seating positions which are compatible with this Child Restraint. If in doubt, contact the vehicle manufacturer for assistance. Only forward-facing vehicle seats can be used with this Child Restraint. Do not use on a folded down Make sure no more than 3 inches of the vehicle seat back.
-
Page 34: Vehicle Seat Belts
VEHICLE SEAT BELTS The information in this section only applies to installation with vehicle seat belts. For simplest installation use LATCH - Refer to page 34 for details. Vehicle seat belts differ from vehicle to vehicle. Refer to your vehicle owner’s manual for specific information about seat belts and their use with Child Restraints. - Page 35 VEHICLE SEAT BELTS The following types of vehicle belts MUST NOT be used to install this Child Restraint. If any of the belt types listed below are in the chosen seating position, choose another vehicle seating position or use LATCH if available. 1.
-
Page 36: What Is Latch
WHAT IS LATCH? WARNING: This Child Restraint is designed to be used with lower LATCH anchors at the standard spacing (11 inches) ONLY! Refer to vehicle owner’s manual for information about LATCH and Child Restraint installation positions. LATCH ower nchors and ethers for ildren United States Motor Vehicle Safety Standards have defined a system for installing... - Page 37 WHAT IS LATCH? Vehicle Top Tether Anchor Points Vehicle Lower Anchor Points Vehicle Seat Crease (Fig. a) (Fig. b) (Fig. c)
-
Page 38: What Is A Tether
WHAT IS A TETHER? Tether anchor locations vary from vehicle to vehicle. Check your vehicle owner’s manual and look for the tether anchor symbol as shown. A tether reduces movement of a forward facing child restraint in a crash and helps to achieve a tight installation. - Page 39 WHAT IS A TETHER? Rear Shelf Back Wall Back of Seat Vehicle Floor...
-
Page 40: Rear-Facing Setup
REAR-FACING SETUP Infants may have difficulty breathing when in a sitting position. Make sure the seat is reclined properly so that your child’s head does not fall forward. Failure to properly recline the Child Restraint could increase the child’s risk of serious injury or death. - Page 41 REAR-FACING SETUP...
- Page 42 REAR-FACING SETUP Place Child Restraint rear-facing on selected vehicle seat. Make sure it is not blocking the vehicle belt buckle. Installation on a Level Surface: Locate the Bubble Level Indicator label and re-adjust the seat recline to any position that the Bubble falls between the lines for REAR-FACING installation.
- Page 43 REAR-FACING SETUP L E V E L L E V E L...
-
Page 44: Install Using Latch
INSTALL USING LATCH Locate the LATCH Connector Storage compartments. Remove LATCH LATCH Tightener strap (Pull 2 nd ) SuperCinch ™ straps. Make sure and LATCH Adjuster strap (Pull 1 st ) are loosened to their full length. Grab both ends of LATCH straps. Slide LATCH strap to blue REAR-FACING opening on both sides. - Page 45 INSTALL USING LATCH Make sure SuperCinch ™ Make sure LATCH Adjuster strap (Pull 1 st ) LATCH Tightener strap (Pull 2 nd ) is loosened to is loosened to the full the full length. length.
- Page 46 INSTALL USING LATCH Locate the LATCH anchor bars in your vehicle. Attach both LATCH Connectors to the vehicle LATCH anchor bars. Pull up on the end of the LATCH Adjuster strap (Pull 1 st ) until strap is tight. Tightener strap (Pull 2 nd ) to secure the ™...
- Page 47 INSTALL USING LATCH PULL PULL PULL PULL “CLICK” “CLICK”...
-
Page 48: Install Using Lap-Shoulder Belt
INSTALL USING LAP-SHOULDER BELT Always use the Lock-Off on the opposite side of the vehicle belt buckle. Lift up on Lock-Off Lever to open it. Route vehicle lap-shoulder belt through the blue REAR-FACING seat belt path on the side of Child Restraint. Pull vehicle belt up through the opening in Child Restraint base. - Page 49 INSTALL USING LAP-SHOULDER BELT...
- Page 50 INSTALL USING LAP-SHOULDER BELT While pushing down on the Child Restraint (a) pull the vehicle shoulder belt (b) to tighten vehicle lap belt. Continue to pull on the vehicle shoulder belt and position the shoulder belt in the middle of the Lock-Off area between the tabs. Lock-Off will not close and lock in place if the vehicle belt is not positioned correctly.
- Page 51 INSTALL USING LAP-SHOULDER BELT...
- Page 52 INSTALL USING LAP-SHOULDER BELT CHECK YOUR WORK Hold Child Restraint at each side near REAR-FACING vehicle belt paths. Pull side to side and forward. Vehicle belt should remain tight and Child Restraint should not move more than 1” (25 mm) from vehicle seat back or side-to-side. ...
- Page 53 INSTALL USING LAP-SHOULDER BELT PAGE INTENTIONALLY LEFT BLANK...
-
Page 54: Install Using Lap Belt Only
INSTALL USING LAP BELT ONLY Route vehicle lap belt through the blue REAR-FACING seat belt path on the side of Child Restraint. Pull vehicle belt up through the opening in Child Restraint base. Route the vehicle belt UNDER the seat padding and behind the Crotch Strap when Crotch Strap is located in forward position. - Page 55 INSTALL USING LAP BELT ONLY...
- Page 56 INSTALL USING LAP BELT ONLY While pushing down on the Child Restraint (a) pull the loose end of the vehicle lap belt (b) to tighten belt. CHECK YOUR WORK Hold Child Restraint at each side near REAR-FACING vehicle belt paths. Pull side to side and forward.
- Page 57 INSTALL USING LAP BELT ONLY...
-
Page 58: Forward-Facing Setup
FORWARD-FACING SETUP IF TETHER ANCHOR IS AVAILABLE IN YOUR VEHICLE - Before placing the Child Restraint in the vehicle, remove Tether from the tether compartment. If a tether anchor is not available, the Tether should be stored properly. Make sure the vehicle is on a level surface, if possible. LEVEL Squeeze the Recline Adjustment Handle on front of Child Restraint and push back to adjust to an upright position as shown (a). - Page 59 FORWARD-FACING SETUP...
- Page 60 FORWARD-FACING SETUP Place Child Restraint facing forward on selected vehicle seat. Make sure it is not blocking the vehicle belt buckle. Lay Tether Strap over the back of the vehicle seat. Installation on a Level Surface: Locate the Bubble Level Indicator label and re-adjust the seat recline to any position that the Bubble falls between the lines for FORWARD-FACING...
- Page 61 FORWARD-FACING SETUP L E V E L L E V E L...
-
Page 62: Install Using Latch
INSTALL USING LATCH Do not use the lower anchors of the child restraint anchorage system (LATCH system) to attach this Child Restraint when restraining a child weighing more than 40lbs (18 kg) with the internal harness of the child restraint. Locate LATCH Connector Storage compartments. - Page 63 INSTALL USING LATCH Make sure SuperCinch ™ Make sure LATCH Adjuster strap (Pull 1 st ) LATCH Tightener strap (Pull 2 nd ) is loosened to is loosened to the full the full length. length.
- Page 64 INSTALL USING LATCH Locate the LATCH anchor bars in your vehicle. Attach both LATCH Connectors to the vehicle LATCH anchor bars. Pull up on the end of the LATCH Adjuster strap (Pull 1 st ) until strap is tight. Tightener strap (Pull 2 nd ) to SuperCinch ™...
- Page 65 INSTALL USING LATCH PULL PULL PULL PULL PULL PULL PULL PULL “CLICK” “CLICK”...
- Page 66 INSTALL USING LATCH Locate Tether anchor in your vehicle. Attach Tether Hook. Pull Tether Adjuster strap to tighten. CHECK YOUR WORK Hold Child Restraint at each side near forward-facing vehicle belt path. Pull side to side and forward. Child Restraint should not move more than 1” (25 mm) from vehicle seat back or side-to-side.
- Page 67 INSTALL USING LATCH...
- Page 68 INSTALL USING LAP-SHOULDER BELT Always use the Lock-Off on the opposite side of the vehicle belt buckle. Lift-Up on Lock-Off Lever to open it. Route vehicle lap-shoulder belt through the red FORWARD-FACING seat belt path on the side of Child Restraint. Lift the padding on the back of the seat and pull the vehicle belt through the opening on the side of Child Restraint.
- Page 69 INSTALL USING LAP-SHOULDER BELT...
- Page 70 INSTALL USING LAP-SHOULDER BELT While pushing down on the Child Restraint (a) pull the vehicle shoulder belt (b) to tighten vehicle lap belt. Continue to pull on the vehicle shoulder belt and position the shoulder belt in the middle of Lock-Off area between tabs. Lock-Off will not close and lock in place if the vehicle belt is not positioned correctly.
- Page 71 INSTALL USING LAP-SHOULDER BELT...
- Page 72 INSTALL USING LAP-SHOULDER BELT Locate Tether anchor in your vehicle. Attach Tether Hook. Pull Tether Adjuster strap to tighten. CHECK YOUR WORK Hold Child Restraint at each side near FORWARD-FACING vehicle belt path. Pull side to side and forward. Vehicle belt should remain tight and Child Restraint should not move more than 1”...
- Page 73 INSTALL USING LAP-SHOULDER BELT...
-
Page 74: Install Using Lap Belt Only
INSTALL USING LAP BELT ONLY Route vehicle lap belt through the red FORWARD-FACING seat belt path on the side of Child Restraint. Lift the padding on the back of the seat and pull the vehicle belt through the opening on the side of the Child Restraint. - Page 75 INSTALL USING LAP BELT ONLY...
- Page 76 INSTALL USING LAP BELT ONLY While pushing down on the Child Restraint (a) pull the loose end of the vehicle lap belt (b) to tighten. Locate Tether anchor in your vehicle. Attach Tether Hook. Pull Tether Adjuster strap to tighten. CHECK YOUR WORK Hold Child Restraint at each side near FORWARD-FACING vehicle belt path.
- Page 77 INSTALL USING LAP BELT ONLY...
-
Page 78: Securing Child With Harness
SECURING CHILD WITH HARNESS For a better fit in the Child Restraint with smaller infants, the Newborn Insert provided may be needed. See page 28 for more details. If Crotch Strap is under child, the crotch strap will need to be re-positioned, refer to page 26 “Adjusting Crotch Strap”. - Page 79 SECURING CHILD WITH HARNESS...
- Page 80 SECURING CHILD WITH HARNESS Place child in Child Restraint with child’s back flat against the back of the seat. Pull Harness Straps over the child’s shoulders and around the child’s waist. Make sure there are no twists in Harness Strap. If the child is wearing cold weather clothing, give extra attention to adjusting the Harness - make sure the Harness Straps lie flat on the child’s shoulders, are adjusted snugly so that the clothing is compressed and the child cannot lean forward, and the Chest Clip is...
- Page 81 SECURING CHILD WITH HARNESS...
- Page 82 SECURING CHILD WITH HARNESS Adjust Harness Strap height position up or down by squeezing Adjustment Handle on top of Head Rest. Make sure Head Rest locks into position before tightening Harness. REAR-FACING POSITION - Position the Harness Straps at or below the child’s shoulders. FORWARD-FACING POSITION - Position the Harness Straps at or above the child’s shoulders.
- Page 83 SECURING CHILD WITH HARNESS REAR-FACING FORWARD-FACING AT OR BELOW AT OR ABOVE...
- Page 84 SECURING CHILD WITH HARNESS Insert each Buckle Tongue into Harness Buckle; listen for a click (a). Pull up firmly on both Buckle Tongues to make sure that they are securely latched (b).
- Page 85 SECURING CHILD WITH HARNESS “CLICK”...
- Page 86 SECURING CHILD WITH HARNESS Fasten Chest Clip by snapping both sides together; listen for a click. Press the button on the Chest Clip and slide into desired position. Harness straps must fit snugly and lay flat on the center of your child’ s shoulders. The chest clip can be used in either position.
- Page 87 SECURING CHILD WITH HARNESS “CLICK”...
- Page 88 SECURING CHILD WITH HARNESS Tighten the harness by pulling slowly on Harness Adjustment Strap until the harness is snug on child (a). If you can pinch a fold in the strap at the child’s shoulders, harness is too loose (b). If the harness is too loose pull the Harness Adjuster strap more.
- Page 89 SECURING CHILD WITH HARNESS...
- Page 90 SECURING CHILD CHECKLIST Harness Straps must be snug. If you can pinch a fold in the strap, the harness is too loose. A snug strap should not allow any slack. It lies in a relatively straight line without sagging. It does not press on the child’s flesh or push the child’s body into an unnatural position.
- Page 91 SECURING CHILD CHECKLIST Check the position of Chest Clip: Chest Clip should be centered on the child’s chest, level with the armpits. Never secure child in Child Restraint with child dressed in bulky garments or heavy clothing. Heavy clothing can prevent harness from being properly tightened around child. ...
-
Page 92: Installation On An Aircraft
INSTALLATION ON AN AIRCRAFT When traveling by airplane with your child, Chicco recommends taking the Child Restraint on the airplane with you so that you can use it with your child. Not only will it protect your child during take-off, landing, and turbulence, but also it will give your child a more comfortable place to sit. - Page 93 PAGE INTENTIONALLY LEFT BLANK...
-
Page 94: Cup Holder
CUP HOLDER WARNING - PLASTIC CONTAINERS ONLY - No glass or metal containers. Only use cups with less than 12 oz. capacity. Never place sharp or pointed objects in Cup Holder. In a crash these objects could hit you or your child and cause serious injuries. - Page 95 CUP HOLDER...
-
Page 96: Cleaning And Maintenance
CLEANING AND MAINTENANCE REMOVING SHOULDER PADS: Unhook the Velcro and remove Shoulder Pads as shown. INSTALL SHOULDER PADS: Re-attach Shoulder Pads by folding the Velcro Tab over the Harness Strap (a). Secure both Velcro Tabs together (b). Make sure they are oriented as shown (c). - Page 97 CLEANING AND MAINTENANCE...
-
Page 98: Removing/Installing Soft Goods
CLEANING AND MAINTENANCE REMOVING SOFT GOODS: Adjust Head Rest to its highest position. Unsnap Head Rest and pull up on the fabric to reveal two hooked elastic strings (a). Unhook both elastic strings and remove. Pull seat padding away from the Harness Release button (b). Unsnap each side of the back padding and pull forward to reveal seat bottom. - Page 99 CLEANING AND MAINTENANCE...
- Page 100 INSTALL CROTCH STRAP: Reverse the removing instructions above to reinstall. DO NOT USE Child Restraint if any part of the harness is damaged. For proper removal and installation of the harness straps visit the Chicco website at www.chiccousa.com or call 1-877-424-4226.
- Page 101 CLEANING AND MAINTENANCE...
- Page 102 CLEANING AND MAINTENANCE DO NOT USE BLEACH, solvents or household cleaners as they may weaken plastics and straps. DO NOT USE SOAPS OR LUBRICANTS on Buckle or LATCH hardware. It may cause them to malfunction. • Fabrics may be spot-cleaned: Hand wash using mild soap and water, or machine washed in cold water on delicate cycle using mild detergent.
- Page 103 Sponge clean, using warm water and mild soap. If debris in buckle, remove and rinse in warm cup of water. Air dry. See page 98 for removal instructions. Do NOT remove LATCH or Adjuster straps. For additional information visit the Chicco website at www.chiccousa.com or call 1-877-424-4226.
Need help?
Do you have a question about the NextFit and is the answer not in the manual?
Questions and answers