Table of Contents
Advertisement
Advertisement
Table of Contents

Related Manuals for Samsung ER-290


Summary of Contents for Samsung ER-290
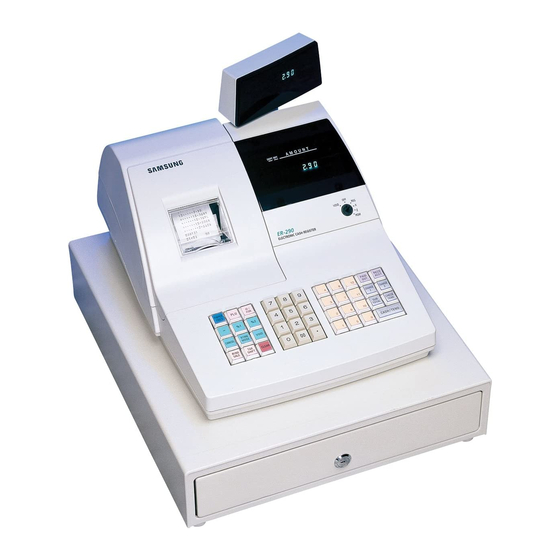
- Page 1 SAMSUNG ER-290 ELECTRONIC CASH REGISTER...
-
Page 2: Table Of Contents
INTRODUCTION ............................5 2. BASIC FEATURES AND FUNCTIONS..................... 5 3. PROGRAMMING..........................5 4. OPERATIONS........................... 5 5. VOID OPERATIONS......................... 5 6. REPORTS............................5 7. SYSTEM BALANCING ........................5 8. SPECIFICATION..........................5 INITIAL SET-UP INSTRUCTION......................6 1-1. UNPACK THE CASH REGISTER ....................6 1-2. - Page 3 3-8. PLU (Price Look Up)........................27 3-8-1. OPEN PLU ..........................27 3-8-2. PRESET PRICE PLU ....................... 28 3-9. DATE ............................29 3-10. TIME ............................29 3-11. REGISTER NUMBER........................ 30 3-12. RECEIPT/JOURNAL ......................... 30 3-13. READ THE PROGRAMMING REPORT ................... 30 OPERATION..............................
- Page 4 4-9-1. OPEN DRAWER ........................48 4-9-2. NON ADD NUMBER ........................ 49 4-10. RECEIVED ON ACCOUNT ....................... 49 4-11. PAID OUT ..........................49 4-11-1. PAID OUT OPERATION ......................49 4-11-2. RECEIPT BUFFER......................... 51 4-12. SUBTOTAL ..........................52 4-13. TENDER ............................ 52 4-13-1.
-
Page 5: Introduction
4. OPERATIONS 5. VOID OPERATIONS - which guides the user through the basic operation of the ER-290. The use of the function keys are included in this section. 6. REPORTS - which lists financial reports, time report, PLU report, Clerk report, Cash-in-drawer report, and Check-in-drawer report. -
Page 6: Initial Set-Up Instruction
INITIAL SET-UP INSTRUCTION The following instructions describe how to unpack and start up the cash register. 1-1. UNPACK THE CASH REGISTER 1-1-1. Unpack and unwrap cash register. 1-1-2. Locate in the packing the following items. · 1 roll of paper ·... -
Page 7: Install Paper In The Printer
INITIAL SET-UP INSTRUCTION 1-3. INSTALL PAPER IN THE PRINTER 1-3-1. Remove the printer cover and cut or tear the end of the paper roll evenly for the straight, even edge, for proper feeding through the printhead. 1-3-2. Place paper roll in the paper holder so that paper will feed from the bottom of the roll. - Page 8 INITIAL SET-UP INSTRUCTION 1-3-5. For journal use: Insert the leading end of the paper into the paper take-up spool, wind the paper two or three turns around the spool shaft and install the spool in the mount. 1-3-6. For ticket use: Pass the outside plain tape through the window of the printer cover and replace the printer cover.
-
Page 9: Changing Ribbon
INITIAL SET-UP INSTRUCTION 1-4. CHANGING RIBBON 1-4-1. Remove the printer cover. 1-4-2. Lift up ink ribbon. 1-4-3. Insert the new ink ribbon. 1-4-4. Replace the printer cover. -
Page 11: Basic Features And Functions
BASIC FEATURES AND FUNCTIONS 2-1. KEYBOARD LAYOUT FEED X/TM CLERK CHARGE CHECK CANCEL TOTAL #/NS CASH/ TEND FUNCTION KEY NUMERIC KEY DEPARTMENT, PLU, FUNCTION AND TENDER KEY 2-2. FUNCTION KEY DESCRIPTIONS FEED - Used to advance printer paper. 00,0-9 - For all numeric entries in REG, X, Z, VOID, and PGM mode. - CLEAR key is used to clear errors made on keybord prior to pressing the registration key. - Page 12 BASIC FEATURES AND FUNCTIONS - VOID key is used for item void operation in REG and VOID mode. - RETURN MERCHANDISE key is used for refund operation in REG mode. Used to set up the decimal and tax information in PGM mode. - MINUS key is used to register a negative amount in REG and VOID mode.
- Page 14 BASIC FEATURES AND FUNCTIONS CHECK - Used to finalize the transaction in cheque sales in REG and VOID mode. Used to convert check into cash in REG mode. CASH/TEND - Used to finalize cash sales in REG and VOID mode. Used to calculate the change in REG and VOID mode.
-
Page 15: Control Lock
BASIC FEATURES AND FUNCTIONS 2-3. CONTROL LOCK The Keylock has 7 positions. VOID Key locks are : 2-3-1. 'VOID' - Used for void operations outside of a sale. 2-3-2. 'OFF' - The system is inoperable. 2-3-3. 'REG' - Used for normal operations. 2-3-4. -
Page 16: Display
BASIC FEATURES AND FUNCTIONS 2-5. DISPLAY A M O U N T CLERK D P T : Indicates the Department number of the last item entered. R P T : Indicates the number of times an item has been repeated or multiplied. AMOU : Indicates the number of times an item has been repeated or multiplied CLERK... -
Page 17: Battery System
turn the power on again. 2-8. BATTERY SYSTEM This model is equipped with a battery system that provides back up power to the register memory if the power cord is accidentally disconnected or if a power interruption occurs. The register program, the transaction totals, and the grand total will be retained in the machine because of the memory protection feature. -
Page 18: Programming
PROGRAMMING Setting up features before use. When you finish with this program, make it a rule to depress the CASH/TEND key. *TURN CONTROL LOCK POSITION TO PGM MODE. 3-1. SYSTEM OPTION System option is provided for your selections of this model's functions according to the your requirements. - Page 19 PROGRAMMING STATUS TABLE S Y S T E M O P T I O N STATUS Print GRAND TOTAL in X,Z report. YES = 0 NO = 1 Print GROSS TOTAL in X,Z report. YES = 0 NO = 1 Select printing DATE &...
- Page 20 PROGRAMMING S Y S T E M O P T I O N STATUS Print data of VOID position in report YES = 0 NO = 1 Select information of TAX - Print separately TAX Amount. - Print TAX Amount Total. - Not print Taxable Total.
- Page 21 NO = 1 Allow Check Cashing. YES = 0 PROGRAMMING S Y S T E M O P T I O N STATUS Select Information of Clerk - Not allow function of Clerk - Allow function of Clerk as Stay down mode. - Allow function of Clerk as Pop up mode.
-
Page 22: Decimal Point & Tax Information
PROGRAMMING 3-2. DECIMAL POINT & TAX INFORMATION This programming is for setting up the decimal point and tax information. Decimal point information comes in four varieties - from 0 to 3 and tax information comes in two varieties - VAT, ADD ON TAX. If you want to set up this information, do it as below. -
Page 23: Percent(%)
3-4. PERCENT(%) Percent(%) key is programmed either positive or negative, as an open or preset amount of percentage. This is set up and calculated between 0.001% and 99.999%. The status of Percent key has two options. One is that tax calculated before percent rate is applied, and the other is that tax calculated after percent rate is applied. -
Page 24: Setting Up Secret Code Of Clerk
You can use the Clerk function as standard. Or you can set up the System option to allow. You can input a secret code for each clerk. The secret code is made up of 3 figures, which are numbers between 100 and 999. Each clerk has his own number between 1 and 4. -
Page 25: Changing The Secret Clerk Code
PROGRAMMING 3-6-2. CHANGING THE SECRET CLERK CODE You can change the existing secret code of a clerk. By inputting the old secret No. followed by the new secret No. of the clerk. CLERK - n1 n2 n3 n4 n5 n6 n7 n8 - CLERK └─────┘... -
Page 26: Department
PROGRAMMING 3-7. DEPARTMENT This programming consists of two parts. One is OPEN DEPARTMENT, and the other is PRESET PRICE DEPARTMENT. Each department can be programmed as OPEN or PRESET PRICE. 3-7-1. OPEN DEPARTMENT This is consist of HDLO(High Digit Lock Out) and status. HDLO means entries above a limit are not allowed. -
Page 27: Preset Price Department
3-7-2. PRESET PRICE DEPARTMENT Preset price department consists of preset price and status. Preset price can be programmed up to seven digits. Status is equal to open department's. The sequence of inputting is as follows. n8 - DPT └ Status(same as open department) └─────────────────┘... -
Page 28: Preset Price Plu
Department NOTE !! Refer to 3-7-1. OPEN DEPARTMENT about HDLO and status. 3-8-2. PRESET PRICE PLU n1 n2 n3 - PLU - n4 n5 n6 n7 n8 n9 n10 n11 - DPT └────────────┘ └ Status └────┘ PLU No.(1 - 300) Preset price (same as open department) Eaxmple. -
Page 29: Date
PROGRAMMING 3-9. DATE This is related to date sequence. You have to program according to following date sequence. n1 n2 n3 n4 n5 n6 - SUBTOTAL NOTE !! Day is allowed 1 to 31, month is allowed 1 to 12, year is consist of a number of two figures. -
Page 30: Register Number
3-11. REGISTER NUMBER You can set up a register number which consists of 2 figures. n1 n2 - #/NS Example. Set up this register number as 30. * ..3 0 # 0 #/NX 0 0 0 0 0 3 1 5 . - Page 31 YOUR RECEIPT - STAMP THANK YOU 2 5 - 1 2 - 1 9 9 7 - HDLO, SINGLE ITEM and VAT STATUS 1 ..1 0 . 0 0 T 1 - DEPT. NO., UNIT PRICE, TAX SYMBOL 2 .
- Page 32 * ..0 - % - -% TAX CALCULATION STATUS * ..1 0 . 0 0 0 - % - -% RATE * ..0 + % - +% TAX CALCULATION STATUS * .
- Page 33 4. OPERATIONS Now, you can operate this model. This part explains how to operate the cash register. The tender keys are CASH/TEND , CHECK , CHARGE key. When the Clerk of System option is set up, operate the Clerk function REG mode first before using other functions in * TURN CONTROL LOCK POSITION TO REG MODE.
-
Page 34: Operation
OPERATION 4-1-1. CLERK SIGN ON You have to program the System option about Clerk and set up the secret code of the Clerk before operating the Clerk function. The system option has three types. One is used without the Clerk function, another is the Stay down mode, and the other is the Pop up mode. -
Page 35: Clerk Sign Off
4-1-2. CLERK SIGN OFF When you sign off current Clerk, depress the O key and the CLERK in order. Then the end of display is not showed the comma. -
Page 36: Department
OPERATION 4-2. DEPARTMENT This operation is when you enter a sales item using the department key. Watch the display when you are operating this key. One digit of the display indicate department No. and items. 4-2-1. OPEN DEPARTMENT You will probably have programmed the department before using this model. -
Page 37: Department Repeat Entry
4-2-3. DEPARTMENT REPEAT ENTRY 2 5 - 1 2 - 1 9 9 7 This is applied to either open or preset price department. 2 ..4 . 0 0 T 2 2 ..4 . 0 0 T 2 Depress again the department key used for the item just 1 . -
Page 38: Department Multiplication With Decimal Point
4-2-5. DEPARTMENT MULTIPLICATION WITH DECIMAL POINT 2 5 - 1 2 - 1 9 9 7 X/TM ── Multiple Department with decimal point · * ..1 . 2 0 0 X @ ..1 . 0 0 DPT5 ──... -
Page 39: Single Item Department
OPERATION 4-2-7. SINGLE ITEM DEPARTMENT For example if Department 4 is programmed as a single item, Department 4 will not operate as a single sale if another department has already been used. And this is applies to open or preset price departments. 2 5 - 1 2 - 1 9 9 7 DPT4 4 . -
Page 40: Plu Overriding
4-3-3. PLU OVERRIDING Press the RA key before entering the number of the PLU in case of overriding of the preset PLU. 2 5 - 1 2 - 1 9 9 7 RA ── PLU Overriding * 0 1 2 PLU ──... -
Page 41: Plu Multiplication
OPERATION 4-3-5. PLU MULTIPLICATION 2 5 - 1 2 - 1 9 9 7 X/TM ── Quantity * ..2 X ─┐ @ ..5 . 0 0 │... -
Page 42: Percent
OPERATION 4-4 . PERCENT These keys are used to add or subtract a percent rate to or from an individual sale entry item or the entire sale. Each of the keys can function with a rate manually entered or a preset rate. To activate the preset rate entry, rate setting is necessary. -
Page 43: Percent On A Department Or Plu For The Manual Rate
OPERATION 4-4-2. PERCENT ON A DEPARTMENT OR PLU FOR THE MANUAL RATE You can operate this key without the preset rate. The manual rate is the number of 5 figures between 0 % and 99.999 %. ┌ -% ‥‥‥ n1 n2 . n3 n4 n5 - │ └... -
Page 44: Percent On Sale Total
OPERATION 4-4-3. PERCENT ON SALE TOTAL ┌ -% ‥‥‥ SUBTOTAL - │ In case of preset rate └ +% ┌ -% ‥‥‥ SUBTOTAL - n1 n2 . n3 n4 n5 - │ In case of the manual rate └ +% └─────────┘... -
Page 45: Return Merchandise
OPERATION 4-5. RETURN MERCHANDISE This operation is used to return merchandise. See the follows. ┌ DPT RF │ -- In case of Preset price └ n1 n2 n3 PLU ┌ n1 n2 n3 n4 n5 n6 n7 - DPT -- In case of Manual price │... -
Page 47: Void
OPERATION 4-6. VOID 2 5 - 1 2 - 1 9 9 7 4-6-1. LAST ITEM VOID / ERROR ITEM 1 ..1 0 . 0 0 T 1 This key corrects the last item or voids the last item only. 4 . -
Page 48: Minus
CASH/TEND ── Tender OPERATION 4-7. MINUS DPT1 ── Sale item 2 5 - 1 2 - 1 9 9 7 DPT2 1 ..1 0 . 0 0 T 1 2 ..2 0 . 0 0 T 2 ──... -
Page 49: Non Add Number
OPERATION 4-9-2. NON ADD NUMBER This is used to print the reference number. n1 n2 n3 n4 n5 n6 n7 - #/NS └────────────┘ Reference number Example. The reference number is 1234567. 2 5 - 1 2 - 1 9 9 7 7 - #/NS * . - Page 50 Example. Paid out 20.00. 2 5 - 1 2 - 1 9 9 7 * ..2 0 . 0 0 P O 0 0 0 0 3 3 1 5 . 3 1...
-
Page 51: Receipt Buffer
OPERATION 4-11-2. RECEIPT BUFFER Receipt issued when required. Set up System option 21. NOTE !! Refer to 3-1. SYSTEM OPTION about receipt buffer. Before operating the register, depress the PO key. This will suppress printing. If receipt required press the CASH/TEND key. Depress the PO key again, printing will resume. -
Page 52: Subtotal
OPERATION 4-12. SUBTOTAL 2 5 - 1 2 - 1 9 9 7 DPT1 ── Sale item 1 ..2 0 . 0 0 T 1 SUBTOTAL ── Subtotal * ..2 0 . 0 0 S T * . -
Page 53: Charge Tender
Tender on Check 4-13-3. CHARGE TENDER DPT3 ── Sale item 2 5 - 1 2 - 1 9 9 7 DPT3 ── Repeat entry 3 ..2 0 . 0 0 3 ..2 0 . 0 0 * . -
Page 54: Post Tender
CHARGE ── Non-amount Tender on Charge 4-13-6. POST TENDER Allows change calculation option is after finalization. NOTE !! Refer to 3-1. SYSTEM OPTION about Post tender. 2 5 - 1 2 - 1 9 9 7 DPT1 ── Sale item 1 . -
Page 55: Reports
REPORTS System reports are divided into two basic categories; "X", or read-only and "Z", or read & reset to zero. Most reports are available in both categories. NOTE 11 Refer to REPORT TABLE about report. 6-1. CASH-IN-DRAWER DECLARATION In System Option Programming (3-1), Cash-In-Drawer Declaration can be programmed as compulsory. -
Page 56: Cash-In-Drawer Report
REPORTS 6-2. CASH-IN-DRAWER REPORT After depressing the SUBTOTAL key in X mode, Cash-in-drawer Read Report will be issued. You can check cash on hand by this means. 2 5 - 1 2 - 1 9 9 7 * ..4 2 8 . 4 4 R 1 0 0 0 0 4 3 1 5 . -
Page 57: Financial Daily Report - X Mode
Financial report is divided into two. One is Daily financial report and the other is Period financial report. You can issue Daily financial report with the CASH/TEND key and Period financial report with the CHARGE key. 6-4-1. FINANCIAL DAILY REPORT - X MODE This Report is read daily financial report. -
Page 58: Plu
Finalcial Daily Read CASH/TEND Read & Reset Financial Period Read CHARGE Read & Reset T I M E Read X/TM Read & Reset Read Read & Reset From-To Read Start number PLU,PLU The Last number of PLU,PLU C L E R K Read CLERK Read &... - Page 59 REPORTS FINANCIAL REPORT 2 5 - 1 2 - 1 9 9 7 @ ..1 Z 1 -- RESET(Z) COUNTER, MODE -- PAID OUT COUNTER -- TIMELY TOTAL -- DEPARTMENT NO, COUNTER 1 .
- Page 60 REPORTS @ ..2 -- SALE -% COUNTER * ..- 5 . 0 0 - % -- SALE -% TOTAL @ ..0 -- SALE +% COUNTER -- SALE +% TOTAL * .
-
Page 61: Time Report
REPORTS 6-5. TIME REPORT If you depress the X/TM key in X mode, and then it will issue Time Read Report. If you depress the X/TM key in Z mode, it will issue Time Read and Reset Report. 2 5 - 1 2 - 1 9 9 7 @ . -
Page 62: From-To Plu Report
REPORTS 6-6-1. FROM-TO PLU REPORT Enter the start number of PLU to be read, depress the PLU key, then the last number of PLU to be read, depress the PLU key in X mode. Example. Issue From 10 To 20 PLU REPORT. PLU ───... -
Page 63: Clerk Report
After depressing the PLU key in Z mode, PLU Read and Reset Report will be issued. 2 5 - 1 2 - 1 9 9 7 @ ..1 Z 1 -- RESET(Z) COUNTER, MODE * 0 1 2 . -
Page 65: System Balancing
SYSTEM BALANCING 7-1. DEPARMENT SALES TOTAL The sum of all department totals: Add all positive departments, subtract all negative department. 7-2. NET TOTAL Net total = The sum of all department totals + Tax total (Add-on tax) + % total + - total 7-3. -
Page 66: Specification
SPECIFICATION : AC 110V/230V ± 10%, 50/60 ㎐ ·POWER ·OPERATING TEMPERATURE : 0℃ - 40℃ ·MEMORY PROTECTION : Approx. 60 days battery ·DISPLAY UNIT : 9 digits (front and rear) ·PRINTER UNIT - COLUMN : 13 COLUMNS - PRINTED SPPEED : 3.2 lines/sec - PAPER ROLL : 57.5 ±...
Need help?
Do you have a question about the ER-290 and is the answer not in the manual?
Questions and answers