Table of Contents
Advertisement
Quick Links
1100 Old Honeycutt Road • Fuquay, NC 27526 • (919) 552-9161 • FAX (919) 552-9798 • (800) 348-2558
$9.00
OWNER'S MANUAL
INSTALLATION
USER'S GUIDE
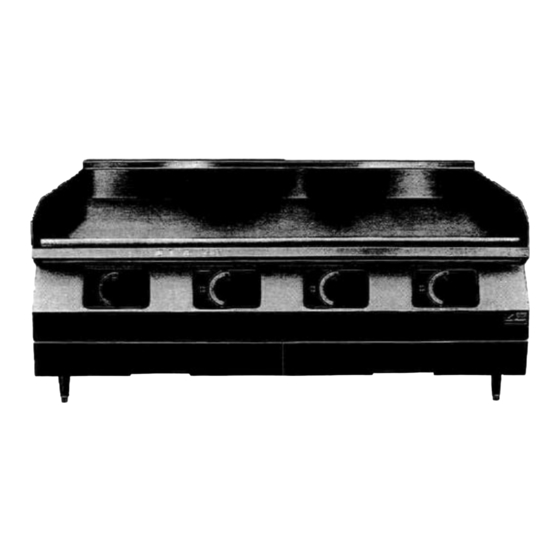
COUNTER GRIDDLE
MODELS: SG-24, SG-24E; SG-36, SG-36E
SG-48, SG-48E; SG-60, SG-60E
SG-72, SG-72E
WARNING: Improper installation, adjustment, alteration, service
or maintenance can cause propertydamage, injury or death . Read
the installation, operating and maintenance instructions
thoroughly before installing or servicing this equipment.
Middleby Corp. Service Hot Line (800) 238-8444
Please complete this information
and retain this manual for the life
of the equipment.
MODEL #
SERIAL #
DATE PURCHASED
SERVICE
PARTS
IMPORTANT
FOR FUTURE REFERENCE
COUNTER GRIDDLE
(Manual Section BP)
Advertisement
Table of Contents

Related Manuals for Southbend G-24


Summary of Contents for Southbend G-24
- Page 1 IMPORTANT FOR FUTURE REFERENCE Please complete this information and retain this manual for the life of the equipment. MODEL # SERIAL # DATE PURCHASED OWNER'S MANUAL INSTALLATION USER'S GUIDE SERVICE PARTS COUNTER GRIDDLE MODELS: SG-24, SG-24E; SG-36, SG-36E SG-48, SG-48E; SG-60, SG-60E SG-72, SG-72E WARNING: Improper installation, adjustment, alteration, service or maintenance can cause propertydamage, injury or death .
- Page 2 Warranty will be void and the manufacturer is relieved of all liability IF... (A) Service work is performed by other than a qualified technician OR... (B) Other than Genuine Southbend replacement parts are installed. WARNING DO NOT OBSTRUCT THE FLOW OF COMBUSTION AND VENTILATION AIR TO AND FROM YOUR GAS COOKING EQUIPMENT.
-
Page 3: Table Of Contents
Congratulations! You have just purchased one of the finest pieces of heavy-duty, commercial cooking equipment on the market today. You will find that your new equipment, like all Southbend equipment, has been designed and manufactured to some of the toughest standards in the industry — those of Southbend. Each piece of Southbend equipment has been carefully engineered and designs have been verified through laboratory tests and field installations in some of the more strenuous commercial cooking applications. -
Page 4: Limited Warranty
This warranty is subject to the following conditions: If upon inspection by Southbend or its Authorized Service Agency it is determined that this equipment has not been used in an appropriate manner, has been modified, has not been property maintained, or has been subject to misuse or misapplication, neglect, abuse, accident, damage during transit or delivery, fire, flood, riot or Act of God, then this warranty shall be void. - Page 5 Counter Griddles offer unsurpassed performance, combining proven control systems with Southbend quality and durability. Standard Features: • One inch thick polished rolled steel plate with 4" high rear and side splash guards. • Stainless steel front and sides. • Flame failure safety device—Standard.
- Page 6 I.D. of the pipe from the unit to which it is connected. Southbend, in line with its policy to continually improve its products, reserves the right to change materials or specifications without notice. INTENDED FOR COMMERCIAL USE ONLY. NOT FOR HOUSEHOLD USE.
-
Page 7: Specifications
I.D. of the pipe from the unit to which it is connected. Southbend, in line with its policy to continually improve its products, reserves the right to change materials or specifications without notice. INTENDED FOR COMMERCIAL USE ONLY. NOT FOR HOUSEHOLD USE. - Page 8 These models are design certified for operation on Natural or Propane gases. The appliance should be connected ONLY to the type of gas for which it is equipped. All Southbend equipment is adjusted at the factory. Check type of gas on serial plate in the compartment behind the front panel, on inside Right Lining.
-
Page 9: Warranty
Counter griddle and legs are supplied when unit is ordered with legs. If these items are not received, contact your Southbend Sales Representative. Please have your model and serial numbers ready when you call. - Page 10 INSTALLATION 10. Griddle is now ready to be installed on counter. Lift griddle from ends and set in place. PLEASE NOTE CLEARANCES BELOW: Minimum clearances from COMBUSTIBLE CONSTRUCTION are: TYPE SIDES REAR 12 IN. 5 IN. ALL MODELS Minimum clearances from NON-COMBUSTIBLE CONSTRUCTION are: TYPE SIDES REAR...
- Page 11 INSTALLATION THE STAND FOR SOUTHBEND COUNTER LINE EQUIPMENT MAY BE SHIPPED DISASSEMBLED. TO ASSEMBLE THE STAND, USE THE FOLLOWING PROCEDURES. INSTRUCTIONS P/N 1173737 TO INSTALL GRIDDLE ON COUNTER LINE STAND: 1. Uncrate and inspect for shipping damage. 2. Follow assembly instructions below to assemble Counter Line Stand.
- Page 12 INSTALLATION ASSEMBLY PROCEDURE FOR SCL-24, SCL-36, & SCL-48 1. Remove from carton two (2) item "A" bottom brace left and right side, and two (2) item "B" bottom brace front and rear, and position as shown in Figure 1. Position one (1) item "D" comer brace into each comer matching prepunched holes on the bottom inside flange of bottom braces.
- Page 13 INSTALLATION *6. When stand requires casters simply substitute left caster leg assembly Item "N" for Item "K" and right caster leg assembly Item "O" for Item "L." Screw in casters with lock Item "Q" into front caster leg assemblies, and casters with out lock Item "R"...
- Page 14 INSTALLATION ASSEMBLY PROCEDURE FOR SCL-60 & SCL-72 1. Remove from carton four (4) Item "A" bottom brace left and right side, and four (4) item "B" bottom brace front and rear, and position as shown in Figure 5. Position one (1) item "D" corner brace into each comer matching prepunched holes on the bottom inside flange of bottom braces.
- Page 15 INSTALLATION *6. When stand requires casters simply substitute left caster leg assembly item "N" for item "K," right caster leg assembly item "O" for item "L," and center caster leg assembly item T" for item "M." Screw in casters with lock item "Q"...
- Page 16 INSTALLATION MOUNTING INSTRUCTIONS FOR SCL-24, SCL-36, SCL-48, SCL-60, SCL-72 Stands for Counter Line are made to hold one or more units. When using the stand, the 4" legs on a Counter Top Unit are not used. To mount a unit on a stand use the following procedure. 1.
- Page 17 INSTALLATION GAS CONNECTIONS 1. Each griddle is a complete unit with an individual 3/4" NPT supply connection at the rear. A 3/4" manual gas shutoff valve is recommended at the gas supply inlet for complete shutdown. Standard pipe fittings are required. 2.
-
Page 18: Operation
OPERATION Before turning main gas supply on, make sure all control valves are in the "OFF" position. All units are adjusted at the factory. On new installations start up with the top burner of the unit(s) furthest from the gas input to the manifold. - Page 19 OPERATION Pilot Lighting Instructions: SG-Series Models with an "E" Suffix: ie all models SB-_E A. Turn burner control valve to OFF. B. Remove grease drawer. Power switch must be in OFF position. C. To light pilot, place power switch to ON position. Observe pilot flame ignition through slot in front panel. Replace grease pan back.
-
Page 20: Maintenance
MAINTENANCE EXTERIOR STAINLESS STEEL: To remove normal dirt, grease, or product residue from stainless steel that operates at low temperatures, use ordinary soap and water (with or without detergent) applied with a sponge or cloth. Dry thoroughly with a clean cloth. To remove grease and food splatter or condensed vapors that have baked on the equipment, apply cleanser to a damp cloth or sponge and rub cleanser on the metal in the direction of the polishing lines on the metal. -
Page 21: Section Three - Service
Warranty will be void and the manufacturer is relieved of all liability IF... (A) Service work is performed by other than a qualified technician OR... (B) Other than Genuine Southbend replacement parts are installed. Before making any adjustment, make sure unit is connected to the type of gas for which it is equipped. -
Page 22: Thermostat Calibration
ADJUSTMENTS THERMOSTAT CALIBRATION A. To Check Calibration: 1. Turn thermostats to the 300°F marking. See Figure 5. After burners have been on a minimum of 1 hour (if cold or 30 minutes if already hot when set at 300°F) place a reliable thermometer or thermocouple with test instruments in the center of the griddle and over the center of each burner. - Page 23 ADJUSTMENTS B. To Recalibrate Thermostat: This control has been carefully calibrated at the factory. That is, it is so adjusted to match the actual griddle temperatures. Field calibration is seldom necessary and it should NOT be done unless considerable experience with cooking and temperatures definitely proves that the control is not maintaining the temperatures to which the dial is set.
-
Page 24: Troubleshooting
SERVICE TROUBLE SHOOTING: Problem Look for - Unit will not heat up - Main gas supply is "OFF" - Pilot not lit - Safety valve not "ON" Burners produce excessive carbon deposits - Incorrect gas type or orifice size - Incorrect supply pressure - Incorrect burner air mixer adjustment - Burner orifice out of alignment with burner - Incorrect orifices... -
Page 25: Section Four - Parts
The serial plate is located behind the front panel, on inside right lining. There is also an Identification Plate mounted on the left side of the front valve panel that will supply model and serial number. Replacement parts may be ordered either through a Southbend Authorized Parts Distributor or a Southbend Authorized Service Agency. - Page 26 PARTS LEG AND INSULATED BASES ITEM PART NO. DESCRIPTION 1163561 4" Leg (single) 1173884 Insulator Front 24" 1173885 Insulator Front 36" 1173886 Insulator Front 48" 1173887 Insulator Front 60" 1173883 Insulator Side 1173888 Insulator Base Assembly 1173889 Insulator Base Assembly 1173890 Insulator Base Assembly 1173891...
- Page 27 PARTS MANIFOLD AND RUNNER TUBE PART ITEM PART NO. DESCRIPTION 1174358 Runner Tube Assembly 24" 1174362 Runner Tube Assembly 36" 1174364 Runner Tube Assembly 48" 1174374 Manifold Pipe Weld Assembly 24" 1174378 Manifold Pipe Weld Assembly 36" 1174382 Manifold Pipe Weld Assmembly48" 1058468 Orifice Spud, NAT 1058465...
- Page 28 PARTS COUNTER GRIDDLE SECTION FOUR — PARTS Litho in U.S.A. PAGE 4 2-94...
- Page 29 PARTS BODY PARTS SG SERIES ITEM PART NO. DESCRIPTION SG 24 SG 36 SG 48 SG 60 SG 72 1174443-01 Griddle Assembly 24" 1174445-01 Griddle Assembly 36" 1174447-01 Griddle Assembly 48" 1174449-01 Griddle Assembly 60" 1174451-01 Griddle Assembly 72" 1172224 Grease Chute Weld Assembly 1174415 Control Panel Assembly 24"...
- Page 30 PARTS COUNTER GRIDDLE SECTION FOUR — PARTS Litho in U.S.A PAGE 6 2-94...
- Page 31 PARTS THERMOSTATS. PILOTS AND CONTROLS ITEM PART NO. DESCRIPTION 1174341 "J"BURNER 1008737 Hood Orifice, NAT 1008752 Hood Orifice, Propane 1174370 Orifice Support Bar 1148306 Orifice Body Fitting 1174393 Tube 3/8 Manifold to T Stat 1166150 Brass Elbow 1174337 Griddle Thermostat 1174366 Pilot Bracket 1173574...
- Page 32 PARTS For Rear Gas Connection SG REAR GAS PIPING AND REGULATOR ITEM PART NO. DESCRIPTION 1147305 Pipe TEE 3/4" x 3/4" x 1/2" 1167381 Pipe Nipple 3/4" x 7" 1174594 Tee Plate Weld Assembly 1147011 Pipe Plug 3/4" 1147116 Bushing 3/4" x 1/2" P9158 Brass Connector 1/2 x 5/8cc 1174601...
- Page 33 PARTS SGE ELECTRONIC IGNITION PARTS - "E" USED ALL MODELS WITH SUFFIX ITEM PART NO. DESCRIPTION ITEM PART NO. DESCRIPTION 1174807 Control Box Body 1174812 Tube 5/8" (90 Degrees) 1174806 Control Box Front 1146803 Nipple Black 3/4" x 3" 1161675 Wire Snap Bushing 1/2"...
- Page 34 PARTS COUNTER GRIDDLE SECTION FOUR — PARTS Litho in U.S.A. PAGE 10 2-94...
- Page 35 A MIDDLEBY COMPANY Convection Ovens Ranges Steam Kettles Under Fired Broilers Cook & Hold Convection Ovens Fryers Tilting Braising Pans Salamander Broilers Bake & Roast Ovens Special & Custom Equipment Cooker/Mixer Kettles Cheese Melters Pizza Ovens Convection Steamers Floor Model Broilers Counter Top Broilers &...
- Page 36 COUNTER GRIDDLE A product with the Southbend name incorporates the best in durability and low maintenance. We all recognize however, that replacement parts and occasional professional service may be necessary to extend the useful life of this unit. When service is needed, contact a Southbend Authorized Service Agency, or your dealer.
Need help?
Do you have a question about the G-24 and is the answer not in the manual?
Questions and answers