Ice Sprint Owner's Manual

Ice Sprint Owner's Manual

Ice trike owner's manual

Advertisement

2011
OWNER'S MANUAL
SPRINT
ADVENTURE
VORTEX

Advertisement

Table of Contents
loading
Need help?

Need help?

Do you have a question about the Sprint and is the answer not in the manual?

Questions and answers

David Rowe
May 1, 2025

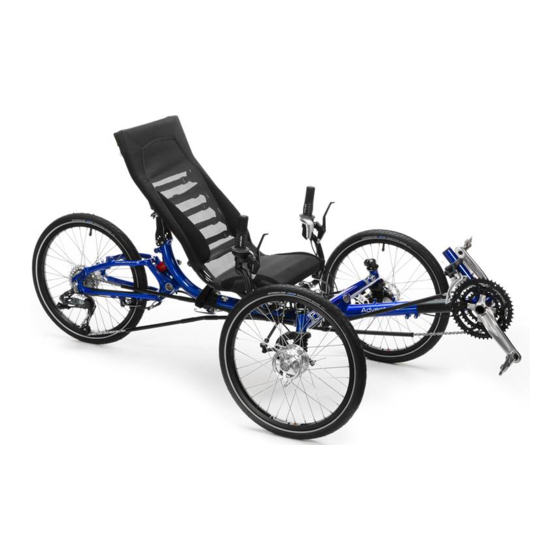
How do I adjust front and rear brakes on Adventure HD? An illustration with instructions would be helpful.

Summary of Contents for Ice Sprint

  • Page 1 2011 OWNER’S MANUAL SPRINT ADVENTURE VORTEX...
  • Page 2: Table Of Contents

    1.0 Introduction..........................3 1.1 Overview ..........................3 1.2 Adjusting and Closing Quick-releases .................. 4 2.0 Adjusting your ICE trike ......................4 2.1 Tyre pressure ......................... 4 2.2 Folding and Unfolding......................4 2.2a Suspension adjustment ....................... 7 2.2b Front suspension adjustment ..................... 7 2.3a Mesh seat cover ........................
  • Page 3: Introduction

    Zinn’s “Zinn and the Art of Mountain Bike Maintenance” as a thorough and easy-to-read reference. If you are assembling your trike for the first time, please refer to the ICE Trikes Assembly Manual. We hope you enjoy owning and riding your ICE trike as much as we like making these great machines.
  • Page 4: Adjusting And Closing Quick-Releases

    Do not over- tighten. 2.0 Adjusting your ICE trike Fine-tuning for leg length, seat angle, handle bar width / angle, brake lever reach, tyre pressure etc are all well worth taking time to set to your personal preference.
  • Page 5 Unscrew the knobs under the front of the seat and slide the clips off the frame cup in which the seat sits. The nuts should not have to be screwed down they should be left at the end of the screws as seen here.
  • Page 6 Swing the QR and its connecting pin backwards 90 degrees. Lift the QR and its pin to release the safety catch. Swing the rear section of the frame up and to the left. Be sure to lift the chaintubes as shown in the photo.
  • Page 7: Suspension Adjustment

    2.2a Suspension adjustment The front and rear suspension can both be fine-tuned to work well for you. The rear suspension can be adjusted by a combination of selecting one of three different hardness and five different fitting positions for the elastomer. The front suspension can be adjusted by selecting one of three different hardness elastomers.
  • Page 8 The elastomers have different compression characteristics, and you may find other combinations of elastomer hardness and pin position which suit the roads you ride on and your riding style better; it is just a matter of trying different combinations. The elastomer system is simple and small enough that you can carry a couple of elastomers in your pocket and change them when you are out on a ride if you like.
  • Page 9 To remove the elastomer: To remove the suspension elastomer, first loosen the Compress the suspension unit and remove the rubber stop screw. bumper. Slide the rubber gaiter off at the bottom. Push the bottom of the elastomer out of the locating hole.
  • Page 10 To replace the elastomer: To replace the elastomer, first grease the elastomer all Push the bottom of the elastomer around to the side over then slide it into the kingpost. and into the locating hole. Apply soapy water to the gaiter groove to aid fitting. Slide on the rubber gaiter at the bottom, checking to make sure that it is properly seated.
  • Page 11: Mesh Seat Cover

    If you cannot adjust the boom to fit you (either it needs to be further than the minimum insertion mark or your heels are coming very close to the cross axle of the frame), then ICE offers accessory seat mounting brackets for your trike.
  • Page 12 2.6 Brake lever adjustment The position of the brake lever relative to the handlebars (the ‘reach’) can be adjusted. It can be useful for move the lever closer to the handlebar for riders with smaller hands. For disc brakes levers, there is a reach adjustment screw on the underside of the lever body, between the cable entry and the handlebar clamp.
  • Page 13: Ice Optional Accessories

    If you require an additional copy of these instructions, they may be downloaded from our website at http://www.icetrikes.co.uk in the Download Centre of ICE World Trailers If you plan to attach a trailer to your trike we strongly recommend using a two wheeled trailer. One wheeled trailers have no lateral stability unlike the trike itself, so when cornering are able to transmit large twisting loads into the trike, possibly enough to cause serious damage to it.
  • Page 14: Stopping In A Low Gear

    check the front brakes. MAKE SURE YOU CAN STOP! You should do this before each ride, as well as checking your brakes for damage and wear. Steering is very easy and natural and you will soon become unaware of the movements required. Gear changing - As with any derailleur system you can only change gear when you are pedalling and moving forward.
  • Page 15: Handling

    This ‘No- Brake-Steer’ geometry is a safety feature that is an ICE innovation and is designed into every trike we make. Because your weight is being supported on 3 wheels rather than 2, you will find it easier to lock up the brakes on the front wheels.
  • Page 16: Ground Clearance

    5.0 Maintenance Your ICE trike has been built from quality materials and parts, and will last for many years with just a bit of simple maintenance. Although there is nothing on the trike that a bike shop can’t maintain for you, doing your own basic maintenance gives you a good feel of how your trike is working.
  • Page 17: Drum Brakes

    To maintain safe and efficient braking, the pads need to be replaced if the material is worn down to 0.5mm. Replacing Brake Pads – follow the instructions that are supplied with your brakes. Parts and spares are available from ICE.
  • Page 18: Rear Brake

    To bleed your brakes, follow the instructions that were supplied with your brakes. Parts and spares are available from ICE. Your brake takes mineral oil, which is not the same as hydraulic fluid used for automotive brakes and clutches. Using automotive fluid will ruin the seals in your brakes and they WILL fail! Always use mineral oil;...
  • Page 19: The Frame

    5.7 The frame The main cruciform and rear section of your ICE trike is powder-coated, a baked-on finish that is both tough and beautiful. It is possible to damage the coating, particularly if you scrape the trike over road obstacles. If this happens, touch-up paint is available from ICE to repair the damage.
  • Page 20: Suspension

    5.9 Suspension The suspension on ICE trikes runs on plain bearings. These bearings are made from a special low-friction, chemical resistant plastic. They do not normally require lubrication. If you should notice any significant amount of play in the suspension joint, the bearings can be easily adjusted.
  • Page 21: Storage

    5.11 Storage If you are using the trike most days, it is best to store it somewhere dry and well ventilated. A damp, covered trike will quickly develop surface corrosion of its components, and eventually, the frame. If you are storing your bike for any considerable period (over winter or a long holiday): ...
  • Page 22: Recommended Minimum Tools And Spares

    6.0 Safety Between all of us here at ICE, we’ve ridden thousands of miles on trikes, and we’ve all developed good road sense. The following safety considerations are for your benefit; please give them serious consideration: ...
  • Page 23: Other Important Information

    FAQ (Frequently Asked Questions) and the registration page. Follow the simple instructions and you will be registered to participate in the discussion. There is a Trikes specific forum under Specialty Discussions, and you will find a number of ICE trike owners there.
  • Page 24: Warranty Information

    7.2 Warranty Information Warranty Inspired Cycle Engineering warrants, to the original owner of each new ICE tricycle that the frame, seat, and steering components are free of defective materials and workmanship for three (3) years from original date of purchase. Component parts are limited to one (1) year from original date of purchase. Warranty is conditional upon the trike being operated under normal conditions and being properly maintained.
  • Page 25: Liability Information

    If you are in any doubt about any of the advice or procedures in this manual, please contact your dealer or ICE. It is up to you to know and obey traffic laws of the country or state where you will be riding your trike.
  • Page 26: Appendix A: Tightening Torques

    Appendix A: Tightening torques Fastener Uses Hex Key (mm) Lb-ft Front derailleur clamp bolt Front derailleur cable clamp bolt Chainset - central crank bolt 35-50 25-36 Chainset - chainring bolt 5 + tool 8-10 Chainring guard bolt 4.5-6 Main frame clamp bolts 8-10 Mudguard adjusters 4.5-6...
  • Page 27: Appendix C: Tyre Pressures

    Appendix C: Tyre Pressures 29.0 36.3 43.5 50.8 58.0 65.3 72.5 80.0 87.0 94.3 101.5 108.8 116.0 123.3 137.8...

This manual is also suitable for:

AdventureVortex2011 sprint2011 adventure2011 vortex

Table of Contents