
Related Manuals for Miele G 7883 CD


Summary of Contents for Miele G 7883 CD
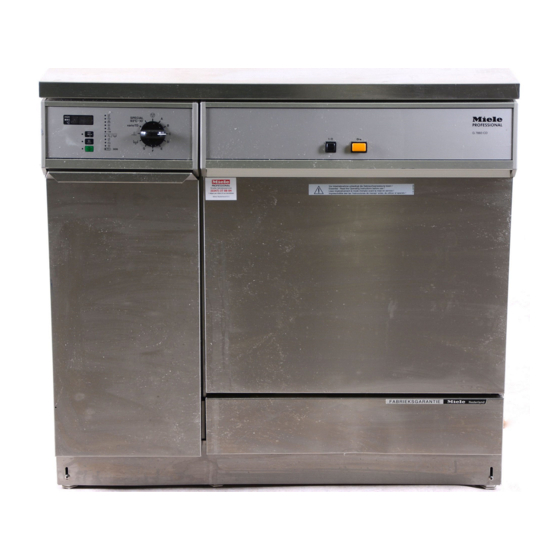
- Page 1 Operating and Installation Instructions Laboratory Glassware Washer G 7883 CD en - US, CA To prevent accidents and machine damage read these instructions before installation or use. M.-Nr. 07 157 440...
-
Page 3: Table Of Contents
Contents IMPORTANT SAFETY INSTRUCTIONS....... . . 5 Guide to the lab washer ..........9 Description of the machine . - Page 4 Contents Program Guide ........... 34 Programming functions .
-
Page 5: Important Safety Instructions
Follow the A damaged machine is dangerous. product manufacturer's instructions. Turn off the machine immediately at the Miele will not be held liable for damage main switch and call the Miele Service caused by incorrect use of any kind. Department. - Page 6 IMPORTANT SAFETY INSTRUCTIONS Take care when handling If you are exposed to toxic vapors or processing chemicals (detergents, processing chemicals, consult the softeners, neutralizers, etc.). These may manufacturer's material safety data contain irritant or corrosive ingredients. sheets for emergency procedures. Do not use organic solvents as these Always allow mobile units, modules, could cause an explosion.
- Page 7 Only use cleaning agents discussed with a Miele Application formulated for special processes and Technology specialist. approved by Miele for use with this It is the responsibility of the operator machine. Use of unsuitable cleaning to routinely check that the required agents could adversely affect the cleaning standards are being met.
- Page 8 Adequate cleaning results cannot chemical reactions. be guaranteed when non-Miele accessories are used, or when Miele The mobile units, baskets and accessories are altered. Damages special inserts should only be used for resulting from the use of unsuitable their specific applications.
-
Page 9: Guide To The Lab Washer
Guide to the lab washer a Display i "Rinse aid" indicator b "Display" indicator j "Neutralizer agent" indicator c "Drying" indicator k "Recharge Softener" indicator d "Start" indicator l "Fill/Drain" indicator e "Start" 6 button m Program sequence display f "Drying" 0 button n Program selector g "Display"... - Page 10 Guide to the lab washer a Drying unit e Level indicator for rinse aid b Dispensers for neutralizer (red) and f Filter combination liquid detergent (blue) g Salt reservoir c Dispenser for powdered detergent (water softener) d Rinse aid reservoir h Service panel (with dosage selector) i Serial interface...
-
Page 11: Description Of The Machine
Description of the machine Miele laboratory washers are designed Intended applications: Laboratory to clean, rinse, and dry laboratory equipment equipment. Lab equipment includes a wide range In this operating manual, the general of items: term "labware" is used to cover a range –... -
Page 12: Opening And Closing The Door
Opening and closing the door Electric door lock Emergency release The machine is equipped with an The emergency release feature electric door lock. should only be used when it is not The door can only be opened when possible to open the door normally, for example after a power outage. -
Page 13: Water Softener
Water softener Setting the water softener Before using the machine for the first time, the water softener should be ^ Use the I - 0 button to switch off the programmed. The water needs to be machine. softened to avoid calcium deposits on ^ Turn the program selector to f. - Page 14 Water softener Settings Settings gr/gal Settings gr/gal 1 - 30 1 - 30 CaCO 31 -60 31 -60 CaCO 19 *) 1010 1030 1040 1060 1080 *) factory setting...
-
Page 15: Filling The Salt Reservoir
Filling the salt reservoir Only special, coarse-grained reactivation salt* should be used in this machine. *Available from Miele. Please see back page for more information. Do not use other types of salt, e.g. table salt, agricultural or gritting salt. These... -
Page 16: Salt Indicator
Water softener Salt indicator When the salt reservoir is empty, the "Recharge Softener" indicator b lights to remind you to fill the reservoir. Reactivation takes place automatically as needed during a program. The "Recharging" indicator a lights while this is occurring. -
Page 17: Rinse Aid
Rinse aid is not used in laboratory glassware cleaning applications. If rinse aid is required, the rinse aid dosage must be activated with assistance from Miele Technical Service. Rinse aid (e.g., MieleClear) is filled in the storage container, and the selected dose is then dispensed automatically. -
Page 18: Rinse Aid Indicator Light
Rinse Aid Rinse aid indicator light Setting the rinse aid dosage The dosage selector has settings from 1 to 6 (1 - 6 ml). The factory setting is at 3 (3 ml). ^ Rinse aid does not need to be refilled until the "Rinse aid"... -
Page 19: Neutralizing Agent
Neutralizing agent Adding neutralizer ^ Open the door of the storage cabinet that houses the neutralizer and Neutralizer has an acidic pH, and detergent dispensers. works by neutralizing any traces of (alkaline) cleaner from the surface of the glassware. When a mild alkaline detergent is used for washing, select a neutralizer that contains phosphoric acid. -
Page 20: Neutralizer Indicator Light
Neutralizing agent Neutralizer indicator light ^ When the "Neutralizer" indicator light comes on, it is important to promptly refill or exchange the neutralizer container. Make sure to refill / exchange the container before it becomes completely empty. -
Page 21: Detergent
The factory setting is designed for liquid detergents. Although powered detergents can be used, Miele recommends that you use liquid detergents instead. Note also that the program "Organica" can only be used with liquid detergents. - Page 22 Detergent Liquid detergent refill light Before starting the program, load the powdered detergent into the compartment (except for the programs "Rinse" and "Drain"). ^ When the "8 Dosing Pump" indicator comes on, it is important to promptly refill or exchange the ^ Press the button on the dispenser detergent container.
- Page 23 Detergent ^ Load the detergent into the compartment. Dosage: To achieve a detergent concentration of approximately 3 g/l, use 30 g of detergent. Always follow the detergent manufacturer's recommendations for dosage concentration. ^ Snap the cover closed.
-
Page 24: Loading The Machine
Loading the machine Depending on the type of labware you After every program completion, wish to clean, the washer can be used conduct the following visual with an upper basket, lower basket, or inspection: injector wagon, as well as an –... - Page 25 Loading the machine Loading the machine Prepare items before loading ^ Empty all glassware before loading – Always load items in a way that all surfaces are exposed. This ensures into the machine. Comply with all that the items will be properly applicable infection-control cleaned.
-
Page 26: Spring Adapter For The Water Connection
Loading the machine Spring adapter for the water Adjusting the upper basket connection The upper basket can be adjusted above and below the middle position, The spring adapter for the water by 2 cm. connection must be properly engaged when a basket or the injector wagon is Depending on the height selected and inserted into the machine. - Page 27 Loading the machine Laboratory equipment This section only covers basic information on how to prepare and load Wide-necked labware, e.g., beakers, labware. wide-necked Erlenmeyer flasks and Petri dishes, or cylindrical items, – Petri dishes and similar items should e.g., test tubes, can be cleaned inside be loaded in a suitable insert with the and out by the rotating spray arms.
- Page 28 Loading the machine Upper basket O 188 E 106 For various inserts. Stainless steel half insert with 28 spring hooks in 2 different heights for various glassware, e.g. narrow necked flasks, graduated cylinders, medicine bottles, etc. Lower basket U 874 For various inserts.
- Page 29 Loading the machine E 350 O 187 Injector wagon Injector wagon For narrow necked glassware, (Upper basket) For direct injection of 15 injectors, 160 mm high; narrow necked glassware, 18 injectors, 220 mm high. 34 injectors,160 mm high.
-
Page 30: Use
Turning on Selecting the (optional) drying function ^ Close the door. The additional function "Drying" can be ^ Press the I - 0 button. selected immediately after a program If the program selector is in the f has been selected (except for "Rinse" position, an indicator light will appear in and "Drain"). -
Page 31: Program Sequence Display
Program sequence display Once a program cycle has started, all other programs are locked until Whenever a program is running, the completion. If the program selector is indicator light for that program will turned to a different program, the remain on. display goes out. -
Page 32: End Of A Program
End of a program Turning off ^ Press and release the I - 0 button. Once the "Start" indicator goes out, and the "Complete" indicator comes on, the Because of the electric door lock, the program has ended. You will see a 0 in door can only be opened if the I - 0 the middle of the display, and all other button is pressed (see "Opening and... -
Page 33: Canceling A Program
Canceling a program ^ Turn the program selector to f. Avoid canceling a running program The program is canceled after unless absolutely necessary, for 2 seconds. example if the glassware is moving ^ Open the door. around excessively or the wrong program has been selected. -
Page 34: Program Guide
93°C - 10' bactericidal, and virus-inactivating). CW = cold water, HW = hot water, DI = distilled water, °F (C°) = Temperature, min = holding time * The DOS 2 rinse aid dosage must be activated by Miele Technical Service... - Page 35 Program Guide Program sequence Pre-Wash Main Wash Rinse Rinse Final Rinse * Drying 99°C 70°C DOS 1 DOS 3 25 min 5 min 80°C 75°C 3 min 1 min 99°C 70°C DOS 3 DOS 1 DOS 3 25 min 5 min 50°C 75°C 70°C...
-
Page 36: Programming Functions
Programming functions For future servicing, be sure to document any changes made to the factory settings in the fields provided. General information: – Program selector positions that have no assigned function are represented by a bar ( - ) in the middle of the display. –... -
Page 37: Dos 1 (Liquid Detergent)
Programming functions DOS 1 (liquid detergent) Setting the detergent dosage The dosage concentration only needs to be set for liquid detergents. Set the concentration according to the detergent manufacturer's recommendations. Do not change the setting if you are using powdered detergent in the door dispenser. -
Page 38: Dos 3 (Neutralizer)
Programming functions DOS 3 (neutralizer) Setting the neutralizer dosage Set dosage concentration according to the neutralizer manufacturer's recommendations. Step Display / Result ^ Press the 0 button until E02 appears in the display. ^ Turn the program selector to "Intensive". The programmed dosage concentration appears in the display, e.g., 0.10 = 0.10 %... -
Page 39: Buzzer
– an error signal that beeps in 1-second intervals, and – a sample-collection signal (allows a sample of the final rinse water to be collected) that beeps in sets of 3 followed by a 2-sec pause. Contact Miele Technical Service to program the sample-collection signal. -
Page 40: Changing Program Parameters
Programming functions Changing program parameters Changing the drying parameters The factory settings for various The drying parameters within the parameters are listed in the "Program various wash programs can be Guide". adjusted to meet specific requirements. Program parameters cannot be For example, the temperatures and changed unless they are activated drying times within the program blocks... -
Page 41: Changing The Temperature
Programming functions Changing the temperature Step Display / Result ^ Press and hold the 0 button until the E09 for Main Wash 1 setting of the desired program block E12 for Main Wash 2 appears in the display. E22 for Rinse 1 E25 for Rinse 2 E28 for Drying 1 E31 for Drying 2... -
Page 42: Restoring The Factory Settings
Programming functions Restoring the factory settings Step Display / Result ^ Press and hold the 0 button until E33 appears in the display. ^ Turn the program selector to a program. Default factory setting(s): Re-programmed setting(s): ^ When PP appears in the display, press the ß 00, the factory settings have button. -
Page 43: Setting The Time And Date
Programming functions Setting the time and date The date and time are set in the serial interface (optional accessory). This information appears in the print log. The date and time can be changed, e.g., from daylight saving to standard time. Use the program selector to activate the desired time and date: 1 o'clock position: Calendar day 01 - 31 2 o'clock position: Month... -
Page 44: Resetting The Coarse And Fine Filter Timer
Programming functions Resetting the coarse and fine filter timer Whenever the coarse or fine filter in the drying unit are changed, the service timer should be reset to zero. Step Display / Result ^ Press and hold the 0 button until E04 appears in the display. -
Page 45: Data Transfer (Optional)
Various printer types with Epson-compatible fonts can be used – dosage system with dosage temperature and target dosage for printing. Miele Technical Service maintains a list amount of recommended printers. – target values for temperature and holding times Pin assignment 9-pin sub-D connector: GND (ground) –... -
Page 46: Maintenance
Maintenance Periodic maintenance for the machine is recommended annually. Routine checks The routine checks must be done daily by the user before using the machine. For the routine checks a checklist is supplied with the washer. Check the following points: –... -
Page 47: Cleaning And Care
Cleaning and Care Cleaning the coarse filter Wear protective gloves and goggles when cleaning this machine. Cleaning the filters in the wash cabinet The machine must not be used without all filters in place. The filters protect the circulation pump from damage caused by foreign objects. - Page 48 Cleaning and Care Cleaning the fine, flat and micro-fine filters ^ Remove the coarse filter. ^ Remove the fine filter from between the flat and micro-fine filters. ^ Then remove together with the flat filter. ^ Clean the filters. ^ Replace the filter combination in reverse order.
-
Page 49: Cleaning The Spray Arms
Cleaning and Care Cleaning the spray arms ^ Unscrew the upper spray arm. ^ Loosen the knurled nut of the lower The spray arms can get clogged. Check daily and clean if necessary. spray arm and remove. ^ Use a sharp pointed object to push Removing the spray arms particles into the spray arm jets and ^ Remove the baskets. - Page 50 Cleaning and Care Cleaning the drain pump and The drain pump is beneath the non-return valve (see arrow). non-return valve If water has not been pumped away at the end of a program the drain pump or the non-return valve may be blocked. ^ Turn off the machine.
- Page 51 Cleaning and Care Cleaning the water inlet filters Cleaning the filters ^ Disconnect the machine from To protect the water inlet faucet, filters are incorporated in the intake hose electricity (unplug it or "trip" the attached to the water supply. If the circuit breaker).
-
Page 52: Cleaning The Control Panel
Do not use abrasive cleaners, The wash cabinet is mostly self glass cleaners or all-purpose cleaning. cleaners! They will damage the If deposits have built, contact Miele for control panel. info. Cleaning the exterior Cleaning the door seal ^ Stainless steel surfaces can be... - Page 53 Cleaning and Care Baskets and inserts If available: To ensure the function of baskets and – do the spray arms rotate freely? inserts, they must be checked daily. A – Are the spray jets clogged? See checklist is supplied with the machine. "Cleaning and Care - Cleaning the Check the following points: spray arms"?
-
Page 54: Frequently Asked Questions
^ Press the On-Off button to switch off the machine. ^ Turn the machine back on and re-start the program. ^ If the error occurs again and cannot be corrected, contact Miele Technical Service for assistance. ^ You will need to provide the error code ( "F...") . - Page 55 Frequently asked questions What if... Possible fault Solution Before the start of a Before addressing the program, the "8 error: Dosing Pump" – Turn the program indicator flashes, and selector to f. The error the program can not be message is erased. started.
- Page 56 Frequently asked questions What if... Possible fault Solution Before the start of a Before addressing the program, the error: "Neutralizer" indicator – Turn the program flashes, and the selector to f. The error program can not be message is erased. started.
- Page 57 Frequently asked questions What if... Possible fault Solution The "Recharge" The water softener has run Refill the salt reservoir. indicator flashes. out of salt. A few minutes after the Before addressing the start of a program, the error: "Fill/Drain" indicator –...
- Page 58 Frequently asked questions What if... Possible fault Solution The rinse program is Before addressing the interrupted and the error: "Fill/Drain" indicator – Turn the program light is flashing. selector to f. The error message is erased. – Press the On/Off button to switch off the machine.
- Page 59 Frequently asked questions What if... Possible fault Solution After a program, there is The dispenser was wet Make sure the dispenser is powdered detergent when it was loaded. dry before loading it. residue left behind in The powdered detergent Always arrange glassware the door dispenser.
- Page 60 Frequently asked questions What if... Possible fault Solution Items made of glass The items are not Only use washer-safe show signs of washer-safe. glassware. corrosion. No neutralization took Fill the neutralizer place in the program container. sequence. Excessively high Select an appropriate temperatures are causing program or lower the wash glass corrosion.
- Page 61 Frequently asked questions What if... Possible fault Solution There are white The water softener setting Test the tap water deposits and/or spots is too low. hardness and program the on the labware. water softener according. Too much powder Be sure you are using the detergent is being used.
- Page 62 Frequently asked questions What if... Possible fault Solution The wash result is The baskets and inserts Properly arrange the unacceptable. were incorrectly loaded or glassware. overcrowded. Do not overload baskets and inserts. The program used was not Select an appropriate suited to the type/amount program or modify the of soiling.
-
Page 63: Thermo Switch
Please proceed as follows. ^ Remove the cause of the problem. ^ Remove the service plinth. ^ Press the reset button on the temperature sensor on the right side. If this switch trips repeatedly, contact the Miele Technical Service Department. -
Page 64: After Sales Service
After Sales Service In the event of a fault which you cannot correct yourself please contact the Miele Technical Service Department 1-800-991-9380 techserv@mieleusa.com 1-800-565-6435 service@miele.ca ^ Please quote the model of your machine. This information can be found on the machine’s front panel. -
Page 65: Installation Instructions
INSTALLATION INSTRUCTIONS... -
Page 66: Installation
Installation Leveling the legs Please refer to the installation diagram supplied with the machine. Any unevenness in the floor can be compensated for and the height of the Furniture and fittings installed machine raised or lowered by adjusting near the machine must be of a the four screw feet. - Page 67 Depending on the requirements for installation, the following kit can be ordered from the Miele Technical Service Department. Cover plate (protects the countertop) The underside of the countertop is protected from steam damage by a...
-
Page 68: Electrical Connection
The wiring diagram is supplied with the machine. See also the supplied installation diagram. A damaged power cord must only be replaced with a genuine Miele cord by a Miele service technician. -
Page 69: Plumbing
If the "Fill/Drain" indicator fault code local and national regulations. "F..E" lights, contact the Miele Technical Service Department. – The washer is constructed so it may be connected to a suitable supply –... - Page 70 Plumbing – Connect the intake hose for the steam condenser (without water safeguard) to the cold water faucet. – See the next page for how to connect the DI water line. – Water valves with inch thread are to be provided on site. They should be easily accessible, because the water supply will need to be turned off when not in use.
- Page 71 10 - 147 psi is acceptable. done by Miele Technical Service. ^ The DI pressure tested hose (marked The discharge port for any DI "H2O pure" with a 3/4" hose thread...
- Page 72 ^ The machine should preferably be connected to a separate drainage system onsite. If separate drainage is not available contact Miele Technical Service for advice. The onsite drain connection point should be located between 1 ft. (0.3 m) and 3 ft. (1 m) above the lower edge of the machine.
-
Page 73: Technical Data
Technical data English Metric Height: with lid 33.5" 85 cm without lid 32.3" 82 cm Width: 35.4" 90 cm Depth: 27.5" 70 cm Depth with the door open: 49.8" 126.5 cm Net weight: 265 lbs 120 kg Voltage / Fuse: see data plate Power cord approx. -
Page 74: Caring For The Environment
Caring for the environment Disposal of the packing Disposal of an old appliance materials Old appliances may contain materials that can be recycled. Please contact The cardboard box and packing your local authorities about recycling in materials protect the appliance during your area. - Page 76 Subject to change without notice / 5207 M.-Nr. 07 157 440 / 00...
Need help?
Do you have a question about the G 7883 CD and is the answer not in the manual?
Questions and answers