Table of Contents
Advertisement
EMPIRE
EMPIRE
Comfort Systems
VISTA SLOPE GLAZE MULTI-SIDED
Installer:
Leave this manual with the appliance.
consumer: retain this manual for future reference.
This appliance may be installed in an aftermarket
permanently located, manufactured (mobile) home,
where not prohibited by local codes.
This appliance is only for use with the type of gas
indicated on the rating plate. This appliance is not
convertible for use with other gases.
wArNING: If the information in these instructions
are not followed exactly, a fire or explosion may
result causing property damage, personal injury
or loss of life.
— Do not store or use gasoline or other flammable
vapors and liquids in the vicinity of this or any
other appliance.
— wHAT TO DO IF YOu SMeLL GAS
•
Do not try to light any appliance.
•
Do not touch any electrical switch; do not use
any phone in your building.
•
Immediately call your gas supplier from a
neighbor's phone. Follow the gas supplier's
instructions.
•
If you cannot reach your gas supplier, call the
fire department.
— Installation and service must be performed by a
qualified installer, service agency or the gas sup-
plier.
INSTALLATION INSTrucTIONS
AND OwNer'S MANuAL
uNVeNTeD GAS LOG HeATer Or
VeNTeD DecOrATIVe HeATer
MODeLS
VFSur(18,24,30)-3
VFSue(18,24,30)-1
This is an unvented gas-fired heater. It uses air (oxy-
gen) from the room in which it is installed. Provisions
for adequate combustion and ventilation air must be
provided. refer to page 11.
wArNING: If not installed, operated and maintained
in accordance with the manufacturer's instructions,
this product could expose you to substances in fuel
or from fuel combustion which can cause death or
serious illness.
wATer VAPOr: A BY-PrODucT OF uNVeNTeD rOOM
HeATerS
water vapor is a by-product of gas combustion. An
unvented room heater produces approximately one (1)
ounce (30ml) of water for every 1,000 BTu's (.3Kw's)
of gas input per hour. refer to page 11.
Page 1
Advertisement
Table of Contents
Troubleshooting

Related Manuals for Empire Comfort Systems VFSUR18-3


Summary of Contents for Empire Comfort Systems VFSUR18-3
- Page 1 INSTALLATION INSTrucTIONS EMPIRE EMPIRE AND OwNer'S MANuAL Comfort Systems VISTA SLOPE GLAZE MULTI-SIDED uNVeNTeD GAS LOG HeATer Or VeNTeD DecOrATIVe HeATer MODeLS VFSur(18,24,30)-3 VFSue(18,24,30)-1 Installer: Leave this manual with the appliance. consumer: retain this manual for future reference. This appliance may be installed in an aftermarket permanently located, manufactured (mobile) home, where not prohibited by local codes.
-
Page 2: Table Of Contents
TABLe OF cONTeNTS SecTION PAGe CARTON CONTENTS ........................5 HARDWARE PACKAGE......................... 5 IMPORTANT SAFETY INFORMATION ..................6 SAFETY INFORMATION FOR USERS OF LP-GAS ..............7 INTRODUCTION ..........................8 GENERAL INFORMATION......................9 REQUIREMENTS FOR CANADA ....................10 WATER VAPOR: A BY-PRODUCT OF UNVENTED ROOM HEATERS ........11 PROVISIONS FOR ADEQUATE COMBUSTION &... - Page 3 Quick Start Guide - Intermittent Pilot Systems To STArT the Fireplace: If the pilot is NOT lit: 1. At the same time, press the “OFF” and high flame buttons and release once there is an audible “beep” sound. 2. The beeping sound will continue for a short time. You may hear a clicking sound around the same time as these beeps, this is normal. 3. The main burner will ignite approximately 15 seconds after the pilot. If the pilot IS lit. 1. To ignite the burner, press the high flame button (there will be a beep) for approximately 5 seconds until there is a soft click, then release the button. To ADJuST the Flame Height 1. Hold down the small flame button. “LO” will be displayed. 2. Hold down the large flame button. Flame automatically goes to high fire. “HI” will be displayed.
- Page 4 THIS PAGE INTENTIONALLY LEFT BLANK Page 4 31722-1-1213...
-
Page 5: Carton Contents
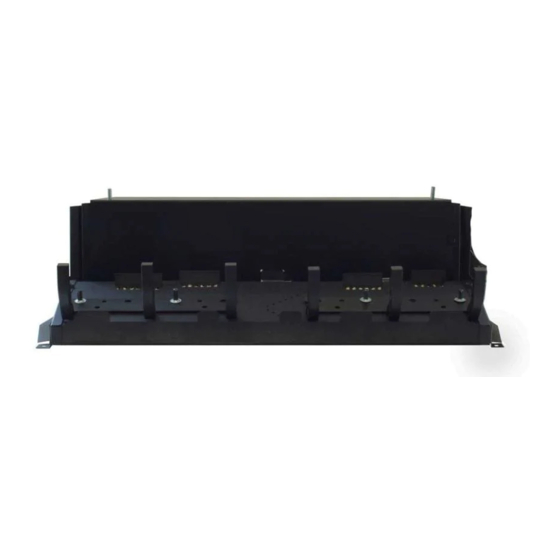
cArTON cONTeNTS Burner Assembly Lava Rock Packet Soot Warning Sheet Installation Package Rockwool Package Damper Clamp Installation Instructions Serial Number Tag Warranty Card Hardware Package (See Figure Below) #10 X 1/2" Phillips Hex Head Screw (3) 1/4" X 1 1/4" Slotted Hex Head Anchor Screw (3) HArDwAre PAcKAGe #10 X ½” PHILLIPS HEX HEAD SCREW (3) 1/4” X 1 1/4” SLOTTED HEX HEAD ANCHOR SCREW (3) Hardware shown to scale where possible. -
Page 6: Important Safety Information
IMPOrTANT SAFeTY INFOrMATION Log set placement instructions for correct log and twig DANGer: Indicates a hazardous situation which, if not avoided, will positioning. result in death or serious injury. replacement components are available through your local wArNING: Indicates a hazardous situation which, if not avoided, dealer as indicated in the How to Order repair Parts section of could result in death or serious injury. -
Page 7: Safety Information For Users Of Lp-Gas
SAFeTY INFOrMATION FOr uSerS OF LP-GAS Propane (LP-Gas) is a flammable gas which can cause fires SOMe POINTS TO reMeMBer and explosions. In its natural state, propane is odorless and • Learn to recognize the odor of LP-gas. Your local LP-Gas colorless. -
Page 8: Introduction
INTrODucTION Notice: During initial firing of this unit, its paint will bake out, and IMPOrTANT: read all instructions carefully before starting smoke will occur. To prevent triggering of smoke alarms, ventilate installation. Failure to follow these installation instructions the room in which the unit is installed. may result in a possible fire hazard and will void the warranty. Save this manual for future reference. wArNING Please read this manual before installing and using the This appliance is for installation only in a solid-fuel burning appliance. -
Page 9: General Information
GeNerAL INFOrMATION This is an unvented gas-fired heater. It uses air (oxygen) from the Millivolt controlled heater (VFSUR) designed to be operated with room in which it is installed. Provisions for adequate combustion optional devices for ON/OFF functions. and ventilation air must be provided. • Wall switch or thermostat with wire. • Hand held remote control with ON/OFF switch or thermostat. Keep room area clear and free from combustible materials, gasoline and other flammable vapors and liquids. Handle the gas log burner assembly by the grate and legs only. Do not pick the unit up by the burner. Unvented gas heaters are a supplemental zone heater. They are not intended to be a primary heating appliance. Water vapor produced Gloves are recommended when handling logs to prevent skin by an unvented heater can create moisture problems in a home irritation. -
Page 10: Requirements For Canada
reQuIreMeNTS FOr cANADA This unit cannot be installed in a UNVENTED application, this wArNING unit can only be installed as a VENTED application with these requirements. DO NOT OPerATe THIS GAS LOG SeT wITH GLASS DOOrS cLOSeD IMPOrTANT SAFeTY INFOrMATION •... -
Page 11: Water Vapor: A By-Product Of Unvented Room Heaters
wATer VAPOr: A BY-PrODucT OF uNVeNTeD rOOM HeATerS Water vapor is a by-product of gas combustion. An unvented room The following steps will help insure that water vapor does not heater produces approximately one ounce (30ml) of water for every become a problem. 1,000 BTU's (.3KW's) of gas input per hour. 1. Be sure the heater is sized properly for the application, including Unvented room heaters must be used as supplemental heat (a ample combustion air and circulation air. room) rather than a primary heat source (an entire house). In most 2. If high humidity is experienced, a dehumidifier may be used to supplemental heat applications, the water vapor does not create a help lower the water vapor content of the air. problem. In most applications, the water vapor enhances the low 3. Do not use an unvented room heater as the primary heat source humidity atmosphere experienced during cold weather. (an entire house). PrOVISIONS FOr ADeQuATe cOMBuSTION &... -
Page 12: Clearances
cLeArANceS Minimum Dimensions For Solid Fuel Burning Fireplaces uL127 Clearances to combustibles must be as stated in the manufacturer's Installation Instructions and/or Owner's Manual of the firebox this Factory Built Fireplaces (Figure 2) unit will be used in. If no clearances to combustibles are listed, the clearances must be as follows: The sides of the fireplace opening Model must be 6" from any combustible wall. The ceiling must be at least 41" from the fireplace opening. See Figure 3. VFSU(R,E)18 VFSU(R,E)24 Mantel clearances without Hood VFSU(R,E)30 You must have non-combustible materials above the fireplace The dimensions shown and defined in the fireplace manufacturer’s opening. Non-combustible material must extend at least 12" above instructions are minimum clearances to maintain in installing this fireplace opening. With sheet metal, you must have non-combustible heater. Left and right clearances are determined when facing the... -
Page 13: Clearances
cLeArANceS (continued) Mantel clearances with Hood Floor clearance You must have non-combustible materials above the fireplace If installing heater at floor level, the minimum distance to combus- opening. Non-combustible material must extend at least 8" above tibles is “0” inches. fireplace opening. With sheet metal, you must have non-combustible FIREPLACE OR material behind it. FIREBOX TOP Heat resistant materials such as slate and marble must be at least 1/2" thick. Sheet metal should not be installed onto combustible HEATER IN FIREPLACE material. -
Page 14: Combustible Material
cOMBuSTIBLe MATerIAL No greeting card, stockings or ornamentation of any type should be Do not attach combustible material to the mantel of your fireplace. placed on or attached to the fireplace. This is a heating appliance. This is a fire hazard. The flow of heat can ignite combustibles. Figure 8 Figure 7 FIrePLAce PrePArATION • Turn off gas supply to fireplace or firebox. FOr MASONrY BuILT FIrePLAceS Free OPeNING AreA OF cHIMNeY DAMPer FOr VeNTING • Have the fireplace floor and chimney professionally cleaned to cOMBuSTION PrODucTS FrOM DecOrATIVe APPLIANceS remove ashes, soot, creosote or other obstructions. FOr INSTALLATION IN SOLID FueL BurNING FIrePLAceS Have this cleaning performed annually after installation. -
Page 15: Placement Of Vfsue Control Module
PLAceMeNT OF VFSue cONTrOL MODuLe The control module is packaged under the burner at the manu- facturer. Use caution to keep all the wire connections in place when removing the burner and module from the carton. During appliance installation, place the control module on the pilot side of the burner, but not under the burner. PILOT SHIELD CONTROL MODULE Figure 9 Insert 4 AA batteries into the control module. Follow the directions on pages 24 to 27 to sync the remote and control module. After the appliance has been installed, slide the control module shield over the control module. Place the module in a location that is easy to reach so that the batteries can be changed. The control module must remain on the fireplace floor or firebox bottom. This location will keep the batteries cool and result in a longer battery life. PILOT CONTROL MODULE Figure 10 Notice: Lava rock can be used to hide the control module and shield. 31722-1-1213 Page 15... -
Page 16: Installing As A Vented Appliance
INSTALLING AS A VeNTeD APPLIANce Notice: (Damper Clamp Installation) Installing Damper clamp When installing your log set as a vented installation the damper Remove all ashes or other debris from the fireplace. If the fireplace clamp must be used. is equipped with an ash dump be sure to seal the door with furnace cement or high temperature silicone. Be sure to check the damper for proper operation and verify that the flue passageway is open. Place the clamp over the lip of the damper and tighten the hold down bolt until the clamp is securely attached to the damper. This will prevent the damper from accidentally closing. Manual and millivolt controlled gas logs may be installed as a vented decorative log set in compliance with ANSI Z21.60 and National DAMPER CLAMP Fuel Gas Code. When the gas logs are operated with the damper DAMPER open, non-combustible material and minimum mantel requirements do not apply. TYPICAL FIREPLACE Figure 11 When installing your log set as a vent-free installation the damper clamp can be used to eliminate the potential for odors when burning the logs for the first time. -
Page 17: Gas Supply
GAS SuPPLY Check all local codes for requirements, especially for the size and type of gas supply line required. recommended Gas Pipe Diameter Pipe Length Schedule 40 Pipe Tubing, Type L Inside Diameter Outside Diameter Nat. L.P. Nat. L.P. 0-10 feet 1/2” 3/8” 1/2” 3/8” 0-3 meters 12.7mm 9.5mm 12.7mm 9.5mm 10-40 feet 1/2” 1/2” 5/8” 1/2” 4-12 meters 12.7mm 12.7mm 15.9mm 12.7mm 40-100 feet... -
Page 18: Placement Of Glowing Embers And Lava Rock
PLAceMeNT OF GLOwING eMBerS AND LAVA rOcK Over time, the rockwool will break down and new rockwool will Placement of the glowing embers (rockwool) is very individual need to be placed to recreate the original glowing embers effect. and light coverage will provide your best effects. We recommend Remove all old rockwool from the appliance and apply new rock as separation of the rockwool by hand and make your coverage as light and fluffy as possible. described in this section or the log manual. NOTICE: Only the rockwool supplied with this unit or ordered in Place just enough rockwool on the burner to obtain the glow and accordance with the Parts List on pages 32 and 34 should be used a gold, yellow flame. on this burner. See the Parts List on pages 32 and 34 to order Do not place rockwool over large ports in middle portion of replacement rockwool. -
Page 19: For Your Safety Read Before Lighting
VFSur-(18,24,30) LIGHTING INSTrucTIONS FOr YOur SAFeTY reAD BeFOre LIGHTING wArNING: If you do not follow these instructions exactly, a fire or explosion may result causing property damage, personal injury or loss of life. A. This appliance has a pilot which must be lighted by •... -
Page 20: Vfsur Wiring
VFSur wIrING On circulating vent-free firebox, install remote control receiver Thermostats are not approved on vented decorative appliances. behind bottom louver. Label all wires prior to disconnection when servicing controls. Wiring Refer to remote control installation and operating instructions for errors can cause improper and dangerous operation. Verify proper more details on remote control. operation after servicing. 750 Millivolt System The millivolt gas valve does not require 24 or 110 volts. The gas When you ignite the pilot, the thermocouple produces millivolts valve is powered by the thermopile. See Figure 15 to provide (electrical current) which energizes the magnet in the gas valve. -
Page 21: Vfsur Troubleshooting
VFSur TrOuBLeSHOOTING SYMPTOMS - POSSIBLe cAuSeS AND cOrrecTION when ignitor button is pressed, there is no spark at ODS/ c. Manual Shutoff valve not fully open - Fully open manual pilot. shutoff valve. a. Ignitor electrode positioned wrong - Replace pilot. d. Thermocouple connection loose at control valve - Hand b. Ignitor electrode is broken - Replace pilot. tighten until snug, then tighten 1/4 turn more. c. Ignitor electrode not connected to ignitor cable - Reconnect e. Pilot flame not touching thermocouple, which allows ignitor cable. thermocouple to cool, causing pilot flame to go out. This d. Ignitor cable pinched or wet. Keep ignitor cable dry - Free problem could be caused by either low gas pressure or ignitor cable if pinched by any metal or tubing. dirty or partially clogged ODS/pilot - Contact local gas e. Broken ignitor cable - Replace ignitor cable. -
Page 22: Vfsue-(18,24,30) Lighting Instructions
VFSue-(18,24,30) LIGHTING INSTrucTIONS FOR YOUR SAFETY READ BEFORE LIGHTING wArNING: If you do not follow these instructions exactly, a fire or explosion may result causing property damage, personal injury or loss of life. A. BeFOre LIGHTING smell all around the appliance B. -
Page 23: Vfsue Wiring
VFSue wIrING 31722-1-1213 Page 23... -
Page 24: Vfsue Remote Electronic Ignition And Control System
VFSue reMOTe eLecTrONIc IGNITION AND cONTrOL SYSTeM APPLIcATION GV60 is a battery-powered electronic and control system for gas appliances with pilot burners and ODS systems. GeNerAL NOTeS radio Frequency remote 433.92 MHz for Europe; 315 MHz for U.S. (FCC ID: RTD- G6R) and for Canada (IC: 4943A-G6R). This device complies with part 15 of the FCC Rules. Opera- tion is subject to the following two conditions: (1) This device may not cause harmful interference, and (2) This device must accept any interference received, including interference that may cause undesired operation. Changes or modifications not expressly approved by the party responsible for compli- Figure 17 ance could void the user's authority to operate the equipment. - Page 25 VFSue reMOTe eLecTrONIc IGNITION AND cONTrOL SYSTeM AuTOMATIc OPerATION Standard, Display, Timer/Thermostat rF remote Handset wArNING • Simultaneously press and hold the OFF and (large flame) buttons until a short beep confirms the start sequence has Wiring of valve and receiver must be completed before starting begun; release buttons. ignition. Failure to do so could damage the electronics. • Continuing beeps confirm the ignition is in process. SeTTING THe eLecTrONIcS cODe • Once pilot ignition is confirmed, there is main gas flow.
- Page 26 VFSue reMOTe eLecTrONIc IGNITION AND cONTrOL SYSTeM SeTTING THe TIMe SeTTING THe TeMPerATure Display, Timer/Thermostat rF remote Handsets • Select either the MODE or the MODE by TEMP TEMP briefly pressing the SET button. • The display will flash after either: • Hold the SeT button until the TEMP display flashes. a. Installing the battery or • Set the desired temperature with (large flame) or (small b. Simultaneously pressing the (large flame) and (small flame).
-
Page 27: Vfsue Remote Electronic Ignition And Control System
VFSue reMOTe eLecTrONIc IGNITION AND cONTrOL SYSTeM 4. Place ON/OFF switch (if equipped) in O (OFF position). Battery replacement 5. Wait five minutes to clear out any gas. Verify that no gas is in Battery replacement is recommended at the beginning of each the area around the appliance, including near the floor. If you heating season. Do not use metal tools to remove batteries. Using detect gas STOP! Follow "A" in the safety information. If no a metal tool could cause a short that may damage the receiver. gas is present, proceed to step 6. 6. Place ON/OFF switch in ON position. Location of receiver 7. With the MANUAL knob in MAN position a manual pi- When the RF-receiver is placed in the appliance, the surrounding lot valve operator and piezo igniter are accessible. -
Page 28: Vfsue Troubleshooting
VFSue TrOuBLeSHOOTING SYMPTOMS - POSSIBLe cAuSeS AND cOrrecTION when ignitor button is pressed, there is no spark at ODS/ d. Thermocouple connection loose at control valve - Hand pilot. tighten until snug, then tighten 1/4 turn more. a. Ignitor electrode positioned wrong - Replace pilot. e. Pilot flame not touching thermocouple, which allows b. Ignitor electrode is broken - Replace pilot. -
Page 29: Burner Instructions
BurNer INSTrucTIONS check the following items during installation prior to lighting • Check all carryover ports for blockage from the ceramic media the multisided burner: If there is blockage, use a small pointed tool to move the ceramic media away from the carryover port. • Check air shutter for correct setting. NAT gas - The air shutter setting must be 1/4" (6.4mm) for VFSU(R,E)18. • For best results when lighting the burner, have the adjustable flame knob to the HI position, then adjust to a lower setting after the burner has ignited. LP gas - The air shutter setting must be Full Open for • When first lighting the pilot on the burner, it takes approximately VFSU(R,E)(18,24,30). 60 to 75 seconds to fully heat and energize the thermopile. AIR SHUTTER FULL OPEN Once the thermopile is energized, turn on the gas valve and light the burner. -
Page 30: Pilot Flame Characteristics
PILOT FLAMe cHArAcTerISTIcS cleaning and Maintenance/Pilot Figure 25 shows a correct pilot flame pattern. The correct flame will be blue and will extend beyond the thermocouple. The flame will Oxygen Depletion Sensor Pilot surround the thermocouple just below the tip. A slight yellow flame When the pilot has a large yellow tip flame, clean the Oxygen may occur where the pilot flame and main burner flame meet. Figure Depletion Sensor as follows: 1. Clean the ODS pilot by loosening nut B from the pilot tubing. 26 shows an incorrect pilot flame pattern. The incorrect pilot flame When this procedure is required, grasp nut A with an open end is not touching the thermocouple. This will cause the thermocouple wrench. to cool. When the thermocouple cools, the heater will shut down. 2. Blow air pressure through the holes indicated by the arrows. VFSu(r,e) PILOT FLAMe PATTerN (VFSue pilot will not This will blow out foreign materials such as dust, lint and spider have a thermopile) webs. Tighten nut B also by grasping nut A. -
Page 31: Cleaning And Servicing
cLeANING AND SerVIcING Annual inspection and cleaning by your dealer or qualified ANNuAL cLeANING/INSPecTION – refer to parts diagram for service technician is recommended to prevent malfunction location of items discussed below. and/or sooting. • Inspect and clean burner air intake hole. Remove lint or particles TurN OFF HeATer AND ALLOw TO cOOL BeFOre with vacuum or brush. Failure to keep air intake hole clean will cLeANING. -
Page 32: Vfsur(18,24,30) Parts List
VFSur(18,24,30) PArTS LIST Attention: when ordering parts, it is very important that part number and description of part coincide. Index Part Number Description Number VFSur18(N,P) VFSur24(N,P) VFSur30(N,P) 32240 32241 32242 Rear Cover Plate 32287 32294 32295 Grate Leg Welded Assembly 24553 24553 24553 Venturi Shield R3624 R3624 R3624 Pilot Assembly - Nat Only... -
Page 33: Vfsur(18,24,30) Parts View
VFSur(18,24,30) PArTS VIew 31722-1-1213 Page 33... -
Page 34: Vfsue(18,24,30) Parts List
VFSue(18,24,30) PArTS LIST Attention: when ordering parts, it is very important that part number and description of part coincide. Index Part Number Description Number VFSue18(N,P) VFSue24(N,P) VFSue30(N,P) 32240 32241 32242 Rear Cover Plate 32287 32294 32295 Grate Leg Welded Assembly 24553 24553 24553 Venturi Shield R5170 R5170 R5170 Pilot Assembly - LP... -
Page 35: Vfsue(18,24,30) Parts View
VFSue(18,24,30) PArTS VIew 31722-1-1213 Page 35... -
Page 36: Master Parts Distributor List
MASTer PArTS DISTrIBuTOr LIST To Order Parts Under Warranty, please contact your local Empire dealer. See the dealer locator at www.empirecomfort. com. To provide warranty service, your dealer will need your name and address, purchase date and serial number, and the nature of the problem with the unit. To Order Parts After the Warranty Period, please contact your dealer or one of the Master Parts Distributors listed below. This list changes from time to time. For the current list, please click on the Master Parts button at www.empirecomfort.com. Please note: Master Parts Distributors are independent businesses that stock the most commonly ordered Original Equip- ment repair parts for Heaters, Grills, and Fireplaces manufactured by Empire Comfort Systems Inc. Dey Distributing Victor Division of F. w. webb company 1401 Willow Lake Boulevard 200 Locust Street Vadnais Heights, MN 55101 Hartford, CT 06114 Phone: 651-490-9191 Phone: 860-722-2433 Toll Free: 800-397-1339 Toll Free: 800-243-9360 website: www.deydistributing.com Fax: 860-293-0479 Parts: Heater, Hearth and Grills Toll Free Fax: 800-274-2004 websites: www.fwwebb.com & www.victormfg.com... -
Page 37: Appliance Service History
APPLIANce SerVIce HISTOrY Date Dealer Name Service Technician Name Service Performed/Notes 31722-1-1213 Page 37... -
Page 38: Appliance Service History
APPLIANce SerVIce HISTOrY Date Dealer Name Service Technician Name Service Performed/Notes Page 38 31722-1-1213... -
Page 39: Warranty Terms
wArrANTY TerMS Empire Comfort Systems Inc. warranties this hearth product to be free from defects at the time of purchase and for the periods speci- fied below. Hearth products must be installed by a qualified technician and must be maintained and operated safely, in accordance with the instructions in the owner’s manual. This warranty applies to the original purchaser only and is not transferable. All warranty repairs must be accomplished by a qualified gas appliance technician. Limited Five-Year Parts & Labor Warranty – All Other Components (Except Remote Controls, Thermostats, Accessories and Replacement Parts) Should any part fail because of defective workmanship or material within five years from the date of purchase, Empire will repair or replace at Empire’s option. Within five years from the date of purchase, Empire will pay reasonable labor to have that defect repaired at Empire’s option. Limited One-Year Parts Warranty – Remote Controls, Thermostats, Accessories, and Parts Should any remote control, thermostat, accessory, or other part fail because of defective workmanship within one year from the date of purchase, Empire will repair or replace at Empire’s option. Duties Of The Owner The appliance must be installed by a qualified installer and operated in accordance with the instructions furnished with the ap- pliance. A bill of sale, cancelled check, or payment record should be kept to verify purchase date and establish warranty period. Ready access to the appliance for service. - Page 40 Empire Comfort Systems Inc. EMPIRE EMPIRE 918 Freeburg Ave. Belleville, IL 62220 If you have a general question about our products, please e-mail us at info@empirecomfort.com. If you have a service or repair question, please contact your dealer. Comfort Systems www.empirecomfort.com Page 40 31722-1-1213...
Need help?
Do you have a question about the VFSUR18-3 and is the answer not in the manual?
Questions and answers