
Related Manuals for Sonoma 30”


Summary of Contents for Sonoma 30”
- Page 1 E D I T I O N P L A T I N U M E D I T I O N Sonoma Platinum Edition Grill: 30” Model USE AND CARE MANUAL FOR OUTDOOR USE ONLY MADE IN THE U.S.A.
-
Page 2: General Safety Instructions
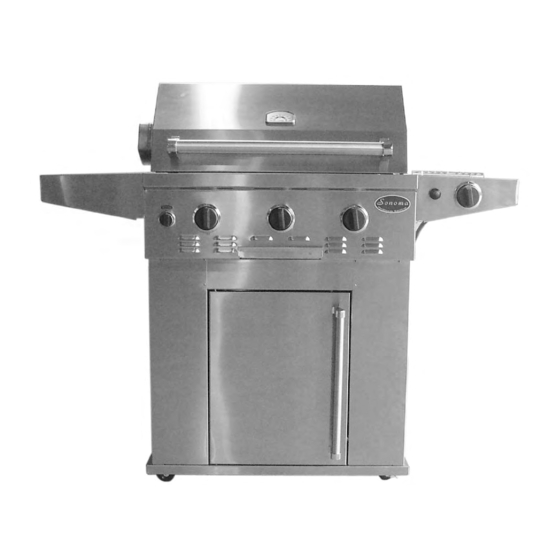
General Safety Instructions IMPORTANT SAFETY INFORMATION Read this manual carefully before using your grill to reduce the risk of fire, burn hazard or other injury. - Extreme care should be used because of the high temperatures produced by this appliance. CHILDREN SHOULD NOT BE LEFT UNATTENDED IN AN AREA WHERE THE GRILL IS BEING OPERATED. - Page 3 Grill Features: SGR30LP 1. Roll top grill hood 8. Warming shelf 2. Grilling/Cooking surface 9. Infrared back burner 3. Side Shelf 10. Electronic igniter: main, rear infrared & side burner 4. Control knob: back infrared burner 11. Cart with door 5.
-
Page 4: Grill Assembly
Grill Assembly IMPORTANT: Remove all protective plastic film from stainless steel parts prior to assembly/use. This film is installed at the factory to prevent damage that could occur during shipment and handling. Fig. 1 SIDE SHELF ATTACHMENT 1. Attach the shelf to the left side of grill by inserting the shelf hooks into the slots on the side of the grill and pushing down on the shelf assembly until level with grill. -
Page 5: Side Burner Assembly
Side Burner Assembly SIDE BURNER PARTS ASSEMBLY 1. Remove burner assembly from packaging. (See Fig. 7) 2. Loosen the bolts on the side of the grill and attach the Fig. 7 shelf by allowing the bolt heads to fall through the large openings in the bottom of the keyhole slots. - Page 6 Side Burner Assembly SIDE BURNER PARTS ASSEMBLY 6. Install black plastic knob. (See Fig. 14 ) 7. Install burner and cap. (See Fig. 15-16) Fig. 14 8. Install grate over burner. (See Fig. 17) 9. Attach the three (3) wires coming out from the side of the grill and the side burner wire to the igniter terminals.
-
Page 7: Gas Requirements
L.P. GAS INSTALLATION Sonoma Gas Grills are set to operate with L.P. gas and come with a high capacity hose and regulator assembly. (Note: Only use the pressure regulator and hose assembly supplied with the grill or a replacement pressure regulator and hose assemblies specified by Sonoma). -
Page 8: Pre Operation Leak Testing
Pre Operation Leak Testing GENERAL INFORMATION Although all gas connections on the grill are leak tested prior to shipment, a complete gas tightness check must be per- formed at the installation site due to possible shifting during shipment, installation or excessive pressure unknowingly being applied to the unit. -
Page 9: Lighting The Grill
Lighting the Grill Do not attempt to “Light” the grill if the odor of gas is present!! BEFORE LIGHTING Important! Before Lighting... Check the gas supply line for cuts, wear or abrasion. Always keep your face and body as far away from the grill as Fig. -
Page 10: Using The Grill
Using the Grill GRILL LOCATION Do not use the grill in garages, breezeways, sheds or any enclosed area. Never operate the grill in enclosed areas as this could lead to a carbon monoxide buildup, which could result in injury or death. - Page 11 Using the Rotisserie & Side Burners The grill rotisserie system is designed to cook items from the back using infrared heat. The rotisserie burner is an infrared type which provides intense searing radiant heat. Preferred by chefs over other cooking methods, this intense heat sears in the natural juices and nutrients found in quality cuts of meats.
-
Page 12: Rotisserie Lighting
Using the Rotisserie & Side Burners ROTISSERIE LIGHTING Open the lid. Push and turn the control knob for the rotisserie counter clockwise to the “HIGH” position. Wait 5 seconds. Then press and hold the electronic igniter button. You’ll hear a snapping sound. If the burner does not light in 4 seconds, turn the control knob to OFF and wait 5 minutes before try- ing again. -
Page 13: Care And Maintenance
Care and Maintenance DRIP TRAY The drip tray should be cleaned periodically to prevent heavy buildup of debris. NOTE: Allow the drip tray to cool before attempting to clean. Important: Do not leave the grill outside during inclement weather unless it is covered. Rain water can collect inside of the grill, the grill cart or the drip tray if left uncovered. -
Page 14: Troubleshooting Your Grill
Troubleshooting Your Grill GENERAL TROUBLE SHOOTING You should inspect the burners at least once a year or immediately if any of the following conditions occur: • The smell of gas. • Flames appearing mostly yellow. (some yellow at the tips is OK) •... - Page 15 Troubleshooting Your Grill PROBLEM SOLUTION Grill will not light with a match or low heat with dial set • Is your gas supply fully turned on? to "High" position. • Is there gas in your L.P. tank ? Check your gas level. •...
-
Page 16: Limited Lifetime Warranty
Valves, Knobs, Electronic Igniter, Other related parts Limited 1 Year If the Sonoma Platinum Edition Grill does not operate properly, first thoroughly carry out the instructions provided with the unit to ensure that the appliance is installed correctly and check the troubleshooting section in the use and care manual.
Need help?
Do you have a question about the 30” and is the answer not in the manual?
Questions and answers