Table of Contents
Advertisement
WARNING
Improper installation, adjustment,
alteration, service or maintenance
can cause injury or property
damage.
Read the installation, operation and
maintenance instructions thoroughly
before installing or servicing this
equipment.
DANGER
Failure to follow these
instructions could result in fire
or explosion that could cause
property damage, personal injury
or death.
DANGER
DO NOT use gas grill for indoor
cooking or heating. TOXIC fumes
can accumulate and cause
asphyxiation. DO NOT use in or
on boats or recreational vehicles.
PROP 65 WARNING
Chemicals known to the State of
California to cause cancer, birth
defects or other reproductive
harm are created by the
combustion of propane.
WARNING
FOR YOUR SAFETY:
For Outdoor Use Only
(Outside any enclosure)
4-Burner LP Gas Grill
SAVE THESE INSTRUCTIONS FOR FUTURE
REFERENCE. IF YOU ARE ASSEMBLING THIS UNIT
FOR SOMEONE ELSE, GIVE THIS MANUAL TO HIM
OR HER TO SAVE FOR FUTURE REFERENCE.
FOR CUSTOMER SERVICE, EMAIL TO
SALESHELP@SUREHEAT.COM OR
CALL 1-800-229-5647 (TOLL-FREE) BETWEEN
8:00 AM AND 5:00 PM EASTERN TIME, MONDAY
THROUGH FRIDAY
PF30LP
Advertisement
Table of Contents

Related Manuals for Sonoma PF30LP


Summary of Contents for Sonoma PF30LP
- Page 1 DO NOT use gas grill for indoor cooking or heating. TOXIC fumes can accumulate and cause asphyxiation. DO NOT use in or PF30LP on boats or recreational vehicles. PROP 65 WARNING Chemicals known to the State of California to cause cancer, birth...
-
Page 2: Grill Operation
Always read and understand the WARNINGS and INSTRUCTION that are contained in this manual before attempting to use this gas barbecue grill, to prevent possible bodily injury or property damage. Always keep this manual convenient for future reference. PF30LP Owner's Manual... -
Page 3: Table Of Contents
Grill Features....................... Getting Started....................Grill Assembly..................... Grill Location...................... Gas Requirements....................Pre-Operation Leak Testing................Lighting the Grill....................Using the Rotisserie Burner................Lighting the Side Burner..................Grill Light Maintenance..................Care and Maintenance..................Troubleshooting Guide..................Replacement Part List ..................Warranty Information..................PF30LP Owner's Manual... -
Page 4: For Your Safety
4. Move gas hoses as far away as possible from hot surfaces and dripping hot grease. 5. Never keep a filled gas container in a hot car or car trunk. Heat will cause the gas pressure to increase, which could open the relief valve and allow gas to escape. PF30LP Owner's Manual... - Page 5 Step 3. Ensure that the valve orifice is pointing straight and completely inserted into the burner tube. GENERAL INFORMATION 1. A propane gas cylinder is required for operation. Valve Orifice 2. This gas grill is NOT intended for commercial use. PF30LP Burner Tube Owner's Manual...
-
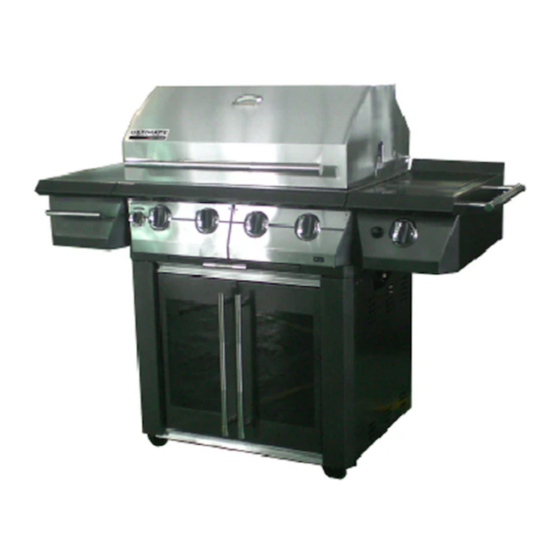
Page 6: Grill Features
Grill Features 1. Roll top grill hood 10. Bread warming rack 2. Grilling/cooking surface 11. Grill light 3. Side shelf 12. Rear Infrared burner 4. Storage drawer 13. Side burner 5. Control knob: Rear infrared burner 14. Control Knob: Side burner 6. -
Page 7: Getting Started
Getting Started Self-tapping screw x 2 Phillips pan head screw x 2 Getting Started 1. Please follow the steps in the order that they are presented. 2. Assemble the grill where you plan to use it. 3. You may want to place an old towel or cloth at the assembly site to prevent nuts and bolts from becoming lost. -
Page 8: Grill Assembly
Grill Assembly Fig. 1 LEFT SHELF ASSEMBLY 1. Pull the drawer all the way out, and press the black plastic drawer slide release levers to remove the drawer. (See Fig. 1) release lever Fig. 2 Bolts 2. Loosen the four hex-head bolts on the side of the grill approximately 1/4 in. - Page 9 Grill Assembly Tips: In order to insert the drawer correctly, you have Fig. 5a to pull the inner slide way out of the track first. (See Fig. 5a) Inner slide way Fig. 5b Then you can re-insert the drawer back into the shelf smoothly.
- Page 10 Grill Assembly Fig. 9 6 pole igniter module 4. Connect loose igniter wires from the grill to the open terminals of the igniter. (See Fig. 9) Note: The igniter is designed in such a way that it does not matter which terminal tab is used when connecting igniter wires.
- Page 11 Grill Assembly Fig. 13 8. Place the side burner grate in position. (See Fig. 13) Note: Remove all the tape before using the grill. Fig. 14 Flavor grids INTERIOR PARTS ASSEMBLY 1. Place the flavor grids in position with slotted holes facing the front of the grill.
-
Page 12: Grill Location
Grill Location Do not use the grill in garages, breezeways, sheds or any enclosed area. Never operate the grill in enclosed areas as this could lead to a carbon monoxide buildup, which could result in injury or ▲ WARNING death. Place the grill on a level surface. Avoid moving the grill while it is in operation. NOTE: The grill will operate best if it is not facing directly into the wind. -
Page 13: Gas Requirements
Gas Requirements GENERAL INFORMATION Never attach an unregulated gas line to the appliance. Connection to ▲ WARNING an unregulated gas line can cause excessive heat or fire. Verify the type of gas supply to be used, either Natural Gas (N.G.) or Liquid Propane (L.P.), and make sure the serial plate agrees with that of the supply. - Page 14 Gas Requirements L.P. GAS INSTALLATION Gas Grills that are set to operate with L.P. gas come with a high capacity hose and regulator assembly. (Note: Use only the pressure regulator and hose assembly supplied with the grill or a replacement pressure regulator and hose assemblies specified by the manufacturer).
-
Page 15: Pre-Operation Leak Testing
Pre-Operation Leak Testing GENERAL INFORMATION Although all gas connections on the grill are leak tested prior to shipment, a complete gas tightness check must be performed at the installation site due to possible shifting during shipment, installation or excessive pressure unknowingly being applied to the unit. Periodically check the whole system for leaks and immediately check the system if the smell of gas is detected. -
Page 16: Lighting The Grill
Lighting the Grill Do not attempt to "Light" the grill if the odor of gas is present!! BEFORE LIGHTING Fig. 18 Important! Before Lighting: ▲ WARNING • Check the gas supply line for cuts, wear or abrasion. • Always keep your face and body as far away from the grill as possible when lighting. -
Page 17: Using The Rotisserie Burner
Using the Rotisserie Burner The grill rotisserie system is designed to cook items from the back using infrared heat. The rotisserie burner is an infrared type which provides intense searing radiant heat. Preferred by chefs over other cooking methods, this intense heat sears in the natural juices and nutrients found in quality cuts of meats. -
Page 18: Lighting The Side Burner
Lighting the Side Burner ▲ Keep any electrical supply cords and the fuel supply away from any heated surfaces. SIDE BURNER LIGHTING Fig. 24 Push and turn the control knob to the "HIGH" position. Conitnue pushing the knob. You’ll hear a snapping sound. -
Page 19: Grill Light Maintenance
Grill Light Maintenance ▲ WARNING Electrical Grounding Instructions This appliance (rotisserie motor) is equipped with a three-prong (grounding) plug for your protection against shock hazard and should be plugged directly into a properly grounded three-prong receptacle. Do not cut or remove the grounding prong from this plug. -
Page 20: Care And Maintenance
Care and Maintenance IMPAIRED VENTILATION OF HOT AIR FROM GRILL - In order for the burners to function properly, hot air created by the burners must have a way to escape, the burners may become deprived of oxygen, especially if the burner output is set at HIGH. This is the reason your grill was designed with ventilation louvers. -
Page 21: Cooking Grates
Care and Maintenance DRIP TRAY Clean the drip tray periodically to prevent heavy buildup of debris. NOTE: Allow the drip tray to cool before attempting to clean. Important: Do not leave the grill outside during inclement weather unless it is covered. Rain water can collect inside of the grill, the grill cart or the drip tray if left uncovered. -
Page 22: Troubleshooting Guide
Troubleshooting Guide Problem Possible Solution 1. Push the igniter button and check for sparks. 2. If there is a spark, check to make sure gas is supplied to the burner. a. Purge the line of any trapped air. b. Check to see if you can match-light the burner. Grill will not light c. - Page 23 Troubleshooting Guide Problem Possible Solution The propane regulator assembly incorporates an excess flow device designed to supply the grill with sufficient gas flow under normal conditions, yet control excess gas flow. Rapid changes in pressure can trgger the excess flow device, providing a low flame and low temperature.
-
Page 24: Replacement Part List
Replacement Part List Hood Assembly Light Switch SASBA00239A RCOZZ00462A 1 set 1 set Hood Handle Assy. Main Cooking Grate RCOZZ00479A RCOZZ00465A 1 set 1 set Temp. Gauge Flavor Grid RCOZZ00481A SBNMC00224A 1 pcs 1 set Bread Warming Rack Main Burner Tube SASBA00237A RCOAZ00044A 1 pcs... - Page 25 Replacement Part List Large Bezel Side Burner Grate RCOAG00003C RCOAZ00009A 1 pcs 1 pcs Large Knob Side Burner Right Assy. RCOFE00006B SASCD00377A 1 pcs 1 set Small Knob Side Burner Valve RCOFE00007B RCOZZ00487A 1 pcs 1 pcs Small Bezel Transformer w/ Wire RCOAG00004B RCOZZ00468B 1 pcs...
- Page 26 Main Igniter w/ Wire 400 RCOZZ00215A Main Igniter w/ Wire 920 RCOZZ00214A Main Igniter w/ Wire 740 RCOZZ00209A Flex Line 7/16 FLR SST 201 RCOZZ00009A Back IR Igniter Wire RCOZZ00117A NG Regulator RCOZZ00398A Cart Mag Stop Galv RCOZZ00020A "INFRARED" Logo RCOZZ00502A "SONOMA" Logo...
-
Page 27: Warranty Information
LIMITED WARRANTY Sure Heat Mfg warrants that for 2 years from the date of purchase, the stainless steel panels will not break due to defects in material or workmanship. All other components of this grill are warranted free from defects in material and workmanship for one year from the date of purchase.
Need help?
Do you have a question about the PF30LP and is the answer not in the manual?
Questions and answers