
Related Manuals for GLEN CANYON 720-0152-NG

Summary of Contents for GLEN CANYON 720-0152-NG
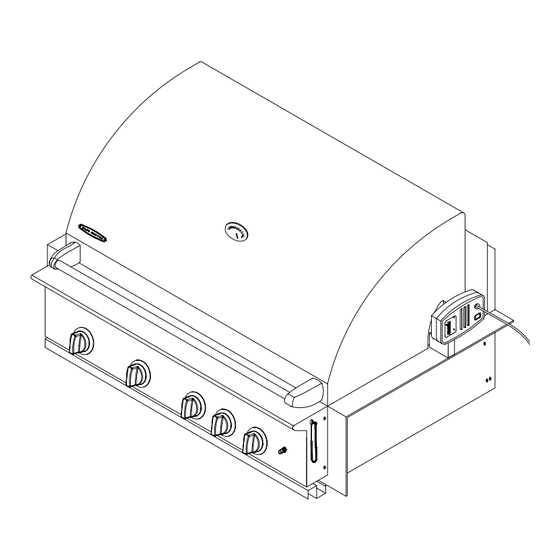
- Page 1 Stainless Steel Built-in Gas Grill USE AND CARE GUIDE MODEL NO.: 720-0152-NG ® FOR OUTDOOR USE ONLY PLEASE CONTACT 1-800-913-8999 FOR ASSISTANCE DO NOT RETURN TO PLACE OF PURCHASE...
-
Page 2: Table Of Contents
TABLE OF CONTENTS Cleaning & Maintenance………………….. Safety Instructions …………………….. Trouble Shooting ………………………… 17~18 Build-in grill specifications………….. Exploded View…………………………… Island construction………………….. Grill Parts List ……………………………. Battery Installation ……………… Grilling Hints …………………………… Rotisserie Motor&Rotisserie Kit Assembly. Grill Cooking Chart ……………………… 22~24 Grill Recipe Suggestions……………….. Installation of Nature gas regulator….. - Page 3 SAFETY INSTRUCTIONS ***** WARNING ***** FOR YOUR SAFETY If you smell gas: 1. Shut off gas to the appliance. 2. Extinguish any open flame. 3. Open Lid. 4. If odor continues, immediately call your gas supplier or your fire department. FOR YOUR SAFETY 1.
- Page 4 SAFETY INSTRUCTIONS WARNING Do not try lighting this appliance without first reading the “LIGHTING INSTRUCTIONS” section of this manual. DO NOT USE ALUMINUM FOIL TO LINE THE GRILL RACKS OR GRILL BOTTOM. This can severely upset combustion airflow or trap excessive heat in the control area. INSECT WARNING!!! Spiders and insects can nest in the burners of this and any other grill, and cause the gas to flow improperly.
- Page 5 SAFETY INSTRUCTIONS WARNING: Always keep your face and body as far away from the burner as possible when lighting. WARNING: IMPORTANT! BEFORE LIGHTING… Inspect the gas supply hose prior to turning the gas “ON”. If there is evidence of cuts, wear, or abrasion, it must be replaced prior to use.
- Page 6 SAFETY INSTRUCTIONS CHILDREN SHOULD NOT BE LEFT ALONE OR TESTED IN ACCORDANCE WITH ANSI UNATTENDED IN AN AREA WHERE THE GRILL IS Z21.58b-2002/CGA 1.6b-2002 STANDARD FOR BEING USED. NEVER ALLOW THEM TO SIT, STAND OUTDOOR COOKING GAS APPLIANCES. THIS OR PLAY ON OR AROUND THE GRILL AT ANY TIME.
- Page 7 GRILL. For proper lighting and performance of the burners keep the burner ports clean. It is necessary to The 720-0152-NG Built-in Grill is designed for clean them periodically for optimum performance. optimum performance without the use of briquettes. The burners will only operate in one position and Do not place briquettes on the radiant as this will must be mounted correctly for safe operation.
-
Page 8: Safety Instructions
SAFETY INSTRUCTIONS CHECKING FOR GAS LEAKS 3. Apply the soap solution to all gas connections. Never test for leaks with a flame. Prior to first use Bubbles will appear in the soap solution if and at the beginning of each new season, you must connections are not properly sealed. -
Page 9: Build-In Grill Specifications
Built-in Grill Specifications Description 720-0152-NG Cutout Width 31 7/8" (80.96 cm) Cutout Depth 21 5/8" (54.93 cm) Cutout Height 9 1/4 " (23.50 cm) Natural Gas: Standard residential 1/2" (1.3 cm) ID gas service line. Natural Gas Requirements gas hose/regulator assembly included with quick-connect fitting for attachment to house natural gas line. -
Page 10: Island Construction
Do not install this unit into combustible enclosures.There should be a minimum clearance of at least 24in.(60.96cm)from all sides to combustible materials. Island cutout dimensions for Glen Canyon 4 burner NG built-in grills: Width 31 7/8 inches (80.96 cm) Depth 21 5/8 inches (54.93 cm) -
Page 11: Battery Installation
BATTERY INSTALLATION 1. To install the battery, remove the ignition button housing. Insert the battery into the housing with the positive pose facing out. Replace the ignition button housing after battery is installed (FIGURE 1). -
Page 12: Rotisserie Motor&Rotisserie Kit Assembly
ROTISSERIE MOTOR & ROTISSERIE KIT ASSEMBLY 1. The rotisserie motor mount are already screwed into the right side of the grill. Put the rotisserie motor on the mount as shown in the figure below. Assemble the rotisserie skewer as shown in the figure below. -
Page 13: Installation Of Nature Gas Regulator
INSTALLATION OF NATURE GAS REGULATOR 1. The Nature Gas regulator has been factory installed. Attach the PVC Gas Hose to the regulator (See drawing below). 2. Connect the other end of the PVC Gas Hose to the house gas line using the quick-connect fitting. -
Page 14: To Match Light The Grill
TO MATCH LIGHT THE GRILL 1. If the burner will not light after several attempts then the burner can be match lit. 2. If you’ve just attempted to light the burner with the igniter, allow 5 minutes for any accumulated gas to dissipate. -
Page 15: Lighting Instruction
LIGHTING INSTRUCTION 1. Become familiar with safety guidelines in CAUTION: front of the manual. DO NOT SMOKE Do not move grill trolley while in operation. WHILE LIGHTING THE GRILL OR CHECKING GAS SUPPLY If the grill fails to operate properly: CONNECTIONS. -
Page 16: Lighting Illustrations
LIGHTING ILLUSTRATIONS Main Burner Lighting Illustration Rotisserie Burner Lighting Illustration 1. Make sure the lid is open 1. Push and turn the rotisserie knob to HIGH. 2. Push and turn one of main burner knob to 2. Press the electric igniter 3 to 4 seconds to light HI position the rotisserie burner 3. -
Page 17: Operating Instructions
OPERATING INSTRUCTIONS Burn-off: Before cooking on your gas grill for the first time, burn off the grill to get rid of any odors or foreign matter by igniting the burners, closing the lid, and operating at a “HI” setting for about five minutes. -
Page 18: Cleaning And Maintenance
CLEANING AND MAINTENANCE BURNER CLEANING KEEP YOUR GRILL APPLIANCE AREA CLEAR AND 1. Wire brush entire surface of burner to remove food FREE FROM COMBUSTIBLE MATERIAL SUCH AS residue and dirt. GASLINE AND OTHER FLAMMBLE VAPORS AND 2. Clean any clogged ports with a stiff wire such as an LIQUIDS open paper clip. -
Page 19: Trouble Shooting
TROUBLE SHOOTING PROBLEM SOLUTION When I light the grill it does not flame --Make sure you have turn on the gas immediately . --Make sure it has spark while you are trying to ignite the burner. --Push in for approximately 5 second before to turn and ignite the grill. -
Page 20: Exploded View
Rotisserie motor will not turn --Check the voltage at the outlet. --If an extension cord is required, ensure it is a 16 gauges, grounded cord. --Ensure the on/off switch is on. --Ensure the load does not exceed the 40 pounds operational capacity. -
Page 22: Grill Parts List
MODEL 720-0152-NG PARTS LIST REF# DESCRIPTION Q’TY REF# DESCRIPTION Lid, Front Control Knob Heat Indicator Electric Ignition Button Name Plate Grease Tray Heater Insulating Spacer Support bracket Handle Assembly, Lid Spit Fork Bowl Assembly Spit Rod Front Baffle Counter-Balance Quick-connect fitting Key washer 12’... -
Page 23: Grilling Hints
GRILLING HINTS The doneness of meat, whether rare, medium, or well done, is affected to a large degree by the thickness of the cut. Expert chefs say it is To get the juiciest meats, add seasoning or salt impossible to have a rare doneness with a thin after the cooking is finished on each side and cut of meat. -
Page 24: Grill Cooking Chart
GRILL COOKING CHART WEIGHT OR FLAME APPROXIMATE SPECIAL INSTRUCTIONS FOOD THICKNESS SIZE TIME AND TIPS VEGETABLES Slice. Dot with butter or margarine. Wrap in heavy-duty foil. Fresh Grill, turning occasionally. Beets Medium 12 to 20 minutes Carrots Grill, turning once. Brush occasionally Turnips with melted butter or margarine. - Page 25 WEIGHT OR FLAME APPROXIMATE SPECIAL INSTRUCTIONS FOOD THICKNESS SIZE TIME AND TIPS Tenderloin, Porterhouse, T-Bone, Sirloin Remove excess fat from edge. Slash remaining fat at 2-inch Rare 1 inch High 8 to 14 minutes intervals. Grill, turning once. 1-1/2 inch High 11 to 18 minutes Medium...
- Page 26 done WEIGHT OR FLAME APPROXIMATE SPECIAL INSTRUCTIONS FOOD THICKNESS SIZE TIME AND TIPS FISH AND SEAFOOD Grill, turning once. Brush withmelted butter, margarine or Steaks oil to keep moist. Halibut 3/4 to 1 inch Medium to 8 to 15 minutes Salmon High Swordfish...
-
Page 27: Grill Recipe Suggestions
GRILL RECIPE SUGGESTIONS BBQ SALMON pork chops. Mix well. Pour remaining ingredients. Mix over chops and marinate one well. Brush 1-1/2 tsp. Butter 2 large salmon steaks hour in a cool place. Turn the mixture over each ear. Close 2 tbs. Oil BBQ grill on full. - Page 28 4 cups thinly sliced potatoes Pound flank steak to ¼ inch alternately thread meat, (4 medium-sized potatoes) thickness or flatten chicken pepper, banana and breasts. Mix oil, lime juice mushrooms. Preheat grill. Preheat grill. Combine and seasonings in a zip lock Brush the kabobs with oil.
- Page 29 on the spit running the rod on your spit. Slide four prong on the spit rod. Place on the the fleshier side of the bone. meat hook down the length of rod and test for balance. spit and tighten. At the Light rotis burner.
-
Page 30: Limited Warranty
LIMITED WARRANTY MODEL 720-0152-NG STAINLESS STEEL OUTDOOR GAS GRILL Nexgrill Industries, Inc. warrants to the original consumer purchaser of each Outdoor Gas Grill that when subject to normal residential use, it is free from defects in workmanship and materials for the periods specified below. This warranty excludes grills used in rental or commercial applications.
Need help?
Do you have a question about the 720-0152-NG and is the answer not in the manual?
Questions and answers