Table of Contents
Advertisement
Quick Links
Use & Care Guide
Manual de Uso y Cuidado
Guide d'Utilisation et d'Entretien
English / Español / Français
Models/Modelos/Modèles: 795.7105*
Bottom Freezer Refrigerator
Congelador Inferior Refrigerador
Congélateur Inférieur Réfrigérateur
*
= color number, número de color, le numéro de la couleur
P/N MFL62184409
Sears Brands Management Corporation
Hoffman Estates, IL 60179 U.S.A.
www.kenmore.com
www.sears.com
Sears Canada Inc.
Toronto, Ontario, Canada M5B 2B8
www.sears.ca
Advertisement
Table of Contents

Related Manuals for Kenmore 795.7105


Summary of Contents for Kenmore 795.7105
- Page 1 Use & Care Guide Manual de Uso y Cuidado Guide d’Utilisation et d’Entretien English / Español / Français Models/Modelos/Modèles: 795.7105* Bottom Freezer Refrigerator Congelador Inferior Refrigerador Congélateur Inférieur Réfrigérateur = color number, número de color, le numéro de la couleur...
-
Page 2: Table Of Contents
TABLE OF CONTENTS English Version Removing Humidity Controlled Crisper Spanish Version Temperature Controlled Pantry Drawer French Version Modular Door Bin Warranty Dairy Bin ❿¤Freezer Section Protection Agreements Safety Instructions 5–7 Extra Ice Bin Grounding Requirements Durabase Parts And Features Durabase Divider Refrigerator Installation 9–17 PullOut Drawer... -
Page 3: Warranty
WARRANTY BOTTOM FREEZER REFRIGERATOR WARRANTY Kenmore Elite Limited Warranty When installed, operated and maintained according to all instructions supplied with the product, if any non-consumable part of this appliance other than the sealed refrigerant system fails due to a defect in material and workmanship within one year from the date of purchase, call 1-800-4-MY-HOME ®... -
Page 4: Protection Agreements
PROTECTION AGREEMENTS Master Protection Agreements Power surge protection against electrical damage due to power fluctuations. Congratulations on making a smart purchase. $250 Food Loss Protection annually for any food Your new Kenmore® product is designed and spoilage that is the result of mechanical failure of manufactured for years of dependable opera-tion. -
Page 5: Safety Instructions
IMPORTANT SAFETY INSTRUCTIONS BASIC SAFETY PRECAUTIONS This guide contains many important safety messages. Always read and obey all safety messages. This is the safety alert symbol. It alerts you to safety messages that inform you of hazards that can kill or hurt you or others, or cause damage to the product. All safety messages will be preceded by the safety alert symbol and the hazard signal word DANGER, WARNING, or CAUTION. - Page 6 w w WARNING • Before replacing a burned-out light bulb, unplug • In refrigerators with automatic icemakers, avoid the refrigerator or turn off power at the circuit contact with the moving parts of the ejector breaker or fuse box in order to avoid contact with a mechanism, or with the heating element that live wire filament.
-
Page 7: Grounding Requirements
CFC DISPOSAL Your old refrigerator may have a cooling system that If you are throwing away your old refrigerator, make used CFCs (chlorofluorocarbons). CFCs are sure the CFC refrigerant is removed for proper believed to harm stratospheric ozone. disposal by a qualified servicer. If you intentionally release this CFC refrigerant, you can be subject to fines and imprisonment under provisions of environmental legislation. -
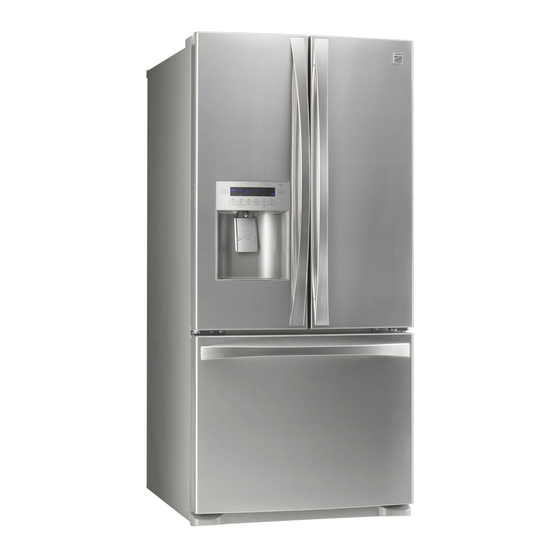
Page 8: Parts And Features
PARTS AND FEATURES Use this page to become more familiar with the parts and features. Page references are included for your convenience. NOTE: This guide covers several different models. The refrigerator you have purchased may have some or all of the items listed below. The locations of the features shown below may not match your model. Refrigerator Light (p. -
Page 9: Refrigerator Installation
REFRIGERATOR INSTALLATION w w WARNING w w WARNING Excessive Weight Hazard When Moving Your Refrigerator: Use two or more people to move and install Your refrigerator is heavy. When moving the refrigerator. Failure to do so can result in back or refrigerator for cleaning or service, be sure to other injury. -
Page 10: Installation
REFRIGERATOR INSTALLATION INSTALLATION PRIOR TO USE • To minimize noise and vibration, the refrigerator Clean your refrigerator thoroughly and wipe off all MUST be installed on a solidly constructed floor. dust accumulated during shipping. • Carpeting and soft tile surfaces are not 2. - Page 11 REFRIGERATOR INSTALLATION NOTE: Removing the doors is always recommended when it is necessary to move the refrigerator through a narrow opening. If it is necessary to remove the handles, follow the directions below. HOW TO REMOVE DOOR HANDLES Handle appearance may vary from NOTE: illustrations on this page.
- Page 12 REFRIGERATOR INSTALLATION HOW TO REPLACE DOOR HANDLES NOTE: Handle appearance may vary from illustrations on this page. 1. Replacing Refrigerator Door Handle • Place the handle on the door, fitting it over the mounting fasteners and tighten the set screws with a 3/32"...
-
Page 13: Removing And Replacing
REFRIGERATOR INSTALLATION REMOVING AND REPLACING 6. Rotate hinge lever (6) counterclockwise. Lift the top hinge (7) free of the hinge lever latch (8). REFRIGERATOR DOORS w w CAUTION: When lifting the hinge free of the latch, To remove the left refrigerator door: be careful that the door does not fall forward. - Page 14 REFRIGERATOR INSTALLATION ❿ Reinstalling the Refrigerator Door Right Door ❿ Left Door 1. Lower the door onto middle hinge pin (9). 1. Lower the door onto middle hinge pin (10). 2. Fit top hinge (4) over hinge lever latch (5) and into place.
- Page 15 REFRIGERATOR INSTALLATION HOW TO REMOVE AND INSTALL THE • With both hands, hold both sides of the door and pull it up to separate it from the rails. FREEZER DRAWER IMPORTANT: To avoid possible injury or product or property damage, you will need two people to perform the following instructions.
- Page 16 REFRIGERATOR INSTALLATION HOW TO REMOVE AND INSTALL THE • Lower door into final position and tighten the FREEZER DRAWER (cont.) screws 2. Installing Freezer Drawer • Fully extend the rails by grasping the center bar with both hands and pulling straight out. •...
-
Page 17: Leveling And Door Alignment
REFRIGERATOR INSTALLATION LEVELING AND DOOR ALIGNMENT 3. Open both doors again and check to make sure that they close easily. If not, tilt the refrigerator Leveling slightly more to the rear by turning both leveling After installing, secure the stability of the product legs clockwise. -
Page 18: Using Your Refrigerator
USING YOUR REFRIGERATOR SETTING THE CONTROLS w w CAUTION: The control display is operated by touch. Excessive moisture on the display may Temperature cause a malfunction. Please keep display clean • The refrigerator control is preset at 37°F (3°C) and and dry. - Page 19 USING YOUR REFRIGERATOR Door Alarm CAUTION • When power is connected to the refrigerator, the Demo Mode (Retail Stores) door alarm is initially set to (ON) and the door The Demo Mode disables all cooling in the refrigerator alarm display will show (ON).
-
Page 20: In-Door Ice Bin
USING YOUR REFRIGERATOR IN-DOOR ICE BIN 2. To remove the in-door ice bin, grip the front handle, slightly lift the lower part, and slowly pull w w CAUTION out the bin as shown. Keep hands and tools out of the ice compartment door and dispenser chute. -
Page 21: Adjusting Control Settings
USING YOUR REFRIGERATOR ADJUSTING CONTROL SETTINGS CONDITION/ RECOMMENDED REASON: ADJUSTMENT: Give the refrigerator time to cool down completely before making final adjustments. It is best to wait 24 I REFRIGERATOR section too Set REFRIGERATOR hours before doing this. The initial settings warm control one degree lower mentioned in SETTING THE CONTROLS section... -
Page 22: Food Storage Guide
USING YOUR REFRIGERATOR FOOD STORAGE GUIDE STORING FROZEN FOOD Wrap or store food in the refrigerator in airtight and NOTE: For further information about preparing food moisture-proof material unless otherwise noted. This for freezing or food storage times, check a freezer prevents food odor and taste transfer throughout the guide or a reliable cookbook. -
Page 23: ❿¤Refrigerator Section
USING YOUR REFRIGERATOR Freezing REFRIGERATOR SECTION Your freezer will not quick-freeze any large quantity WATER DISPENSER of food. Do not put more unfrozen food into the To dispense cold water, push on the dispenser freezer than will freeze within 24 hours (no more switch with a glass. -
Page 24: Refrigerator Shelves
USING YOUR REFRIGERATOR REFRIGERATOR SHELVES • To reinstall a shelf—Tilt the front of the shelf up and guide the shelf hooks into the slots at a desired The shelves in your refrigerator are adjustable to height. Then lower the front of the shelf so that the meet your individual storage needs. -
Page 25: Humidity Controlled Crisper
USING YOUR REFRIGERATOR HUMIDITY CONTROLLED CRISPER To remove the glass 1. Lift up the glass under the crisper cover. The crispers provide fresher-tasting fruit and vegetables by letting you easily control humidity 2. Pull the glass up and out. inside the drawer. You can control the amount of humidity in the moisture-sealed crispers. -
Page 26: Modular Door Bin
USING YOUR REFRIGERATOR MODULAR DOOR BIN FREEZER SECTION The door bins are removable for easy cleaning and EXTRA ICE BIN adjusting. To remove the ice bin from the upper drawer, pull out 1. To remove the bin, simply lift the bin up and pull the drawer as far as possible. -
Page 27: Durabase
USING YOUR REFRIGERATOR DURABASE PULLOUT DRAWER To remove the Durabase, push it to the back as 1. To remove, pull the drawer out to full extension. much as possible. Tilt up the front of the Durabase Lift the front of the drawer up, then pull it straight and pull straight out. -
Page 28: Filter
FILTER FILTER It is recommended that you replace the filter approximately every 6 months, when the water filter indicator • Firmly lock in the filter. ) turns on, or when the The cover will click back into ice and water dispenser place. -
Page 29: Performance Data Sheet
FILTER Performance Data Sheet Model: LG ADQ36006102-S Use Replacement Filter: ADQ36006102 The concentration of the indicated substances in water entering the system was reduced to a concentration less than or equal to the permissible limit for water leaving the system as specified in NSF/ANSI Standard 42 and Standard 53. - Page 30 FILTER Application Guidelines/Water Supply Parameters w w WARNING Service Flow 0.5 gpm (1.9 lpm) Water Supply Potable Water To reduce the risk associated with ingestion of contaminants: Do not use with water that is Water Pressure 20 -120 psi (138 - 827 kPa) microbiologically unsafe or of unknown Water Temperature 33°F - 100°F (0.6°C - 38°C)
- Page 31 FILTER State of California Department of Public Health Water Treatment Device Certificate Number 09 - 2019 Date Issued: December 15, 2009 Trademark/Model Designation Replacement Elements ADQ36006102-S ADQ36006102 Manufacturer: Sears Roebuck and Co. The water treatment device(s) listed on this certificate have met the testing requirements pursuant to Section 116830 of the Health and Safety Code for the following health related contaminants: Microbiological Contaminants and Turbidity Inorganic/Radiological Contaminants...
-
Page 32: Care And Cleaning
CARE AND CLEANING INSIDE WALLS (allow freezer to warm up so w w WARNING the cloth will not stick) To help remove odors, you can wash the inside of the refrigerator with a mixture of baking soda and warm water. Mix 2 tablespoons baking soda to 1 quart of water (26 g soda to 1 liter water.) Be sure the baking soda is completely dissolved so it does not scratch the surfaces of the refrigerator. -
Page 33: Power Interruptions
CARE AND CLEANING Change Freezer Compartment Light Bulb WHEN YOU GO ON VACATION 1. Unplug refrigerator power cord form outlet. If you choose to leave the refrigerator on while you are away, follow these steps to prepare your 2. Remove the screw using a Phillips screwdriver. refrigerator before you leave. -
Page 34: About The Automatic Icemaker
ABOUT THE AUTOMATIC ICEMAKER AUTOMATIC ICEMAKER w w WARNING Ice is made in the automatic icemaker and sent to the dispenser. The icemaker will produce 12 cubes Personal Injury Hazard per cycle—approximately 100 in a 24-hour period, DO NOT place fingers or hands on the automatic depending on freezer compartment temperature, icemaking mechanism while the refrigerator is room temperature, number of door openings and... -
Page 35: About The Automatic Icemaker
ABOUT THE AUTOMATIC ICEMAKER WHEN YOU SHOULD SET THE ICEMAKER w w CAUTIONS POWER SWITCH TO OFF (O) • The first ice and water may include particles or • When the water supply will be shut off for several odor from the water supply line or the water tank. hours. -
Page 36: Connecting The Water Line
CONNECTING THE WATER LINE BEFORE YOU BEGIN WHAT YOU WILL NEED This water line installation is not warranted by the • Copper Tubing, 1/4" outer diameter refrigerator or icemaker manufacturer or retailer. to connect the refrigerator to the Follow these instructions carefully to minimize the water supply. -
Page 37: Installation Instructions
CONNECTING THE WATER LINE INSTALLATION INSTRUCTIONS 5. TIGHTEN THE PIPE CLAMP Tighten the clamp screws until the sealing washer Install the shutoff valve on the nearest frequently begins to swell. used drinking water line. NOTE: Do not overtighten or you may crush the 1. -
Page 38: Connecting The Water Line
CONNECTING THE WATER LINE 8. FLUSH OUT THE TUBING 10. TURN THE WATER ON AT THE SHUTOFF VALVE Turn the main water supply on and flush out the tubing until the Tighten any connections that leak. water is clear. Shut the water off at the water valve after about one quart of water has been flushed through the tubing. -
Page 39: Troubleshooting Guide
TROUBLESHOOTING GUIDE UNDERSTANDING SOUNDS YOU MAY HEAR • A clicking noise may come from the electronic control switching the cooling system on and off. Your new refrigerator may make sounds that your old • Rattling noises may come from the flow of one did not make. - Page 40 TROUBLESHOOTING GUIDE LIGHTS DO NOT WORK Check if… Then… The power supply cord is unplugged. Firmly plug the cord into a live outlet with proper voltage. Light bulb is loose in the socket. Unplug the refrigerator. Gently remove the bulb and reinsert. Then plug in refrigerator and reset the refrigerator control.
- Page 41 TROUBLESHOOTING GUIDE DOORS WILL NOT CLOSE COMPLETELY Check if… Then… The refrigerator is not level. See Leveling and Door Alignment section on page 17. Food packages are blocking the door open. Rearrange food containers to clear door and door shelves. The ice bin, crisper cover, pans, shelves, door bins Push bins all the way in and put crisper cover, pans, shelves or baskets are out of position.
- Page 42 TROUBLESHOOTING GUIDE THE REFRIGERATOR SEEMS TO MAKE TOO MUCH NOISE Check if… Then… The sounds may be normal for your refrigerator. Refer to the Understanding Sounds You May Hear section on page 39. THE ICEMAKER IS NOT PRODUCING ICE OR NOT ENOUGH ICE Check if…...
- Page 43 TROUBLESHOOTING GUIDE NOT DISPENSING ICE Check if… Then… All the doors are not closed completely. Ice will not dispense if any of the refrigerator doors are left open. The dispenser display is locked. Press and hold the Lock ( ) for 3 seconds to unlock the control panel and dispenser.
- Page 44 TROUBLESHOOTING GUIDE NOT DISPENSING WATER Check if… Then… The dispenser panel is locked. Press and hold the Lock ( ) for 3 seconds to unlock the control panel and dispenser. New installation. Flush and fill the water system. Refrigerator or freezer doors are not closed Water will not dispense if any of the refrigerator doors are left properly.
- Page 45 TROUBLESHOOTING GUIDE TEMPERATURE IS TOO WARM OR THERE IS INTERIOR MOISTURE BUILDUP Check if… Then… The air vents are blocked. Cold air circulates from Locate air vents by using your hand to sense airflow and move the freezer to the fresh food section and back all packages that block vents and restrict airflow.
Need help?
Do you have a question about the 795.7105 and is the answer not in the manual?
Questions and answers