Q-See QC SERIES User Manual
Hide thumbs
Also See for QC SERIES:
- User manual (77 pages) ,
- Setup manual (50 pages) ,
- Quick start manual (5 pages)

Related Manuals for Q-See QC SERIES


Summary of Contents for Q-See QC SERIES
-
Page 1: User Manual
QC SERIES NVRS POWER ENTER SHIFT QC828 NVR 8 Channels USER MANUAL... -
Page 2: About This Manual
© 2010-2014 Q-See. Reproduction in whole or in part without written permission is prohibited. All rights reserved. This manual and software and hardware described herein, in whole or in part, may not be reproduced, translated, or reduced to any machine-readable form without prior written approval. -
Page 3: Table Of Contents
3.4 Shutdown 5.4 Activity Log 4. SETTINGS Appendix 4.1 Camera A.1 Connecting Alarms Remote Alarm Input Image Alarm Output Camera Settings A.2 Hard Drive Installation/Removal Camera Name A.3 Troubleshooting Record Schedule A.4 Q-See Product Warranty Record Status A.5 Technical Support... -
Page 4: Introduction
CHAPTER 1 FOR YOUR SAFETY To prevent damage to your Q-See product or injury to yourself or to others, read and understand the following safety precautions in their entirety before installing or using this equipment. Keep these safety instructions where all those who use the product will read them. -
Page 5: Features And Specifications
FEATURES AND SPECIFICATIONS Individually Configurable User Controls Your NVR (Network Video Recorder) contains professional-grade features and flexibility that Create up to 20 individual user accounts giving specific users access to only certain functions, allows the do-it-yourselfer to easily setup and maintain a reliable and secure security system cameras and etc. -
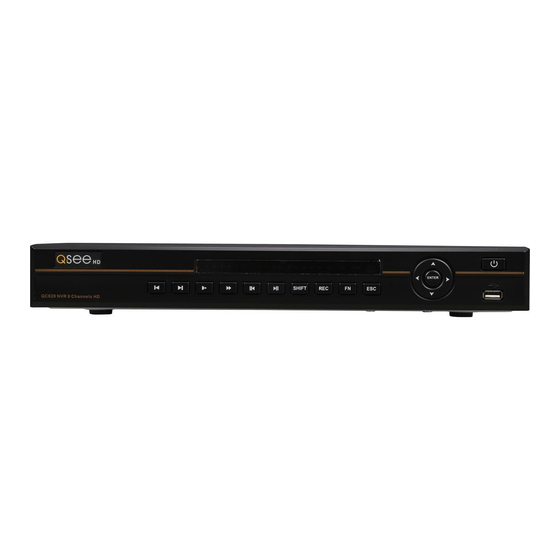
Page 6: Connections And Controls
Depending on your model, your NVR may have one or more of these ports as well: CONNECTIONS AND CONTROLS CHAPTER 2 DC 48V DC 48V DC 12V DC 12V 2.1 CONNECTIONS RS232 RS232 RS232 The illustrations below show the ports found on the back of your NVR. Their location will differ by model, This port is for factory maintenance only. -
Page 7: Mouse Control
2.2 MOUSE CONTROL 2.3 REMOTE CONTROL Your NVR is controlled through the USB mouse. Some models also include an infrared remote control The buttons on the Remote Control operate in the same manner as on a conventional video player remote. and buttons on the front panel that serve as shortcuts. -
Page 8: Live View
2.4 LIVE VIEW SHORTCUT MENU Live View is the default mode for your NVR. It will display the video feeds from your cameras - either a In Live View mode, right-clicking anywhere on the screen will bring up the pop-up Shortcut Menu Shortcut Menu. -
Page 9: Status Icons
SHORTCUT VIDEO CONTROLS STATUS ICONS There are four icons that will appear on the left side of each channel’s view. They provide a quick look at Moving the mouse to the upper center of a channel with a live feed will reveal the Shortcut Video that camera’s status. -
Page 10: On-Screen Menus And Windows
2.5 ON-SCREEN MENUS AND WINDOWS Search/ Your NVR will normally display live video from your cameras in the Live Viewing mode. It is configured Playback to record video only when it detects movement - and for most people, this is sufficient. But, everyone’s needs are different so we’ve organized the on-screen menu in a way to make it easy for you to do what you want, quickly and easily. -
Page 11: Ip Cameras
AUDIO 2.6 IP CAMERAS ADDING AND REMOVING CAMERAS IN YOUR DISPLAY While cameras connected to the NVR through the PoE are automatically added to the recorder’s display, What makes Internet Protocol (IP) or Network cameras different is that they each have a little computer Router/ your system will need to be directed to cameras connected to the network or Internet. -
Page 12: Ip Pan-Tilt-Zoom Cameras
2.7 IP PAN-TILT-ZOOM CAMERAS EXPANDED CONTROLS IP Pan-Tilt-Zoom (PTZ) cameras share the same plug-and-play ease as other IP cameras, but, because Clicking on the arrow at the far right of the PTZ Control window reveals the expanded controls area of their extra capabilities, they require additional setup in order to perform. These settings are found in which lets you command the camera to run a pre-programmed function. - Page 13 Tour This is also known as a “Patrol”. 1. Enter the number (1-8) for this Tour (Patrol). 2. Select the first Preset Point by entering its number. 3. Click Add Preset. 4. Enter additional points (up to 16) the same way).
-
Page 14: Functions
3.1 VIDEO SEARCH FUNCTIONS CHAPTER 3 VIDEO SEARCH & PLAYBACK WINDOW From R/W HDD Interval This chapter covers the most commonly used, day-to- day features which are found in the Functions area at < 2014 > Su Mo Tu We Th Fr Sa the top of the menu. -
Page 15: Search
SEARCH STEP 5. Once you have refined your search, click on the Search (Picture 3-6) button to refresh Select recorded videos to play back, back up, or lock for later using the Search function. You can reach your results. the Search and Playback window can be reached through either the Navigation Bar (left) or Shortcut Menu (right). -
Page 16: Playback
3.2 PLAYBACK Video Playback Controls Once you’ve selected your video(s), you can control the playback in the same manner as using a VCR or computer’s media playback software using the controls below the video screen. Volume Play Play Slow/Fast You can also play in reverse as well as forward, frame-by-frame movement and multiple playback Control Forward Reverse... -
Page 17: Digital Zoom
24hr software included on the Manuals and Software disc that came with this NVR or available for free download at Q-See.com by searching for your model number and looking under Software. This software can also convert the .DAT files to .AVI... -
Page 18: Backup
3.3 BACKUP Once you have selected the files, press Start to begin the download. A progress bar will be This NVR supports backing up files from the hard drive to both an external USB storage device as well BACKUP displayed showing estimated time remaining. as over a network. -
Page 19: Shutdown
3.4 SHUTDOWN The NVR should never be shut off by unplugging it or by using the power switch without first using the Shutdown function. This function allows you to shut down the NVR safely by letting the system finish writing files, parking the hard drive and other actions to preserve the electronics. -
Page 20: Settings
4.1 CAMERA SETTINGS CHAPTER 4 Use the Camera menu to add cameras, adjust their video settings, set recording schedules and control Pan-Tilt-Zoom (PTZ) cameras. These options are found in submenus and tabs. Most users will make occasional changes to their system using the Settings area of the menu as they become more familiar with their system and how to optimize it to best suit their needs. -
Page 21: Remote
Removing and Configuring Cameras. REMOTE This submenu is for adding and controlling The Added Devices section of the window shows the list of cameras connected to the NVR along with cameras connected to the NVR either through its information about each device including ID and manufacturer. A series of icons to the right of the channel POE ports or over a network/Internet connection. -
Page 22: Image
Firmware Tab IMAGE Use this submenu to adjust the video image for each camera. You can view the firmware version - shown as System Version - of the cameras connected to your NVR. PICTURE 4-7 Upgrade Tab You can upgrade the firmware of your cameras - including those connected remotely. -
Page 23: Camera Settings
CAMERA SETTINGS Overlay Tab This window has controls for on-screen displays Use this submenu has three tabs covering the video stream (data transmission), on-screen displays of from the camera as well as for masking sensitive information and event notice snapshots. areas. -
Page 24: Camera Name
CAMERA NAME Setting a Recording Schedule There are two ways to set up your schedule - either sheduling blocks of time using the timeline, or by Naming your cameras to something more descriptive may help you or other users quickly setting precise start and stop times in the Period window. -
Page 25: Record Status
4.2 EVENT RECORD STATUS Now that you’ve set up the recording schedule, you can use the Event window to direct the actions that This window offers a quick way to override the the NVR will take when motion, tampering or loss of video is detected. current camera settings should the need arise. -
Page 26: Alarm
The lower portion of the Motion Events lets you control how the NVR will react when it detects motion. ALARM This window handles inputs from external alarms and sensors in the same way that the Detections Trigger Period - Just as you’ve configured the NVR to record on a schedule, you can set the alert window handles camera inputs. Even if your NVR does not have alarm inputs, some IP cameras have notifications to occur only at certain times. -
Page 27: Abnormality
Local Alarm ABNORMALITY This tab handles input from alarms connected If the NVR experiences an error with its hard disk drive (HDD) or its network connection, it can alert you directly to an alarm port on the back of the NVR, to the problem so it can be quickly fixed. -
Page 28: Network
4.3 NETWORK PORTS Ports are the “doorways” through which data The network settings control how the NVR communicates with your local network, the Internet and travels to and from the NVR. the IP cameras. For most users, following the instructions in the Setup Wizard will establish a reliable connection for remotely monitoring your system. -
Page 29: Upnp
UPNP Interval – This adjusts the amount of time that will pass before the DVR sends out another e-mail. The interval can be set from 0 minutes to 6 hours (360 minutes). If you are getting too many e-mails, Universal Plug ‘n Play is a technology that allows you may wish to increase the length of the interval. devices to discover each other on a network, which simplifies the process of adding your NVR Health – When checked, the NVR will send out a test message at the interval below. -
Page 30: Storage
4.4 STORAGE GROUPING On systems with more than one internal hard drive, you can group multiple hard drives into a group that This window helps you manage your NVR’s internal hard drive(s). will act as a larger, single hard drive and different types of recordings can be assigned to that group. PICTURE 4-37 PICTURE 4-38 HARD DISK (HDD) MANAGER... -
Page 31: System
4.5 SYSTEM Date & Time As the name implies, this window is for setting the Settings in this menu control the basic operations of the NVR itself. Among the other options, you can date and time on your system. This is important make changes to settings you made when you first set up your system. -
Page 32: Display Settings
DISPLAY SETTINGS ACCOUNT SETTINGS This window lets you control your on-screen display. This is the account management window where you can add and remove users as well as change user settings and permissions. PICTURE 4-44 PICTURE 4-46 General • There are two user accounts which cannot be deleted: Admin and User. Resolution – Adjust the screen resolution to match your monitor’s capabilities. • You should change their passwords from their defaults: Admin: admin User: 666666 Transparency – You can make your on-screen menus more transparent to let you see more of the video image behind them. -
Page 33: Auto Maintenance
AUTO MAINTENANCE IMPORT AND EXPORT Just like your computer, the NVR can benefit from being restarted. This allows it to clear the memory and If you are using more than one QC NVR, you can copy the settings from one machine to the other. other temporary files that may slow it down. None of your settings will be deleted. PICTURE 4-48 PICTURE 4-49 Auto Reboot... -
Page 34: Default
PICTURE 4-50 UPGRADE Q-See is committed to improving our products. If you have registered your system with Q-See, you will receive notification of any product improvements. This includes firmware updates that can be downloaded from Q-See.com/support to your computer and then transferred to your system either via a USB disk or through the Smart PSS program running on your computer. -
Page 35: Information
• S.M.A.R.T. stands for Self-Monitoring, Analysis and Reporting Technology • The data shown here can help you anticipate a drive failure, or identify the cause of one. • Today’s hard drives are much more reliable than those in the past. Q-See uses A/V rated hard drives that can meet the demands of constant PICTURE 5-2 video recording and playback. -
Page 36: Record
5.2 EVENT INFORMATION RECORD This window shows the date and time of the first This window shows the active event status of your NVR and connected cameras. and last recordings on a hard drive. PICTURE 5-3 BITS PER SECOND (BPS) When this window is opened, green traces will show the data load for each channel in real time. -
Page 37: Network Information
5.3 NETWORK INFORMATION TEST This is one of the “active” windows in the Information section. Here, you can see who is logged into your You can see the status of your NVR’s connection NVR as well as see and test the data transmission from your NVR. to remote cameras and save the results for analysis. -
Page 38: Activity Log
5.4 ACTIVITY LOG This searchable window contains the list of all user and system activities such as reboots, time updates and etc. PICTURE 5-11 • You can search for events by selecting a start and end time for the period to be searched • The search can be refined by selecting the typ of event you are searching for. • Clicking the icons under detail will show more information about the particular event, if available. • You can save your search results to a USB drive. It will be a .txt (Text) file saved in a folder named “Log...” with the date and time it was recorded as part of the name. -
Page 39: Appendix
Troubleshooting Tips 1. The alarm input must be grounded. 2. A grounding signal is required for the Q-See Warranty and Help alarm input 3. When connecting the NVR to another device - including another NVR - through the alarm input, a relay should be used to separate them. -
Page 40: Alarm Output
The accompanying diagram (Picture A-2), along with your alarm’s manual should be ALARM OUTPUT consulted to ensure proper connection. The alarm output port should not be directly connected to a higher power load (greater than 1A) to avoid high current which may damage the relay. Use the co-contactor to establish the • Normal open or Normal close type connection between the alarm output port and the load. -
Page 41: Hard Drive Installation/Removal
A.2 HARD DRIVE INSTALLATION/REMOVAL • Your NVR uses one or more standard computer A/V-rated SATA (Serial Advanced Technology Attachment) hard disk drive and will support up to a 4TB (terabytes) drive. • These drives are the current industry standard and may be purchased wherever computer parts are sold. It is strongly advised against opening the case when atmospheric conditions present the risk of static discharge which can damage electronic components. WARNING! ELECTRIC SHOCK RISK! PICTURE 7-4 PICTURE 7-3... -
Page 42: Troubleshooting
A.3 TROUBLESHOOTING There is no audio when monitoring. Possible Causes: a. Channel with audio is not full screen, make the channel you want to hear audio on full The NVR does not boot up properly Possible Causes: screen. a. Input power is not correct, check power supply. b. -
Page 43: Q-See Product Warranty
Need to enter the correct Device ID on the remote control. b. Distance is too far or control angle is too wide. Q-See is proud to back all of our products with a conditional service warranty covering all c. Remote control battery power is low.
Need help?
Do you have a question about the QC SERIES and is the answer not in the manual?
Questions and answers