Q-See QC-SERIES User Manual
Hide thumbs
Also See for QC-SERIES:
- User manual (77 pages) ,
- Setup manual (50 pages) ,
- Quick start manual (5 pages)
Table of Contents
Advertisement
QSDR16RTCB
User's Manual
Contact Us:
Digital Peripheral Solutions, Inc.
8015 E. Crystal Drive
Anaheim, CA 92807
Website:
http://www.Q-See.com
Customer Service:
Phone: 877-998-3440 x 538
Email:cs@dpsi-usa.com
Tech Support:
Phone: 877-998-3440 x 539
Email:ts@dpsi-usa.com
Fax:
714-998-3509
Revised 11/11/2009
Advertisement
Table of Contents

Related Manuals for Q-See QC-SERIES


Summary of Contents for Q-See QC-SERIES
- Page 1 QSDR16RTCB User’s Manual Contact Us: Digital Peripheral Solutions, Inc. 8015 E. Crystal Drive Anaheim, CA 92807 Website: http://www.Q-See.com Customer Service: Phone: 877-998-3440 x 538 Email:cs@dpsi-usa.com Tech Support: Phone: 877-998-3440 x 539 Email:ts@dpsi-usa.com Fax: 714-998-3509 Revised 11/11/2009...
-
Page 2: Table Of Contents
CONTENTS Chapter 1: DVR Features ........................2 Chapter 2: Layout ..........................3 2.1: Front Panel ................................... 3 2.2: Rear Panel ................................... 4 2.2.1: RS485/Sensor/Alarm Port Functions: ........................4 2.2.2: Remote Control ..............................5 2.2.3 Mouse Operation ..............................6 Chapter 3: DVR Installation ........................ 7 3.1: Hard Drive Installation .............................. - Page 3 5.2.5: Backup Recorded Files ............................17 5.2.6: Multi Player ................................17 5.2.7: Device Management ............................19 5.2.7.1: HDD Management ............................19 5.2.7.2: Alarm Set ..............................20 5.2.7.3: PTZ Setup ..............................22 5.2.7.4: Mobile Setup ..............................22 5.2.7.5: Mobile Phone Access ........................... 23 5.2.7.6: Motion Detect ..............................
- Page 4 Chapter 8: Appendix ......................... 37 8.1: Operation Function Table ............................37 8.2: Setting up Alarm Record Mode ..........................38 8.3: Troubleshooting ................................39 8.4: System Connections ..............................40 8.5: Accessories Included ..............................40 Q-See Product Warranty ........................41 Customer Information Card ......................42...
- Page 5 This DVR has a built in fan that properly ventilates the system. 7. If there are any unusual sounds or smells coming from the DVR, unplug it immediately and contact Q-See. Warning: You may be subjected to severe electrical shock if you remove the cover of the DVR.
-
Page 6: Chapter 1: Dvr Features
QSDR16RTCB User Manual Chapter 1: DVR Features Function Brief Description Real-Time Double video output with monitor VGA virtual output port; Supports net-viewer and Multiple Monitoring Person live surveillance, Zoom In/Out on live video, dwell time display and PIP display. H.264 video compression format; recording quality options, multiple recording modes Record (Always, Scheduled, Manual, Alarm, Motion detection and remote recording). -
Page 7: Chapter 2: Layout
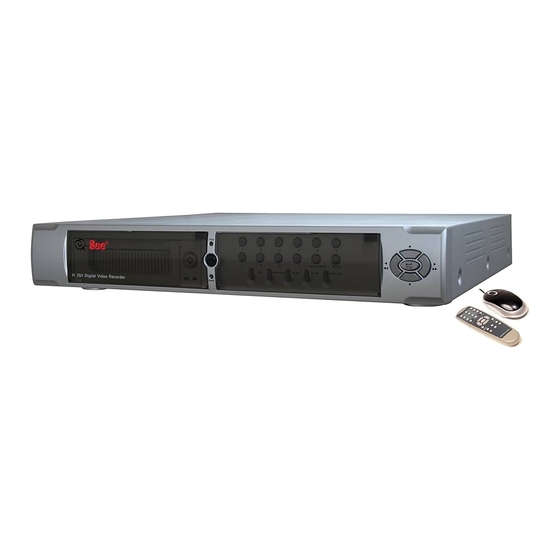
QSDR16RTCB User Manual Chapter 2: Layout 2.1: Front Panel Item Type Key Title /Indicator Marks Function HDD Indicator Hard drive is being read or written to when “Red” indicator flashes. Indicator Power Indicator If the “Green” indicator is on the system is getting power. IR Receiver Receives signal from Remote Control CH-1;... -
Page 8: Rear Panel
QSDR16RTCB User Manual 2.2: Rear Panel Item Physical Port Connection Method Video Input Connect Ch1-16 (BNC Interface) Video Output Main Video Output Audio Input Connect CH1-4 Audio Signal Input (BNC Interface) Audio Output Connect Audio Output (BNC Interface) Ethernet Port Connect Intranet, Internet (RJ-45 Interface) LINE IN Port Phonetic Talkback... -
Page 9: 2: Remote Control
QSDR16RTCB User Manual 2.2.2: Remote Control Key Title Key Function Manual Recording SEARCH Search Mode 2×2 Quad Display 3×3 9-CH Display 4×4 16-CH Display AUTO Dwell Time Display Channel Select; Numeric Key Multiple CH Display (Quad, 9-CH, 16-CH DISPLAY MODE and Single-CH Display) ▲... -
Page 10: Mouse Operation
QSDR16RTCB User Manual 2.2.3 Mouse Operation For your convenience, your Q-See DVR System can also be operated by a mouse in addition to the front panel controls and remote control. Function Action With your DVR in Menu Unlock mode, left clicking on your mouse opens a pop-up dialog menu that allows you to access your programming and configuration settings. -
Page 11: Chapter 3: Dvr Installation
QSDR16RTCB User Manual Chapter 3: DVR Installation 3.1: Hard Drive Installation Caution: NEVER Install or remove the hard drive while the DVR is running! The model has a Hard Disk Drive (HDD) drawer. Please use key provided to open the drawer and insert the HDD as follows: (1) Remove screws and open DVR upper cover carefully;... -
Page 12: Chapter 4: Dvr Boot Up
QSDR16RTCB User Manual Chapter 4: DVR Boot up 4.1: System Initialization After connecting the power adapter and turning on the power button, the system will boot-up and you will see a “System Initializing” message (See Picture 1). 4.2: Main Interface (Picture 1) Once the system initialization process is complete, the system will enter the main interface (See Picture 2). -
Page 13: Chapter 5: Dvr Menu
QSDR16RTCB User Manual Chapter 5: DVR Menu 5.1: Main Menu At-a-Glance Color Set Camera Dwell Time Display Recording Search Network Playback Rec. Search Detail File File Backup Log Search HDD Management Alarm Setting Device PTZ Setting Management 3G Network Area Setting Motion Time Setting User Password... -
Page 14: Main Menu
QSDR16RTCB User Manual 5.2: Main Menu The right-click menu in the Main Interface mode (Picture 3) allows you to access the Main Menu interface (Picture 4). You can use the right click function of the mouse or the Menu button on the front panel of the DVR to enter into the Main Menu interface. -
Page 15: 2: Record Setup
QSDR16RTCB User Manual 5.2.2: Record Setup The right click menu in the Main Interface mode (Picture 3) allows you to access the Main Menu interface (Picture 4). To set up the recording parameters and settings of your DVR, go to [Main Menu] [Record] to enter into [Record Setup] menu (Picture 7). -
Page 16: 3: Network Setup
QSDR16RTCB User Manual 5.2.3: Network Setup The right click menu in the Main Interface mode (Picture 3) allows you to access the Main Menu interface (Picture 4). To set up the Network settings of your DVR, go to [Main Menu] [Network Set] to enter into [Network Setup] menu (Picture 9). -
Page 17: 4: Port Forwarding
QSDR16RTCB User Manual To set up the Network settings of your DVR, go to [Main Menu] [Network Set] to enter into [Network Setup] menu (Picture 9). Select the Static option from the drop down menu on the Network Setup menu (Picture 12). -
Page 18: 5: Pop-Ups & Activex Controls
QSDR16RTCB User Manual to the same router as the DVR. This website will display your address as illustrated in Picture 16. The example below shows an IP Address of 76.254.183.54. Please make sure to take note of the address that you obtain for your own Router and use it accordingly. - Page 19 QSDR16RTCB User Manual (Picture 18) (Picture 19) If you get a error message that says the program cannot load because the publisher is unknown or the program is unsigned, go to internet explorer→Tools→Internet Options (see Picture 18), then go to the “Advanced” tab (RED box in Picture 20).
-
Page 20: 4: Recording Search
QSDR16RTCB User Manual 5.2.4: Recording Search Click [Main menu search] to enter into [Video Search] menu (Picture 22). If you input a specific date and click [Search], you will find all the recordings for that day. When you select [Date] item, you will playback the recordings in 4 channel mode;... -
Page 21: 5: Backup Recorded Files
QSDR16RTCB User Manual 5.2.5: Backup Recorded Files If you want to backup a single recorded file from the file list, from the File List dialog box in Picture 23, select the file you wish to back up by placing a check mark in the accompanying green box and hit the [BACKUP] button on the right of the screen. - Page 22 QSDR16RTCB User Manual To play the file, click the Play menu on the toolbar of the multimedia player interface as shown in Picture 27. Doing this will generate a pop up window as illustrated in Picture 28. Click the button on the bottom of the multimedia player and the [Play- ] button to start playing the file.
-
Page 23: 7: Device Management
QSDR16RTCB User Manual (Picture 30) (Picture 29) Audio Settings: In your Multimedia player interface, go to the Setting menu on your toolbar. From there, go to SettingAudio Channel SettingNormal Video Bar (Picture 31). This will open up a dialog as illustrated in Picture 32 allowing you to choose from a drop down list of which audio channels to play. -
Page 24: 2: Alarm Set
QSDR16RTCB User Manual The ALL/FREE column in your HDD Management interface indicates the total amount of allocated space available on the Hard Drive and the amount of unused space available on the Hard Drive. The FREE TIME column will tell you how much recording time you have left on your system based on the current settings and configuration details. - Page 25 QSDR16RTCB User Manual • The HDD LOSS tab allows you to choose from a drop down list of “On” and “Off”. Choosing the “On” option will generate an alarm buzzer when the connection to your HDD has been lost, your system does not detect a connected HDD or your system detects that your HDD needs to be formatted.
-
Page 26: 3: Ptz Setup
QSDR16RTCB User Manual SMTP Port: indicates sender port of SMTP server. Generally the SMTP port value is 25. There are exceptions however and you should check with your Email server’s website. SMTP Server: indicates server address you use. Sender Email: indicates sender’s email address. The email address should be consistent with the server you use. -
Page 27: 5: Mobile Phone Access
QSDR16RTCB User Manual 5.2.7.5: Mobile Phone Access The DVR is currently compatible with mobile phones running Windows Mobile, Symbian operating systems and iPhones on 3G networks. Before you can access the DVR from a mobile phone you need to setup the Network Configuration on the DVR. - Page 28 QSDR16RTCB User Manual When accessing your DVR from a mobile phone using a Windows Mobile operating system, follow these steps: 1. Webcam installation: Begin by installing the webcam program that is included on the CD that comes with the DVR by copying the “QQeye.CAB” file to the mobile phone. You can do this by attaching the mobile phone to a computer and copying the file from the CD to the memory card on the phone, or by copying the file from the computer to the phone’s memory card through a memory card reader or through a Bluetooth connection.
- Page 29 QSDR16RTCB User Manual User name: same as user name setup in DVR under Menu, Devices, Mobile Password: same as password setup in DVR under Menu, Devices, Mobile Server address: Public IP address of router DVR is connected to. Web port: Same as the Server Port you setup in the DVR, it needs to be forwarded to the IP address of the DVR, setting range is between 1024 and 65535, the default setting is 18600.
- Page 30 QSDR16RTCB User Manual When accessing your DVR from a mobile phone using a Symbian operating system, follow these steps: 1. First you need to copy the “QQeye.CAB” file included on the Setup CD disk to your mobile phone. There are two different ways you can do this: a.
- Page 31 QSDR16RTCB User Manual The following information is required to set up access to your Symbian based mobile phone: Default Access Point:Input the access point. System default for the access point is GPRS connection. Server Address:Input the public IP address of the router the DVR is attached to (refer to section 5.2.3 Network Setup this product manual).
-
Page 32: 6: Motion Detect
QSDR16RTCB User Manual 5.2.7.6: Motion Detect Clicking on the MOTION icon in the Device Management interface (Picture 33) will allow you to configure your Motion Detection settings. Once you click on the icon a pop up MOTION DETECTION Setup interface as illustrated in Picture 58 will appear and you will be able to configure the various settings directly through here. -
Page 33: 2: Password
QSDR16RTCB User Manual 5.2.8.2: Password Click on [Main menuSystemPassword] to adjust your system’s password settings. This will generate a Password Setup dialog box that will allow you to enable or disable password protection and also set up an administrator password (Picture 62). Turning your Password Enable setting to “On” will generate a User Password field and Administrator Password field to populate. -
Page 34: Menu Lock
QSDR16RTCB User Manual 5.3: Menu Lock Your DVR is equipped with a Menu Lock feature to ensure that your settings and configurations are tamper-proof. Right clicking on your mouse and clicking on [Menu] the [Lock] from the pop up menu will lock your DVR and you will be required to enter a password to unlock this feature as illustrated in Picture 67). -
Page 35: Pip Mode
QSDR16RTCB User Manual Channel Select: Allows you select the channel with the PTZ camera. Total: Allows you to set the bit quantity. Cur Point: System has default starting (current) cruise point as 01. You can use this option to set additional cruise points. Stop Time: Sets the pause time at each stop. -
Page 36: Chapter 6: Net-Viewer Program
QSDR16RTCB User Manual Chapter 6: Net-Viewer Program 6.1: Enable Plug-Ins and Log-In to Net-Viewer Refer to Section 5.2.3.5 to ensure that your pop-up blockers are turned off and your ActiveX is enabled prior to running the Net-Viewer program. Once you have disabled your pop-up block option and enabled ActiveX, open an IE Browser window and input the IP address and web port of your DVR (i.e., http://172.18.6.202/) -
Page 37: 1: Menu
QSDR16RTCB User Manual 6.2.1: Menu In the Net-Viewer Main Interface window illustrated in Picture 71, the Menu toolbar is on the top left side of the screen. The toolbar includes a button for [Live] video, the option to [Replay] video, access to your [Setup] controls and a [Logout] button. -
Page 38: Ptz Control
QSDR16RTCB User Manual ② Alarm The [Alarm] tab in the Setup menu allows you to control the alarm options on the individual channels remotely via the Net Viewer program. Clicking on the drop down list of the I/O Alarm option for each Channel on the [Alarm] tab (Picture 74) will generate an Alarm Schedule interface which will allow you to configure the specific parameters of your alarm scheduled recording (Picture 75). -
Page 39: 4: Logging Out Of Net-Viewer
QSDR16RTCB User Manual ⑤ Setting The [Setting] tab in the Setup menu (Picture 78) will allow you to control the Net-Viewer program settings. From this tab, you can set the path to where you would like to save screen capture images and other files by clicking on the “…”... -
Page 40: Chapter 7: Specifications
QSDR16RTCB User Manual Chapter 7: Specifications FEATURE PARAMETER SPECIFICATION Video System NTSC or PAL Compression Format H.264 Audio Compression Format 8kHz*16bit ADPCM Video/ Display Resolution D1:704×576(PAL) 704×480 (NTSC) Audio Playback Resolution D1/HD1/CIF PAL: 100fps (D1)/ 200fps (HD1)/ 400fps (CIF) Recording Frame Rate (Shared) NTSC: 120fps (D1)/ 240fps (HD1)/ 480fps (CIF) Display Mode Support Dwell time display, PIP and Zoom in/out in live mode... -
Page 41: Chapter 8: Appendix
QSDR16RTCB User Manual Chapter 8: Appendix 8.1: Operation Function Table TYPE TITLE DESCRIPTION Time Setting Setting system date, time and format and day-light saving time setting Language Select Setting system language Setting CH title and position; adjusting image color parameter value; setting CH Ch Setting display to ON / Off and time display/recording time overlaying to On/Off. -
Page 42: Setting Up Alarm Record Mode
QSDR16RTCB User Manual Auxiliary System Info Check device model, software version and MAC address Function Confirm The button allows you save the modification of parameter value. The button allows you recover default The option will be effective once Menu Button Recover Default value of current menu or system confirmed... -
Page 43: Troubleshooting
QSDR16RTCB User Manual 8.3: Troubleshooting Q: What can I do if the system does not detect the HDD? A: Check the data and power cables and make sure they are securely connected. Q: I have changed the password but do not remember the new password. How can I access the system? A: If you forget the system password, enter 519070 into the password field to reset the password Q: I am not getting any video signal on the DVR. -
Page 44: System Connections
QSDR16RTCB User Manual 8.4: System Connections (Diagram is for reference only to show where to attach various devices to the DVR. The cameras, external alarms, USB flash drives, monitors and computers are not included with the standard DVR package) 8.5: Accessories Included Power Cord Ethernet Cable Power Adaptor... -
Page 45: Q-See Product Warranty
(3) Damage caused by acts of nature (e.g., earthquake, fire, etc). (4) Equipment damage caused by the maintenance of personnel not authorized by Q-See. (5) Product sold over 12 months ago. -
Page 46: Customer Information Card
Purchase Date Distributor The material in this document is the intellectual property of Q-See. No part of this manual may be reproduced, copied, translated, transmitted, or published in any form or by any means without our company’s expressed written consent.
Need help?
Do you have a question about the QC-SERIES and is the answer not in the manual?
Questions and answers