Advertisement
Table of Contents
- 1 Table of Contents
- 2 Before You Begin
- 3 Important Safety Notices
- 4 Warning Label Placement
- 5 Hardware Pack
- 6 Assembly Instructions
- 7 Exploded Diagram
- 8 Parts List
- 9 Care, Maintenance and Storage
- 10 Operating Notes
- 11 Computer
- 12 Warranty
- 13 Ordering Parts
- Download this manual
See also:
Owner's Manual
NOTE:
Please read all instructions
carefully before using this
product
Table of Contents
Safety Notice
Hardware Pack
Assembly Instruction
Parts List
Warranty
Ordering Parts
Model
AIR-1
Retain This
Manual for
Reference
121209
ASSEMBLY &
OWNER'S
MANUAL
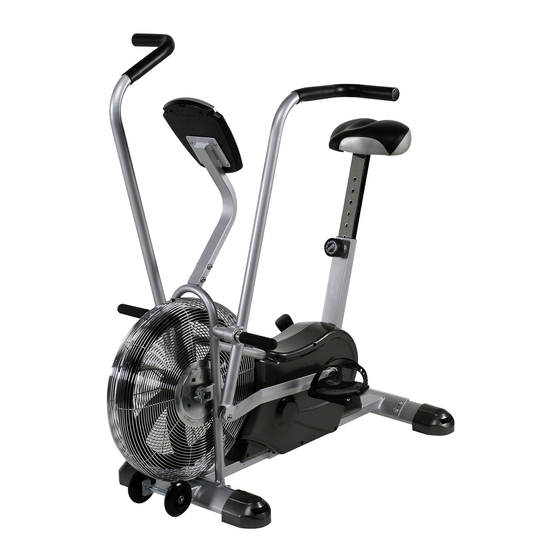
Deluxe Fan Bike
AIR-1
IMPEX
2801 S. Towne Ave, Pomona, CA 91766
Tel: (800) 999-8899 Fax: (626) 961-9966
www.impex-fitness.com
info@impex-fitness.com
®
INC.
Meijer.com
Advertisement
Table of Contents

Related Manuals for Impex AIR-1


Summary of Contents for Impex AIR-1
- Page 1 Meijer.com NOTE: Please read all instructions carefully before using this product Table of Contents Safety Notice Deluxe Fan Bike Hardware Pack AIR-1 Assembly Instruction Parts List Warranty Ordering Parts Model AIR-1 Retain This Manual for Reference 121209 ASSEMBLY & OWNER'S ®...
-
Page 2: Table Of Contents
WARRANTY....................……. 21 ORDERING PARTS..................…….. 21 BEFORE YOU BEGIN ® Thank you for selecting the MARCY Deluxe Fan Bike AIR-1 by IMPEX INC. For your safety and benefit, read this manual carefully before using the bike. As a manufacturer, we are committed to provide you complete customer satisfaction. If you have any questions, or find there are missing or damaged parts, we guarantee you complete satisfaction through direct assistance from our factory. -
Page 3: Important Safety Notices
BEFORE BEGINNING ANY EXERCISE PROGRAM, CONSULT YOUR PHYSICIAN. THIS IS ESPECIALLY IMPORTANT FOR INDIVIDUALS OVER THE AGE OF 35 OR PERSONS WITH PRE-EXISTING HEALTH PROBLEMS. READ ALL INSTRUCTIONS BEFORE USING ANY FITNESS EQUIPMENT. IMPEX INC. ASSUMES RESPONSIBILITY PERSONAL INJURY PROPERTY DAMAGE SUSTAINED BY OR THROUGH THE USE OF THIS PRODUCT. -
Page 4: Warning Label Placement
The Warning Labels and Caution Label shown here have been placed on the Rear Stabilizer, Main Frame. If the labels are missing or illegible, please call customer service at 1-800-999-8899 for replacement. Apply the labels in location shown. © IMPEX INC. -
Page 5: Hardware Pack
Meijer.com HARDWARE PACK NOTE: The following parts are not drawn to scale. Please use your own ruler to measure the size. © IMPEX INC. - Page 6 Meijer.com COMPONENTS FOR ASSEMBLY © IMPEX INC.
-
Page 7: Assembly Instructions
C.) Attach the Rear Stabilizer (#55) to the Main Frame. Secure it with four M8 x 5/8” Allen Bolts (#5), and four Ø 5/8” Washers (#6). D.) Securely tighten all Bolts. E.) Use the four Floor Level Adjustment Knobs (#38) to stabilize the Bike on floor. © IMPEX INC. - Page 8 STEP 2 A.) Connect the Upper Computer Wire (#2) from the Front Post to the Computer Wire from the Computer (#1). B.) Attach the Computer to the Front Post (#4). Secure it with four Computer Philips Screws (#3). © IMPEX INC.
- Page 9 A.) Connect the Lower Computer Wire (#37) from Main Frame (#35) to the Upper Computer Wire (#2) from Front Post (#4). B.) Attach the Front Post to the Main Frame. Secure it with four M8 x 5/8” Allen Bolts (#5). © IMPEX INC.
- Page 10 STEP 4 A.) Attach the pivot on Left Swing Handle (#30L) to the pivot on Main Frame (#35). B.) Thread the Swing Handle Shaft (#28) though Left Swing Handle into Main Frame, and firmly secure them together. © IMPEX INC.
- Page 11 A.) Attach the Swing Handle Connecting Rod (#48) to the open bracket on the bottom of the Left Swing Handle (#30L). B.) Secure them together with one M8 x 1 ¾” Allen Bolt (#49) and one M8 Aircraft Nut (#50). © IMPEX INC.
- Page 12 STEP 6 A.) Attach the pivot on Right Swing Handle (#30R) to the pivot on Main Frame (#35). B.) Thread the Swing Handle Shaft (#28) through Right Swing Handle into Main Frame, and firmly secure them together. © IMPEX INC.
- Page 13 A.) Attach the Swing Handle Connecting Rod (#48) to the open bracket on bottom of the Right Swing Handle (#30R). B.) Secure them together with one M8 x 1 ¾” Allen Bolt (#49) and one M8 Aircraft Nut (#50). © IMPEX INC.
- Page 14 Meijer.com STEP-8 A.) Thread the Left Pedal (#41L) counter clockwise into Left Crank (#44L). B.) Thread the Right Pedal (41R) clockwise into Right Crank (#44R). © IMPEX INC.
- Page 15 A.) Remove the three Ø 5/8” Seat Flat Washers (#32) and M8 Seat Aircraft Nut (#33) from the Seat Pad (#31). B.) Attach the Seat Pad to the Seat Post (#34). Secure it with the three Ø 5/8” Seat Flat Washers (#32) and M8 Seat Aircraft Nut (#33) from the Seat Pad (#31). © IMPEX INC.
- Page 16 Meijer.com STEP-10 A.) Insert the Seat Post (#34) into the opening one Main Frame (#35). B.) Thread the Lock Knob (#63) through the hole on Seat Post to securely hold it at desired height. © IMPEX INC.
-
Page 17: Exploded Diagram
Meijer.com EXPLODED DIAGRAM © IMPEX INC. -
Page 18: Parts List
End Cap Ø 1 ¼” Handle Bar Grip 4 ¾” Swing Handle Shaft Bearing 6903ZZ Left Swing Handle Right Swing Handle Seat Pad Seat Flat Washer Ø 5/8” Seat Aircraft Nut Seat Post Main Frame Computer Wire Connector © IMPEX INC. - Page 19 Pan Head Tapping Screw ST4.2 x ¾” Left Shroud Lock Knob Sensor Holder Axle Lock Ring Ø ¾” Arc Washer Ø ¾” Bearing 6004ZZ Chain Plate Axle Crank Wheel Shroud Sleeve Right Shroud U-shaped Stopper Belt Locking Clip © IMPEX INC.
-
Page 20: Care, Maintenance And Storage
Post, then release the Lock Knob and securely fasten the Knob to lock the Seat Post. The seat height adjustment is in approximately 1 ½” increment. TRANSPORT The Bike has a pair of transport Roller Wheels on Front Stabilizer. To move, carefully tilt and roll. © IMPEX INC. -
Page 21: Computer
6. When the batteries are removed, all the functional values will reset to zero. Note: Please note all values on this computer are approximate and they are for comparison purpose only. Do not use these values for any medical or rehabilitation purpose. © IMPEX INC. -
Page 22: Warranty
IMPEX. IMPEX is not responsible or liable for indirect, special or consequential damages arising out of or in connection with the use or performance of the product or other damages with respect to any economic loss, loss of property, loss of revenues or profits, loss of enjoyments or use, costs of removal, installation or other consequential damages or whatsoever natures.
Need help?
Do you have a question about the AIR-1 and is the answer not in the manual?
Questions and answers