Chapters
Table of Contents

Subscribe to Our Youtube Channel
Related Manuals for LG LH-C6230P


Summary of Contents for LG LH-C6230P
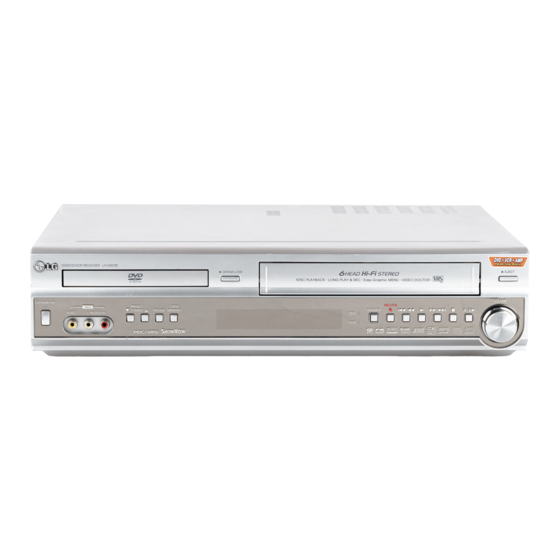
- Page 1 DVD/CD/VCR RECEIVER Home Cinema System SERVICE MANUAL MODELS: LH-C6230P/C6231P (LGEDG/LGEES/LGEPT/LGEIS) LH-C6230S (LGEFS/STUH) LH-C6230W (LGESA/LGEGF) P/N : 3829RDT033C JULY, 2003 LH-C6231W (LGEAP) LH-C6230X (MOSCOW) LH-C6230Y/C6231Y (LGEPL/LGEMK)
-
Page 2: Table Of Contents
CONTENTS SECTION 1. GENERAL • PRODUCT SAFETY SERVICING GUIDELINES FOR VIDEO PRECAUTIONS ......1-2 • SERVICING PRECAUTIONS......................1-5 • ESD PRECAUTIONS ........................1-6 • SPECIFICATIONS ........................1-7 SECTION 2. AUDIO PART • AMP ELECTRICAL TROUBLESHOOTING GUDIE ..............2-1 • BLOCK DIAGRAM......................... 2-2 •... -
Page 3: Section 1. General
SECTION 1. GENERAL PART PRODUCT SAFETY SERVICING GUIDELINES FOR VIDEO PRODUCTS CAUTION : DO NOT ATTEMPT TO MODIFY THIS PRODUCT IN ANY WAY, SUBJECT : X-RADIATION NEVER PERFORM CUSTOMIZED INSTALLATIONS WITHOUT MANUFAC- 1. BE SURE PROCEDURES AND INSTRUCTIONS TO ALL SERVICE PER- TURER S APPROVAL. - Page 4 NOTES REGARDING HANDLING OF THE PICK-UP 1. Notes for transport and storage 1) The pick-up should always be left in its conductive bag until immediately prior to use. 2) The pick-up should never be subjected to external pressure or impact. Storage in conductive bag Drop impact 2.
- Page 5 NOTES REGARDING COMPACT DISC PLAYER REPAIRS 1. Preparations 1) Compact disc players incorporate a great many ICs as well as the pick-up (laser diode). These components are sensitive to, and easily affected by, static electricity. If such static electricity is high voltage, components can be damaged, and for that reason components should be handled with care.
-
Page 6: Servicing Precautions
SERVICING PRECAUTIONS CAUTION : Before servicing the COMBI HOME THEATER Electrostatically Sensitive (ES) Devices SYSTEM covered by this service data and its supplements Some semiconductor (solid state) devices can be damaged and addends, read and follow the SAFETY PRECAUTIONS. easily by static electricity. Such components commonly are NOTE : if unforeseen circumstances create conflict between called Electrostatically Sensitive (ES) Devices. -
Page 7: Esd Precautions
ESD PRECAUTIONS Electrostatically Sensitive Devices (ESD) Some semiconductor (solid state) devices can be damaged easily by static electricity. Such components commonly are called Electrostatically Sensitive Devices (ESD). Examples of typical ESD devices are integrated circuits and some field-effect transistors and semiconductor chip components. The following techniques should be used to help reduce the incidence of component damage caused by static electricity. -
Page 8: Specifications
SPECIFICATIONS General Power requirements AC230V ~ , 50 Hz Power consumption 130 W Dimensions (approx.) 430 X 90 X 350 mm (w x h x d) Mass (approx.) 8 kg (17.6 lbs) Operating temperature 5ßC to 40ßC (41ßF to 104ßF ) Timer 24-hour display type Operating humidity... - Page 9 Speakers Satellite (LHS-C6230T) Type 1 Way 1 Speaker Impedance 4‰ Frequency Response 130 - 20,000 Hz Sound Pressure Level 83 dB/W (1m) Rated Input Power Max Input Power Net Dimensions (W x H x D) 88 x 100 x 95 mm Net Weight 0.54 kg Passive Subwoofer (LHS-C6230W)
-
Page 10: Section 2. Audio Part
SECTION 2. AUDIO PART - 2-1 -... - Page 11 SECTION 3. VCR PART ELECTRICAL ADJUSTMENT PROCEDURES 1. Servo Adjustment 1) PG Adjustment Test Equipment a) OSCILLOSCOPE C) PAL MODEL : PAL SP TEST TAPE b) NTSC MODEL : NTSC SP TEST TAPE Adjustment And Specification MODE MEASUREMENT POINT ADJUSTMENT POINT SPECIFICATION V.Out PLAY...
- Page 12 VCR ELECTRICAL TROULBESHOOTING - 3-2 -...
- Page 13 - 3-3 -...
- Page 14 2. SYSTEM/KEY CIRCUIT (1) AUTO STOP Auto Stop Does the SW25 waveform Check the Drum Motor appear at the IC501 signal. Pin105? Do T/UP Reel Pulses Do the T-UP Reel Pulses Does 5.2V appear at the appear at the Q514 appear at the IC501 Pin49? RS501? Base terminal ?
- Page 15 3. SERVO CIRCUIT (1) Unstable Video in PB MODE Unstable Video in PB Mode. Does the Noise level of the screen change periodically? Do the CTL pulses appear Is adjusting the height of at the IC501 Pin8? the CTL Head accurate? Does the CFG waveform Readjust the height of the appear at the IC501...
- Page 16 (3) When the Capstan Motor doesn t run, When the Capstan Motor doesn t run, Refer to SMPS(CAPSTAN/12Volt) Does 12VA appear at the PMC01? Trouble Shooting . Does 2.8V appear at the PMC01? Check the PMC01 and the Capstan Does the PWM signal appear at the IC501 Pin108? Motor Ass y.
- Page 17 (4) KEY doesn t working KEY doesn t working. Is 5V applied to the IC501 Refer to SMPS 5.3VA Pin36? Trouble Shooting . Does LED or FLD change Replace the defective when a function button is switches. pressed? - 3-7 -...
- Page 18 4. Y/C CIRCUIT (1) No Video in EE Mode, No Video in EE Mode Does the Video signal Check the 24Pin of Tuner. appear at the IC301 Pin48? Is 5V applied to the IC301 Check the 5.2VT, 5.3VA Pins18, 24, 42, 55, 72, 91? Line.
- Page 19 (2) When the Y(Luminance) signal doesn t appear on the screen in PB Mode, Is 5.2VT, 5.3VA applied to the Check the line of the 5.2VT, 5.3VA Line. (Power Circuit) IC301 Pins24, 42, 55, 72, 91? Is the I C Bus siganl applied Refer to SYSTEM I C BUS to the IC301 Pins68, 69 ?
- Page 20 (3) When the C(Color) signal doesn t appear on the screen in PB Mode, Is 5.2VT/5.3VA applied to the Check the line of the 5.2VT/ 5.3VA Line. (Power Circuit) IC301 Pins24, 42, 55, 72, 91. Is the Color Rotary signal Check the Color Rotary applied to the IC301 Circuit.
- Page 21 (4) When the Video signal doesn t appear on the screen in REC Mode, Is the EE signal normal? Check EE Mode. Is 5.2VT/5.3VA applied to the Check the line of the 5.2VT/ IC301 Pins24,42,55,72,91? 5.3VA Line.(Power Circuit) Does PB Mdoe operate Check PB Mode.
- Page 22 5. Hi-Fi CIRCUIT (A) No Sound(EE Mode) No Sound. Check the TU Audio of IC801 Check the IC751 Pins30, 31. Pins1, 3. Check the DVD Audio of IC801 Check the DVD MODULE. (P8D01 Pins3, 5). Pins4, 5. Check the AV1 Audio of IC801 Check the Scart1 Jack.
- Page 23 (B) Hi-Fi Playback PB mode No Sound. Check the Vcc of IC801 Check Power 5.2V, 12VT. (Pins34, 40) Check the Hi-Fi Selection switch. Check IC501 Pin25 (A.H/SW) (IC801 Pin41) and the Tape quality. Is the RF Envelope at IC801 Pin44 over 2Vp-p? Check IC801 Pin42(Data), Check the parts of -COM (IC501 Pins59, 60)
- Page 24 Hi-Fi REC. It is impossible to record Hi-Fi Audio signal. Check Vcc of IC801.(Pins34, 40) Check Power 5V, 12VT. Check IC801 Pin42(Data), Pin43(CLOCK). Check ports of -COM. Check Audio input signal of IC801 Do Audio signals appear at IC801 Pins2, 3(TU.A.), 4, 5(DVD.A.), Pins16, 17? 6, 7(AVI.A.), 8, 9(AV2.A.), 10, 11(AV3.A.).
- Page 25 6. Tuner/IF CIRCUIT (A) No Picture on the TV screen No picture on the TV screen Does the Video signal at Is +33V applied to TU701 Check 33V line. the TU701 Pin24. Pin16? Is +5V applied to TU701 Check 5V line. Pin13? Does the Clock signal Check the lIC Clock Signal...
- Page 26 (B) No Sound No Sound. Check the Vcc of IC751 Pins1, 11, 19, Check 5.2V Line. 22, 33. Check the Tuner SiF signal at IC751 Check the Tuner SIF of TU701 Pin22. Pin2. Check the oscillator of IC751 Pins5, 6. Replace X751 Check the IIC Clock and Data at IC751 Check the Audio of IC751 Pins30, 31.
- Page 27 SECTION 5. DVD PART DVD ELECTRICAL TROUBLESHOOTING 1. Test & debug flow - 5-1 -...
- Page 28 - 5-2 -...
- Page 29 - 5-3 -...
- Page 30 - 5-4 -...
- Page 31 - 5-5 -...
- Page 32 - 5-6 -...
- Page 33 DETAILS AND WAVEFORMS ON SYSTEM TEST AND DEBUGGING 1. SYSTEM 27MHz CLOCK,RESET,FLASH R/W SIGNAL 1) MT1379 main clock is at 27MHz(X501) 2) MT1336 reset is high active - 5-7 -...
- Page 34 3) RS232 waveform during procedure(Downloading) 4) Flash R/W enable signal during download(Downloading) - 5-8 -...
-
Page 35: Sdram Clock
2. SDRAM CLOCK 1) MT1379 main clock is at 27MHz(X501) 3. TRAY OPEN/CLOSE SIGNAL 1) Tray open/close waveform - 5-9 -... - Page 36 2) Tray close waveform 3) Tray open waveform - 5-10 -...
- Page 37 4. SLED CONTROL RELATED SIGNAL (NO DISC CONDITION) 5. LENS CONTROL RELATED SIGNAL(NO DISC CONDITION) - 5-11 -...
- Page 38 6. LASER POWER CONTROL RELATED SIGNAL (NO DISC CONDITION) 7. DISC TYPE JUDGEMENT WAVEFORM - 5-12 -...
- Page 39 - 5-13 -...
- Page 40 8. FOCUS ON WAVEFORM - 5-14 -...
- Page 41 9. SPINDLE CONTROL WAVEFORM (NO DISC CONDITION) - 5-15 -...
- Page 42 10. TRACKING CONTROL RELATED SIGNAL(System checking) - 5-16 -...
- Page 43 11. RF WAVEFORM 12. MT1379 AUDIO OPTICAL AND COAXIAL OUTPUT (ASPDIF) - 5-17 -...
- Page 44 13. MT1379 VIDEO OUTPUT WAVEFORM 1) Full colorbar signal(CVBS) 2) Y - 5-18 -...
- Page 45 3) C 14. AUDIO OUTPUT FORM AUDIO DAC 1) Audio related Signal - 5-19 -...
- Page 46 MEMO - 5-20 -...
- Page 47 • SPEAKER Satellite speaker • MODEL: LHS-C6230T A800 RUN DATE : 05.JUNE.2003 LOCA.NO PART NO DESCRIPTION SPECIFICATION REMARKS 3701RM0042A NET ASSEMBLY SPK LHS-D6230T L.SILVER 6400FTTC02A SPEAKER,FULLRANGE F30C-D366 TOPTONE FULL-RANGE(H 3110RMP009A CASE REAR LH-6230TE MOLD STANDARD 6871RU4116B PWB(PCB) ASSEMBLY,SUBSET(AUDIO FE-3620TE 2P NEW TERMINAL 150M 6871RU9271A PWB(PCB) ASSEMBLY,SUBSET(AUDIO LHS-D6230T FRONT WIRE(5M) R CH...
- Page 48 Passive(Sub) Woofer • MODEL: LHS-C6230W RUN DATE : 05.JUNE.2003 LOCA.NO PART NO DESCRIPTION SPECIFICATION REMARKS 3720RMF045A PANEL,FRONT FRONT LH-6230WE STANDARD 3701RM0043A NET ASSEMBLY SPK LHS-D6230W SILVER STANDARD 3091RMW050A CABINET ASSEMBLY ASSY LH-6230WE ALL PB 9T 6400WTTJ03A SPEAKER,WOOFER F65C-D365 TOPTONE WOOFER LHS-6 6871RU9271F PWB(PCB) ASSEMBLY,SUBSET(AUDIO LHS-D6230W SUB WOOFER 2.5M, OR...
-
Page 49: Block Diagram
BLOCK DIAGRAM... - Page 50 AUDIO SHEMATIC DIAGRAMS • U-COM SCHEMATIC DIAGRAM...
- Page 51 • FUNCTION & POWER SCHEMATIC DIAGRAM...
-
Page 52: Main Amp Schematic Diagram
• MAIN AMP SCHEMATIC DIAGRAM... - Page 53 WIRING DIAGRAM 2-10 2-11...
- Page 54 AUDIO VOLTAGE SHEET (IC&TR) [FRONT] [MAIN] LOC. PART PIN NUM. STOP DVD PLAY LOC. PART PIN NUM. STOP DVD PLAY LOC. PART PIN NUM. STOP DVD PLAY LOC. PART PIN NUM. STOP DVD PLAY IC501 LC87F57C IC707 KIA7805 11.9 11.9 IC703 KIA7812 18.4...
- Page 55 PRINTED CIRCUIT DIAGRAM • MAINAMP & FRONT P.C. BOARD (SOLDER SIDE) 2-14 2-15...
- Page 56 • MAINAMP & FRONT P.C. BOARD (COMPONENT SIDE) 2-16 2-17...
- Page 57 • FUNCTION & POWER P.C. BOARD (SOLDER SIDE) 2-18 2-19...
- Page 58 • FUNCTION & POWER P.C. BOARD (COMPONENT SIDE) 2-20 2-21...
-
Page 59: Vcr Shematic Diagrams
VCR SHEMATIC DIAGRAMS • SYSTEM SCHEMATIC DIAGRAM 3-17 3-18... - Page 60 • A(AUDIO)/V(VIDEO) SCHEMATIC DIAGRAM 3-19 3-20...
- Page 61 • POWER SCHEMATIC DIAGRAM NOTE: Warning NOTE: Parts that are shaded are critical With respect Shaded(I) parts are critical for safety.Replace only to risk of fire or electrical shock. with specified part number. 2. Voltages are DC-measured with a digital voltmefer during Play mode.
- Page 62 • TU/IF. ACSS SCHEMATIC DIAGRAM 3-23 3-24...
- Page 63 • HIFI/TUNER SCHEMATIC DIAGRAM 3-25 3-26...
- Page 64 • A/V JACK, SCART SCHEMATIC DIAGRAM 3-27 3-28...
-
Page 65: Vcr Voltage Sheet (Ic&Tr)
VCR VOLTAGE SHEET (IC&TR) IC501 IC301 IC801 IC302 IC501 IC301 IC801 IC302 MODE MODE STOP PLAY STOP PLAY STOP PLAY STOP PLAY STOP PLAY STOP PLAY STOP PLAY STOP PLAY PIN NO. PIN NO. 2.17 1.78 2.78 2.96 0.23 4.85 4.85 2.17 2.53... -
Page 66: Printed Circuit Diagrams
PRINTED CIRCUIT DIAGRAMS • TUNER P.C BOARD 3-31 3-32... - Page 67 • VCR P.C BOARD 3-33 3-34...
- Page 68 • VCR P.C BOARD 3-35 3-36...
-
Page 69: Dvd Part Schematic Diagrams
DVD PART SCHEMATIC DIAGRAMS • MPEG SCHEMATIC DIAGRAM 5-21 5-22... - Page 70 • SERVO SCHEMATIC DIAGRAM 5-23 5-24...
- Page 71 • AUDIO SCHEMATIC DIAGRAM 5-25 5-26...
- Page 72 • INTERFACE SCHEMATIC DIAGRAM 5-27 5-28...
-
Page 73: Voltage Sheet (Ic&Tr)
VOLTAGE SHEET (IC&TR) 5-29 5-30... -
Page 74: Printed Circuit Diagram
PRINTED CIRCUIT DIAGRAM • DVD P.C. BOARD(SOLDER SIDE) 5-31 5-32... - Page 75 • DVD P.C. BOARD (COMPONENT SIDE) 5-33 5-34...
-
Page 76: Cabinet And Main Frame
SECTION 7. EXPLODED VIEWS • CABINET AND MAIN FRAME NOTE) Refer to “SECTION 7 REPLACEMENT PARTS LIST” in order to look for the part number of each part. A42B AUDIO TUNER... - Page 77 SECTION 4. MECHANSIM OF VCR PART...
- Page 78 DECK MECHANISM PARTS LOCATIONS T op View Procedure Fig- Part Fixing Type Starting 1 Drum Assembly 3 Screw 2 Plate Top 2 Hook 3 Holder Assembly CST Chassis Hole 4 Opener Door Chassis Hole 5 Bracket Assembly 3 Hook L/D Motor 2,3,4 6 Gear Assembly Rack F/L 1 Hook, Chassis Hole A-2...
- Page 79 DECK MECHANISM DISASSEMBLY Stator (S2) (S2) (S3) Drum Motor (S3) Rotor Drum Sub Assembly (Fig. A-1-1) Drum FPC Carbon Brush (S1) (S1) (S1) Holder FPC Fig. A-1 (Fig. B-1) 1. Drum Assembly (Fig. A-1-1) 1) Unplug the Drum FPC Connector. 2) Remove three Screws(S1) on bottom side and separate the Drum assembly.
- Page 80 DECK MECHANISM DISASSEMBLY (Fig. A-2-1) Plate Top (B’) (Fig. A-2-2) Holder Assembly CST (Fig. A-2-6) Arm Assembly F/L (C1) (Fig. A-2-7) Lever Assembly S/W (H8) Bracket Assembly L/D Motor Spring Lever S/W (Fig. A-2-4) (C’) (E’) Opener Door (Fig. A-2-3) (H6) Chassis Gear Assembly Rack F/L...
- Page 81 DECK MECHANISM DISASSEMBLY 2. Plate Top (Fig. A-2-1) 2) Unhook three Hooks(H3, H4, H5) on bottom side of the Chassis, lift up the Bracket Assembly L/M and disassem- 1) Pull the (B) portion of the Plate Top back in direction of ble the Bracket Assembly L/D Motor.
- Page 82 DECK MECHANISM DISASSEMBLY Arm Assembly Cleaner (Fig. A-3-1) (S4) Base Assembly A/C Head (Fig. A-3-3) Head F/E (Fig. A-3-2) Chassis Fig. A-3 9. Arm Assembly Cleaner (Fig. A-3-1) 11. Base Assembly A/C Head (Fig. A-3-3) 1) Breakaway the (A) portion as Fig. A-3-1 from the 1) Remove the Screw(S4) and lift the Base Assembly A/C embossing of the Chassis, turn the Arm assembly Head up.
- Page 83 DECK MECHANISM DISASSEMBLY Arm Assembly Tension (Fig. A-4-3) (H11) Spring TB Brake Assembly T (Fig. A-4-1) Spring Tension Reel S Reel T (Fig. A-4-4) (Fig. A-4-4) Spring RS Brake Assembly RS (Fig. A-4-2) (H12) (H9) (H10) Base Tension Chassis Fig. A-4 12.
- Page 84 DECK MECHANISM DISASSEMBLY Opener Lid (Fig. A-5-2) Assembly Pinch (Fig. A-5-3) Base Assembly P4 Lever T/up (H13) (Fig. A-5-1) (Fig. A-5-4) (H13) Arm T/up (Fig. A-5-5) Chassis Fig. A-5 16. Base Assembly P4 (Fig. A-5-1) NOTE 1) Breakaway the (A) portion of the Base Assembly P4 from When reassembling, confirm the (C) portion of the Arm the embossing of the Chassis.
- Page 85 DECK MECHANISM DISASSEMBLY Belt Capstan (Fig. A-6-1) Motor Capstan (Fig. A-6-2) Washer(W1) Clutch Assembly D35 (Fig. A-6-4) (L1) (L1) Brake Assembly Capstan (Fig. A-6-5) Lever F/R (Fig. A-6-3) (L2) Chassis (S5) Fig. A-6 20. Belt Capstan (Fig. A-6-1)/ 22. Clutch Assembly D35 (Fig. A-6-4) Motor Capstan (Fig.
- Page 86 DECK MECHANISM DISASSEMBLY (H14) Gear Cam Hole(B) Gear Cam (Fig. A-7-2) Gear Drive Hole(A) Gear Sector Washer (W2) (Fig. A-7-3) Plate Slider Gear Drive (Fig. A-7-4) (Fig. A-7-1) Lever Tension (Fig. A-7-5) Lever spring (L3) (Fig. A-7-6) Gear Drive Hole(C) Base Loading (H15) (H16)
- Page 87 DECK MECHANISM DISASSEMBLY Gear Assembly P2 Hole Gear Assembly P3 Hole Gear Assembly P3 (Fig. A-8-2) Gear Sector Hole(A) Lever Spring Boss Gear Assembly P2 Plate Slider Hole(B) (Fig. A-8-1) Chassis Base Assembly P3 (Fig. A-8-4) Base Assembly P2 (Fig. A-8-3) Fig.
- Page 88 DECK MECHANISM DISASSEMBLY (S7) Base Tension Base Loading (Fig. A-9-2) Arm Assembly Idler (Fig. A-9-1) (Fig. A-9-3) Chassis Fig. A-9 31. Base Loading (Fig. A-9-1) 33. Arm Assembly Idler (Fig. A-9-3) 1) Remove the Screw(S7). 1) Make narrower the two parts, (B) and (C), as Fig. A-9-3. 2) Lift the Base Loading up.
- Page 89 - 4-12 -...
-
Page 90: Deck Mechanism Adjustment
DECK MECHANISM ADJUSTMENT 1. Mechanism Alignment Position Check Purpose:To determine if the Mechanism is in the correct position, when a Tape is ejected. Test Conditions (Mechanism Test Equipment/ Fixture Check Point Condition) Mechanism and Mode Switch Position Blank tape Eject Mode (with Cassette ejected) 1) Turn the Power S/W on and eject the Cassette by press- 4) Remove the Screw which fixes the Deck Mechanism and ing the Eject Button. -
Page 91: Checking Torque
DECK MECHANISM ADJUSTMENT 2. Preparation for Adjustment (To set the cassette without tape. Cover the holes of the End Sensors at the both sides of Deck Mechanism of the loading state the Chassis to prevent a light leak. without inserting a cassette tape). Then the Deck Mechanism drives to the Stop Mode. -
Page 92: Guide Roller Height Adjustment
DECK MECHANISM ADJUSTMENT 4.Guide Roller Height Adjustment Purpose: To regulate the height of the tape so that the bottom of the tape runs along the tape guide line on the Lower Drum. 4-1. Preliminary Adjustment Test Equipment/ Fixture Test Conditions (Mechanism Condition) Adjustment Point Post Height Adjusting Driver Play or Review Mode... - Page 93 DECK MECHANISM ADJUSTMENT 5. Audio/Control (A/C) Head Adjustment Purpose: To insure that the tape passes accurately over the Audio and Control Tracks in exact alignment of the both Record and Playback Modes. 5-1. Preliminary Adjustment (Height and Tilt Adjustment) Perform the Preliminary Adjustment, when there is no Audio Output Signal with the Alignment Tape. Test Equipment/ Fixture Test Conditions (Mechanism Condition) Adjustment Point...
- Page 94 DECK MECHANISM ADJUSTMENT 5-2. Confirm that the tape passes smoothly (2) If folding or curling is observed at the top of it then slowly turn the Tilt Adjustment Screw(C) in the between the Take-up Guide and Pinch counterclockwise direction. Roller(using a mirror or the naked eye). 1) After completing Step 5-1.(Preliminary Adjustment), check NOTE: that the tape passes around the Take-up Guide and Pinch...
- Page 95 DECK MECHANISM ADJUSTMENT 7. Adjustment after Replacing Drum Assembly (Video Heads) Purpose: To correct for shift in the Roller Guide and X value after replacing the Drum. Test Conditions Test Equipment/ Fixture Connection Point Adjustment Points (Mechanism Condition) CH-1: PB RF Envelope Guide Roller Precise Oscilloscope Play the Blank Tape...
-
Page 96: Check Before Starting Repairs
MAINTENANCE/INSPECTION PROCEDURE 1. Check before starting repairs The following faults can be remedied by cleaning and oil- ing. Check the needed lubrication and the conditions of cleanliness in the unit. Check with the customer to find out how often the unit is used, and then determine that the unit is ready for inspec- tion and maintenance. -
Page 97: Required Maintenance
MAINTENANCE/INSPECTION PROCEDURE 2. Required Maintenance 4. Supplies Required for Inspection and Maintence The recording density of a VCR(VCP) is much higher than that of an audio tape recorder. VCR(VCP) components must (1) Grease : Kanto G-311G (Blue) or equivalent be very precise, at tolerances of 1/1000mm, to ensure com- (2) Isopropyl Alcohol or equivalent patibility with the other VCRs. - Page 98 MAINTENANCE/INSPECTION PROCEDURE 5-2) Greasing (2) Periodic greasing Grease specified locations every 5,000 hours. (1) Greasing guidelines 1) Loading Path Inside & Top side 6) Plate Slider Guide Sections Apply grease, with a cleaning patch. Do not use exces- 2) Base Assembly P2,P3 stopper 7) Plate Slider Guide Sections sive grease.
- Page 99 MAINTENANCE/INSPECTION PROCEDURE Lever, F/R, Base, Tension GEAR AY, P2 & P3 Boss Lever, F/R Base, Tension Clutch (G-754. Yellow) Arm Tension Guide Hole - 4-22 -...
-
Page 100: Deck Mechanism
MECHANISM TROUBLESHOOTING GUIDE 1.Deck Mechanism Auto REW doesn’t work. Is the output of END sensor of supply side "H"? H : more than 3.5V L : less than 0.7V~1V Is the Vcc. voltage of End Check the syscon power. sensor 5V? Replace the End sensor. - Page 101 - 4-24 -...
- Page 102 MECHANISM TROUBLESHOOTING GUIDE In PB mode Tape Presence not sensed. Is the Pinch Roller attached Check Alignment positions to the Capstan Motor Shaft? (page 4-13). Does the T/Up Reel turn? Is the Belt ok? Replace the Belt. Check the Clutch and Idler Does the Capstan Motor turn? Assembly.
-
Page 103: Front Loading Mechanism
MECHANISM TROUBLESHOOTING GUIDE 2. Front Loading Mechanism Cassette cannot be inserted. Does the Lever Assembly Is the Lever Assembly Switch Replace or add the Lever Switch work? Spring damaged or omitted? Assembly Switch Spring. Does the CST IN Switch work Replace the CST IN Switch. - Page 104 MECHANISM TROUBLESHOOTING GUIDE Cassette does not load. Does the cassette insert? Does the Opener Lid work? Does the Gear Assembly Rack F/L Replace the Opener Lid. work? Replace the Gear Rack F/L. Does the Opener Door work? Check the opener Door assembled Does the Arm Assembly F/L work? correctly.
-
Page 105: Exploded Views
EXPLODED VIEWS 1. Front Loading Mechanism Section - 4-28 -... - Page 106 EXPLODED VIEWS 2. Moving Mechanism Section(1) OPTIONAL PART - 4-29 -...
- Page 107 EXPLODED VIEWS 3. Moving Mechanism Section(2) OPTIONAL PART - 4-30 -...
- Page 108 SECTION 6 MECHANISM OF DVD PART CONTENTS 5. Frame Assembly Up/Down ....6-4 DECK MECHANISM PARTS 6. Belt Loading........6-4 LOCATIONS 7. Gear Pulley ........6-4 8. Gear Loading ........6-4 • Top View..........6-1 9. Guide Up/Down.........6-4 • Top View(without Tray Disc) ....6-1 • Bottom View ...........6-1 10.
-
Page 109: Deck Mechanism Parts Locations
DECK MECHANISM PARTS LOCATION • Top View (With Tray) Procedure Disass Fig- Parts Fixing Type embly Starting No. Holder 2 Screws, Clamp 2 Locking Tabs Clamp Assembly Disc 1, 2 Plate Clamp 1, 2, 3 Magnet Clamp 1, 2, 3, 4 Clamp Upper Tray Disc 1, 6... -
Page 110: Deck Mechanism Disassembly
DECK MECHANISM DISASSEMBLY 1. Holder Clamp (Fig. 6-1) 2. Tray Disc (Fig. 6-2) 1) Release 2 Screws(S1). 1) Insert and push a Driver in the emergency eject 2) Unhook 2 Locking Tabs(L1). hole(A) at the right side, or put the Driver on the 3) Lift up the Holder Clamp and then separate it from the Lever(B) of the Gear Emergency and pull the Lever(B) Base Main. -
Page 111: Base Assembly Sled
DECK MECHANISM DISASSEMBLY 3. Base Assembly Sled (Fig. 6-3) 3-3. Gear Assembly Rack 1) Release the Scerw(S3) 1) Release 4 Screw(S2). 2) Disconnect the FFC Connector(C1) 4. Rubber Rear (Fig. 6-3) 3-1. Gear Assembly Feed 3-2. Gear Middle... -
Page 112: Frame Assembly Up/Down
DECK MECHANISM DISASSEMBLY 5. Frame Assembly Up/Down (Fig. 6-4) 8. Gear Loading (Fig. 6-4) 9. Guide Up/Down (Fig. 6-4) Note 1) Move the Guide Up/Down in direction of arrow(A) as Put the Base Main face down(Bottom Side) Fig.(A) 1) Release the Screw(S4) 2) Push the Locking Tab(L5) down and then lift up the 2) Unlock the Locking Tab(L3) in direction of arrow and Guide Up/Down to separate it from the Base Main. -
Page 114: Exploded View
EXPLODED VIEWS 1. Deck Mechanism Exploded View 024A 024B 024A 011A 015A 015B 015C...
Need help?
Do you have a question about the LH-C6230P and is the answer not in the manual?
Questions and answers