Table of Contents
Advertisement
Advertisement
Table of Contents

Related Manuals for Mr Handsfree BC9000


Summary of Contents for Mr Handsfree BC9000
- Page 1 MULTIMEDIA BLUETOOTH CARKIT ® USER’S MANUAL BC9000M - GB1 -...
-
Page 2: Table Of Contents
TABLE OF CONTENTS INTRODUCTION SAFETY INSTRUCTIONS CERTIFICATION AND SAFETY APPROVALS DECLARATION OF CONFORMITY BLUETOOTH ® PRODUCT FEATURES PACKAGE CONTENTS BEFORE STARTING 1) Check the car configuration 2) Remove the car radio INSTALLATION 1) Install the black box 2) Install the in-car radio cable 3) Notes on the power supply cable 4) Install the music cable, the microphone and the screen unit FIRST USE 1) Description different ways to press the buttons 2) Description different ways to navigate through the menu 3) Pairing 4) Make a call 5) Answer/reject/end a call 6) Adjust the volume FUNCTIONS 1) Transfer a call from the BC9000m to your mobile phone and back 2) 3- way call function: 3) Mute the microphone: 4) Connect/disconnect your phone 5) Delete paired phones 6) Automatic phonebook synchronization... -
Page 3: Introduction
INTRODUCTION Thank you for choosing mr Handsfree! Please read this manual carefully before using the BC9000m. TE-Group NV reserves its rights to make any changes and improvements to the product described in this document without prior notice. Without written permission from TE-Group NV, reproduction, transfer, distribution or storage of part or all of the contents in this document in any form is prohibited. Please make sure your mobile phone supports Bluetooth profiles and network operator supports ® the functions described in this manual, otherwise the related functions cannot be realized on this handsfree device. Please refer to the manual of your mobile phone or contact your network operator for more detailed information. SAFETY INSTRUCTIONS • Before starting the installation, make sure that the car ignition is off. • Make sure that the operation and installation of the carkit will never influence your safety. • Before you install the individual components, check that the installation locations have been selected in such a way that the cable length is sufficient to connect every element. • Do not install any component in the airbag deployment area. • Once the installation is complete, make sure that no cables are pinched or trapped. • Make sure not to damage electrical cables, fuel or brake lines or safety equipment during the installation. -
Page 4: Certification And Safety Approvals
End-users and installers must be provided with antenna installation instructions and transmitter operating conditions for satisfying RF exposure compliance. DECLARATION OF CONFORMITY Company TE-Group NV Address: Kapelsestraat 61, Kapellen, Belgium declare, that the following equipment : Product Name: MrHandsfree BC9000 Product Type Handsfree carkit Conforms with EN 301 489-1 V1.6.1(2005-09); EN 301 489-17 V1.2.1(2002-08); EN 300 328 V1.7.1(2006-10); EN 60950-1:2001�A11:2004 EN 300 328 V1.7.1(2006-10); EN 60950-1:2001�A11:2004 EN 60950-1:2001�A11:2004 99/5/EC BC9000M - GB4 -... -
Page 5: Bluetooth
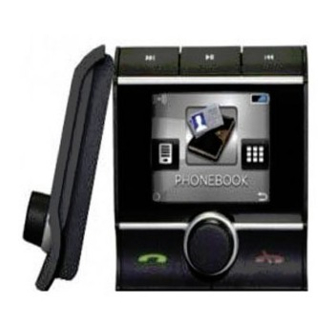
BLUETOOTH ® The Bluetooth word mark and logos are owned by the Bluetooth SIG, Inc. and any use of such ® ® marks by TE-Group NV is under license. Other trademarks and trade names are those of their respective owners. PRODUCT FEATURES The BC9000m is a Bluetooth carkit for handsfree calling & listening to music with the following ® features: • Multipoint: connect & use 2 phones at the same time* • Full color TFT screen • A djustable background color • C ustomize background with personal picture • V oice control technology: say ‘Answer’ or ‘Ignore’ to accept or reject calls • I nnovative Extreme Audio Technology • E xcellent sound quality: NEW Full duplex – DSP technology with ANR feature • V oice and music over car speakers • P lay music from any Bluetooth stereo A2DP compatible device ®... -
Page 6: Package Contents
PACKAGE CONTENTS 1. Screen unit 2. Black box 3. Microphone 4. ISO cable, including 2 pair of line-out wires 5. Screen unit to black box cable 6. Music line-in cable (Jack cable) and holder for screen unit 7. SW upgrade cable 8. Mounting accessories (Mini USB to USB convert cable) (Screws, double side adhesive tape, etc.) 9. Mini cd CD Contents: Software to create a background picture for the BC9000m using a User’s manual Utilities & Advanced Bluetooth ® carkit personal picture in order to personalize the BC9000m. Sample pictures that can be used as background for the BC9000m (including car brands and country flags) Version 1.0... -
Page 7: Before Starting
BEFORE STARTING 1) CHECK THE CAR CONFIGURATION • The cables supplied with the kit feature ISO connectors and two pair of line-out wires. The line- out wires can be used if your audio system has a special amplifier system. Several set-ups are therefore possible, depending on the type of car stereo and your vehicle. • If your car stereo is not fitted with ISO connectors, you need to purchase an ISO adapter cable to simplify the wiring procedure. 2) REMOVE THE CAR RADIO • Remove your car radio from you vehicle. Refer to your car radio’s user guide or contact your car dealer for more information. • The mute function is used to cut the sound of your car radio to enable a phone call. The choice of the mute-in jack depends on your car radio’s configuration. INSTALLATION 1) INSTALL THE BLACK BOx Blackbox The black box can be fixed in 2 ways: Under the dashboard or at any other place in the car using the installation screws. - Page 8 The black box is fitted with 4 interfaces: ISO cable connector Screen unit connector Music line in Microphone We recommend installing all the cables before fixing the screen unit. Each cable supplied has a different connector to avoid wrong connections. The box may not be installed near the heating or the air-conditioning. Ensure that it is not exposed to sunlight. Avoid installation behind metal walls, which could alter the quality of the Bluetooth ® link. BC9000M - GB8 -...
-
Page 9: 2) Install The In-Car Radio Cable
2) INSTALL THE IN-CAR RADIO CABLE A. Connect in-car radio with «ISO» connectors Disconnect the audio and supply bundles from the in-car radio. Connect the audio and supply bundles from the vehicle to the male connectors. Link the female connectors of the mute supply cables and of the power supply cable to the in-car radio. If the in-car radio is equipped with a mute input, connect the yellow wire of the mute cable to one of the mute in 1, 2 , 3 or your radio specific connection. Settings in your screen unit must be set in the music menu. Select ‘music’ > ‘Audio out’> ’to iso connector’ Note! Mute in 1, mute in 2 and mute in 3 are only suggested mute locations. You first have to test and verify the mute on the vehicle. For some cars e.g. the mute connection is in another location. Please check your car radio’s user manual for more information. A: 12 V ignition (orange) E: connection to the vehicle’s speaker B: 12V battery supply (red) 1: Rear right speaker (purple... -
Page 10: 3) Notes On The Power Supply Cable
B. Connect black box (line-out) to car radio line-in U se this type of connection by wiring the line-out (brown & white wire or red & black wire to your car radio’s line-in. U sing the two pairs of line-out will enable you to take advantage of the music function in stereo over your vehicle’s speakers. O n the installation cable, connect the yellow wire of the mute cable to the corresponding audio system’s mute-input if available (mute in 1, 2 or 3). S ettings in your screen unit must be set in the music menu. Select ’music’ > ‘Audio out’ > ’to Line-out’ A: 12 V ignition (orange) F: Line-out 2 B: 12V battery supply (red) 1: Line 2 + (black) C: Ground... -
Page 11: 4) Install The Music Cable, The Microphone And The Screen Unit
4) INSTALL THE MUSIC CABLE, THE MICROPHONE AND THE SCREEN UNIT A. Music cable / line-in to black box Connect the music cable to the black box and place the jack connector into the music device. Make sure that the cable is not pinched. Make the setting in the music menu . Select ’music’... - Page 12 C. Screen unit See below illustration: • Click the mounting bracket on the screen unit as indicated in below illustration. • Stick the double-sided tape on the back side of the screen unit. Stick the screen unit on a plane and clean spot on the dashboard. BC9000M - GB12 -...
-
Page 13: First Use
FIRST USE 1) DESCRIPTION DIFFERENT wAYS TO PRESS THE BUTTONS Type of pressing Description Press Press and release the button within 1 second Long press Press and hold the button at least 3 seconds, then release Hold Press and hold the button for more than 3 seconds Release Release the button after hold Turn Turn the turning wheel left or right 2) DESCRIPTION DIFFERENT wAYS TO NAVIGATE THROUGH THE MENU Function Description Access the menu Press the or the central turning wheel to access the menu Turn the turning wheel to browse through the menu. Press the Select a menu item or the central turning wheel to select a menu item Go back Press the... - Page 14 Attention! Some mobile phones require an extra action to complete the pairing process. E.g. your phone may ask ‘Authorise BC9000m to connect ?, or ‘Connect to BC9000m’? Please confirm these options whenever they occur. When Bluetooth connection is established, the carkit will automatically start downloading the ® phonebook from your phone into the carkit (if supported by your phone). The carkit screen will show ‘downLoAdinG’ > ‘sortinG’ In case your phone doesn’t support the phonebook download, you can either send your phonebook content as ‘business card’ to the carkit by the phones menu, or insert your SIM card to the carkit to copy phonebook saved on your SIM card to the carkit. Please check p.20 ‘Phonebook copy by SIM card’ for additional information. A shortcut to start the paring procedure immediately: Long press Once your phone is paired, the BC9000m will automatically connect with your phone and your mobile phone will be shown on the display. 4) MAKE A CALL A.
- Page 15 THROUGH VOICE DIALING: • Press the turning wheel and select ‘Voice diAL’ → you will hear a tone that indicates that you can pronounce the desired name (=’voice tag’). → Say the voice tag. → The phone will now play the voice tag and start dialing the related phone number. Note: Your mobile phone needs to support voice dialing and you must record voice tags in your phone before using this function. Please refer to your phone manual for detailed descriptions on how to set up voice dialing and recording voice tags. B. To call a contact listed in one of your call lists (missed calls / received calls / dialed numbers ). Please note that numbers in this list will only be added when making calls with your carkit. → Phone calls made on your phone without being connected with the carkit will not be saved into the log lists. ‘cALL List’...
-
Page 16: 5) Answer/Reject/End A Call
C. To call a number that is not listed in your phonebook: • P ress the turning wheel and select ‘KeypAd’ • Turn the turning wheel to scroll through the digits and press the turning wheel to input the digits • You can press the to delete the digits you input • Press the to call the number • The number of the contact is now shown on the display. D. To Redial: A shortcut to redial: Long press 5) ANSwER/REjECT/END A CALL A. Answer/reject a call When you receive a call you will hear your phone’s ringtone followed by the voice command ‘Call/ Answer or ignore’ . -
Page 17: Functions
6) ADjUST THE VOLUME • D uring a call, you can adjust the volume by turning the turning wheel. • T he volume setting is saved automatically for next calls. FUNCTIONS 1) TRANSFER A CALL FROM THE BC9000M TO YOUR MOBILE PHONE AND BACK To transfer a call from the BC9000m to your mobile phone: • During a call, press the • T he call will now be transferred to the mobile phone. To transfer a call from your mobile phone back to the BC9000m: • During a call, press the • T he call will now be transferred back to the BC9000m. After ending the call, the connection with the BC9000m will be restored automatically. 2) 3- wAY CALL FUNCTION: When you are already in a conversation (A) and you receive another incoming call(waiting call) (B), you can: •... -
Page 18: 3) Mute The Microphone
3) MUTE THE MICROPHONE: When you are in a conversation: • P ress the to mute the microphone. You will hear a tone that indicates that the mute function is activated. You will still hear the other person but this person will no longer be able to hear you. • P ress the to unmute the microphone. You will hear a tone that indicates that the mute function is deactivated. 4) CONNECT/DISCONNECT YOUR PHONE A. Disconnect your phone from BC9000m • When your phone is currently connected with Bluetooth carkit (or in the connected mode), ® you can disconnect them by pressing or the turning wheel and select ‘BLuetooth’ > ‘disconnect’ > ‘nAme oF your moBiLe phone’ A shortcut to disconnect your phone: Long press... -
Page 19: 6) Automatic Phonebook Synchronization
6) AUTOMATIC PHONEBOOK SYNCHRONIzATION When Bluetooth connection is established, the carkit will automatically start downloading the ® phonebook from your phone into the carkit (if supported by your phone). The carkit screen will show ‘downloading’ /’ Sorting’. In case your phone doesn’t support the phonebook download, you can either send your phonebook content as ‘business card’ to the carkit by the phones menu, or insert your SIM card to the carkit to copy the phonebook saved on your SIM card to the carkit. Note: The carkit can store up to 4 phonebooks from 4 different phones. The maximum amount of contact numbers of each phonebook is 1000. 7) ORGINATE PHONEBOOK SYNCHRONIzATION FROM BLUETOOTH CARKIT ® • P ress the turning wheel and select ‘phoneBooK’> ‘copy’ > ‘From phone’ The phonebook in the phone will be synchronized to the carkit. This function will only be visible when your carkit’s phonebook is empty. • P ress the turning wheel and select ‘phoneBooK’ > ‘copy’ > ‘From sim’ The phonebook stored on your phone’s SIM card can be wirelessly copied to the carkit, if your mobile phone supports this function. -
Page 20: 9) Phonebook Copy By Sim Card
9) PHONEBOOK COPY BY SIM CARD The BC9000m has a slot at the left side of the screen that fits a standard size SIM card. Insert the SIM CARD until it locks into place. The phonebook copy will start automatically. If phonebook copy via Bluetooth fails, or if you like a simple way of copying the phonebook, then you can insert your ® SIM card into the carkit as shown on the illustration below: After entering your pincode (if you have set a pin code earlier), the phonebook will be copied from SIM card to carkit. This can take a while. Please wait until ‘Remove SIM card’ is shown on the display. When the copying procedure is finished, the SIM card should be placed back into your phone. To remove the SIM card, you have to press it again in order to release it. Please note that you first may have to copy contacts saved on your phone’s memory to the SIM card in order to copy your contacts. 10) DELETE PHONEBOOK • P ress the turning wheel and select ‘settinGs & Gsm’ > ‘nAme oF your moBiLe phone’ > ‘settinGs’ > ‘phoneBooK’ > ‘deLete’ > ‘deLete ALL’ You can delete all contacts in the carkit. -
Page 21: Music
MUSIC 1) MUSIC PLAYER CONNECTED VIA LINE-IN CABLE If you are using the BC9000m with a music player, you can connect your music player to the BC9000m by using the line-in cable. In the menu ‘music’ > ‘Line in detect’ you have to set ‘on’ or ‘Autodetect’ The music will be played through the speakers of the car. 2) MUSIC PLAYER CONNECTED VIA BLUETOOTH ®... -
Page 22: 3) Music Settings
3) MUSIC SETTINGS The music output can be set in the menu or ‘music’> ‘Audio out’ ‘ to iso connector’ ‘ to Line-out’ Please refer to the chapter ‘INSTALLATION’ in this manual for more details. The default music volume can be set in ‘music’ > ‘VoLume’ menu. The appearance of the music player can be changed in the menu ‘music > sKin’ You can either select Modern or Classic. BC9000M - GB22 -... -
Page 23: Multipoint
MULTIPOINT MULTIPOINT BLUETOOTH – How to do? ® – 2 phones, 1 carkit - mr Handsfree BC9000m supports MULTIPOINT BLUETOOTH , which allows you to connect and ® use 2 different Bluetooth telephones at the same time with your carkit. ® When 2 phones are connected to the BC9000m you always have: • Primary phone (1st phone connected to the carkit) • Secondary phone (2nd phone connected to the carkit) The primary phone is the most important phone. So if you select for example ‘phoneBooK’ , then you will see the phonebook of the primary phone. The same is valid for ‘cALL List’, ‘KeypAd’, ‘Voice diAL’ and the shortcut buttons. • Primary phone: Make, Answer, End & Reject calls / Redial / Voice dialing • Secondary phone: Make, Answer, End & Reject calls The standard order of phones can be set in the menu ‘BLuetooth’>’priority’. - Page 24 Initiate connection request from the carkit: When the carkit is in standby mode, which means no Bluetooth connection exists, press the ® turning wheel and select ‘BLuetooth®’ > ‘connect’> ‘nAme oF your moBiLe phone’ . Once the connection is established, start to connect the second top priority device. Note that, if your phones are not the top two priority phones, you need to make the connection from the phone’s side. When two phones are connected with the carkit, the one which takes the higher priority will works as the primary device and the other one will function as the secondary device. Any operation initiated from the carkit, such as redialing and voice dialing, will only be applied to the primary device. Operations initiated from either phone shall be applied to the carkit as normal. When you are already in a conversation and you receive an incoming call, you can handle the incoming call on the other phone.
-
Page 25: Settings
SETTINGS To acces the menu-item ‘Settings’, you select ‘settinGs & Gsm’ > ‘nAme oF your moBiLe phone’ > ‘settinGs’ This submenu has 9 items. 1) PHONEBOOK This submenu has 5 options: ‘View’ : To view your phonebook : to copy your phonebook by Bluetooth (=same copying procedure that automatically ‘copy’ ® starts the moment your phone is connected. Alternative phonebook copy methods are sending business cards and using the SIM card reader, as described earlier in this manual.) : To delete your phonebook ‘deLete’ ‘swAp First & LAst nAme’ : To swap the first and last name. This may be useful for the sorting order. ‘preFix’... -
Page 26: 4) Voice Control
4) VOICE CONTROL To activate/deactivate the voice control feature (to say ‘Answer’ or ‘Ignore’ to accept or reject an incoming call) : Press the turning wheel and select ‘settinGs & Gsm’ > ‘settinGs’ > ‘Voice controL’ U se the turning wheel to activate/deactivate voice command feature. 5) AUTO ANSwER To activate/deactivate the auto answer feature: P ress the turning wheel and select ‘settinGs & Gsm’ > ‘settinGs’ > ‘Auto Answer’ U se the turning wheel to activate/deactivate auto answer feature. Once the Auto answer is activated, the incoming call will be answered automatically if you don’t press either the to accept the call or to reject the call within 3 seconds. 6) DISPLAY Brightness To adjust the display brightness of the carkit: P ress the turning wheel and select ‘settinGs &... -
Page 27: 7) Language
Backlight off time To adjust the backlight off time of the carkit: Press the turning wheel and select: ‘settinGs & Gsm’ > ‘settinGs’ > ‘dispLAy’ > ‘BAcKLiGht time out’ Use the turning wheel to select the backlight off time of the carkit. The options of backlight off time are Always On, 10 sec, 20 sec, 30 sec, 40 sec, 50 sec and 60 sec. 7) LANGUAGE You can select the language of the menu: P ress the turning wheel and select ‘settinGs & Gsm’ > ‘settinGs’ > ‘LAnGuAGe’ U se the turning wheel to select the language you want to display on the menu. 8) SECURITY To change the PIN of paired phone, you can: P ress the turning wheel and select ‘settinGs &... -
Page 28: Upgrade Software / Change Background Picture
D ownload the latest version of software for BC9000m from our website, the file may be named BC9000m_YYYYMMDD.img, YYYYMMDD means the date of software been released, e.g. BC9000m_20101012.img . F ormat your USB disk in FAT or FAT32 format. C opy the software to your USB disk and rename it as BC9000.img. Make sure that the file ‘BC9000.img’ is the only saved file on the USB stick. C onnect the USB stick with BC9000m handsfree carkit using the USB convert cable. C heck and make sure the screen unit and the black box are well connected. - Page 29 If you have saved/created a background picture before, then the following message will appear: Select OK if you want to overwrite the previously saved background. Otherwise press cancel, and save the original file first. When the file for the BC9000m is created successfully, the above window will be shown on your screen. BC9000M - GB29 -...
-
Page 30: Guarantee
GUARANTEE Mr Handsfree is a registered trademark of TE-Group NV. The mr Handsfree brand stands for superior product quality and outstanding customer service. That is why mr Handsfree warrants this product against all defects in material and workmanship for a period of two (2) years from the date of original purchase of the product. The conditions of this guarantee and the extent of responsibility of mr Handsfree under this guarantee are as follows: • This guarantee is limited to the original purchaser of the product and is not transferable to any subsequent purchaser/end user. • During the guarantee period, the sole responsibility of mr Handsfree will be limited to repair or replace, at its option, any defective parts of the product if this is needed because of malfunction or failure under normal use and conditions. No charge shall be made to the customer for parts and/or repair labor. • The product must be shipped to an authorized service center in its original and complete packaging, with transportation charges prepaid. Mr Handsfree will not assume responsibility for any losses or damages during transportation. - Page 31 BC9000m/03-11/V02 BC9000M - GB31 -...
Need help?
Do you have a question about the BC9000 and is the answer not in the manual?
Questions and answers