Table of Contents
Advertisement
Advertisement
Table of Contents

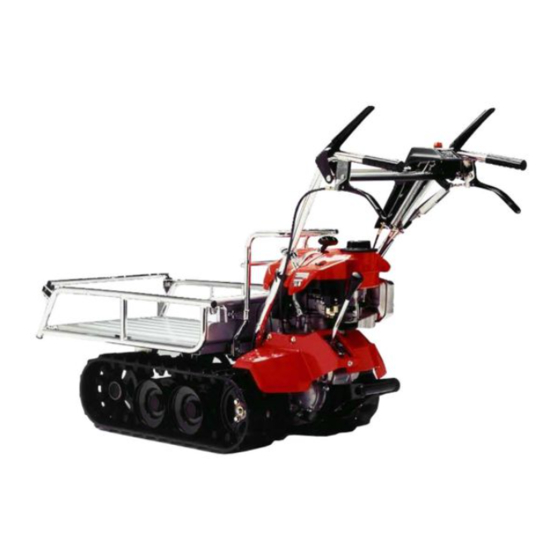
Summary of Contents for Honda HP250
- Page 3 Honda power carrier dealer. of the Honda HP250 at any time written permission. part of the power carrier words: damage if a U.S.D.A.
- Page 4 1. POWER CARRIER 2. COMPONENT IDENTIFICATION 3. CONTROLS 4. PRE-OPERATION 5. OPERATION Starting the engine ... Operating the power carrier Stopping the engine ... High altitude operation 6. CARRYING LOADS 7. MAINTENANCE 8. TRANSPORTING/STORAGE 9. TROUBLESHOOTING 10. SPECIFICATIONS 11. WARRANTY SERVICE.
- Page 5 Honda power carriers are designed to give safe and dependable service if operated according Manual before operating the power carrier. Failure to do so could result in personal injury or equipment damage. Keep children and pets away from the area of operation to avoid possible injury from contact with the power carrier.
- Page 6 peal-j asayl slaqel aJo4aq alemdo JaMod ‘Ja!JJe3 SNldOlS :33wtlns wan5 t7t7 t1333tl smhfa ivnww tla4 siwa...
- Page 7 FUEL FILLER CAP ENGINE SWITCH FILLER CAP WRACK...
- Page 8 THROTTLE LEVER DRIVE CLUTCH LEVERS +iJEL VALVE TRANSMISSION GUARD...
- Page 9 Fuel valve The fuel valve opens and closes the fuel passage to the carburetor. Turn the fuel valve to the ON position position when the engine is stopped. When the power carrier is not in use, always leave the fuel valve in the OFF position to reduce the possibility of fuel leakage.
- Page 10 Throttle lever The throttle lever controls engine speed. When the throttle the START (CHOKE) The choke is open when the throttle position. NORMAL HIGH START (CHOKE) Starter grip Pull the starter grip to operate the recoil starter. STARTER GRI position, it also closes the choke for cold starting.
- Page 11 Gear shift-lever Use the gear shift lever to select drive speed or to back up. Shift gears with the engine running and the drive clutch levers released. Drive cltitch levers Use the drive clutch levers to propel or stop the power carrier. The two levers are connected and move simultaneously.
- Page 12 Steering clutch levers Use the steering clutch lever to steer right. Pull up the left lever to steer left. Carrier bed release lever Pull the release lever to unlock the carrier bed when you wish to tilt the bed for dumping a load. With the carrier bed unlocked, tilt it by lifting the engine guard.
- Page 13 Check the power carrier on level ground with the engine stopped. FUEL Unscrew the fuel tank cap, and check the fuel level. Refill the tank if the fuel level is low. Do not fill above the UPPER LEVEL. Refill the tank if the fuel level is low. Use automotive gasoline with higher, or a research octane number of 91 or higher (unleaded is preferred...
- Page 14 GASOLINES CONTAINING If you decide to use a gasoline containing octane rating is at least as high as that recommended two types of “gasohol”: that containing ethanol, and that containing nol. Do not use gasohol that contains more than 10% ethanol. gasohol containing methanol contain...
- Page 15 ENGINE The engine oil level must be checked with the power carrier level surface. 1. Remove the oil filler cap, and wipe the dipstick clean. 2. Insert the dipstick into the filler neck, but do not screw it in. 3. Remove the dipstick below the end of the dipstick, commended oil.
- Page 16 AIR CLEANER 1. Remove the wing nut to remove the air cleaner cover. 2. Remove and inspect follow the cleaning procedure described on page 33. 3. Reinstall the air cleaner element cover, and wing nut. Securely tighten the wing nut. CAUTION: ,Never run engine without.the result from contaminants,...
- Page 17 5. OPERATION Starting the engine 1. Check that the gear shift lever is in the NEUTRAL position. Allow the drive clutch levers to remain in the STOP position. G,EAR SHIFT LEVER STOP NEUTRAL 2.Turn the fuel valve to the ON position.
- Page 18 3. Move the throttle lever to the START (CHOKE) position. START (CHOKE) THROTTLE NOTE: If restarting a warm engine, the choke will not be needed. Restart a warm engine with the throttle lever in the LO position. 4. Turn the engine switch .to the ON position. INE SWITCH...
- Page 19 5. Pull the starter grip lightly until you feel resistance, then pull briskly. CAUTION: Do not allow the starter grip to snap back against the engine. Return it gently to prevent damage to the starter. Do not pull the starter grip while the engine is running, damage the starter.
- Page 20 ‘Operating the power carrier 1. Move the throttle lever to the LO position. THROTTLE ‘LEVER 2. Move the gear shift lever to the desired position. To avoid loss of control, descend steep slopes in low (I 1 gear, using LO throttle position.
- Page 21 3. Squeeze the drive clutch levers down against the handlebars smoothly and quickly. After. the power carrier starts to move, adjust the throttle lever to maintain the desired speed. DRIVE CLUTCH LEVERS If the engine stalls on a slope, release the drive clutch levers im- mediately to stop the power carrier and avoid loss of control.
- Page 22 Stopping the engine 1. Release the drive clutch levers to disengage the drive and apply the brake. STOP DRIVE CLUTCk LEVERS 2. Move the gear shift lever to the NEUTRAL position. NEUTRAL...
- Page 23 3. Move the throttle lever to the LO position. THROTTLE LEVER 4. Turn the engine switch to either OFF position. ENGINE SWITCH...
- Page 24 5. Turn the fuel valve to the OFF position.
- Page 25 High altitude operation At high altitude, the standard carburetor rich. Performance will decrease, and fuel consumption High altitude performance main fuel jet in the carburetor and readjusting the pilot screw. If you always operate the power carrier at altitudes level, ask your authorized carburetor’modifications.
- Page 26 Load carrying safety To avoid accidents or overturning: Observe the load limits described on page 27. Do not stack the load so that the power carrier becomes top-heavy unstable. Carry only lightweight Do not allow the load to protrude bility. Secure the load to the tie-down :Before operating the power carrier, check that the carrier bed is iodked.
- Page 27 Tie-bo\?rn hooks Secure the load in the carrier bed with strong ropes or straps attached to the tie-down hooks. CAUTION: Do not attach ropes or straps to locations other than the tie- down hooks. The side rails may be extended carrying bulky,-lightweight To extend the side rails, loosen the four lock bolts, pull both side rails out an equal amount, then tighten the lock bolts securely.
- Page 28 Dumping loads Dump loads with the power carrier stopped and the drive clutch released. 1. Pull the carrier bed release lever, and tilt the carrier bed by lifting the engine guard. 2. After dumping the load, push down firmly on the engine guard to lock the carrier bed in the normal position.
- Page 29 Load carrying capacity To avoid personal injury and property or equipment to overturning, do not carry loads on upward downward slopes greater than 15’. operating limits: For operation on level ground - Maximum load: 200 kg (441 lb) Maximum load height: 900 mm (35.4 For operation on slopes - Maximum load: 150 kg (330...
- Page 30 7. MAlMTENANCE Periodic maintenance and adjustment in good operating condition. below. Shut off the engine before performing engine must be run, make sure the area is well ventilated. poisonous carbon monoxide lead to death. CAUTION: Use only genuine HONDA replacement parts which engine.
- Page 31 Maintenance schedule Your power carrier should be serviced regularly to assure maximum service life. Perform at every indicated Air cleaner NOTE: (1 I Service more frequently (21 These items should be serviced and is mechanically proficient. month or operat- when used in dusty areas.
- Page 32 Hand tools tools supplied with the carrier are necessary for performing some periodic maintenance, simple adjustments and repairs. Always keep the tool kit with the carrier. TOOL BAG WRENCH 14 x 19 WRENCH 10 x 12 SPARK PLUG WRENCH HANDLE SPARK PLUG WRENCH OIL FUNNEL...
- Page 33 Engine oil change NOTE: Drain the oil while the engine is still warm to assure rapid and com- ‘plete draining. Changing the oil 1. Remove the engine and loosen the oil drain bolt. 2. Set the oil funnel as shown, remove the oil drain bolt and drain the oil into a suitable container.
- Page 34 Spark plug service Recommended spark plug: BMR4A To ensure proper engine operation, and free of deposits. 1. Remove the spark .plug cap. The muffler becomes very hot during operation and remains hot for a while after stopping while it is hot. 2;...
- Page 35 Servicing the air cleaner A dirty air cleaner will restrict air flow to the carburetor. buretor malfunction, quently when operating the power carrier in extremely Never use gasoline or low flash point solvents air cleaner element. A fire or explosion CAUTION: Never run the engine without the air cleaner.
- Page 36 Adjusting the track tautness If the tracks are not properly service life may be markedly reduced. Inspection Check that the slackness is between 8m12 mm (0.31~0.47 (about 10 kg, 22.1 lb) is applied to the middle of the tracks.. Track adjustment 1.
- Page 37 Adjusting the drive clutch cable The clutch will slip and the power carrier may not move unless the drive clutch cable is adjusted properly. 1. Measure and record the clearance holder with the drive clutch levers at their applied position (DRIVE). Next, measure the same clearance again with the levers at their released posi- tion (STOP).
- Page 38 Adjusting the brake cable 1. Check whether the brake spring collar is 14-l the spring holder when the drive clutch levers are at their released (STOP) position. 2. To adjust, loosen the lock nuts with the levers still at the stop position and set the distance 3.
- Page 39 Checking brake wear Check the brake shoe wear indication properly adjusted. Brake shoe wear is OK if you cannot see the “A” mark through the brake arm hole, when the drive clutch However, if you can see any part of the its service limit;...
- Page 40 Adjusting the steering clutch cable Steering control will be impaired unless both steering clutch cables are ad- justed properly. 1. With the engine off, rock the power carrier forward and backward to find the position at which each lever can be pulled Closest to the handle grip. 2.
- Page 41 Adjusting the dumping lock cable 1. With the carrier locked, check whether bed release lever is 10 m 15 mm (0.39 2. To adjust, loosen the lock n& and turn the adjust bolt to set the pre- scribed distance. 3. After adjustment, tighten the lock nut. 10 - 15 mm 10.39...
- Page 42 Checking the transmission oil Remove the check bolt and check that the oil is up to the lower edge of the check bolt hole. If it is low, engine oil classification, Checking the clutch oil Remove the check bolt and check that the oil is up to the lower edge of the check bolt hole.
- Page 43 Spark arrester maintenance (Optional The muffler becomes very hot during operation and remains hot for a while after stopping the engine. while it is hot. Allow it to cool before proceeding. CAUTION: The spark arrester must be serviced every 100 hours to main- tain its efficiency.
- Page 44 Lubrication Grease the points noted below, at least once a year or after any time you have washed the carrier. Recommended grease: SAE multipurpose grease. ARRIER B&J RELEASE SECTION DRIVE CLUTCH JOINT SECTIoN JOINT SECTION...
- Page 45 Temporary installation In the unlikely event that a track slips off the sprockets during operation, pro- ceed with the following: 1. Stop the engine (refer to page 20). 2. Remove any load in the carrier, by hand. Do not empty it by dumping the carrier.
- Page 46 6. Remove the sprocket 7. First install the track onto the forward driven wheel and then place the sprocket in the rear of the track and.insert 8. Install and tighten the sprocket bolts securely. 9. Remove the wooden Then adjust the track tautness CAUTION: Special care should be exercised when mounting the tracks.
- Page 47 When transporting or storing the power carrier, make sure the engine switch is in the STOP position accidental engine start up. o To avoid severe burns or fire hazards, let the engine cool before trans- porting the power carrier or storing it indoors. ep When transporting the power carrier, turn the fuel valve to the OFF posi- tion,...
- Page 48 Keep all sparks and open flames away when draining the fuel. Perform the operation Dispose of the drained fuel properly. 4. Change the engine oil (see page 31 for details). 5. Clean the air cleaner (see page 33 for details). 6.
- Page 49 To assure maximum service life from your carrier, don’t disassemble it un- necessarily. If the following your carrier back to work, dealer. Check the following points if the engine does not start. Is there sufficient fuel? Is there sufficient engine oil? Is there a spark at the spark plug? a.
- Page 50 1.4 km (0.9 mile/h) in 1 st gear, 3.5 km/h (2.2 mile/h) in 2nd gear, 1.3 km/h (0.8 mile/h) in reverse 0.6 P (0.63 2.0 P (0.21 180 mm x 1,800 subject change HP250 (CA) .NAl GVI OOKI 4-stroke, side valve type 20°...
- Page 51 Owner Satisfaction Your satisfaction and goodwill are important Honda warranty details are explained Normally, any problems concerning dealer’s service department. been handled to your satisfaction, we suggest you take the following action: Discuss your problem with a member of dealership management. complaints can be quickly already...
- Page 52 MEMO...
- Page 53 MEMO...
- Page 54 MEMO...
Need help?
Do you have a question about the HP250 and is the answer not in the manual?
Questions and answers
New throttle cable