Table of Contents
Advertisement
I m p o r t a n t s a f e g u a rd s
• Use this appliance only as described in this instruction manual.
As with any electrical appliance, whilst the instructions aim to cover as many eventualities as
possible caution and common sense should be applied when operating and installing this air
conditioner.
• This appliance has been manufactured to cool and de-humidify domestic environments and
should not be used for other purposes.
• It is dangerous to alter or modify the unit's characteristics in any way.
• The appliance must be installed in line with the relevant national legislation.
• Should repairs be necessary, contact the nearest authorised Repair Service Centre. Unautho-
rised servicing can be dangerous.
• This appliance is to be used by adults only; keep away from children.
• In the case that the power cable becomes damaged, this must be substituted only by specialised
personnel authorised by the manufacturer.
• Always ensure the appliance is earthed. If you have any doubts check with a qualified elec-
trician.
• Avoid using extension leads with the unit.
• Before cleaning or maintenance operations, always unplug the unit from the socket.
• Do not pull on or place strain on the power cable when moving the appliance.
• The appliance should not be installed where the atmosphere may contain combustible gases,
oil or sulphur, or near heat sources.
• If the appliance is utilised in areas where there is no ventilation of air, it is necessary to take pre-
cautions to avoid that the refrigerant gases that may leak from the appliance do not remain
in the room, thereby causing a fire hazard.
• This appliance must be utilised and installed only in rooms with a total volume of 15 cubic metres
or greater.
• The refrigerant gases R290 conform to EC regulations on the environment. Avoid perforating
the refrigerant circuit of the appliance.
• Keep the unit at least 50 cm away from inflammable substances (alcohol etc) or pressurised con-
tainers (eg. aerosol cans).
• Do not rest hot or heavy objects onto the appliance.
• Clean the dust filter at least once a week.
• Remember to perform the descaling procedure at the end of each season (see page 37). In
areas where the water is particularly hard (rich in minerals), the use of a commercial anti-lime
product added to the water is recommended. This can be requested from De'Longhi LTD.
• Avoid using heaters near the unit.
• Do not cover this appliance with bags when is not in use
• Unventilated area where the appilance using flammable refrigerants is installed shall be so con-
structed that any leaked refrigerants will not stagnate so as to cause a fire or an explosion hazard
caussed by igniting stagnant refrigerants from other source such as electric heater, stove and simi-
lar home applications.
• The unit should be transported in a vertical position. If this is not possible secure the unit at an
angle, do not lie horizontally.
Before transporting the unit drain the condensation collecting-tray and tank. After transporta-
tion, wait at least 1 hour before switching on the unit.
• The packaging materials can be recycled. You are therefore recommended to place them in
the special containers for differentiated waste collection.
22
Advertisement
Table of Contents

Related Manuals for DeLonghi PINGUINO 70ECO


Summary of Contents for DeLonghi PINGUINO 70ECO
- Page 1 I m p o r t a n t s a f e g u a rd s • Use this appliance only as described in this instruction manual. As with any electrical appliance, whilst the instructions aim to cover as many eventualities as possible caution and common sense should be applied when operating and installing this air conditioner.
- Page 2 How does your Pinguino work uring the summer, optimum comfort is achieved with a temperature of between 24 and 27˚C and about 50% relative humidity. An air conditioner removes moisture and heat from the room where it is located. One advantage of portable air conditioning units over fitted models is that they can be moved from one room to another in the home or even transferred between different buildings.
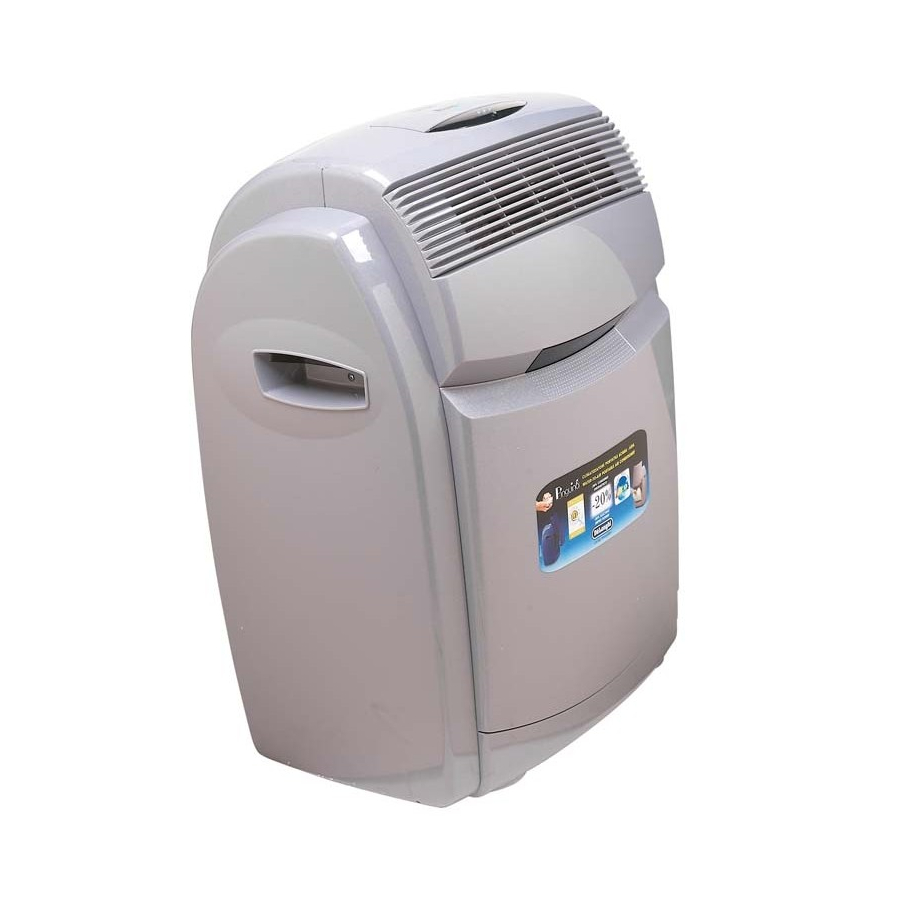
- Page 3 De s c r i p t i o n a n d s e t t i n g u p DESCRIPTION OF THE APPLIANCE 1) Remote control unit compartment with 11)Handle cover 12)Air exhaust hose fitting 2) Control panel 13) Drain tube 3) Manual function button 14) Air intake grill...
- Page 4 S e t t i n g u p AIR CONDITIONING WITH INSTALLATION • Fit the flange supplied to the hole. For more efficient use Pinguino can also be • Fix the hose to the coupling on the semi-permanently installed back of the unit (figure A).
- Page 5 Pre p a ra t i o n f o r u s e HOW TO USE THE AIRCONDITIONER WITH WATER These air conditioners can use both air and water to cool the condenser (the hot part) of the air conditioner.
-
Page 6: Description Of The Remote Control
Description of the remote control High High M ODE SW I NG TIM ER SLEEP SUPE R SM ART When the remote control is not used, it can be stored in the foreseen compartment . To open the compartment press “push”. - Page 7 Description of the remote control/ Electrical connection High IL DISPLAY C. FAN button ( High Signal transmission High High High Sets fan speed to automatic, high, High Air conditioning indicator medium or low in sequence. Dehumidifying indicator D. TIMER button Fan indicator Sets or cancels the timer.
- Page 8 Warning lights/Forced operations THE LEDS Led displays come on depending on the selected function or as warning of possible anomalies. BLU LIGHT FUNZIONE GREEN LIGHT YELLOW LIGHT AIR-CONDITIONING DEHUMIDIFYING As soon as this function is selected, all LED displays will remain on for some seconds until the control SMART unit selects which mode to function in (whether air-conditioning, dehumidifier, fan or heater).
- Page 9 Description of the remote control REMOTE CONTROL Inserting the batteries • Slide the cover as shown in figure. • Insert two new batteries (not rechargea- ble) making sure the (+) and (-) are in the correct positions. • Put the cover back on, letting it slide into its original position.
- Page 10 Selecting functions AIR-CONDITIONING MODE • Press the button to turn the appliance on. • A beep indicates that the air-conditioning unit is on and the symbol flashes on the display • Press the MODE button a number of times until the air-conditio- ning symbol appears on the display.
- Page 11 Selecting functions SMART MODE In SMART mode, the air-conditioning unit decides the best way to operate to guarantee maximum comfort. • Press the button to turn the appliance on. A beep indicates High High that the air-conditioning unit is on and the symbol flashes on the display.
- Page 12 Selecting functions SUPER MODE SUPER mode is used to turn rapid cooling on or off. The fan is set to high speed and the temperature is automatically set to 18° C. To select SUPER mode, proceed as follows: • Make sure there is water in the tank •...
- Page 13 Pu r i f i c a t i o n f i l t e r PURIFICATION FILTER The appliance is provided with a 3M purifica- tion filter. This filter is able to capture even the smallest sized particles and impurities (up to 0.003 millimetres), such as cigarette smoke.
- Page 14 R e c o m m e n d a t i o n s RECOMMENDATIONS Follow these recommendations to achieve • Make sure there are no heat sources maximum efficiency from your air conditio- in the room. ning unit: •...
- Page 15 M a i n t e n a n c e Before cleaning or maintenance, always turn the CLEANING THE RESORVOIR unit off and unplug from the mains. It is recommended that you clean this at least CLEANING THE APPLIANCE once a month using the following method: We recommend cleaning the appliance with •...
- Page 16 De s c a l i n g When the scale deposits become excessive (on average, after about 400 hours of opera- tion) or in any case, at least once each sea- son, it is very important to proceed with the decalcification of the appliance as described below.
-
Page 17: Troubleshooting
Troubleshooting PROBLEM CAUSES REMEDY The unit does not • the power is off • restore the power • the plug is not inserted into the electrical outlet • plug in the appliance work • the fan is blocked • call the Service Centre •... -
Page 18: Technical Specification
Technical specification TECHNICAL SPECIFICATION Power supply see rating plate Max. absorbed power in air conditioning “ Refrigerating capacity “ Refrigerant “ Number of fan speeds 3 + silent Max. air flow . 370 m Dimensions: RECOMMENDED OPERATING CONDITIONS • width 580 mm •...
Need help?
Do you have a question about the PINGUINO 70ECO and is the answer not in the manual?
Questions and answers
What remote is used with this item
The compatible remote for the DeLonghi PINGUINO 70ECO is the one described in the manual, which includes buttons for MODE, SWING, FAN, TIMER, SMART, and SUPER functions, and fits into the designated compartment on the appliance.
This answer is automatically generated