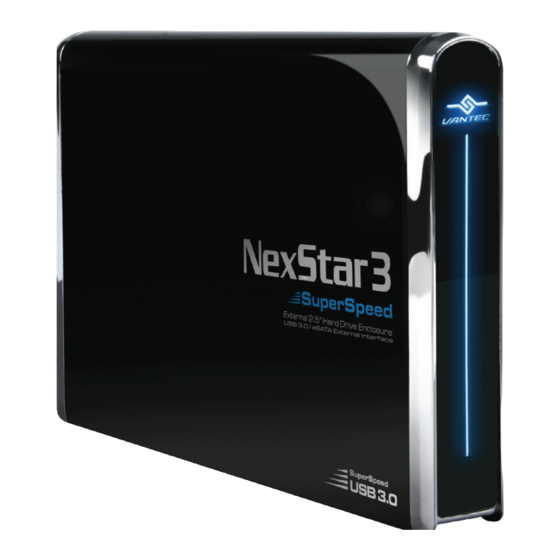
Summary of Contents for Vantec NextStar3 Superspeed
- Page 1 2.5" SATA to USB 3.0 & eSATA External Hard Drive Enclosure U S E R ’ S M A N U A L...
-
Page 2: Package Contents
MS-DOS, Microsoft, Windows NT/2000/XP/Vista/7 are trademarks of Microsoft Corporation. Apple, Macintosh and Mac are trademarks of Apple Computer. NexStar is a registered trademark of Vantec Thermal Technologies. *All other third-party brands and names are the property of their respective owners. -
Page 3: Table Of Contents
Table of Contents: 1. Introduction ........................02 2. Specifications/Features NexStar 3 Superspeed External 2.5” HDD Enclosure ............ 03 3. System Requirements ..................04 4. Parts Layout NexStar 3 Superspeed External 2.5” HDD Enclosure ............05 5. Installation NexStar 3 Superspeed External 2.5” HDD Enclosure 5.1 Hardware Installation ....................06 6. -
Page 4: Introduction
Integrated with the latest USB 3.0 technology, performance is increased by 10 fold offering maximum speeds of up to 5 Gbps. Quickly store and back-up your data with the Vantec NexStar 3 SuperSpeed USB 3.0 & eSATA External Hard Drive Enclosure. NST-280SU3-BK Introduction... -
Page 5: Specifications/Features
2. Specifications/Features: 2.5" SATA to USB 3.0 & eSATA External Hard Drive Enclosure (Supports 7mm, 9.5mm, 12.5mm HDD/SSD) Features: Attractive Mirror Finish Design Aluminum Casing Cools Down Your Hard Drive Maximum Transfer Rates Up to 5 Gbps w/USB 3.0 Maximum Transfer Rates Up to 3Gbps w/eSATA Maximum Transfer Rates Up to 480 Mbps w/USB 2.0 Easily Add Storage to Any System with USB 2.0, 3.0 or eSATA Backwards-Compatible with USB 2.0... -
Page 6: System Requirements
3. System Requirements: Mac OS 10.4 & greater Microsoft Windows XP/Vista/7 For USB 2.0 speeds, the system must For USB 2.0 speeds, the system must support USB 2.0 specifications support USB 2.0 specifications For USB 3.0 speeds, the system must For USB 3.0 speeds, the system must support USB 3.0 specifications support USB 3.0 specifications... -
Page 7: Parts Layout
4. Parts Layout: 2.5" SATA to USB 3.0 & eSATA External Hard Drive Enclosure Parts Layout... -
Page 8: Installation
5. Installation: 2.5" SATA to USB 3.0 & eSATA External Hard Drive Enclosure 5.1. Hardware Installation: Preparing the NexStar 3: Remove the side of the NexStar 3 SuperSpeed with the power and USB connection ports. Carefully slide out the hard drive caddy. ( figure 5.1-A ) Installation... - Page 9 Installing the hard drive in the NexStar 3 SuperSpeed: (1) Connect the SATA and power connector to the hard drive as pictured. ( figure 5.1-B ) ( figure 5.1-B ) (2) Align the hard drive mounting holes with the holes on the back of the drive caddy and secure the hard drive with the screws provided.
- Page 10 NOTE : Connecting the NexStar 3 to your computer: USB 3.0 For new hard drives, you will need to initialize and Connect the type (A) USB connector to the partition your hard drive before it will appear in NexStar 3 SuperSpeed and the type (A) USB Windows Explorer or on your Mac desktop.
-
Page 11: Disconnecting The Nexstar
6. Disconnecting the NexStar 3 SuperSpeed: NexStar 3 SuperSpeed USB 3.0 External 3.5" HDD Enclosure: Windows XP/Vista/7: Mac OS: Make sure all operations using the hard Make sure all operations using the hard drive within the NexStar 3 SuperSpeed drive within the NexStar 3 SuperSpeed has ceased. -
Page 12: Creating A New Partition
7. Creating A New Partition: For Windows XP/ Vista/7 Users: NOTE : Right click on “My Computer” and choose Most hard drives should come with a CD that “Manage”. ( figure 7-A ) includes an installation program. If not, a download Under “Storage”... - Page 13 Please allow some time for the partition and format to complete. ( figure 7-C ) ( figure 7-D ) Once completed, your drive will appear in My Computer or in Window Explorer. VANTEC (E:) ( figure 7-D ) Creating a New Partition...
- Page 14 When the Disk Utility window is open, select able detect the hard drive and allowing you to format or mount the hard drive. the volume labeled Vantec Desktop Hard Disk from the list of available hard drives on the left side of the window.
-
Page 15: Warranty
9. Contact : Vantec Thermal Technologies www. vant ecus a.c o m Copyright © 2011 Vantec Thermal Technologies. All Right Reserved. All Registered Trademarks Belong To Their Respective Companies. Warranty/ Contact...


