Table of Contents
Advertisement
Quick Links
Advertisement
Table of Contents

Related Manuals for Vantec NexStar VAULT AV


Summary of Contents for Vantec NexStar VAULT AV
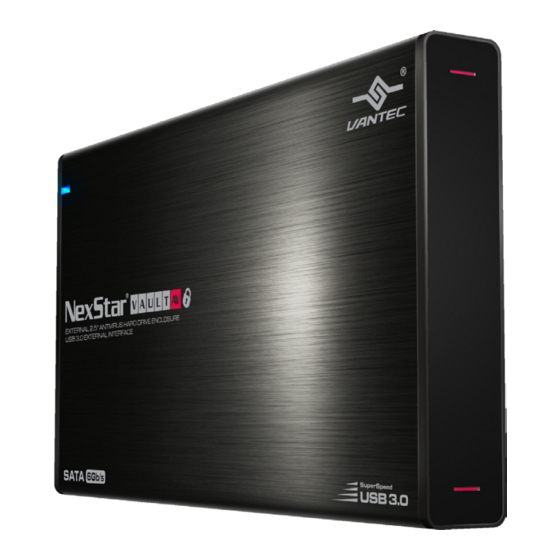
- Page 1 USER’S MANUAL...
-
Page 2: Table Of Contents
Table of Contents: 1. Introduction Introducción / Introduction / Einleitung / 介紹 2. Hardware Installation Instalación del hardware/ Installation du matériel / Hardware-Installation / 安裝指南 3. Software Installation Instalación del software/ Installation du logiciel / Software-Installation / 軟體安裝指南 4. Starting USB KAV for the First Time Iniciar USB-KAV por primera vez / Première utilisation de USB-KAV / USB-KAV das erste Mal starten / 第一次開始使用卡巴斯基USB-KAV隨身版... -
Page 3: Introduction
USB. De plus, le NexStar VAULT AV est doté d’un mode de cryptage de disque privé qui vous permet de crypter tous vos documents financiers, vos mots de passe et n’importe quel type de données critiques. - Page 4 Das Vantec NexStar® VAULT AV ist ein transportables Gehäuse mit Sicherheitseinrichtungen, die Sie effektiv vor Viren schützen. Ein Antiviren- Schutz von Kaspersky® ist für ein ganzes Jahr integriert—NexStar VAULT AV bietet Ihnen also eine Echtzeitschutz gegen neueste Malware und Viren für alle USB-Massenspeicher.
-
Page 5: Hardware Installation
Hardware Installation / Instalación del hardware/ Installation du matériel / Hardware-Installation / 安裝指南 1. Verify the package contents. Compruebe el contenido del paquete. Vérifiez le contenu du paquet d’emballage. Überprüfen Sie den Inhalt des Produktkartons. 檢查包装内的物品. 2. Connect the 2.5” hard drive to the SATA &... - Page 6 3. Make sure the hard drive is oriented properly and insert the hard drive into the enclosure. Asegúrese de que la unidad de disco duro está orientada correctamente e insértela en la carcasa. Assurez-vous que le disque dur est orienté dans le bon sens, puis insérez-le dans le châssis.
- Page 7 5. Use the provided screws and fasten the caddy to the enclosure. Utilice los tornillos proporcionados y fije el estuche en la carcasa. Utilisez les vis fournies et fixez le boîtier au châssis. Befestigen Sie mit den beiliegenden Schrauben den Caddy am Gehäuse.
- Page 8 7. Connect the USB cable (power will be drawn from the USB Port and provide power to the hard drive). Conecte el cable USB. (El puerto USB suministrará energía al dispositivo y éste a la unidad de disco duro). Branchez le câble USB (le courant passera par le port USB et alimentera le disque dur)
-
Page 9: Software Installation
Die Festplatte muss, bevor die Installation der USB-KAV-Software fortgesetzt werden kann, formatiert werden. Details zur Formatierung der Festplatte finden Sie in den Unterlagen des Festplattenherstellers. 請確認您的硬碟在安裝卡巴斯基USB-KAV隨身版前,已完成硬碟格式化。硬碟格式化 說明,請參考硬碟原廠說明書。 1. With the NexStar Vault AV connected, “USB-KAV Starter” will be mounted and appear in “Computer”. Run “StartUse.exe”. Con su NexStar Vault AV conectado, se mostrará... - Page 10 3. Please make sure that your ‘MakeUSB-KAV.exe’ is placed in the root directory on the external hard drive. Nota: si ya descargó el archivo ‘MakeUSB-KAV.exe’ de Vantec en otro lugar, elija “No” y continúe con el paso 3. Asegúrese de que el archivo ‘MakeUSB-KAV.exe’ Está colocado en el directorio raíz en la unidad de disco duro externa.
- Page 11 3. USB-KAV will prompt asking if you would like to perform setup. Click “Yes” to continue and proceed with installation. Once complete, click “OK”. USB-KAV le preguntará si desea realizar la instalación. Haga clic en “Sí” para continuar y llevar a cabo la instalación.
-
Page 12: Starting Usb Kav For The First Time
Starting USB KAV for the First Time / Iniciar USB-KAV por primera vez / Première utilisation de USB-KAV / USB-KAV das erste Mal starten / 第一次開始使用卡巴斯基USB-KAV隨身版 1. Run StartUse.exe. Ejecute el archivo StartUse.exe. Exécutez le fichier StartUse.exe. Führen Sie StartUse.exe aus. 執行... - Page 13 USB-KAV Internet Registration will be prompted. Please input the ‘Registration Code’ found on the bottom of your NexStar Vault AV enclosure. Aparecerá el registro a través de Internet de USB-KAV. Introduzca el ‘código de registro’ que se encuentra en la parte inferior de la carcasa de NexStar Vault AV.
- Page 14 Registration complete. Registro completado. Enregistrement terminé. Registrierung erfolgreich. 依照貼紙上的號碼輸入並選擇” 確定”,以便完成註冊 Whenever you run USB-KAV, the software will prompt you to see if you would like to download the latest update. To update, click “Yes”, otherwise click “No”. USB-KAV update will run in the background.
-
Page 15: Menu
Menu / menú / Menu / Menüoption / 功能選單 Real-time Monitor / Seguimiento / Surveillance / Echtzeitmonitor / 即時監測資訊 From this menu, you can view a live status monitoring of the USB-KAV software. Desde este menú, puede vear una supervisión del estado en directo del software de USB-KAV. - Page 16 Update / Actualizar / Mettre à jour / Aktualisierung / 更新 It is best to keep your virus definitions updated to ensure you have the latest protection from Kaspersky. This menu displays the current version and update status. Lo mejor es mantener las definiciones de virus actualizadas para garantizar que Kaspersky le ofrece la máxima protección.
- Page 17 Quarantine / Cuarentena / Quarantaine / Quarantäne / 隔離 Infected files found will be moved to Quarantine. Should you have a need to Restore or Delete quarantined files, you may from this menu. Los archivos infectados que se detecten se moverán a Cuarentena. Si necesita restaurar o eliminar archivos en cuarentena, puede hacerlo desde este menú.
-
Page 18: Using Private Disk
Using Private Disk / Utilizar Disco privado / Utilisation du disque privé / Verschlüsseltes Laufwerk verwenden / 使用私 密碟 Select Tools -> Private Disk Login Wizard. May take a few seconds to start depending on system. Seleccione Herramientas-> Asistente para inicio de sesión en Disco privado. - Page 19 Private disk will automatically mount and show up on your Computer. El Disco privado se montará automáticamente y se mostrará en su PC. Le disque privé sera automatiquement monté et s’affichera sur votre ordinateur. Das verschlüsselte Laufwerk wird automatisch registriert und auf Ihrem Rechner angezeigt.
- Page 20 To change password and hint for the Private disk, click on Change ‘Password’ from the Private Disk Login Wizard. You will need to know the original Old password to change. Para cambiar la contraseña para el Disco privado, haga clic en ‘Cambiar contraseña’ en el Asistente para inicio de sesión en Disco privado.
-
Page 21: Using File Sync
Using File Sync / Utilizar sincronización de archivos / Utilisation de File Sync / Datei-Synchronisierung verwenden Please make sure USB-KAV and the Private disk is functioning properly. Seleccione Herramientas-> Asegúrese de que USB-KAV y el Disco privado funcionan correctamente. Assurez-vous que USB-KAV et le disque privé... - Page 22 Select a folder from the tree-view list “Private Disk – Input a sync folder”. Seleccione una carpeta en la lista de vista de árbol “Disco privado – Especificar una carpeta de sincronización”. Sélectionnez un dossier dans la liste « Disque Privé – Sélection Dossier Synchro ».
- Page 23 檔案同步 同步私密碟與電腦檔案,請選擇工具箱中的檔案同步 電腦檔案同步至私密碟 – 選擇 要同步的檔案資料夾,並在檔案 同步精靈中設置目的儲存位置, 再執行新增關聯。在同步關聯表 中,將會顯示資料同步路徑。 私密碟資料同步至電腦–選擇要 同步的檔案資料夾,並在檔案同 步精靈中設置目的儲存位置, 再執行新增關聯。在同步關聯表 中,將會顯示資料同步路徑。 注意: 同步後,私密碟與電腦磁碟(儲存設備)中的檔案內容會完全一致,檔案內容將會 是您最新修改後的版本...
-
Page 24: Warranty
Warranty The NexStar VAULT AV comes with a 1 year limited warranty (90 day parts). If your unit should become defective within that time frame, please go to www.vantecusa.com for information on how to receive warranty exchange or repair. Cosmetic defects and missing parts are not covered under this warranty.
Need help?
Do you have a question about the NexStar VAULT AV and is the answer not in the manual?
Questions and answers