Table of Contents
Advertisement
Quick Links
Download this manual
See also:
User Manual
Advertisement
Table of Contents

Summary of Contents for Elation DMX DUO
-
Page 1: User Manual
USER MANUAL Version 1.3 24-004-1648-00 Elation Professional · Los Angeles, Ca 90058 · www.elationlighting.com... -
Page 2: Table Of Contents
DMX DUO Table of contents 1. General Introduction......................3 2. Safety Information & Maintenance...................3 3. Information Notice......................4 4. Front Panel Overview......................4-5 5. Rear Panel Overview......................6 6. FX Buttons & FX Timer....................6-7 6a. Manual On/Off control of FX buttons 1-8 6b. FX Timer 7. -
Page 3: General Introduction
DMX controller can simply be downloaded into the DMX Duo for easy playback. In many cases, the DMX Duo is pre-programmed at the factory when sold in system packages. This unit is made up of two control sections - one part for effect lighting and the other for playback of dimmers and moving lights. -
Page 4: Information Notice
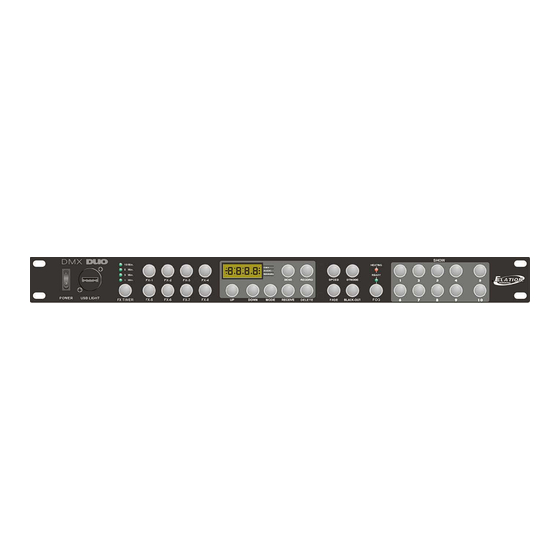
(See next section for additional information). 4. Display- display’s show times and current operation mode. 5. Send Button- used to send memory data file to another DMX Duo or PC. (See next Section for additional data transfer information). - Page 5 15. Mode Button- used to select between DMX, Audio or Manual operation modes. 16. Receive Button- used to receive a memory data file from another DMX Duo or PC. (See next Section for additional data transfer information).
-
Page 6: Rear Panel Overview
ADJ MB-1000, Stallion, Vapor-Flow, Fog Storm-1200 and Fog Storm-1700. 2. DB9 Pin RS-232 input connector- connect to a another DMX Duo, lap top or PC to transfer or load a data file. Use a standard RS-232 serial lap link type cable to connect between DMX Duo and other device. -
Page 7: 6A. Manual On/Off Control Of Fx Buttons
As a result, the record LED will illuminate. (Note: if you do not have a DMX controller connected to the DMX input of the DMX Duo as described in the previous step, you will not be able to access the Record mode). -
Page 8: Editing Shows
As a result, the Record LED will illuminate. (Note: if you do not have a DMX controller connected to the DMX input of the DMX Duo as described in the previous step, you will not be able to access the Record mode). -
Page 9: Strobe Function Assign
As a result, the Record LED will illuminate. (Note: if you do not have a DMX controller connected to the DMX input of the DMX Duo as described in the previous step, you will not be able to access the Record mode). -
Page 10: Show Playback
AUDIO silk screen. This confirms you are in audio or sound active mode. Your shows will now be triggered to sound via an internal microphone in the DMX Duo. 2. To exit audio mode, press the “MODE“ button twice. Your shows will now return to the default speed... -
Page 11: Fog Machine
Section 17: Send & Receive Send and Receive are two functions used when wanting to transfer data from one DMX Duo to another or from a DMX Duo to your PC or laptop via our RS232 software program availible on our website at www.elationlighting.com... -
Page 12: Send & Receive
4. On your PC or laptop, select the “SEND“ button from the RS232 program and select the file that you wish to transfer into the DMX Duo. 5. As a result, the program will notify you that it is sending the selected file and the DMX Duo will also display a receiving track in its LED. -
Page 13: Blackout Setup
DMX DUO Section 18: Blackout Setup This feature allows you to set your DMX Duo to activate or deactivate black out on power up. Deactivating allows you to automatically begin playback of shows on power up. 1. Flip the power switch to the “OFF“ position.


Need help?
Do you have a question about the DMX DUO and is the answer not in the manual?
Questions and answers