Table of Contents
Advertisement
Advertisement
Table of Contents

Subscribe to Our Youtube Channel
Related Manuals for Argox PT-60

Summary of Contents for Argox PT-60
- Page 1 User’s Manual PT-60 Mobile Computer DOC NO. UM-P6005-01 Sep. 2009 Version 1.1...
- Page 2 Argox will not be liable in case modifications are made by the customer. In such case the standard repair charge will be applicable. The standard charge for repair will also be applicable in case no defect is found at all.
-
Page 3: Table Of Contents
..................... 17 EYPAD ESCRIPTION 3.2 I ....................19 NSTALLING CARD 3.2.1 Inserting SD card into the PT-60 ..............19 3.3 C PT-60 S ................20 ONFIGURING ETTINGS 3.3.1 Calibrating Touch Screen Alignment ............20 3.3.2 Adjusting LCD Backlight Brightness ............21 3.3.3 Adjusting Sound Volume ................ - Page 4 7.5 C PT-60 ..................55 ONNECTING THE 7.5.1 Synchronizing Data..................55 7.5.2 Solving Problems during Synchronization ............ 55 7.5.3 Searching PT-60 Contents from a Desktop PC..........56 OVERVIEW OF MICROSOFT WINDOWS CE 5.0 ..........57 8.1 M ....................... 57 INDOWS 8.2 T...
- Page 5 8.3.22 Timeout and Brightness................. 79 8.3.24 Volume and Sound..................79 TROUBLE SHOOTING ....................81 9.1 G ....................81 ENERAL HECKS 9.2 R ................. 81 PERATION ROBLEMS 9.3 M ................81 OBILE OMPUTER ROBLEMS User’s Manual...
-
Page 6: About Thi Manual
Chapter 3: Operating the Mobile computer – Describes customizing the PT-60 Chapter 4: Scanning Chapter 5: Useful Utilities Chapter 6: Software Applications Chapter 7: Communication – Describes using the PT-60 for different types of communication Chapter 8: Overview of Microsoft Windows CE 5.0 Chapter 9: Troubleshooting Chapter 10: Appendix... -
Page 7: User And Product Safety
Conditions exceeding IP54 standards could result in water or other contaminants entering the PT-60. Use only the approved AC Adapter with the PT-60. Use of an unapproved AC Adapter could result in electrical problems, or even cause a fire or an electrical shock to the user. - Page 8 [ENT] key, which can discharge your batteries or change settings you do not want changed. Using the Cradle Do not place any product other than the PT-60 mobile computer in the cradle. Maintenance There are no user-serviceable parts inside the mobile computer or the cradle. So do not try to take it apart.
-
Page 9: Specifications
1.3 Specifications Model PT-60 PT-6010 PT-6020 Wireless Communication WPAN Bluetooth Class2, version 1.2 WLAN Wi-Fi 802.11b/g External I/O interface USB / RS-232(4 Wires) Expansion slot Standard SD General Characteristics WinCE 5.0 ARM9 Core 266MHz 128MB Mobile DDRAM 128MB Nand Flash Display 2.4”... - Page 10 Developing tools embedded Visual C++ 4.0, Visual Studio.NET, Visual Studio 2005, Windows CE SDK Scanner Configuration Utility Scanner Scanner system Long Range CCD scanner 2048 pixels Resolution 0.127mm (5mil) at PCS 90% Depth of field 600mm (code 39, 20mils, PCS 90%) Scanning rate 400 scans /sec Readable barcode...
-
Page 11: Getting Started
Getting Started This chapter describes the PT-60 physical characteristics, how to install and charge the batteries, how to remove and replace the strap assembly and how to start the PT-60 for the first time. 2.1 Check the package Carefully remove all protective material from around the PT-60 and save the shipping container for later storage and shipping. -
Page 12: Cradle Package
2.1.2 Cradle Package CRD-20 USB cable Cradle USB cable Figure 2-2 Cradle Package Inspect the package contents for damage. If any item is missing or damaged, please contact the Argox Technical Support Center immediately. User’s Manual... -
Page 13: Detailed View
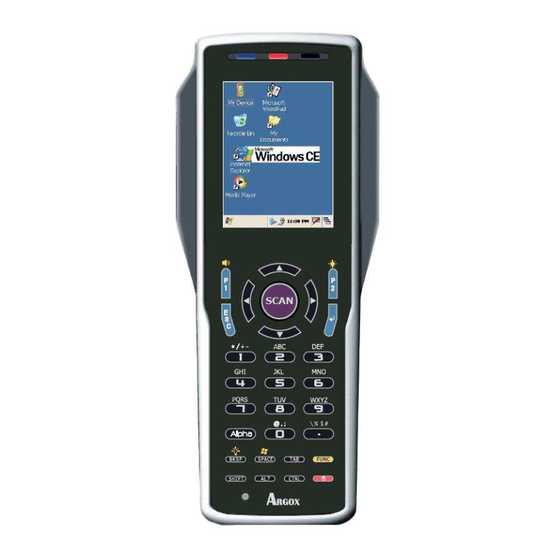
2.2 Detailed View The pictures below provide information on the PT-60’s various buttons, ports and other functions. 2.2.1 PT-60 Mobile Computer Dimensions of the PT-60 168.8mm (L) x 70.1mm (W) x 34.0mm (H) Details of the PT-60 Left side Front... -
Page 14: Cradle
Charging Slot For charging a spare rechargeable battery pack RS-232 Socket For connecting to PC serial port through Argox RS232 cable USB Socket For connecting to PC USB port through a standard USB cable... -
Page 15: Assembly
2.3 Assembly Follow the next steps to make your terminal ready for installation in a system that is described further in the manual. 2.3.1 Terminal The hand strap protects the Terminal from being damaged as a result of it being dropped by mistake during movement. -
Page 16: Cradle
Figure 2-6 BatterCharging Terminal on cradle Take notice that the PT-60 cradle is designed for the PT-60 or PT-20 terminal. No other type of terminal can be placed into this cradle. This can cause damages to the connector on the cradle. -
Page 17: Installing, Replacing And Charging Batteries
Before installing (new) batteries, please make sure you are using the recommended batteries. Use the right charger for batteries. The rechargeable battery pack form Argox can be charged in the cradle when either it is in the terminal or alone in the charging slot in the back of the cradle. -
Page 18: Installing / Replacing The Battery Pack
2.4.1 Installing / Replacing the Battery Pack How to install or replace the main battery in the terminal Slide the main battery compartment cover lock to the FREE position and remove the cover Figure 2-8-1 Installing /Replacing The Battery Pack Load a lithium-ion battery pack into the main battery... - Page 19 How to install or replace the battery in the gun grip Turn the screw Figure 2-9-1 Installing /Replacing The Gun Grip Battery Open the cover Figure 2-9-2 Installing /Replacing The Gun Grip Battery User’s Manual...
-
Page 20: Charging The Battery Pack With Cradle
2.4.2 Charging the Battery Pack with Cradle Figure 2-10 Charging with Cradle a) Leaving the battery pack inside the Mobile computer Connect the power adaptor to a power source Plug in the connector of the power adapter to the Cradle Insert the Mobile computer into the Cradle When charging the battery pack, the Power LED on the Mobile computer turns Note:... -
Page 21: Installing In A System
2.5 Installing in a System Exercise caution at all times when working with AC-powered equipment. Turn off Notes: your devices before installation. Because of the special pin-out of the connectors, use the cables supplied by the manufacturer. Do not modify the cable provided by the manufacturer. If you need a special cable for some cases, contact your supplier to purchase the right cables or technical support. -
Page 22: Operation Of The Mobile Computer
Operation of the Mobile Computer 3.1 Keypad Description The PT Series keypad consists of 29 rubber keys including one SCAN key. Figure 3-1 Keypad Description 1. Scan key Scan a bar code read operation 2. Cursor key This Cursor key navigates among applications. 3. - Page 23 7.Control keys ALPHA Switches between the number input mode or the character input mode. When [1] on the screen Icon-Bar indicate that the input mode at number input mode. (Default on number mode) When [a] or [A] on the screen Icon-Bar indicate that the input mode at character input mode.
-
Page 24: Installing Sd Card
3.2 Installing SD card Make sure you have fully charged the battery before turning the unit on. Caution: 3.2.1 Inserting SD card into the PT-60 1. Open the SD cover. 2. Insert a correctly oriented SD card. 3. Close the SD cover. -
Page 25: Configuring Pt-60 Settings
3.3 Configuring PT-60 Settings 3.3.1 Calibrating Touch Screen Alignment Calibrating the PT-60 This screen can be accessed at any time by pressing the hot key “FN” and “TAB” key. Or by accessing the menus and tab in order of Start → Settings →... -
Page 26: Adjusting Lcd Backlight Brightness
Using the Stylus The stylus is located next to CF cover or hand-strap on the rear of the PT-60 as illustrated in figure 2-3 PT-60 Back view (page 8). The stylus functions the same as a mouse on a PC. Use the stylus to: Navigate the display, select menu items and open optional applications. -
Page 27: Entering Information
Use the keyboard input panel (soft keyboard) to enter text. Scan bar code data into data fields. Use Microsoft ActiveSync to synchronize or copy information form the host computer to the PT-60. For more information on ActiveSync, refer to Chapter 6. 3.4.1 Entering Information Using a Keypad The alphanumeric keypads produce the 26-character alphabet (A-Z), number s (0-9), function keys and assorted characters. -
Page 28: Power Management
3.5 Power Management 3.5.1 Power Status Indication Checking main and Backup Battery Statue Enter “Power Properties” If the above mentioned “Plug” or “Battery” icon is displayed, double tap this icon to bring up the “Power Properties” screen. Or, select Settings/ Control Panel from the Start menu and then double tap the “Power” icon to display “Power Properties”. - Page 29 Five different icons are displayed on the status bar to indicate the on-board power status. Icon Description Indicates there is no external power supply to the PT-60 but No icon: the battery power status is good. Shows external power is in use. The PT-60 is either “Plug”...
-
Page 30: Saving Battery Power
Automatic shut-down of the PT-60 The PT-60 enters idle mode when there is no task or if all tasks are waiting for input. In default setting, the PT-60 automatically turns itself off if idle for 3 minutes and when there is no external charging power. -
Page 31: Suspend Mode
3.5.3 Suspend Mode The PT-60 will go into suspend mode when it is idle for a period of time. Customize the idle duration using the Power control panel (refer to Figure “Schemes Tab”). Suspend mode appears just like you have turned the unit off. Press the key to suspend the PT-60. -
Page 32: Resume
Resume Press <Power> key to suspend or resume (wake up) Waking the PT-60 The default wakeup conditions define what actions wakeup the PT-60. These setting are configurable and the factory default settings are subject to change / update. Status Description... -
Page 33: Resetting The Pt-60
3.6 Resetting the PT-60 If the PT-60 stops responding to input, reset it. There are two reset functions, warm boot and cold boot. A warm boot restarts the PT-60 by closing all running programs. All data that is not saved is lost. -
Page 34: Flash Disk
Flash memory is a re-writable location in which to store 128MB of programs and data files. The benefit of this feature is that files and programs saved in Flash Memory are unaffected by the PT-60’s power status. Note: The Flash Disk storage memory persists for all reset (warm/cold reboot) conditions and software/firmware updates. -
Page 35: Flash Disk Size
3.7.3 Flash Disk Size The size of the Flash Disk varies depending on the size of the system firmware. A. Inside the Flash Disk directory, tap File → Properties B. The Flash Disk Properties dialog: The number following Free is the amount of memory currently available on your device. -
Page 36: Bluetooth Enable Setting
3.8 Bluetooth Enable Setting 3.8.1 Please enable Bluetooth first like Figure 3-15. Figure 3-15 Enable Bluetooth 3.8.2 After enable Bluetooth, please select “show BT” like figure 3-16 Figure 3-16-1 Show BT Figure 3-16-2 Show BT User’s Manual... - Page 37 3.8.3 On Bluetooth manager screen, select file -> new connection like Figure 3-17. Figure 3-17 Bluetooth connection 3.8.4 Bluetooth has four functions to choose like Figure 3-18. Figure 3-18 Bluetooth Explorer User’s Manual...
- Page 38 3.8.5 First function is Pair with remote device, after press next button. It will start to search devices. Select a device and press Pair button; it needs to enter Bluetooth PIN code like Figure 3-19. Figure 3-19-1 Bluetooth Pairing Figure 3-19-2 Bluetooth Pairing 3.8.6 After PT60 check pin code with device.
- Page 39 3.8.7 Second function is serial Port which communication with device via com port like Figure 3-20. Figure 3-20 3.8.8 After press next button, it will start to search device like Figure3-21. Figure3-21 User’s Manual...
- Page 40 3.8.9 After press Connect button, it will appear a connection with SPP mode like Figure 3-22. Figure 3-22 3.8.10 Third function is File Transfer like Figure 3-23 Figure 3-23 User’s Manual...
- Page 41 3.8.11 After press next button, it will start to search device and it needs to enter pin code like Figure 3-24 Figure 3-24 3.8.12 After checking pin code with the connect device. PT60 will enter FTP mode like Figure 3-25. Figure 3-25 User’s Manual...
- Page 42 3.8.13 On Bluetooth manager screen, it will add a FTP connection like Figure 3-26. Figure 3-26 3.8.14 The latest function is ActiveSync connection. The function can connect with computer via ActiveSync. Figure 3-27 User’s Manual...
- Page 43 3.8.15 After press next button, it will start to search device. Figure 3-28-1 Figure 3-28-2 3.8.16 PT60 will add a ActiveSync connection on Bluetooth manager screen. It will synchronize with computer. Figure 3-29 User’s Manual...
-
Page 44: Wlan Configuration Step
3.9 WLAN configuration step Method 1: auto-configuration 3.9.1 After enable Wifi setting, a POP window appears as below. Figure 3-30 Figure 3-30-1 Figure 3-30-2 User’s Manual... - Page 45 3.9.2 If the above window doesn’t show, try to double click the wireless icon on the screen bottom. 3.9.3 Double click the new connection, Best Western for instance; it will appear the configuration window (picture 2). Then user can set wireless Encryption on this window.
-
Page 46: Scanning
Scanning The PT-60 has an integrated CCD scanner that reads all major bar code labels with excellent performance. The trigger key is located in the middle of the unit. Press this key to activate the CCD scanner. 4.1 Scan Configuration... - Page 47 Figure 4-1-3 Scan Configuration Figure 4-1 -4 Scan Configuration After you change settings, go to the “Setting” page and press the “OK” button to configure, or press “Reset” to return to the scan default settings. The “Download” page allows you to update scan firmware.
-
Page 48: Scan Driver
4.2 Scan driver Scan driver lets you put data into Microsoft Wordpad. Open scan driver and the scan module Figure 4-2-1 Scan Driver Figure 4-2-2 Scan Driver powers on the scanner. You can then scan barcode. To turn off the power, press “Exit” on the task bar. -
Page 49: Scan Test
4.3 Scan test The PT-60 has a built-in Scan Test.exe program that allows you to test the barcode scan function. Scan Test.exe is located in directory \Programs\Scanner\Scan Test.exe. This program shows barcode type and barcode data when pressing the “Scan” key. -
Page 50: Reading Barcode
4.4 Reading barcode Note: Observe handling precautions. Make sure the mobile computer is installed according to instructions. Never remove the main batteries or battery pack while the mobile computer is turned on. Doing so can cause loss of data in the mobile computer. -
Page 51: Barcode Reading Problems
4.5 Barcode reading problems When the barcode can not be read, try the following: 1. Change the angle between the barcode and the mobile computer. 2. Change the distance between the bar code and the mobile computer. If the bar code is larger than the LED light beam, try moving the mobile computer a bit further away from the bar code. -
Page 52: Utilities
Utilities 5.1 Function Key Setting AP Settings Tab To assign your favorite application program from F1 to F9 hot keys: Choose F1, F2, F3 … or F9 from pull-down list. Tap “Define” inside the “Function Key Setting” applet. Select the application program you want from program list, and then choose “OK”. Tap the Apply tab to complete setting. -
Page 53: Timeout & Brightness
5.2 Timeout & Brightness Backlight setting is a tool for changing the LCD backlight. If you wish to save power use this program to change LCD backlight settings. This application supports battery power backlight and external power backlight. Figure 5-3 Timeout & Brightness User’s Manual... -
Page 54: Software Applications
Software Applications The PT-60 includes software applications such as Internet Explore, Media player, Microsoft WordPad, Remote Connection, Transcriber, and Windows Explore. Figure 6-1 Programs Implemented 6.1 Internet Explorer With Internet Explorer, you can view Web or intranet Web pages on your device. You will need to use WLAN to connect to an Internet Service Provider (ISP) or network. -
Page 55: Media Player
6.2 Media Player The PT-60 comes with Media Player for Windows CE.NET installed. Open Media Player by selecting Start → Programs → Media Player from the desktop. Select File → Open to open a new media file. Please refer to www.microsoft.com... -
Page 56: Transcriber
6.5 Transcriber Features: Microsoft Transcriber is the natural handwriting recognition solution for your Windows CE device. It recognizes words from its integrated dictionary, and allows you to write in cursive, print or mixed handwriting. The letter Shapes Selector (note 1) is for optimizing recognition to your own Figure 6-6 Transcriber handwriting style... -
Page 57: Communication
Communication The Argox PT-60 lets you link to a host computer via RS-232 or USB port for data communication. This chapter gives an overview of the PT-60’s communication capabilities. 7.1 ActiveSync To exchange data between your desktop computer and the PT-60, Microsoft ActiveSync must be installed on your desktop computer. -
Page 58: Connecting The Pt-60 To Activesync
Microsoft ActiveSync and restart your computer. 7.3 Connecting the PT-60 to ActiveSync Connect the PT-60 to a desktop PC using a USB cable. Make the partnership between the desktop PC and PT-60 through ActiveSync, and then proceed with the synchronization of the desktop PC and PT-60. -
Page 59: Setting Up A Partnership
Once the partnership set-up is finished, you can synchronize data with the PT-60. While the PT-60 can set up the partnership with two desktop computers, email messages can be received only through one computer. -
Page 60: Connecting The Pt-60
By modifying the problem-solving settings, you can have ActiveSync not register the problem as “not completed item” instead, if you select the PT-60 or desktop PC as default version, ActiveSync automatically updates the information contained in the other computer. If you do not want to solve the problem manually, you can modify the problem-solving setting to have ActiveSync always use the PT-60 or desktop PC version. -
Page 61: Searching Pt-60 Contents From A Desktop Pc
Searching PT-60 Contents from a Desktop PC If the PT-60 is connected to a desktop PC, you can use ActiveSync on the desktop PC to see the contents of the PT-60. Click Explore from the file menu of ActiveSync. The content of the PT-60 is displayed on the window of Mobile Device. -
Page 62: Overview Of Microsoft Windows Ce 5.0
Overview of Microsoft Windows CE 5.0 This chapter describes Microsoft Windows CE 5.0, the operating system for the PT-60 This introduction to Microsoft Windows CE 5.0 includes: How to use the main Windows How to use a taskbar How to use settings 8.1 Main Windows... - Page 63 Start Icon Start icon is the starting point for the PT-60 program. If you point at the start menu with the stylus pen, you can see various menus including program, bookmark, document, setting, help, and operation.
-
Page 64: Taskbar
8.2 Taskbar Taskbar shows a variety of information including keying in characters, battery, network connection, status of running programs, etc. If you press and hold the taskbar with the stylus, the right button function menu appears. The right button function menu is composed of task manager and features. If you select the taskbar and start menu feature, general option menus such as “always place above, “automatic hiding,”... - Page 65 Upper / lower case Selection: Press this icon to select upper and lower case letters. If you select upper case, capital letters and characters appear on the number key pad. It serves the same function with the Shift key. Hot key Selection: If you use hot key such as “z”, “x”, “c”...
-
Page 66: Setting Up The Pt-60
8.3 Setting up the PT-60 You can set up various configurations of the PT-60 such as date/time, Network, Display, Volume, Power, System, etc. at the control panel. Figure 8-5 -1 Control Panel If you press Start → Setting → Control Panel, the control panel window appears. In the View option in the menu, you can change the view mode into large icons, small icons, details or to arrange icons. -
Page 67: Certificates
8.3.1 Certificates Application programs use certificates to ensure reliability and safe communication. Figure 8-6 Certificates Authorized certificate providers issue certificates that are valid for a specified period. Windows CE.NET manages several certificate storages. Select Go to Start → Setting → Control Panel. Double click a certificate to run. -
Page 68: Date/Time
8.3.2 Date/Time This screen sets date, time, standard time zone, watch and alarm. Figure 8-7 Date/Time Date/Time You can set standard time zone, year, day and time. Set as follows: Press the down arrow in the standard time zone until it reaches your location. If the previously set value is appropriate, move on to the following. -
Page 69: Dialing
8.3.3 Dialing Dialing Properties 1. In the When dialing from list, select the “Location” where you want to change settings. 2. To create a new location, select “New”. Enter the name of the location, and then select “OK” 3. Enter or edit the area code and local country code as needed. 4. -
Page 70: Display
8.3.4 Display This screen lets you set the wallpaper image of the PT-60, change the color of the background screen, or change the backlight setting. Call up the right button menu and select “properties” and you can check the Display Properties window. -
Page 71: Hot Function Key
8.3.5 Hot Function Key Please refer to Function Key Setting above. 8.3.6 Input Panel You can set up the input method and options. Figure 8-10-1 Input Panel Properties Figure 8-10-2 Input Panel Properties Select keyboard and press Options. The Soft Keyboard Options window appears. Select the size of the keys. -
Page 72: Internet Options
8.3.7 Internet Options This setting allows you to specify the home page, clear cache, specify connection, define the security and make advance settings of the IE browser. Figure 8-11-1 Internet Options Figure 8-11-2 Internet Options Figure 8-11-4 Internet Options Figure 8-11-4 Internet Options General Click the General tab. -
Page 73: Keyboard
Connection Under Connection page, specify the network connection you want the browser to connect to the network. To use a proxy server, click [Access the Internet using a proxy server] check box and enter the proxy address and port. Security Under Security page, specify the security option for your browser. -
Page 74: Mouse
8.3.9 Mouse Double-click the checkerboard grid at a comfortable speed. Double-click the Test icon to test your setting. Tap “OK” to exit the Mouse tab. Figure 8-13 Mouse Properties 8.3.10 Network and Dial-up Connection You can directly link to the network via network (Ethernet, LAN) or phone (modern) connection. -
Page 75: Owner
8.3.11 Owner This function lets you set the PT-60 to display user information at start up, add information on the user, and set up a network ID. Figure 8-15 Owner Properties Identification Enter information such as name, company, address, company phone number, home phone number in the user information tab. -
Page 76: Password
You may encounter a request to enter the password again on the initial screen if you have turned off the PT-60’s power after activating password or have done a software reset. If you forget the password and cannot boot the system you may have to do a hardware reset. A hardware reset erases all files, data, as well as programs. -
Page 77: Pc Connection
Select Connection Change icon. Select the connection mode. Connect to a desktop PC. To connect the PT-60 to a desktop PC, you must have Microsoft ActiveSync 3.7 or higher on your desktop PC. 8.3.14 Power Please refer to the previous section on Power Management. -
Page 78: Regional Settings
8.3.15 Regional Settings Figure 8-18 Regional Setting Properties You can set up region, numbers, currency, time, and date. Select Go to Start → Setting → Control Panel. Open regional setting icon. Select the tab for information to change. Select the preferred option. Available features are dependent on which region you have chosen in the region tab. -
Page 79: Remove Programs
Select the program to delete from the program list. Click Delete. Note: You can only remove programs installed in RAM. If you cannot delete a program, see detailed information in Windows CE Help on the PT-60 or in the program documents. User’s Manual... -
Page 80: Scan Configuration
8.3.17 Scan Configuration Please refer to the previous section on Scan Configuration. 8.3.18 Storage Manager Storage manager allows the users to check the information of the SD/flash storage and format, dismount or make new partition on SD card. Figure 8-20 Storage Properties Select the flash or SD card form the storage information dropdown list. -
Page 81: Stylus
If the icon does not change, adjust the setting using the grid above. Calibration If the PT-60 screen does not respond properly, adjust the screen with the calibration function. To start calibration: Select Go to Start → Setting → Control Panel. - Page 82 User’s Manual...
-
Page 83: System
Figure 8-22 System Properties The memory of the PT-60 is used for data storage and programs. Basic memory capacity is 128MB. You can set the size of the memory cache used for running programs or storing data. -
Page 84: Terminal Server Client Licenses
8.3.21 Terminal Server Client Licenses Figure 8-23 Terminal Server Client Licenses 8.3.22 Timeout and Brightness Please refer to the previous section on Timeout and Brightness. 8.3.24 Volume and Sound Adjust volume and select sound. Volume To adjust the volume of the system: Select Go to Start →... - Page 85 Sound To set the sound: Select go to Start → Setting → Control Panel. Open volume and sound icons and select volume tab. Select an event from the event list. Select a sound from the event sound list. To remove the sound from the selected event, choose (None). To save the changes in another scheme, select save in another name and name the sound scheme.
-
Page 86: Trouble Shooting
Argox for technical support: http://www.argox.com If the PT-60 mobile computer needs repair, please ensure that the label with the serial number is present. If sending the mobile computer or cradle back to your local supplier or Argox, please use the original package to minimize the chances of damage during shipping. - Page 87 Mobile computer will not shut off If the mobile computer is processing data, attach a charging cable to insure the battery isn’t depleted. If the mobile computer is connected to AC power, disconnect. 3.6.1 Perform a warm boot – WARNING – Unsaved data will be lost. 3.6.2 Perform a cold boot –...
Need help?
Do you have a question about the PT-60 and is the answer not in the manual?
Questions and answers