Table of Contents
Advertisement
Advertisement
Table of Contents

Related Manuals for SkyLink HU-318


Summary of Contents for SkyLink HU-318
- Page 1 User’s Manual HU-318 skylinkhome.com...
-
Page 2: Table Of Contents
CONTENTS INTRODUCTION ................. 3 SETTING UP THE INTERNET HUB ........... 4 PROGRAMMING THE INTERNET HUB ........5-25 Assign Zones and Lights ................7-11 All On/Off ...................... 12 Device ......................13 Scene ......................14-15 Timer ......................16-17 TC Remote ....................18-20 Camera ...................... -
Page 3: Introduction
INTRODUCTION SkylinkHome™ Internet Hub allows you to remotely control various devices from a computer, a Smartphone or tablet. With the wireless camera, you may visually see your command occur, turning on a light or opening a door. The following items are included in this package: • One Internet Hub • One Power adapter • One Network cable... -
Page 4: Setting Up The Internet Hub
SETTING UP THE INTERNET HUB Before installing the Internet Hub, ensure your system/network meets the following requirements. You must have: • An Ethernet RJ-45 port from your existing Wireless router. • A computer installed with an Internet Browser. Follow the steps below to setup your Internet Hub. Make sure you follow each step carefully to ensure that the Internet Hub operates correctly. 1) Insert 4 AAA batteries into the Internet Hub (with the correct polarity as shown). -
Page 5: Programming The Internet Hub
PROGRAMMING THE INTERNET HUB The Internet Hub includes a web graphics user interface (web GUI) which allows you to configure the Internet Hub using your web browser on your computer. After you have connected the Internet Hub to your Wireless router and have applied power to the Internet Hub, write down the IP address shown on the LCD display of the Internet Hub, such as 192.168.001.199:8081. Yours may be different from this. - Page 6 PROGRAMMING THE INTERNET HUB By default, the Internet Hub is set to DHCP Client, which automatically obtains IP addresses from your router. However, in some instances you may want to assign static IP addresses to the Internet Hub to ensure convenient accessibility. To assign static IP, Go to [Settings] and then [Network Settings]. 1. The [DDNS Status] should show “Ok”. Write down the DDNS name: “nh007.my.skyhm.net” in this example (yours will be different) and Http Port: “8081” in this example. 2. Uncheck the [DHCP client] to disable the DHCP Client function. 3. Click [Save Config] to save the current setting. PROGRAMMING THE INTERNET HUB...
- Page 7 ASSIGN ZONES AND LIGHTS PROGRAMMING THE INTERNET HUB To setup the Internet Hub to control SkylinkHome™ Wireless Modules, follow the steps below: 1. Assign different zones such as Kitchen, Bedroom, Family Room, Hallway etc. 2. Assign different devices in each zone, such as island lights, ceiling lights, pot lights, floor lamp etc.
- Page 8 ASSIGN ZONES AND LIGHTS PROGRAMMING THE INTERNET HUB 4. Click [Zone] on the top of the toolbar. Select the zone, e.g. [Kitchen] to assign different devices to this zone. 5. Click the [Settings] icon in the ‘Kitchen Devices Control Page’, and then assign different devices in this zone. 6. Enter the name of the device (e.g. Island Lights). Select the type of module controlled (On/Off or Toggle, Dim or Non-Dim) and then click [ADD]. ASSIGN ZONES AND LIGHTS PROGRAMMING THE INTERNET HUB...
- Page 9 ASSIGN ZONES AND LIGHTS PROGRAMMING THE INTERNET HUB 7. After you have assigned a name for each light or device, you may now learn the light to the Wireless Module. Refer to the User’s Instructions of that specific receiver to put the unit into ‘Learning’ mode, then press the [Learn] button on the Internet Hub interface. The Signal LED will flash, then turn off on the Internet Hub indicating the ‘Learn’ code has been sent. 8.
-
Page 10: Assign Zones And Lights
ASSIGN ZONES AND LIGHTS PROGRAMMING THE INTERNET HUB 10. Each light has 4 control buttons: On / Off / Bright / Dim • Press the [ON] button to turn on that light. • Press the [OFF] button to turn off that light. • Press the [Bright] button to increase the brightness of that light. • Press the [Dim] button to decrease the brightness of that light. Note: To change the brightness, make sure the Wireless Module and the load (i.e. the light bulb) are dimmable. 11. You can setup a camera to view live images of this zone. Please refer to the ‘Settings page’ to setup a wireless camera. 12. To program the zone control, go to the Zone page and click [Settings]. - Page 11 ASSIGN ZONES AND LIGHTS PROGRAMMING THE INTERNET HUB 13. To operate the zones, go to [Zone]. Each zone has 4 control buttons: On/Off/ Bright /Dim. • Press the [ON] button to turn on all the lights in that zone. • Press the [OFF] button to turn off all the lights in that zone. • Press the [Bright] button to increase the brightness of all the lights in that zone. • Press the[Dim] button to decrease the brightness of all the lights in that zone. Note: To change the brightness, make sure the Wireless Module and the load (i.e. the light bulb) are dimmable. ASSIGN ZONES AND LIGHTS PROGRAMMING THE INTERNET HUB...
-
Page 12: All On/Off
ALL ON/OFF PROGRAMMING THE INTERNET HUB 1.To program the all control go to the Home page and click [All]. You will see the following screen: 2. Set your device into learning mode and press the [Learn] button on this screen 3. Repeat “step 2” for every device you want to control with the [All on/off] button. ALL ON/OFF PROGRAMMING THE INTERNET HUB... -
Page 13: Device
DEVICE PROGRAMMING THE INTERNET HUB The ‘Device’ shows you all of the lights which you have programmed. You can control every light/device individually from this page. DEVICE PROGRAMMING THE INTERNET HUB... -
Page 14: Scene
SCENE PROGRAMMING THE INTERNET HUB Scene control can provide a specific brightness for multiple lights with the press of a button. Common scenes are the morning scene, the evening scene, the movie scene, etc. To setup a scene, click the [Settings] icon on the Scene control page. 1. Enter the Scene name (e.g. Morning), then click [ADD]. Repeat this step for all the scenes that you plan to assign. 2. To specify an atmosphere for the scene, go to the [Scene Control] page and click [Settings]. You will see the below screen. For instance, in the Morning Scene, you want to set the Island Lights in the Kitchen zone at 10% brightness. -
Page 15: Scene
SCENE PROGRAMMING THE INTERNET HUB 4. After setting the Zone, Light and Brightness, you now have to program this scene setting to the Wireless Module. Refer to the User’s Instructions of the Wireless Module to put the unit into learning mode. Once the Wireless Module is in learning mode, press the [LEARN] button on this screen to program this scene setting to the Island Light module. -
Page 16: Timer
TIMER PROGRAMMING THE INTERNET HUB You may program up to 10 different timers to the Internet Hub. It will send a signal to control the desired devices at a pre-set time. You may control the following: • Turn a specific light on/off • Turn a specific zone on/off • Turn a specific scene on/off • Turn all lights on/off You need to set the time and the day of the week for when you want this action to take place. -
Page 17: Timer
TIMER PROGRAMMING THE INTERNET HUB 3. Select the timer no., name, zone/scene/all light, time, day of the week and whether on or off, then press the [SET] button. Once it is entered, the timer setting will show up on the screen. 4. To enable the timer, go to the Timer page. Click on the clock next to the Timer you want to activate. When there is no red bar across the clock, the timer is enabled. -
Page 18: Tc Remote
TC REMOTE PROGRAMMING THE INTERNET HUB This function allows the user to control all devices with the same interface as the SkylinkHome™ TC Remote Transmitter. Users that are familiar with the TC Remote Transmitter will find this interface very user friendly. This layout is the same as SkylinkHome™ Model TC-318-14. The buttons on the TC Remote Transmitter can be treated as a standalone control which is not related to any zone or devices assigned to the Internet Hub. - Page 19 TC REMOTE PROGRAMMING THE INTERNET HUB Program TC to Wireless Modules 1. Refer to the User’s Instructions for the Wireless Module you have, in order to put the unit into ‘Learning’ mode. 2. Click the [Learn] box on the TC Remote page, then click the number button you want to control the Wireless Module with.. : 3. The Wireless Module should respond indicating this TC Remote button is now programmed.
-
Page 20: Tc Remote
TC REMOTE PROGRAMMING THE INTERNET HUB Operation Toggle Operation Press buttons 1 -10 to turn on or off that specific load/module (toggle mode). Pressing the button when the load is off will turn on the load , and vice versa. Designated On/Off If you want to turn on a light upstairs while you are downstairs and do not know whether that light is already on, you may use the designated on/off buttons. 1. Choose the ON box above the TC Remote 2. Press the number button 3. This will send an ON command to that device... -
Page 21: Camera
CAMERA PROGRAMMING THE INTERNET HUB You may program one camera per zone. This camera provides live footage of that zone so you may see the response of each of your commands (i.e. turning on the light, dimming the light, opening of a door, etc) as they occur. To setup the camera, Click the [Settings] on the top toolbar or click on the [System Settings] icon on the main page. - Page 22 CAMERA PROGRAMMING THE INTERNET HUB 1. In the Settings page, click [Camera Settings] on the bottom of the page. 2. You may assign one camera to each zone 3. To display the camera in the zone, enter the following information: • IP address of the camera • Port of the camera • Mode (for SkylinkHome™ Wireless Camera, select F Series, Video Mode) • User Name – Login to the camera • Password – Login to the camera After entering all the information, press the [ADD] button.
-
Page 23: Camera
CAMERA PROGRAMMING THE INTERNET HUB To view a camera, press the [camera] icon. 1. You will see all the cameras you have programmed. 2. Click onto the camera that you want to view or click on [All Camera Control] to view all cameras at the same time. 3. Once a camera is selected, it will show the live view of the camera. 4. -
Page 24: Settings
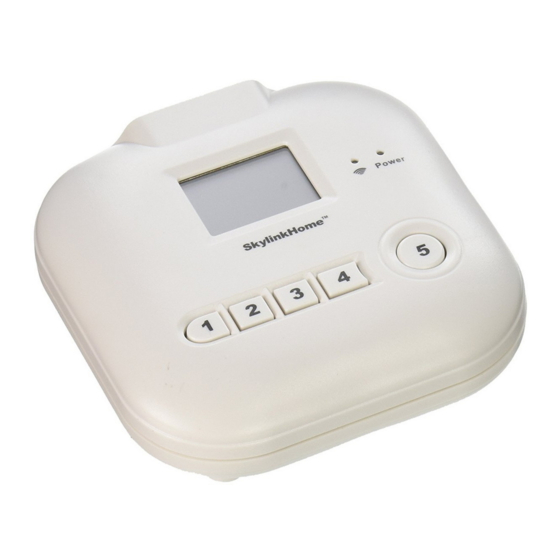
SETTINGS PROGRAMMING THE INTERNET HUB Settings allow you to set the following functions: • Date and Time • 4 Quick Access Buttons • User Name and Password for different users • Camera Settings • Network Settings Date and Time Follow the format shown to input the current time, date. This information is used for the Timer operation. 4 Quick Access Buttons The 4 physical buttons on the Internet Hub can be used to control 4 different commands. - Page 25 SETTINGS PROGRAMMING THE INTERNET HUB Camera Settings You may assign one camera to each zone. To display the camera in the zone, enter the following information: • IP address of the camera • Port of the camera • Mode (for SkylinkHome™ Wireless Camera, select F Series, Video Mode) • User Name – Login to the camera • Password – Login to the camera After entering all the information, press the [ADD] button.
- Page 26 SETTINGS PROGRAMMING THE INTERNET HUB Network Settings Http Port: Enter the access port of the Internet Hub. This is the port you need to setup in your Cable/ DSL router to access the Internet Hub. MAC Address: This is the MAC address of your Internet Hub. Host Name: Default Host Name is HU. You can enter this Host Name in your web browser as the address to access the Internet Hub, format will be: http://Host Name, in this case, it is http://HU:8081 DHCP client: If DHCP Client is selected, the Internet Hub will assign an IP address to the client. The default setting is not selected. IP Address / Gateway / Subnet Mask / Primary DNS / Secondary DNS: Please refer to your existing Cable/ DSL router’s settings for these variables.
-
Page 27: Appendix
Resetting the Internet Hub Please note the IP address should fall into the same subnet (192.168.1.XXX) of your existing network or Cable/DSL router. If this is not the case, you can reset the Internet Hub to factory default and try again or check whether the DHCP Server is enabled in your Cable/DSL router. Please refer to your Cable/DSL router User’s Instructions for details. 1. Unplug the network cable before resetting the Internet Hub. 2. Press and hold the reset button located at the back of the Internet Hub for 5 seconds until the RF and Power LED indicator on the front are steadily on. The LCD should now show “Resetting...” RESET 3. Shortly after a while the LCD should show the “Skylink” logo with a factory default IP address. 4. Plug in the network cable and go to the ‘Programming the Internet Hub’ instructions found under Section 3 of this User’s Manual RESETTIING THE INTERNET HUB APPENDIX... -
Page 28: Advanced Installation
ADVANCED INSTALLATION APPENDIX Advanced Installation Certain computer skill/knowledge is needed in this section. If for any reason the Internet Hub cannot connect to your Cable/DSL router (IP address shown on the LCD does not fall in the same subnet of your router) you can still connect the Internet Hub directly to your computer. Please refer to the section ‘Resetting the Internet Hub’ to reset the Internet Hub before proceeding. 1. Plug in the network cable which connects the Internet Hub to your computer’s LAN port (instead of the Cable/DSL router). -
Page 29: Appendix
ADVANCED INSTALLATION APPENDIX Cable /DSL Router Settings - Port Forwarding / Virtual Server Below are a few examples of Port forwarding/Virtual Server Settings of different routers for your reference. Please refer to your Cable/DSL router manual for adding a port forwarding entry. After adding the port forwarding entry in the router, you may now access the Internet Hub remotely. To access your router, open a web browser such as Internet Explorer and enter your current IP address of the router (ex. http://192.168.0.1) or refer to the manual of the router for details. Follow the on-screen page or the wizard page to enter your current login name and password. -
Page 30: Advanced Installation
ADVANCED INSTALLATION APPENDIX Refer to your Cable/DSL router manual for adding a port forwarding entry ADVANCED INSTALLATION APPENDIX... -
Page 31: Fcc/Ic
FCC/IC This device complies with Part 15 of the FCC Rules. Operation is subject to the following two conditions: (1) This device may not cause harmful interference, and (2) This device must accept any interference received, including interference that may cause undesired operation. WARNING: Changes or modifications to this unit not expressly approved by the party responsible for compliance could void the user’s authority to operate the equipment. NOTE: This equipment has been tested and found to comply with the limits for a Class B digital device, pursuant to Part 15 of the FCC Rules. These limits... -
Page 32: Warranty
If, within one year from date of purchase, this product should become defective (except battery), due to faulty workmanship or materials, it will be repaired or replaced, without charge. Proof of purchase and a Return Authorization are required. CUSTOMER SERVICE If you would like to • find out the up-to-date specifications • know more about features and applications • download documents, i.e. user’s instructions • order Skylink products or if you have difficulty getting products to work, please: 1. visit our FAQ section at www.skylinkhome.com 2. email us at support@skylinkhome.com ADDRESS 17 Sheard Avenue, Brampton, Ontario, Canada L6Y 1J3 Email: sales@skylinkhome.com skylinkhome.com... - Page 34 W i r e l e s s C o n t r o l E v e r y w h e r e . skylinkhome.com...
Need help?
Do you have a question about the HU-318 and is the answer not in the manual?
Questions and answers