
Related Manuals for HP TFT7600


Summary of Contents for HP TFT7600
- Page 1 HP TFT7600 G2 Rackmount Keyboard Monitor KVM Console User Guide Part Number 615930-001 June 2010 (First Edition)
-
Page 2: Intended Audience
ENERGY STAR and ENERGY STAR mark are registered U.S. trademarks. Intended audience This document is for the person who installs racks and rack products. This procedure is performed only by trained personnel. HP assumes you are qualified in performing installations and trained in recognizing hazards in rack products. -
Page 3: Table Of Contents
Rear components ............................7 Installation ........................... 8 Kit contents ..............................8 Installing the HP TFT7600 G2 Rackmount Keyboard Monitor KVM Console ............8 Connecting and routing cables ........................12 Accessing the HP TFT7600 KVM Console ..................... 13 Removing the HP TFT7600 KVM Console ..................... 14 Removing the HP 1U Adjustable Toolless Rails .................... - Page 4 Power cord statement for Japan ........................28 Electrostatic discharge ......................... 29 Preventing electrostatic discharge ........................ 29 Grounding methods to prevent electrostatic discharge ..................29 Technical support ........................30 HP contact information ..........................30 Acronyms and abbreviations ......................31 Index ............................32...
-
Page 5: Introduction
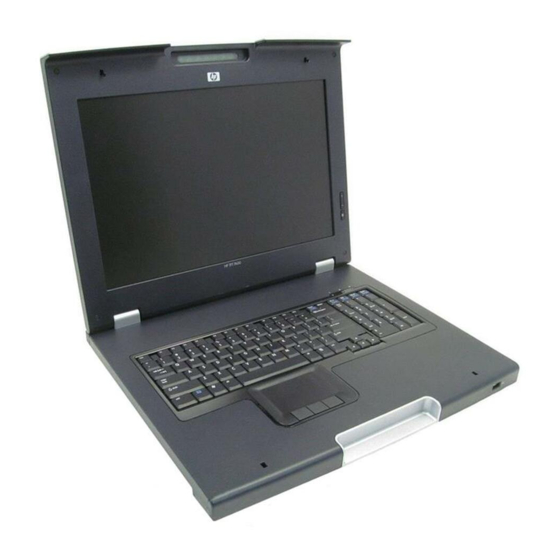
NOTE: 1U = 1.75 inches or 44.45 cm The HP TFT7600 KVM Console is mounted on rails with space available to add a 1U KVM switch box behind the unit. The console can be used with all HP racks. The HP TFT7600 KVM Console uses a 43.9-cm (17.3-inch) color-active matrix TFT LCD ("Main... -
Page 6: Energy Star Compliant
ENERGY STAR compliant The HP TFT7600 KVM Console is ENERGY STAR® qualified. For more information about the ENERGY STAR® qualifications, see the HP website (http://www.hp.com/hpinfo/globalcitizenship/environment/products/ecolabels.html). Main components Callout Component Function Display release latch Pushes down to unlatch the display assembly Blue LED •... -
Page 7: Rear Components
Callout Component Function USB connection Pass-through to the rear USB port Scroll bar Used to scroll on the monitor Right pick button Used to select the option on the right Middle pick button Used to select the option in the middle Left pick button Used to select the option on the left Touchpad... -
Page 8: Installation
Installing the HP TFT7600 G2 Rackmount Keyboard Monitor KVM Console Align the HP 1U Adjustable Toolless Rails with the holes marked on the rack, and snap them into place. Snap one end of the HP 1U Adjustable Toolless Rails into the retna rails. - Page 9 Extend the inner slides until they lock into place. Align the unit with the extended inner slides, and then insert the unit into the rack. Installation 9...
- Page 10 From the rear of the rack, slide the brace rail assembly in between the HP 1U Adjustable Toolless Rails. Align the screw holes on the brace rail with the screw holes on the HP 1U Adjustable Toolless Rails. Using two 6-32 screws, secure the brace rail to the HP 1U Adjustable Toolless Rails.
- Page 11 Remove and discard the two shipping screws from the rear of the unit. Attach the cable management arm to the rear of the unit with two 6-32 screws. Installation 11...
-
Page 12: Connecting And Routing Cables
Connecting and routing cables When connecting and routing the cables through the cable management arm and cable tray to the HP TFT7600 KVM Console, use the following cable-routing method to ensure that the cables fit into the tray. IMPORTANT: Use either the PS/2 cables or USB keyboard/mouse cable when connecting the unit to a device. -
Page 13: Accessing The Hp Tft7600 Kvm Console
Description Power cable VGA cable USB keyboard/mouse cable USB pass-through cable Accessing the HP TFT7600 KVM Console Gently extend the HP TFT7600 KVM Console until the slides lock. Push the display release latch, and then lift the display. Installation 13... -
Page 14: Removing The Hp Tft7600 Kvm Console
Removing the HP TFT7600 KVM Console To remove the HP TFT7600 KVM Console, reverse the order of the steps listed in Installing the HP TFT7600 G2 Rackmount Keyboard Monitor KVM Console (on page 8). Removing the HP 1U Adjustable Toolless Rails Locate the spring release. -
Page 15: Enabling The Native Display Resolution Of 1440X900 In Hp-Ux
To fix issues related to wide screen panels, verify that you have at least one of the following server patches (or newer) installed: • PHSS_40809 (11.31) • PHSS_40810 (11.23) For more information about setting resolutions in HP-UX, see the Graphics Administration Guide for HP-UX 11.x servers on the HP website (http://www.docs.hp.com/en/5900-0585/5900-0585.pdf). Installation 15... -
Page 16: Operational Overview
Operational overview On-screen display The OSD buttons are used to operate the HP TFT7600 KVM Console OSD menus. Callout Component Function OSD activation button • Launches OSD menus • Selects menu options • Exits menus and OSD OSD scroll up and down button... -
Page 17: Osd Menu
Press the OSD activation button to select the Exit function and exit the OSD menu. OSD menu The OSD menu provides access to display settings and functions, enabling the user to customize the HP TFT7600 KVM Console display settings. Brightness/Contrast The Brightness/Contrast option contains the following options: •... -
Page 18: Advanced
Vertical position The V position option displays a slider bar to enable the adjustment of the screen's vertical position. The center of the bar is obtained from the factory-preset value for Vertical Position. Clock The Clock option displays a slider bar to enable the adjustment of the Horizontal Clocks. Phase The Phase option displays a slider bar to enable the adjustment of the analog signals phase. -
Page 19: Auto Configuration
Auto Clock—Automatically adjusts the output clock per line to match the input Factory settings The Factory settings option enables the user to set the HP TFT7600 back to its original factory settings. The following options are available in the Factory settings menu list: •... -
Page 20: Maintenance
Do not attempt to service this product yourself. Adjust only those controls that are covered by the operating instructions. If the unit is not operating properly or has been dropped or damaged, contact your HP authorized dealer, reseller, or service provider. Cleaning the monitor To clean the display: Turn off and unplug the unit. -
Page 21: Shipping Instructions
Shipping instructions Keep the original packing box in a storage area in case you must move or ship your HP TFT7600 KVM Console. Moving a rack with the HP TFT7600 KVM Console installed When moving the HP TFT7600 KVM Console installed in a rack, HP recommends that you install the lock plates, included in your kit, on each side of the unit and rack. -
Page 22: Specifications
Specifications HP TFT7600 KVM Console specifications Item Specifications Display size 43.9 cm (17.3 inch) Display type Flat panel, active matrix-TFT LCD Viewable image size 43.9 cm (17.3 inch) diagonal Maximum weight 4.5 kg (10 lb) (unpacked) Maximum height 4.2 cm (1.7 inch) Maximum depth 42.3 cm (16.7 inch) -
Page 23: Regulatory Compliance Notices
Regulatory compliance notices Regulatory compliance identification numbers For the purpose of regulatory compliance certifications and identification, this product has been assigned a unique regulatory model number. The regulatory model number can be found on the product nameplate label, along with all required approval markings and information. When requesting compliance information for this product, always refer to this regulatory model number. -
Page 24: Declaration Of Conformity For Products Marked With The Fcc Logo, United States Only
Hewlett-Packard Company P. O. Box 692000, Mail Stop 530113 Houston, Texas 77269-2000 • 1-800-HP-INVENT (1-800-474-6836). (For continuous quality improvement, calls may be recorded or monitored.) For questions regarding this FCC declaration, contact us by mail or telephone: • Hewlett-Packard Company P. -
Page 25: European Union Regulatory Notice
Compliance with these directives implies conformity to applicable harmonized European standards (European Norms) that are listed in the EU Declaration of Conformity issued by HP for this product or product family and available (in English only) either within the product documentation or at the following HP website (http://www.hp.eu/certificates) (type the product number in the search field). -
Page 26: Japanese Notice
Japanese notice BSMI notice Korean notice Class A equipment Class B equipment Regulatory compliance notices 26... -
Page 27: Chinese Notice
Chinese notice Class A equipment China energy regulations Disposal of waste equipment by users in private households in the European Union This symbol on the product or on its packaging indicates that this product must not be disposed of with your other household waste. Instead, it is your responsibility to dispose of your waste equipment by handing it over to a designated collection point for the recycling of waste electrical and electronic equipment. -
Page 28: Power Cord Statement For Japan
product. In addition, the diameter of the wire must be a minimum of 1.00 mm or 18 AWG, your maximum length may be up to 3.66 m (12 ft). Power cord statement for Japan Regulatory compliance notices 28... -
Page 29: Electrostatic Discharge
Electrostatic discharge Preventing electrostatic discharge To prevent damaging the system, be aware of the precautions you need to follow when setting up the system or handling parts. A discharge of static electricity from a finger or other conductor may damage system boards or other static-sensitive devices. -
Page 30: Technical Support
(http://welcome.hp.com/country/us/en/wwcontact.html). For HP technical support: • In the United States, for contact options see the Contact HP United States webpage (http://welcome.hp.com/country/us/en/contact_us.html). To contact HP by phone: Call 1-800-HP-INVENT (1-800-474-6836). This service is available 24 hours a day, 7 days a week. -
Page 31: Acronyms And Abbreviations
Acronyms and abbreviations keyboard, video, and mouse liquid crystal display light-emitting diode on-screen display rackmount keyboard monitor thin film transistor universal serial bus video graphics array Acronyms and abbreviations 31... -
Page 32: Index
OSD menu 17 Federal Communications Commission (FCC) OSD position 18 notice 23, 24 OSD settings 18 OSD, launching 16 grounding methods 29 Phase adjust 17, 18 power cord 27, 28 Horizontal Position 17 PS/2 devices 14 HP website 30 Index 32... - Page 33 7 regulatory compliance notices 23, 27 Removing the Brace Rail Assembly 14 removing the HP 1U Adjustable Toolless Rails 14 removing the unit 14 shipping the unit 21 specifications 22, 27 technical support 30 telephone numbers 30 Vertical Position 18...
Need help?
Do you have a question about the TFT7600 and is the answer not in the manual?
Questions and answers