Table of Contents
Advertisement
Advertisement
Table of Contents

Related Manuals for Samsung SNP-6200RH


Summary of Contents for Samsung SNP-6200RH
-
Page 1: Network Camera
NETWORK CAMERA User Manual SNP-6200RH... - Page 2 Disclaimer Samsung Techwin makes the best to verify the integrity and correctness of the contents in this document, but no formal guarantee shall be provided. Use of this document and the subsequent results shall be entirely on the user’s own responsibility.
-
Page 3: Important Safety Instructions
overview important Safety inStructionS 1. Read these instructions. 2. Keep these instructions. 3. Heed all warnings. 4. Follow all instructions. 5. Do not use this apparatus near water. 6. Clean only with dry cloth. 7. Do not block any ventilation openings, Install in accordance with the manufacturer’s instructions. -
Page 4: Explanation Of Graphical Symbols
overview warninG TO REDUCE THE RISK OF FIRE OR ELECTRIC SHOCK, DO NOT EXPOSE THIS PRODUCT TO RAIN OR MOISTURE. DO NOT INSERT ANY METALLIC OBJECT THROUGH THE VENTILATION GRILLS OR OTHER OPENNINGS ON THE EQUIPMENT. Apparatus shall not be exposed to dripping or splashing and that no objects filled with liquids, such as vases, shall be placed on the apparatus. - Page 5 Battery Batteries(battery pack or batteries installed) shall not be exposed to excessive heat such as sunshine, fire or the like. caution Risk of explosion if battery is replaced by an incorrect type. Dispose of used batteries according to the instructions. These servicing instructions are for use by qualified service personnel only.
- Page 6 overview Please read the following recommend safety precautions carefully. y Do not place this apparatus on an uneven surface. y Do not place this apparatus near conductive material. y Do not attempt to service this apparatus yourself. y Do not install near any magnetic sources. y Do not block any ventilation openings.
-
Page 7: Table Of Contents
contentS oveRview Important Safety Instructions Product Features Recommended PC Specifications Recommended SD/SDHC Memory Card Specifications What’s Included At a Glance iNSTALLATioN & Connecting with other Device CoNNeCTioN Installation Inserting/Removing a SD Memory Card Memory Card Information (Not Included) NeTwoRk CoNNeCTioN Connecting the Camera Directly AND SeTup to Local Area Networking... -
Page 8: Web Viewer
overview web vieweR Connecting to the Camera Login Installing ActiveX Installing Silverlight Runtime Using the Live Screen Playing the recorded video SeTup SCReeN Setup Audio & Video Setup Network Setup Event Setup System Setup AppeNDix DIP Switch Setting Camera Wiring Specification Product Overview Troubleshooting... -
Page 9: Product Features
proDuct featureS • full HD video Quality • multi-Streaming This network camera can display videos in different resolutions and qualities simultaneously using different CODECs. • web Browser-based monitoring Using the Internet web browser to display the image in a local network environment. •... -
Page 10: Recommended Pc Specifications
overview recommenDeD pc SpecificationS • CPU : Intel Core 2 Duo 2.6GHz or higher • Operating System : Microsoft Windows 7/VISTA/XP SP3, Apple MAC OS X • Resolution : 1280X1024 pixels or higher • RAM : 2GB or higher • Web Browser : Internet Explorer 10.0(32bit)/9.0(32bit)/8.0(32bit)/7.0(32bit) or Higher, Firefox 9.0 or Higher, Chrome 15.0 or Higher, *Safari 5.1 or Higher Neither a beta test version unlike the version released in the company website nor the developer version will be supported. - Page 11 wHat’S incLuDeD Please check if your camera and accessories are all included in the product package. Appearance Item Name Quantity Description Main Body Instruction book, Installer S/W CD, CMS S/W DVD Quick Guide (Optional) Warranty card (Optional) Used to test the camera connection to a Cable for the testing monitor portable display device Used for attaching the installation base to...
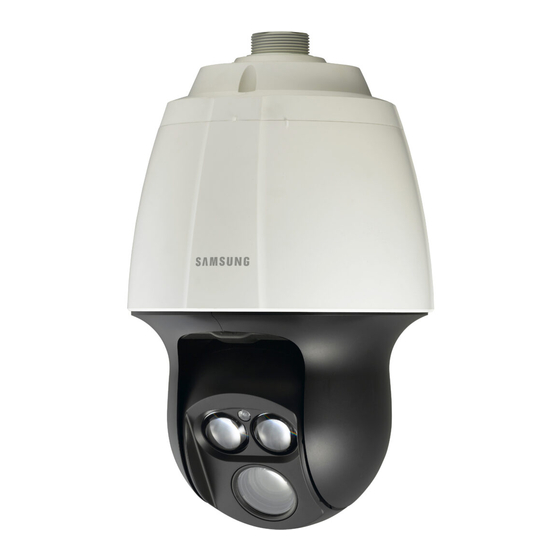
- Page 12 overview at a GLance appearance Item Description Protects the internal PTZ mechanism from the direct sunlight, rain or Main unit external impact. Shield cover Shield cover for the lens and unit protection. Safety Cable The cable prevents the product from dropping during installation. 12_ overview...
- Page 13 inside Item Description Compartment for the SD memory card. SD Memory Card M Refer to <Inserting/Removing a SD Memory Card> for the SD Compartment memory card insertion position. (page 28) The camera is reset to factory initialization condition. For details, refer to <Upgrade / Reboot>. (page 105) Initialization Switch Refer to <Inserting/Removing a SD Memory Card>...
- Page 14 overview Bottom view of installation inner view of installation Base Base Video Out Video Out Power Power 2N.C 2N.C AC 22~26V AC 22~26V 2N.0 2N.0 COM2 COM2 1N.C 1N.C 1N.0 1N.0 COM1 COM1 AUDIO_IN AUDIO_IN AUDIO_OUT AUDIO_OUT Alarm Alarm Alarm1 ON Alarm1 ON Alarm2 ON Alarm2 ON...
- Page 15 Item Description Network Used to connect the LAN cable. (10/100Mbps supported) Connections Video Out Port Analog video output port. (for installation) Power Port Used to connect the power. Alarm I/O Port Used to connect the alarm I/O cable. English _15...
-
Page 16: Installation & Connection
installation & connection ` camera wiring interface Board For the camera wiring, please refer to the picture below. Power Supply AC24V 6A Video Power Input Output Ground ETHERNET Alarm Video Out Video Out Alarm output Power Power 2N.C 2N.C AC 22~26V AC 22~26V 2N.0 2N.0... - Page 17 The maximum power capacity of the alarm and AUX outputs is 30VDC/2A, 125VAC/0.5A, and 250VAC/0.25A. When connecting alarm input and output cables, be sure to connect one cable to each terminal respectively. To connect products over the camera’s capacity, please use an additional relay device. Connecting the power connector and GND incorrectly to the NC/NO and COM ports can cause a short circuit which may lead to fire and damage the camera.
-
Page 18: Connecting With Other Device
installation & connection connectinG witH otHer Device preparing adapter and cable Connect the camera to the power adaptor. Then, plug the power cord of the adaptor to the wall outlet. A.NO A.NO A.COM A.COM TXD- TXD- TXD+ TXD+ AXICOM AXICOM IMO3 IMO3 5VDC... -
Page 19: Ethernet Connection
electrical resistance of copper wire at [20°c (68°f)] Copper Wire Gauge (AWG) #24(0.22mm ) #22(0.33mm ) #20(0.52mm ) #18(0.83mm Resistance (Ω/m) 0.078 0.050 0.030 0.018 Drop Voltage (V/m) 0.028 0.018 0.011 0.006 Recommended Distance (m) Less than 20 Less than 30 Less than 30 Less than 30 As shown in the table above, you may encounter a voltage-sag depending on the wire length. -
Page 20: Installation
installation & connection This product is a network camera that transfers video over a network; the video output terminal is used to set the imaging range of the camera at installation. Using the terminal for monitoring purposes may cause problems such as degradation in video quality. -
Page 21: Installing By Wall Mount
installing by wall mount ` fix the installation base with the bracket 1. Fix the base with the bracket by turning it clockwise. 2. As shown in the picture below, gently press Knob and lift up the handle of the hinged door on the bottom of the installation base. - Page 22 installation & connection 4. Assemble Camera and Installation Base Assemble the installation base and camera by matching the installation direction guides. 5. Attach Camera Turn the camera frame counterclockwise until the protrusions on the camera frame and installation base become matched perfectly. 6.
- Page 23 notes for waterproofing This model is an integrated housing product for outdoor installation. ` when combining the main body and the wall mount for installation on the wall 1. Install the wall mount on the vertical Concrete wall wall. When it is installed on an inclined Silicon wall, moisture may permeate into the sealant...
-
Page 24: Optional Accessories For Installation
installation & connection ` when combining the main body and the ceiling mounting adaptor for installation on the wall 1. Wrap the screw part of the housing Concrete ceiling with a sufficient amount of Teflon tape for assembly. 2. Please make sure that the gasket is Silicon Ceiling mount not disassembled from the shield cover... - Page 25 • Wall mount (SBP-300WM) 2. If installing the camera on the ceiling • Ceiling Mount (SBP-300CM) 3. If installing the wall mount (SBP-300WM/SBP-300WM1) on an at least 80mm-long cylinder • Pole Mount (SBP-300PM) English _25...
- Page 26 installation & connection 4. If installing the wall mount (SBP-300WM/SBP-300WM1) on a corner of the wall • Corner Mount (SBP-300KM) 5. If installing on a building rooftop • Parapet Mount (SBP-300LM) 26_ installation & connection...
- Page 27 ` mount Joint Wall mount (SBP-300WM1) Wall mount (SBP-300WM) Ceiling Mount (SBP-300CM) Parapet Mount (SBP-300LM) English _27...
-
Page 28: Inserting/Removing A Sd Memory
installation & connection inSertinG/removinG a SD memory carD Disconnect the power cable from the camera before inserting the SD memory card. Tighten the screws when assembling the camera body, shield cover and SD holder bracket to prevent moisture penetration. When mounting or dismounting an SD memory card, place the main body on the floor first to prevent part loss and falling accident. - Page 29 4. Pull up the SD holder bracket and push the SD memory card to the arrow direction as shown in the figure. Do not insert the SD memory card while it’s upside down by force. Otherwise, it may damage the SD memory card.
-
Page 30: Memory Card Information
installation & connection memory carD information (not incLuDeD) what is a memory card? The memory card is an external data storage device that has been developed to offer an entirely new way to record and share video, audio, and text data using digital devices. Selecting a memory card that’s suitable for you Your camera supports SD/SDHC memory cards. -
Page 31: Network Connection And Setup
network connection and setup You can set up the network settings according to your network configurations. connectinG tHe camera DirectLy to LocaL area networKinG connecting to the camera from a local pc in the Lan 1. Launch an Internet browser on the local PC. 2. -
Page 32: Connecting The Camera Directly To A Dhcp
network connection and setup connectinG tHe camera DirectLy to a DHcp BaSeD DSL/caBLe moDem INTERNET DSL/Cable External Remote PC Modem Camera DDNS Server (Data Center, KOREA) 1. Use the cross LAN cable to connect the network cable directly to your PC. 2. -
Page 33: Modem
connectinG tHe camera DirectLy to a pppoe moDem INTERNET PPPoE Modem External Remote PC Camera DDNS Server (Data Center, KOREA) 1. Use the cross LAN cable to connect the network cable directly to your PC. 2. Run the IP Installer and change the IP address of the camera so that you can use the web browser on your desktop to connect to the Internet. -
Page 34: Connecting The Camera To A Broadband Router With The
network connection and setup connectinG tHe camera to a BroaDBanD router witH tHe pppoe/caBLe moDem This is for a small network environment such as homes, SOHO and ordinary shops. Camera INTERNET PPPoE or PPPoE or Broadband External Remote Cable Modem Cable Modem Router Camera... -
Page 35: Buttons Used In Ip Installer
ButtonS uSeD in ip inStaLLer e f g Item Description Model name of the connected camera. Device Name Click the column to sort the list by model name. However, search will be stopped if clicked during the search. Alias This function is not currently implemented. Displays either <Static>, <Dynamic>... -
Page 36: Static Ip Setup
Exits the IP Installer program. For the IP installer, use only the installer version provided in the installation CD or use the latest one if available. You can download the latest version from the Samsung web site (www.samsungcctv.com). Static ip Setup manual network Setup Run <ip installer_v2.XX.exe>... - Page 37 3. In the <address> pane, provide the necessary information. • MAC (Ethernet) Address : The MAC address imprinted on the camera label is automatically displayed and requires no user setting. You can configure the static IP settings only if the DHCP checkbox is unchecked. if not using a Broadband router For setting <ip address>, <Subnet mask>, and <Gateway>, contact your network administrator.
- Page 38 network connection and setup if using a Broadband router • IP Address : Enter an address falling in the IP range provided by the Broadband Router. ex) 192.168.1.2~254, 192.168.0.2~254, 192.168.XXX.2~254 • Subnet Mask : The <Subnet mask> of the Broadband Router will be the <Subnet mask>...
-
Page 39: Auto Network Setup
auto network Setup Run <ip installer_v2.XX.exe> to display the camera search list. At the initial startup, both [auto Set] and [manual Set] will be grayed out. For cameras found with the IPv6 setting, these buttons will be grayed out as the cameras do not support this function. -
Page 40: Dynamic Ip Setup
network connection and setup Dynamic ip Setup Dynamic ip environment Setup • Example of the Dynamic IP environment - If a Broadband Router, with cameras connected, is assigned an IP address by the DHCP server - If connecting the camera directly to modem using the DHCP protocols - If IPs are assigned by the internal DHCP server via the LAN checking the Dynamic ip 1. -
Page 41: Manual Port Range Forwarding
port ranGe forwarD (port mappinG) Setup If you have installed a Broadband Router with a camera connected, you must set the port range forwarding on the Broadband Router so that a remote PC can access the camera in it. manual port range forwarding 1. - Page 42 network connection and setup Setting up port range forward for several network cameras When several network cameras are connected to one Broadband Router device, you should forward the TCP 943 port of the router to the TCP 943 port of a connected camera. If you don’t set properly the TCP 943 port of the router, you cannot get any video stream from the web page of the camera.
-
Page 43: Connecting To The Camera From A Shared Local Pc
connectinG to tHe camera from a SHareD LocaL pc 1. Run the IP Installer. It will scan for connected cameras and display them as a list. 2. Double-click a camera to access. The Internet browser starts and connects to the camera. Access to the camera can also be gained by typing the camera’s IP address in the address bar of the Internet browser. -
Page 44: Connecting To The Camera
web viewer connectinG to tHe camera normally, you would 1. Launch the Internet browser. 2. Type the IP address of the camera in the address bar. ex) • IP address (IPv4) : 192.168.1.100 http://192.168.1.100 - the Login dialog should appear. •... - Page 45 To register your device to the <DDnS> server, visit www.samsungipolis.com and register your device first, and then set the Web Viewer’s <network> - <DDnS> to <Samsung DDnS>, as well as providing <product iD> that had been used for DDNS registration.
-
Page 46: Installing Activex
web viewer inStaLLinG activeX If connecting to a camera for the first time, you will see the installation message. Then, install the required ActiveX to access the camera and control the video from it in real time. 1. Click [install] in the yellow security warning display box at the bottom of the page after initial monitoring page is accessed. -
Page 47: Installing Silverlight Runtime
inStaLLinG SiLverLiGHt runtime If your PC has not installed Silverlight Runtime or has just installed an old runtime version, you will be redirected to the Silverlight Runtime installation page automatically when accessing the web viewer. 1. Click <click Here>. 2. When the file download dialog pops up, click <run>. - Page 48 web viewer 5. When done, click <close>. 6. Close and restart the web browser, and try to access the Web Viewer. When Silverlight Runtime is properly installed, you will see the Live screen. For normal installation, set the Block Popup setting as follows: ex) Internet Explorer ...
-
Page 49: Using The Live Screen
uSinG tHe Live Screen a b c Item Description Monitoring Move to the monitoring screen. Playback Switch to the monitoring screen that plays recording data in the SD memory. Setup Move to the Setup screen. Viewer Screen Displays the Live video on the screen. Auto Focus Fit the focus automatically. - Page 50 web viewer Item Description Audio/Microphone Activate the audio and microphone and control the audio’s volume. Control Hides the alarm indicator near the border of the viewer screen. In the following cases, the alarm message will pop up on the border of the viewer.
-
Page 51: To Capture The Snapshot
to enable the area Zoom mode From the viewer screen, right-click to display the context menu below: Menu items and descriptions • AreaZoom : Zoom the area selected with the mouse. • Goto 1X : Change the current zoom factor to x1. •... - Page 52 web viewer to toggle the audio sound 1. Click the [audio ( )] button. The corresponding button will be displayed in the Viewer. 2. Click the button to listen to / mute the sound as you wish. This button operates as a toggle button. to toggle the microphone sound 1.
-
Page 53: To Play The Content After Searching By Event
to control the ptZ 1. Press the [ptZ ( )] button. 2. When the PTZ button bar appears on the screen, use the direction buttons to adjust the camera angle, zoom factor or focus to your preference. For further details on PTZ use, refer to “PTZ setup”. - Page 54 web viewer Item Description Search range setting Set the search date and time from the data saved in the SD memory card. Search event setting Set the event type to search within the search period. Event search Run the event search. 1.
-
Page 55: To Play After Searching By Time
to play after searching by time Item Description Time bar The section in the specific period is played by moving the time bar. Set the search date using the calendar. Search date setting Dates for which there is video in the SD memory card are displayed within the boxes on the calendar. - Page 56 web viewer Item Description Video information Time data of the replayed video is displayed on the screen. Time zone is set to back up the video saved in the SD memory card. Backup Can be set as up to 5 minutes. The time search is not available with other web browsers than Internet Explorer.
- Page 57 to back up the searched video 1. Click [ ] on the scene to back up. Save as window appears. 2. Confirm the save path and click [Save] button. The selected data will be backed up to the specified path in .avi format. to play the backup video You can play the video stored (for the backup purpose) with Windows Media Player or VLC Media Player.
-
Page 58: Video Profile
setup screen Setup You can configure the audio & video, network, event and system settings of the camera via the network. 1. In the Live screen, click [Setup ( 2. The Setup screen appears. auDio & viDeo Setup video profile 1. -
Page 59: To Add A Video Profile
to add a video profile You can add as many codecs as necessary so that a variety of profiles can be applied according to the recording condition. 1. Select a profile number. 2. Provide the name and select a codec. 3. - Page 60 setup screen • Profile : You can select the H.264 profiling method. • Entropy coding : Reduce the possible compression loss due to encoding. • Smart codec : Specify the use of Smart codec. The Smart Codec will be active only if the codec is of H.264 and the compression system is CBR.
-
Page 61: Video Setup
video setup 1. From the Setup menu, select the <audio & video ( )> tab. 2. Click <video setup>. 3. Select a <video source> mode. • Flip/Mirror mode : Displays the video from the camera upside down or reversely. • Digital Flip : This limits the vertical screen navigation range of the camera lens. -
Page 62: Audio Setup
setup screen audio setup You can configure the I/O settings of the audio source from the camera. 1. From the Setup menu, select the <audio & video ( )> tab. 2. Click <audio setup>. 3. Set the audio input value. •... -
Page 63: Ptz Setup
ptZ setup You can change the direction of lens and activate the zoom. 1. From the Setup menu, select the <audio & video ( )> tab. 2. Click <ptZ setup>. 3. Click [Direction adjustment ( • [change direction to ( )] : Change the direction of camera lens. - Page 64 setup screen To add a preset 1. Select the preset number to add. 2. Set the name for the preset. 3. Press the [ ] button. To delete a preset 1. Select the preset number to delete. 2. Press the [ ] button.
- Page 65 To set the home position 1. Move to a desired start screen point and press [ The point will be set to the home position. 2. Click [ ] in the home position. You will move to the predetermined home position.
- Page 66 setup screen To set a group The group function enables you to group various presets before calling them in sequence. Each group can contain up to 128 presets. 1. Set <mode> in <Sequence setup> to <Group>. The menu screen will switch to the group setting screen.
- Page 67 3. Press the [ ] button. Your settings will be entered in the right list. 4. Press the [ ] button. Set data on the right list will be saved. 5. Press the [ ] button. It performs the tour operation. 6.
- Page 68 setup screen To set the auto run This feature will activate the predefined sequence function if the user does not manipulate anything on the product for a certain time. 1. Set <mode> in <Sequence setup> to <trace & auto run>. The menu screen will switch to the PTZ tracking and Auto execution menu screen.
- Page 69 • Action : PT limiting operation is set. ] : Start limit setting. ] : Provide the start and end points. ] : If you want to change the point setting, click this to return to the input dialog. Smart codec setup Set a desired area of the video incoming from the camera as ROI area and specify the detection sensitivity for the area.
-
Page 70: Camera Setup
<Video profile> according to mode setup. (Page 58) SSDr (Samsung Super Dynamic range) Setup In a scene where the difference between bright and dark is severe, you can increase the brightness of the dark area alone to regulate the overall brightness. - Page 71 white balance Setup You can correct the image colors based on white under any lighting conditions. 1. Select <white balance>. 2. Select <mode>. • ATW : Corrects the colors of the camera video automatically. • Manual : You can adjust the red and blue gains of the camera video manually.
- Page 72 setup screen BLc Setup You can specify a desired area on the video manually and set the area to be displayed more clearly. 1. Select <Backlight>. 2. Set <mode> to <BLc>. 3. Select each item and set it properly. • BLC level : You can change the level to adjust the brightness of the monitoring area.
- Page 73 wDr Setup You can set to display a sharp image of the objects in a scene where both bright and dark areas exist. 1. Select <Backlight>. 2. Set <mode> to <wDr>. 3. Select each item and set it properly. • WDR Level : Specify the WDR sensitivity level.
- Page 74 setup screen For the best WDR performance, it is recommended to set the Iris mode to <Auto>. Since the auto focus operation can be repeated depending on the lighting condition if user backlight compensation is used, it is recommended to use the focusing mode of <One Shot AF> or <Manual>.
- Page 75 • Sens-up limit : Set the work condition to Auto mode in a low contrast scene. • Iris : You can set the camera iris to Auto or Manual to your preference. - Auto : Automatically sets the iris adaptively to the ambient lighting and shutter speed.
-
Page 76: Focus Setup
setup screen • Dwell time : This is the time while each applicable lighting condition is kept in order to enable the switch between day and night modes. • Duration : Specify the time interval of lighting at which the sequence operation is triggered. - Page 77 oSD Setup 1. Select <oSD>. 2. Select each item and set it properly. • Camera title : Specify whether or not to display the camera title on the screen. You can enter up to 15 characters for the title. • Camera title position X, Y : Specify the coordinates where the camera title is displayed on the screen.
- Page 78 setup screen ir Setup 1. Select <ir>. 2. Select each item and set it properly. • IR Mode: - Off : Turns off IR LED. - On : Turns on IR LED. When using, the daytime/nighttime mode of the special is set to B/W. - Day &...
-
Page 79: Network Setup
networK Setup interface 1. From the Setup menu, select the <network ( )> tab. 2. Click <interface>. 3. Set the <interface> and <ipv6 setup> as necessary. • IP type : Select an IP connection type. - Manual : Specify the IP address, Subnet mask, Gateway, DNS1, and DNS2. - Page 80 Setting the HTTP port for Safari and Google Chrome browsers to 65535 is not allowed by security policy. • Device port : Set a port used to transfer video signals with the Samsung protocols. • RTSP port : Used to transfer videos in the RTSP mode; the default is 554.
- Page 81 DDNS server provided by Samsung Techwin. - Product ID : Enter the product ID that is registered with the Samsung DDNS service. • Public DDNS : Select one of provided public DDNS servers when you use a public DDNS server.
-
Page 82: Registering With Ddns
DDnS to register your product with the Samsung DDnS 1. Visit the iPOLiS web site(www. samsungipolis.com) and sign in with a registered account. 2. From the top menu bar, select <DDnS Service> - <my DDnS>. 3. Click [proDuct reGiStration]. - Page 83 Samsung DDnS in camera setup 1. From the DDNS setup page, set <DDnS> to <Samsung DDnS>. 2. Provide the <product iD> that you registered product ID with the DDNS site. 3. Click [apply ( When the connection is successfully made, you will see the message of <(Success)>...
- Page 84 setup screen ip filtering You can create a list of IPs that you want to grant or deny access to them. 1. From the Setup menu, select the <network ( )> tab. 2. Click <ip filtering>. 3. Select <filtering type>. •...
- Page 85 You can select a secure connection system or install the public certificate for this purpose. 1. From the Setup menu, select the <network ( )> tab. 2. Click <SSL>. 3. Select a secure connection system. To access the camera using HTTPS mode, you have to type the IP address for the camera in the form of “https://<Camera_IP>”.
- Page 86 setup screen 802.1x When connecting network, you can choose whether using 802.1x protocol, and then install the certification. 1. From the Setup menu, select the <network ( )> tab. 2. Click <802.1x>. 3. Set the <ieee 802.1x Setting(eapoL using eap-tLS)>. •...
- Page 87 You can specify the priority to secure a stable transfer rate for a specific IP. 1. From the Setup menu, select the <network ( )> tab. 2. Click <QoS>. 3. Enter an IP address to which you will apply QoS. The default prefix for IPv4 is 32;...
-
Page 88: Event Setup
setup screen • Enable SNMP v3 : SNMP version 3 will be active. - Password : Specify the default password for SNMP version 3. The default password is <admin4321>. The default password can be exposed to a hacking thread so it is recommended to change the password after installing the product. - Page 89 - Port : The default port of the FTP server is 21; however, you can use a different port number according to the FTP server settings. - Passive mode : Select <on> if you need to connect in passive mode due to the firewall or the FTP server settings.
- Page 90 setup screen to make recording on the SD memory 1. Check the <total size> and the <free size>. 2. If the SD memory has a sufficient free space, set <record> to <on>. Otherwise, check the stored data and if you find them not important, then click <format>...
- Page 91 alarm input 1 ~ 4 You can set the alarm input type, activation time, and operation mode. 1. From the Setup menu, select the <event ( )> tab. 2. Click <alarm input>. 3. Specify an input device. • Type - Normal Open : It is normally open, but if it is closed, an alarm will be triggered.
- Page 92 setup screen va / mD This can be set to generate an event signal when a motion or intelligent video analysis event is detected. 1. From the Setup menu, select the <event ( )> tab. 2. Click <va / mD>. DIS cannot be used if VA/MD is used.
- Page 93 ` to use intelligent video analysis (va) 1. Select an Intelligent Video Analysis mode. 2. Set <iv analysis function> to <enable>. 3. Select a type. • Line/Area : This detects the change as an object passes across the line or zone set up by the user. •...
- Page 94 setup screen Motion Detection and Intelligent Video Analysis cannot be used simultaneously. Before using, set the minimum and maximum motion sizes to suit desired motion range to be detected. Detected size of an object may have difference with the actual size according to its shape. Up to 16 objects from the top side of the screen can be displayed.
- Page 95 ` to set the video analysis rules (va) Line / area • minimum object Size 1. Set <iv analysis function> to <enable>. 2. Set the type to <Line/area>. 3. Set the event rule to <minimum object Size>. 4. Drag and drop to a desired point of the video.
- Page 96 setup screen • virtual line based rules 1. Set <iv analysis function> to <enable>. 2. Set the type to <Line/area>. The virtual line based rules can be specified only if the intelligence video analysis type is set to <Line/Area>. 3. Set the event rule to <virtual line based rules>.
- Page 97 appearing/Disappearing • minimum object Size 1. Set <iv analysis function> to <enable>. 2. Set the type to <appearing/ Disappearing>. 3. Set the event rule to <minimum object Size>. 4. Drag and drop to a desired point of the video. The minimum object size will be applied to the blue area (dragged area). Objects smaller than the specified minimum will not be detected.
-
Page 98: Time Schedule
setup screen • Defined area based rules 1. Set <iv analysis function> to <enable>. 2. Set the type to <appearing/ Disappearing>. 3. Set the event rule to <Defined area based rules>. 4. Drag and drop to a desired point of the video. -
Page 99: Audio Detection
network disconnect This can be set to generate an event signal when the physical network connection is cut off. 1. From the Setup menu, select the <event ( )> tab. 2. Click <network disconnect>. 3. Specify the use of “Network disconnect”. -
Page 100: Face Detection
setup screen face detection You can set to detect recognized face and trigger an event accordingly. 1. From the Setup menu, select the <event ( )> tab. 2. Click <face detection>. 3. Set whether or not to < enable >. 4. -
Page 101: Tampering Detection
tampering detection You can set to detect tampering attempts and trigger events, such as sudden change of camera’s framing direction, blocked lens and other overall change of scenes from the video. 1. From the Setup menu, select the < event ( ) >... -
Page 102: System Setup
setup screen SyStem Setup product information 1. From the Setup menu, select the <System ( )> tab. 2. Click <product information>. 3. Check the camera information, or provide details according to your network environment. • Model : Model name of the product. •... -
Page 103: Date & Time
Date & time 1. From the Setup menu, select the <System ( )> tab. 2. Click <Date & time>. 3. Specify the time and date that will be applied to the camera. • Current system time : Displays the current time settings of your system. •... - Page 104 setup screen user 1. From the Setup menu, select the <System ( )> tab. 2. Click <user>. 3. Provide the necessary user information. • Administrator Password Change : Change the password for the administrator. The default password can be exposed to a hacking thread so it is recommended to change the password after installing the product.
- Page 105 If you forcibly terminate the upgrade process, upgrade will not be completed properly. During restarting the system, accessing with web viewer will not be made. You can download the latest version from the Samsung web site (www.samsungcctv.com). English _105...
- Page 106 setup screen to back up the current settings 1. Click [Backup]. The Save As dialog should appear. 2. Specify the backup path with a proper file name, and click [Save]. The backup file will be saved to the specified path in the format of “.bin”. to restore the backup settings 1.
- Page 107 You can check the system log or event log. 1. From the Setup menu, select the <System ( )> tab. 2. Click <Log>. 3. Select a log type. • Syslog : You can check the system logs where any system changes are recorded including the time information.
-
Page 108: Dip Switch Setting
appendix Dip SwitcH SettinG How to set up protocols and iD Dip Switches You can control various settings of the camera system using the Communication and ID DIP switches. Before installing the product, please set up the DIP switches according to the installation environment. -
Page 109: Protocol Settings
Transfer Method (RS-485/422) Settings Response Mode Settings RESERVED 10~11 Termination Settings RESERVED • protocol Settings Select a communication protocol for the camera. Protocol SW2-#1 SW2-#2 SW2-#3 SW2-#4 SAMSUNG-T Pelco-D Pelco-P SAMSUNG-E Panasonic Vicon Honeywell BOSCH Reserved Reserved Reserved Reserved Reserved... -
Page 110: Communication Method Settings
appendix • baud Rate Settings Select the transfer speed of a selected communication protocol. Baud Rate (BPS) SW2-#5 SW2-#6 2400 4800 9600 (Default) 19200 • Communication Method Settings Select a communication method for the camera. Function SW2-#7 Transfer Mode Switch RS-422(4Wire) RS-485(2Wire) •... -
Page 111: Camera Id Chart
camera iD Dip Switch Settings (Sw1) To set up camera IDs, refer to the “camera iD chart” next. • Camera iD Chart SW1-#1 SW1-#2 SW1-#3 SW1-#4 SW1-#5 SW1-#6 SW1-#7 SW1-#8 ON/OFF English _111... - Page 112 appendix SW1-#1 SW1-#2 SW1-#3 SW1-#4 SW1-#5 SW1-#6 SW1-#7 SW1-#8 112_ appendix...
- Page 113 SW1-#1 SW1-#2 SW1-#3 SW1-#4 SW1-#5 SW1-#6 SW1-#7 SW1-#8 English _113...
- Page 114 appendix SW1-#1 SW1-#2 SW1-#3 SW1-#4 SW1-#5 SW1-#6 SW1-#7 SW1-#8 114_ appendix...
- Page 115 SW1-#1 SW1-#2 SW1-#3 SW1-#4 SW1-#5 SW1-#6 SW1-#7 SW1-#8 English _115...
- Page 116 appendix SW1-#1 SW1-#2 SW1-#3 SW1-#4 SW1-#5 SW1-#6 SW1-#7 SW1-#8 116_ appendix...
- Page 117 SW1-#1 SW1-#2 SW1-#3 SW1-#4 SW1-#5 SW1-#6 SW1-#7 SW1-#8 English _117...
- Page 118 appendix camera wirinG control Signal connection • RS-485 Communications Camera Controller TXD+ TXD- • RS-422 Communications Camera Controller TXD+ TXD- RXD+ RXD- communications cable For the camera to communicate with the controller, a RS-485/422 communications line is required. A 30m or shorter length is recommended for the connection. The communication cable is not enclosed with the camera.
- Page 119 Specification Description Items SNP-6200RHN SNP-6200RHP Imaging Device 1/3-type PS CMOS (Panasonic MN34041) Total Pixels 2010(H) x 1108(V) Effective Pixels 1944(H) x 1092(V) Scanning System Progressive Scan Video Min. Illumination Color : 1.5 Lux/F1.6(50IRE), B/W : 0 Lux (IR LED On) S / N Ratio 50dB CVBS : 1.0 Vp-p / 75Ω...
- Page 120 Backlight Compensation Off / BLC / WDR / HLC Wide Dynamic Range 128X (60dB) Contrast Enhancement SSDR (Samsung Super Dynamic Range) (Off / On) Digital Noise Reduction SSNRIII (2D+3D Noise Filter) (Off / On) Digital Image Stabilization Off / On...
- Page 121 Description Items SNP-6200RHN SNP-6200RHP y File upload via FTP, E-Mail y Notification via E-Mail, TCP y Local storage(SD/SDHC) recording at Network Operational Alarm events disconnected y External output y PTZ preset Ethernet RJ-45 (10/100BASE-T) Video Compression Format H.264 (MPEG-4 Part 10/AVC), Motion JPEG 1920 x 1080P (Full HD), SXGA (1280 x 1024), 1280 x 960, Resolution HD (16 : 9, 1280 x 720p), 1024 x 768, SVGA (800 x 600),...
- Page 122 appendix Description Items SNP-6200RHN SNP-6200RHP HTTPS(SSL) Login Authentication Digest Login Authentication Security IP Address Filtering User access Log 802.1x Authentication Streaming Method Unicast / Multicast Max. User Access 10 users at Unicast Mode Memory Slot SD/SDHC Memory Slot ONVIF Conformance Network English, French, German, Spanish, Italian, Chinese, Korean, Russian, Japanese, Swedish, Denish, Portuguese, Czech,...
-
Page 123: Product Overview
proDuct overview Unit : mm (inch) 1-1/2inch PF TAP English _123... -
Page 124: Troubleshooting
appendix trouBLeSHootinG PROBLEM SOLUTION y Check to make sure that the camera’s Network settings are appropriate. y Check to make sure that all network cables have been connected properly. I can’t access the camera from a y If connected using DHCP, verify that the camera is able to acquire web browser. - Page 125 PROBLEM SOLUTION No file is transferred via e-mail y Verify the settings in the following sequence: on occurrence of intelligent video A. Check <Data & Time> settings. analysis event of camera even B. The <IV analysis function> should be set to <Enable>. when the <IV analysis function>...
-
Page 126: Gnu General Public License
Corresponding Source code from us for a period of three years after our last shipment of this product by sending email to help.cctv@samsung.com If you want to obtain the complete Corresponding Source code in the physical medium such as CD-ROM, the cost of physically performing source distribution might be charged. - Page 127 You may charge a fee for the physical act of transferring a Subsection b above.) The source code for a work means copy, and you may at your option offer warranty protection in the preferred form of the work for making modifications exchange for a fee.
- Page 128 enD of termS anD conDitionS application of that system ; it is up to the author/donor to decide if he or she is willing to distribute software through How to apply these terms to your new programs any other system and a licensee cannot impose that choice. This section is intended to make thoroughly clear what is If you develop a new program, and you want it to be of believed to be a consequence of the rest of this License.
- Page 129 preamble “Licensees” and “recipients” may be individuals or organizations. The GNU General Public License is a free, copyleft license To “modify” a work means to copy from or adapt all or part for software and other kinds of works. The licenses for of the work in a fashion requiring copyright permission, most software and other practical works are designed to other than the making of an exact copy.
- Page 130 2. Basic permissions. d) If the work has interactive user interfaces, each must display Appropriate Legal Notices; however, if the All rights granted under this License are granted for the term Program has interactive interfaces that do not display of copyright on the Program, and are irrevocable provided Appropriate Legal Notices, your work need not make the stated conditions are met.
- Page 131 favor of coverage. For a particular product received by c) Prohibiting misrepresentation of the origin of that a particular user, “normally used” refers to a typical or material, or requiring that modified versions of such common use of that class of product, regardless of the material be marked in reasonable ways as different from status of the particular user or of the way in which the the original version;...
- Page 132 10. automatic Licensing of Downstream recipients. covered work and works based on it. A patent license is “discriminatory” if it does not include within the scope of its Each time you convey a covered work, the recipient coverage, prohibits the exercise of, or is conditioned on the automatically receives a license from the original licensors, non-exercise of one or more of the rights that are specifically to run, modify and propagate that work, subject to this...
-
Page 133: End Of Terms And Conditions
15. Disclaimer of warranty. you can change the software and use pieces of it in new free programs; and that you are informed that you can do THERE IS NO WARRANTY FOR THE PROGRAM, TO THE these things. EXTENT PERMITTED BY APPLICABLE LAW. EXCEPT WHEN OTHERWISE STATED IN WRITING THE COPYRIGHT To protect your rights, we need to make restrictions that HOLDERS AND/OR OTHER PARTIES PROVIDE THE... - Page 134 Although the Lesser General Public License is Less protective the facility is invoked, then you must make a good of the users’ freedom, it does ensure that the user of a faith effort to ensure that, in the event an application program that is linked with the Library has the freedom and does not supply such function or table, the facility still the wherewithal to run that program using a modified version...
- Page 135 Library (because it contains portions of the Library), rather e) Verify that the user has already received a copy of than a “work that uses the library”. The executable is these materials or that you have already sent this user a therefore covered by this License.
- Page 136 If any portion of this section is held invalid or unenforceable DAMAGES, INCLUDING ANY GENERAL, SPECIAL, under any particular circumstance, the balance of the section INCIDENTAL OR CONSEQUENTIAL DAMAGES is intended to apply, and the section as a whole is intended ARISING OUT OF THE USE OR INABILITY TO USE THE to apply in other circumstances.
- Page 137 Computer Science Department at University College - Redistributions in binary form must reproduce the above London copyright notice, this list of conditions and the following disclaimer in the documentation and/or other materials 4. Neither the name of the University nor of the Department provided with the distribution.
-
Page 138: Openssl License
and/or sell copies of the Software, and to permit persons from this software without prior written permission. to whom the Software is furnished to do so, subject to the For written permission, please contact openssl-core@ following conditions: openssl.org. 5. Products derived from this software may not be called THE SOFTWARE IS PROVIDED “AS IS”, WITHOUT WARRANTY OF ANY KIND, EXPRESS OR IMPLIED, “OpenSSL”... - Page 139 THIS SOFTWARE IS PROVIDED BY ERIC YOUNG ‘‘AS IS AND ANY EXPRESS OR IMPLIED WARRANTIES, INCLUDING, BUT NOT LIMITED TO, THE IMPLIED WARRANTIES OF MERCHANTABILITY AND FITNESS FOR A PARTICULAR PURPOSE ARE DISCLAIMED. IN NO EVENT SHALL THE AUTHOR OR CONTRIBUTORS BE LIABLE FOR ANY DIRECT, INDIRECT, INCIDENTAL, SPECIAL, EXEMPLARY, OR CONSEQUENTIAL DAMAGES (INCLUDING, BUT NOT LIMITED TO, PROCUREMENT OF...
- Page 140 pHp License The PHP License, version 3.01 Copyright (c) 1999 - 2012 The PHP Group. All rights reserved. Redistribution and use in source and binary forms, with or without modification, is permitted provided that the following conditions are met: 1. Redistributions of source code must retain the above copyright notice, this list of conditions and the following disclaimer.
- Page 141 Samsung Techwin cares for the environment at all product manufacturing stages, and is taking measures to provide customers with more environmentally friendly products.
- Page 142 SAMSUNG TECHWIN AMERICA Inc. SAMSUNG TECHWIN EUROPE LTD. 100 Challenger Rd. Suite 700 Ridgefield Park, NJ 07660 Samsung House, 1000 Hillswood Drive, Hillswood Business Toll Free : +1-877-213-1222 Direct : +1-201-325-6920 Park Chertsey, Surrey, UNITED KINGDOM KT16 OPS Fax : +1-201-373-0124 TEL : +44-1932-45-5300 FAX : +44-1932-45-5325 www.samsungcctvusa.com...
Need help?
Do you have a question about the SNP-6200RH and is the answer not in the manual?
Questions and answers