Table of Contents
Advertisement
IMPORTANT SAFEGUARDS
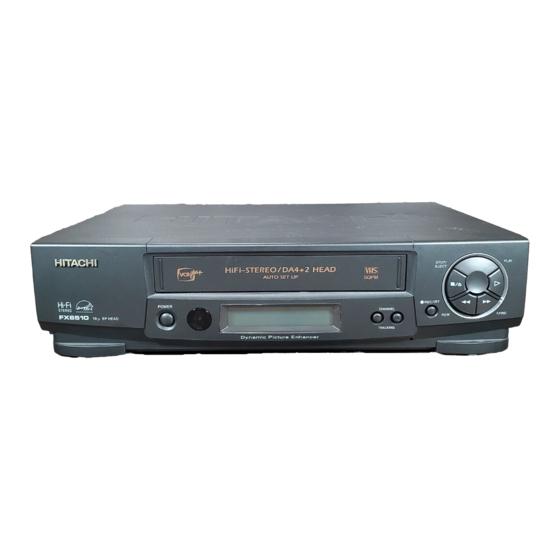
HITACHI
VIDEO CASSETTE RECORDER
VT-FX6510A
Owner's manual
Auto Set Up System - simply plug in all cables and press the POWER button (see page 17).
Using these quality features:
The VCR Plus+* programming system allows you to program the VCR for timer recording by simply entering
a PlusCode* number.
*VCR Plus+C³ and PlusCode are registered trademarks of Gemstar Development Corporation.
The VCR Plus+ system is manufactured under license from Gemstar Development Corporation.
Auto Set Up system automatically tune in broadcast channels.
S-VHS
Quasi playback allows you to playback the tape that is recorded by S-VHS type.
Super index allows you to quickly search for a program you want to view or the point from which you want to
start recording on tape.
Super rewind and fast forward.
Multi-channel TV sound (MTS).
8-program/1-month preset recording.
Auto tracking system automatically adjusts the tracking so the picture is optimized.
Frequency synthesized tuner provides easy, preset tuning of up to 68 broadcast TV channels and 125 cable
channels.
VHS Hi-Fidelity sound in playback.
On-screen programming guide.
With display, VCR Plus+ can be programmed to record without turning power on.
Easy Cursor Operation
As an ENERGY STAR" Partner, HITACHI Home
Electronics (America), Inc. has determined that this
product meets the ENERGY STAR' guidelines for
energy efficiency.
HITACHI AMERICA, LTD.,
HOME ELECTRONICS DIVISION
1855 Dornoch Court,
San Diego, CA 92173,
Tel. 1-800-HITACHI
(1-800-448-2244)
QR32252 © Hitachi, Ltd. 2000
HITACHI CANADA LTD.,
DIGITAL MEDIA DIVISION
6740 Campobello Road, Mississauga,
Ontario L5N 2L8 CANADA
Tel. 1-800-HITACHI
(1-800-448-2244)
Printed in Malaysia
Advertisement
Table of Contents

Related Manuals for Hitachi VT-FX6510A


Summary of Contents for Hitachi VT-FX6510A
-
Page 1: Important Safeguards
Auto Set Up System - simply plug in all cables and press the POWER button (see page 17). Using these quality features: The VCR Plus+* programming system allows you to program the VCR for timer recording by simply entering a PlusCode* number. -
Page 2: Table Of Contents
IMPORTANT SAFEGUARDS TABLE OF CONTENTS IMPORTANT SAFEGUARDS ... 5 CUSTOMER CONTROLS ... 8 VCR Customer Controls ... 9 Remote Control Customer Controls... 9 REMOTE OPERATION... 10 Install batteries in the remote control... 10 Operating in the remote control ... 11 CASSETTE TAPES... - Page 3 EASY DELAYED RECORDING WITH THE VCR PLUS+ SYSTEM ... 54 VCR Plus+ setup - Channel setup ... 54 Using the VCR Plus+ system to record a program (by using TV screen) ... 55 Using the VCR Plus+ system to record a program (by using VCR's display) ... 58 PROGRAM REVIEW...
- Page 4 POWER SUPPLY: AC 120V, 60 Hz ONLY. The POWER button turns the VCR on and off, leaving the clock/timer unaffected. If the unit is to be left unattended for a long period, it is recommended that the unit be completely switched off and unplugged.
-
Page 5: Important Safeguards
IMPORTANT SAFEGUARDS IMPORTANT SAFEGUARDS In addition to the careful attention devoted to quality standards in the manufacture of your video product, safety is a major factor in the design of every instrument. But, safety is your responsibility too. This page lists important information that will help to assure your enjoyment and proper use of a Video Cassette Recorder and accessory equipment. - Page 6 IMPORTANT SAFEGUARDS...
- Page 7 IMPORTANT SAFEGUARDS 12 Outdoor Antenna Grounding -- If an outside antenna or cable system is connected to the video product, be sure the antenna or cable system is grounded so as to provide some protection against voltage surges and built-up static charges. Section 810 of the National Electrical Code, ANSI/NFPA No. 70, provides information with respect to proper grounding of the mast and supporting structure, grounding of the lead-in wire to an antenna discharge unit, size of grounding conductors, location of antenna-discharge unit, connection to grounding electrodes, and requirements for the grounding electrode.
-
Page 8: Customer Controls
CUSTOMER CONTROLS CUSTOMER CONTROLS VCR Customer Controls Item No. Function POWER button Infrared receiver Cassette compartment STOP/EJECT button PLAY button F.FWD button REW button REC/IRT button CHANNEL (channel up/down)/ TRACKING buttons VCR Display AM/PM indicators Time, Tape counter, Tape remaining or... -
Page 9: Vcr Customer Controls
IN FROM ANT. - signal input OUT TO TV - signal out to TV VIDEO OUT jack AUDIO OUT L, R jacks Remote Control Customer Controls Item No. Batteries for remote this VCR to a TV control handset (R6) Function Function Page Page... -
Page 10: Remote Operation
DISP- to recall on-screen display PROG./VCR+ (programming) button CLEAR - clears time counter REC - record button VCR, TV, CATV - Device buttons let you set the remote to control one of the three devices. VCR/TV mode select button CH (channel up/down) button PAUSE/ENTER buttons F.FWD button - fast forward or search... -
Page 11: Operating In The Remote Control
Operating the VCR: 1 Make sure there is no obstacle between the remote control and VCR's infrared receiver. Note: You cannot operate the VCR if there is an obstacle (for example, coffee table, sofa, etc) between the VCR and remote control. -
Page 12: Cassette Tapes
The VCR automatically enters the playback mode when a cassette without its safety tab is inserted. The VCR won't record on a tape without a safety tab and the cassette will be ejected if the REC or REC/IRT button is pressed. Be sure to check the safety tab before inserting a cassette. -
Page 13: Basic Antenna Hookup [A]
* PURCHASED SEPARATELY Switch the RF Channel When the VCR is on, its video signal can come into your TV on either channel 3 or channel 4. You need to select the appropriate channel. When the power is turned on, press the POWER button to turn it off. Press the PLAY button on front of the VCR. -
Page 14: Advanced Antenna Hookup -Av Hookup [B]
ADVANCED ANTENNA HOOKUP -AV HOOKUP [B] ADVANCED ANTENNA HOOKUP -AV HOOKUP [B] WITH THIS HOOKUP YOU CAN... WATCH AVAILABLE TV CHANNELS RECORD AND WATCH THE SAME CHANNEL RECORD ONE CHANNEL AND WATCH ANOTHER Caution: Do not connect to the power supply outlet before connecting all cables (see page 17). * PURCHASED SEPARATELY... -
Page 15: Basic Cable Hookup [C]
Caution: Do not connect to the power supply outlet before connecting all cables (see page 17). Switch the RF Channel When the VCR is on, its video signal can come into your TV on either channel 3 or channel 4. You need to select the appropriate channel. -
Page 16: Advanced Cable Hookup -Av Hookup [D]
ADVANCED CABLE HOOKUP -AV HOOKUP [D] ADVANCED CABLE HOOKUP -AV HOOKUP [D] WITH THIS HOOKUP YOU CAN... WATCH AVAILABLE CABLE CHANNELS RECORD AND WATCH THE SAME CHANNEL RECORD ONE CHANNEL AND WATCH ANOTHER Caution: Do not connect to the power supply outlet before connecting all cables (see page 17). * PURCHASED SEPARATELY... -
Page 17: Basic Cable Hookup -With Cable Box [E]
Caution: Do not connect to the power supply outlet before connecting all cables (see page 17). Switch the RF Channel When the VCR is on, its video signal can come into your TV on either channel 3 or channel 4. You need to select the appropriate channel. -
Page 18: Advanced Cable Hookup -With Cable Box [F]
ADVANCED CABLE HOOKUP -WITH CABLE BOX [F] ADVANCED CABLE HOOKUP -WITH CABLE BOX [F] WITH THIS HOOKUP YOU CAN... WATCH AVAILABLE CABLE CHANNELS RECORD AND WATCH THE SAME CHANNEL YOU CAN'T... RECORD ONE CHANNEL AND WATCH ANOTHER ALL CHANNEL SELECTIONS MUST BE MADE AT THE CABLE BOX. BE SURE TO CONSULT YOUR CABLE BOX MANUAL FOR THE CABLE BOX OUTPUT CHANNEL. -
Page 19: Advanced Cable Hookup -With Cable Box And Splitter [G]
Select Cable Select Channel Output Channel to Watch Select Cable Select Channel Output Channel to Watch Select Cable Select Channel Output Channel to Record VCR indicator (Press the VCR/TV mode select button to turn the VCR indicator on or off.) -
Page 20: Auto Set Up
The VCR will automatically store channels received in your area. It takes about 2 - 3 minutes. When the auto set up is complete, the channel with the lowest number appears in the VCR's display. Notes If you press the POWER button inadvertently before connecting all cables, follow the steps on page 20 for further tuning function. -
Page 21: Setting The Clock
Tips 1 You'll need to set the clock when first hooking up your VCR, and any time the power goes out more than 30 seconds. When you first plug in the VCR or after a power outage, the clock display will read "--:--". - Page 22 YEAR, and then press the the year. 9 Press the GUIDE button. The VCR clock is now set, and should show the correct time of day on the VCR's display. Notes: The clock uses the 12-hour system. You set it for AM or PM.
-
Page 23: Pre-Tuning The Vcr Tuner
PRE-TUNING THE VCR TUNER PRE-TUNING THE VCR TUNER Note: An antenna or cable must be connected to the VCR before you begin this operation. Presetting the received channels without using a cable box (Hookups [A], [B], [C], or [D]) Press the POWER button to turn on the VCR. -
Page 24: When Automatic Presetting Of Channels Are Finished
6 Press GUIDE to return to regular viewing. Note: Your VCR is capable of receiving 68 broadcast TV channels (VHF 2 - 13, UHF 14 - 69) and cable channels (CATV 1 - 125). In some areas channels cannot be received when CATV1 is selected. In this case, select CATV2 in the receiving setup. -
Page 25: Auto Blue Setting
PRE-TUNING THE VCR TUNER 3 Press the cursor button to select the CHANNEL, and then press the ENTER button 4 Use the cursor buttons to select CH LIST <ADD/ERASE>, and then press the ENTER button. 5 Use the number buttons to select the number of the channel you want to add or erase. -
Page 26: Cable Box Setup
CABLE BOX SETUP The screen becomes blue and mutes sound when a channel without a broadcast signal on the VCR or a channel on which broadcasting has finished. If the signal is too strong, this function may not operate even if you specify ON. During playback this function does not operate. - Page 27 Or, if you want to select "NO", press the cursor button and then the ENTER button. If you select "YES", you need not operate "VCR PLUS + SETUP" (see page 44). During delayed recording, the VCR channel will automatically switch to the cable box output channel.
- Page 28 CABLE BOX SETUP The cable box output channel has now been set. However, the VCR does not control your cable box. Turn on the cable box and leave it tuned to the channel you want to record before the recording is scheduled to begin.
-
Page 29: Playback
4 Press the STOP button to end playback. Note: This VCR can quasi playback the tape that is recorded by S- VHS type. SQPB stands for S-VHS Quasi Playback. When VCR playback by SQPB, the inversion noise will appears on screen in STILL and... -
Page 30: Rewinding The Tape
PLAYBACK Rewinding the tape When the video cassette reaches the end of the tape, the VCR will stop and automatically rewind the tape. If you press the POWER button while the tape is rewinding, the power will not shut off until the tape has been completely rewound. -
Page 31: To Remove Noise From The Picture
Scratched tapes or poorly recorded tapes may require additional picture adjustment. You can do this with the remote control. Note: To reactivate auto tracking, simply eject the tape and reinsert it into the VCR. Press the CH ( ) button on the remote control or TRACKING button on the VCR when viewing a cassette. - Page 32 After 1 minute in the PAUSE mode, the VCR automatically switches to STOP mode to protect the tape. If noise bars appear on the TV screen during the PAUSE mode, first set the VCR to the SLOW mode by pressing the SLOW button during playback and then press the CH ( control to minimize the noise bars (see page 28).
-
Page 33: Slow Motion
Press the STOP button to stop the tape. Notes: Use the CH ( ) button to minimize any visual noise bands on the screen. After 1 minute in slow motion playback, the VCR will stop the tape automatically to prevent damage to tape and VCR. -
Page 34: Choosing A Mode For Audio Playback
Choosing a mode for audio playback The VCR records the same audio on both the Hi-Fi and linear tracks on the tape. The Hi-Fi sound is recorded on separate left and right stereo channels. Monaural sound is recorded on the linear track. - Page 35 Select Hi-Fi to playback sound recorded on the Hi-Fi track and for normal use. The [L] and [R] indicators will light in the VCR's display panel. Select LINEAR to play back the sound recorded on the linear monaural track. Also, if the audio sounds distorted or unusual or there is no audio, select LINEAR.
-
Page 36: Using The "Super Index" Feature
2 If this is the program you were looking for press the PLAY button for normal playback. To stop the index search before an index mark is reached, press the STOP button. Note: If there are no index marks on the tape, the VCR will just rewind to the beginning or fast forward to the end. -
Page 37: Locating The Beginning Of A Blank Section (Blank Search)
The blank square in the tape bar shows the current tape position. The tape remaining time appears on the screen and VCR display during BLANK SEARCH. When a blank is detected, the tape will automatically rewind to the beginning of the blank. -
Page 38: Switching Rewind Or Fast Forward To Visual Search (Easy View)
USING THE "SUPER INDEX" FEATURE Switching rewind or fast forward to visual search (EASY VIEW) Hold down the (VIEW/SKIP/BLANK) button during rewind (or fast forward), and the mode will switch to visual search, so that you can search for a scene you want to view while scanning pictures. Hold down the (VIEW/SKIP/BLANK) button during rewind: The tape will be visually scanned in the reverse direction while the button is held. -
Page 39: Viewing The On-Screen Display
Press DISP while the on-screen display is displayed. The on-screen display switches in the order below together with the VCR's display.. Press the DISP button to see the clock.. Press the DISP button a second time to see just the time counter. -
Page 40: Index With The Time Counter
1 Press the DISP button two or three times. The counter will appear in the VCR's display. 2 Begin recording or playing back a tape. 3 At the point that you want to go back to, press the CLEAR button. -
Page 41: Recording A Program
Before you record Note: The cassette safety tab must be in place in order to record. The VCR must be hooked up properly for recording. See the Simple Hookups at the beginning of this manual. Copyright infringement warning Most television programs and films are copyrighted. This means that someone has legal rights governing the reproduction and distribution of this material. - Page 42 Press the PAUSE button to set the VCR to the recording pause mode. Press the button again to re-start recording. If you stay in PAUSE mode for more than 5 minutes, the VCR automatically switches to STOP mode to protect the tape.
-
Page 43: Recording A Program - Recording Tips
TV (see page 50). Notes: You can check on the recording by pressing VCR/TV again. This will switch you back to viewing through VCR, and you'll see the program you are recording. If you're hooked up with an audio/video cable: Switch the TV from AUX or VIDEO mode back to the TV mode, then select the channels you want to watch, as described in Step 2. -
Page 44: To Record A Second Audio Program (Sap)
3 Press the PAUSE button to continue recording. Automatic Indexing Your VCR will automatically create an invisible "INDEX" mark every time you press the REC button while recording. During playback, the Index Search feature will let you move through a tape that has several on it by searching for the "INDEX"... -
Page 45: Stereo Vs. Mono Sound
Stereo vs. mono sound When you select the STEREO option in the initial setup operation, your VCR records in stereo any station that broadcasts stereo sounds. When a TV channel broadcasts in stereo, you'll see a stereo indicator on the TV screen. - Page 46 RECORDING A PROGRAM -RECORDING TIPS Note: When you select MONO, sound is recorded as mono even when a channel broadcasts in stereo.
-
Page 47: Instant Recording Timer
You may increase the recording time by 30 minutes each time you press the REC/IRT button. While you are recording, the remaining recording time is shown on the VCR display. At the end of your recording, the display will read "0:00", recording will stop automatically, and the VCR will turn itself off. -
Page 48: Delayed Recording
8 timed recordings at once. Recording is even easier when have set up your channels for the VCR Plus+ system. Learn the basics of delayed recording in this section. Then read about the VCR Plus+ system beginning on page 43. - Page 49 4 Press the ENTER button to bring up the screen for One Time Recording EXAMPLE: Set the VCR to record "one time", a program on Channel 8 that starts at 6:00 PM and records for 30 minutes on 7/10/99, at the EP recording speed.
- Page 50 DELAYED RECORDING button to change the hour. 8 Press the cursor button to select the minutes, and then press the cursor button to change the minutes. If you have installed a cable box (see page 23), the cable box output channel will appear in the CH column.
- Page 51 TAPE SPEED button to change the recording speed to EP. 11 Press the cursor to select the recording date, and then press the cursor button to change the date. 12 Press the PROG./VCR+ button to set the program in memory.
- Page 52 DELAYED RECORDING Note: If program is overlap, the VCR gives you an error message that disappears from the screen in about 5 seconds. 13 Press the POWER button to turn off the VCR. The delayed recording indicator will display on the VCR.
-
Page 53: Using The Vcr Plus+ System For Recording
These are the VCR Plus+ channel numbers that you will use in the channel setup procedure. 2 Make a list of the VCR Plus+ channel numbers and the channel numbers you are receiving them on. If there are any differences, YOUR channel numbers must be assigned to the corresponding VCR Plus+ numbers. -
Page 54: Easy Delayed Recording With The Vcr Plus+ System
23 "cable box setup" in "First Time Setup" section. The following operation is not necessary. VCR Plus+ setup - Channel setup The following shows the procedure you should perform when you are receiving the Cable News Network (channel 42 with the VCR Plus+ system) on channel 38. Example VCR Plus+ Channel Number... -
Page 55: Using The Vcr Plus+ System To Record A Program (By Using Tv Screen)
"NO", and then press the ENTER button. A small arrow points to a blank "- -" in the CHANNEL column. Note: If your broadcast channel number is the same as the VCR Plus+ Channel in your TV listing do not enter any number. - Page 56 2 Press the PROG./VCR+ button to select VCR PLUS+ RECORDING. If eight programs have already been stored in memory, "FULL" will flash in the VCR's display for about five seconds. The screen on the right (below) will not appear at this time.
- Page 57 7 Review the screen to be sure everything is set as you want, then press the PROG./VCR button to complete your programming or continue with additional programs. Note: If program is overlap, the VCR gives you an error message that disappears from the screen in about 5 seconds.
-
Page 58: Using The Vcr Plus+ System To Record A Program (By Using Vcr's Display)
VCR and TV. Notes: If you use the VCR Plus+ system to program the timer while observing the VCR's display, you can only program a one-time recording. To stop programming, press the POWER button to turn the VCR power on. - Page 59 The delayed recording indicator ill display on the VCR. This tells you that the VCR will automatically record at the times and dates you have programmed. Note: If a cassette has not been inserted or a cassette without safety tab has been inserted, the delayed recording indicator will flash to warn you.
- Page 60 EASY DELAYED RECORDING WITH THE VCR PLUS+ SYSTEM 3. Press the TAPE SPEED button to switch the recording mode.
-
Page 61: Program Review
4 Each time pressing the button to cycle through all the programs you have preset. The screen will display the next program, if there are more, or it will switch back to the main menu 5 Press the PROG./VCR+ button to end. -
Page 62: Programming The Vcr Remote To Control Your Tv
PROGRAMMING THE VCR REMOTE TO CONTROL YOUR TV PROGRAMMING THE VCR REMOTE TO CONTROL YOUR TV The VCR remote control can be programmed to control many TV brands that are remote controlled. 1 Turn on the TV. 2 Point VCR remote control toward TV. -
Page 63: Using The Vcr Remote To Control Your Tv
PROGRAMMING THE VCR REMOTE TO CONTROL YOUR TV Using the VCR remote to control your TV 1 Press the "TV" button on remote control. 2 Point VCR remote control toward TV. 3 Press buttons corresponding the functions available on your TV remote control. -
Page 64: Programming The Vcr Remote Control To Control Your Cable Box
PROGRAMMING THE VCR REMOTE CONTROL TO CONTROL YOUR CABLE PROGRAMMING THE VCR REMOTE CONTROL TO CONTROL YOUR CABLE BOX The VCR remote control can be programmed to control many cable boxes that are remote controlled. You can easily change channels. 1 Turn on the cable box. -
Page 65: Using The Vcr Remote To Control Your Cable Box
PROGRAMMING THE VCR REMOTE CONTROL TO CONTROL YOUR CABLE for your cable box. Using the VCR remote to control your cable box 1 Press the "CATV" button on remote control. 2 Point VCR remote control toward cable box. 3 Press buttons corresponding to the functions available on your cable box remote control. -
Page 66: Integrating Your Stereo System With Your Vcr
BEFORE YOU BEGIN... Make sure the VCR is connected to your stereo system, as shown above. Make sure that "STEREO" audio is selected from the VCR Set-Up Menu, as shown on page 38, of "RECORDING OPERATIONS" section, "Stereo vs. mono sound". -
Page 67: Copying Tapes From A Camcorder
VCR. 1 Press the AVX button twice on remote control, to display LINE on the TV display. 2 Press the REC, then PAUSE buttons on the VCR remote control. The VCR will go into Record/ Pause. 3 Press the PLAY button on the camcorder. You will see the camcorder tape being played on the... -
Page 68: Copying From One Vcr To Another Vcr (Dubbing)
(DUBBING) Hookup If you have two VCRs, you may use one VCR to record a tape that is being played back in the other VCR. To copy from one VCR to another VCR 1 Press the AVX button on the remote control of VCR-1 so that L (line) appears in the display. - Page 69 3 Press the PLAY button on VCR-2. You will see the taped program being played on the TV. 4 When you see the part of the program you wish to record, press the PAUSE button on VCR-1 again to release pause and start recording.
-
Page 70: Problem Guide / Maintenance
Please consult your service dealer for further information. NOTE: Dirt accumulation on the video heads will cause the playback picture to become noisy. The VCR may require the video heads to be professionally cleaned by a qualified service dealer. -
Page 71: Guide Indications In The Vcr Display
GUIDE INDICATIONS IN THE VCR DISPLAY GUIDE INDICATIONS IN THE VCR DISPLAY Guide indications in VCR display and OSD screen The following indications appear in the VCR display and OSD screen to tell you the current status of your VCR. Indication... -
Page 72: Technical Specifications
1 remote control unit (Part No. HL11163) , 2 AA batteries * Check your cable company's compatibility requirements. For information about how to obtain these and other HITACHI accessories, please call HiTRON, Inc. TOLL FREE at 1-800-995-4500 (in the continental United States). For ALASKA and HAWAII, please contact the nearest Hitachi Regional Office.
Need help?
Do you have a question about the VT-FX6510A and is the answer not in the manual?
Questions and answers