Table of Contents
Advertisement
Advertisement
Table of Contents

Related Manuals for Nvidia 3DForce4-MX440 Series


Summary of Contents for Nvidia 3DForce4-MX440 Series
- Page 1 3DForce4-MX440 Series nVIDIA GeForce4 MX440 User’s Manual Version 6.00...
-
Page 2: Table Of Contents
C o p y r i g h t © 2 0 0 1 J a t o n C o r p o r a t i o n , U S A Contents INTRODUCTION ............5 FEATURES ..............6 AGP B ............. - Page 3 ÿ ÿ ....... 18 INDOWS RIVE NSTALLATION ÿ ÿ NT™4.0 ......22 ICROSOFT INDOWS ÿ ÿ 2000 D ....27 INDOWS RIVER NSTALLATION ÿ ÿ XP D ...... 30 INDOWS RIVER NSTALLATION 3D LC SHUTTER GLASS .......... 34 ..........34 ARDWARE OMPONENTS 3D LC...
- Page 4 -15 P ........48 ONVERSION ABLE ............ 48 ECHNICAL UPPORT LIMITED WARRANTY..........52 .............. 52 THER IMITS ..........53 XCLUSIVE BLIGATION ............. 53 THER TATEMENTS ..........53 ERMS AND ONDITIONS : ..........54 ERVICES AGREEMENT ............54 NTIRE BLIGATION REDUCING WARRANTY CLAIM REJECTIONS....
-
Page 5: Introduction
A leverage of hardware and software technology combination, features and benefits from nVIDIA GeForce4™ MX GPU that provides cost-effective, high-performance integrated, unprecedented quality and resolution. With all of this, 3DForce4-MX440 Series video cards bring a new level of graphics accomplishment and flexibility to the mainstream desktop PC. -
Page 6: Features
Features AGP Bus Interface AGP 4x/2x with Fast Write AGP Texturing support Graphics Processor Unit (GPU) 256-bit graphics engine 64MB DDR SDRAM with 128bit access bus. Integrated dual 350MHz RAMDACs drives two independent CRT displays (Twin optional only) 2 dual 128bit pixel pipelines rendering Surface engine for high-order surfaces and patches Programmable Vertex Shader Programmable Pixel Shader... -
Page 7: Performance
True, reflective bump mapping High-performance 2D rendering engine API support - DirectX 8.1 and lower Compatibility nVIDIA Unified Driver Architecture Industry’s first fully compliant professional OpenGL 1.3 support for Windows® operating systems Windows® 98, Windows Me, Windows®NT™4.0, Windows® 2000, and Windows XP... -
Page 8: System Requirement
System Requirement Intel Pentium® II, III or P4, or compatible system with AGP4x Bus Extension Slot CD-ROM drive, Double speed or faster Hard Drive with at least 10MB Free space MS Windows® 98/Me/NT 4.0/2000/XP operating systems Check List 3DForce4-MX440, or 3DForce4-MX440Twin Multimedia Accelerator 3”... -
Page 9: Hardware Description
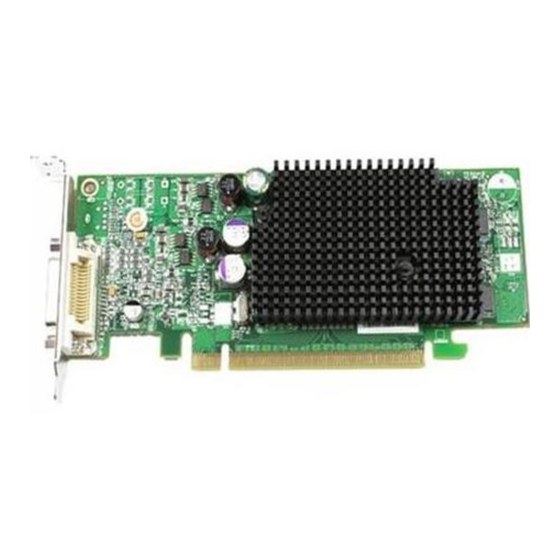
DB 15 VGA Product Name / PCB Version Core Chipset PCB Size Memory / Size 3DForce4-MX440 82158A nVIDIA GeForce4 MX440 4M*32 DDR SDRAM x 4 64MB W = 6.9" x H = 3.8" 3DForce4-MX440 82158B nVIDIA GeForce4 MX440 4M*16 DDR SDRAM x 8 64MB W = 6.9"... -
Page 10: Display Devices Output
Display Devices Output Display Devices Output Plate Convert Cable S_Video Connector MD 4Pin TV set Composite RCA DB 15 VGA Connector PC Computer RGB out - DB15 VGA connector to an Analog monitor. TV out - MD4 connector to a TV set S_Video input or a RCA Composite Video input. AGP Plate DB 15 VGA Connector (Additional output Connector) -
Page 11: Operable Tvout Cables
Operable TVout Cables Operable TVout Cables Jaton video card has built TVout connectors onboard in a vary alternative arrangement, and the suitable convert cables for these connectors may also code in different to the user’s documentation. The following description is the updated inforamtion for users to verify the convert cable with his/her purchase of Jaton video card. -
Page 12: Hardware Installation
Hardware Installation Installation Procedures !! WARNING !! Discharge static electricity by touching the GROUND such as metal part of your case connected with good power ground before you handle the electronic circuit boards. The manufacturer assumes no liability for any damage, caused directly or indirectly, by improper installation of any components by unauthorized service personnel. - Page 13 above the expansion slot connector on the motherboard. Then press the adapter into place, completely. Use the (remaining) screw you removed to secure the adapter- retaining bracket in place. Replace the computer cover. Secure the cover with the mounting screws you removed in Step 3. You have now completed the installation of your new graphics adapter on your system.
-
Page 14: Software Installation
3. Insert the software’s CD. 4. Check [Specify a location:] ,Under that enter D:\Win9x, then select [Next]. 5. Select [Next] to install “3DForce4-MX440 Series, nVIDIA GeForce4 MX 440” driver. 6. Select [Finish] to restart the computer. To a new system: SELECT the “Display”... - Page 15 D:\Win9x ,click the OK button. (Where D is the letter of your CD ROM drive, typically, D or E Drives, etc.) 9. Select ”3DForce4-MX440 Series , nVIDIA GeForce4 MX 440”, then Click the OK button. 10. Click the Next button.
- Page 16 driver installation that provided from Video Adapter manufacturer. Autorun feature brings-up the “Welcome Screen”, and you may pointing on “display driver” then press on it. Microsoft InstallShield Wizard has start loading its setup process, please wait until it finished.
- Page 17 Click on “Next” to continue the process. Windows system has copying all driver files from source media to your local hard disk, please wait until the process is over.
-
Page 18: Windows Me Drive Installation
Click on “Finish” to restart your computer, the new display driver will in placed after the Windows boots-up. ÿ Windows Me Drive Installation Upgrade video adapter to an existing system. (Windows has been pre-loaded) Select [Next] to install Standard VGA Graphics Adapter at Add New Hardware Wizard screen. - Page 19 Check [Specify a location:] ,Under that enter D:\Win9x, then select [Next]. Select [Next] to install “3DForce4-MX440 Series, nVIDIA GeForce4 MX 440” driver. Select [Finish] to restart the computer. To a new system: SELECT the “Display” icon from control panel and then tab on “Settings”...
- Page 20 InstallShield Program: Since the Microsoft InstallShield program has been added on our software’s CD, the Display Driver Installation and its procedures are much easier for users whom running with Windows 95/98/Me operating systems. When you powered the computer and boots-up in the Windows, the Plug-n-Play detects a new hardware and pops-up install wizard.
- Page 21 Microsoft InstallShield Wizard has start loading its setup process, please wait until it finished. Click on “Next” to continue the process.
-
Page 22: Microsoft Windows Nt™4.0
Windows system has copying all driver files from source media to your local hard disk, please wait until the process is over. Click on “Finish” to restart your computer, the new display driver will in placed after the Windows boots-up. ÿ... - Page 23 “X:\Winnt4\”. (X: is the CD ROM drive where the Software & Documents CD has been inserted.) If the driver “3DForce4-MX440 Series, nVIDIA GeForce4 MX 440” is listed under the Display list, SELECT the “OK” button to continue.
- Page 24 procedures are much easier for users whom running with Windows NT™ operating system. After the desktop loaded with service pack 6 completely, insert the software’s CD into CD ROM drive and proceed the display driver installation that provided from Video Adapter manufacturer. 1.
- Page 25 Click on “Next” to continue.
- Page 26 Scroll down and Select on the “3DForce4-MX440 Series, nVIDIA GeForce4 MX440” , then click on “OK” for next screen. Windows system has transmitting all driver files from source media to your local hard disk, please wait until the process is over.
-
Page 27: Windows 2000 Driver Installation
Check [Specify a location:] Under [Copy manufacturer’s files from:] enter D:\WIN2K&XP, where D is your CD_ROM drive. Then click on [OK]. Select [Next] to install “3DForce4-MX440 Series, nVIDIA GeForce4 MX 440” driver. Select [Finish] to restart the computer. InstallShield Program: Microsoft Windows®2000 detects this new hardware and... - Page 28 Autorun feature brings-up the “Welcome Screen”, and you may pointing on “display driver” then press on it. Microsoft InstallShield Wizard has start loading its setup process, please wait until it finished.
- Page 29 Click on “Next” to continue the process. Click on “Yes” to continue the installation. Otherwise, you may terminate the process by click on “No”.
-
Page 30: Windows Xp Driver Installation
Click on “Finish” to restart your computer, the new display driver will in placed after the Windows boots-up. ÿ Windows XP Driver Installation Upgrade video adapter to an existing system. (Windows has been pre-loaded) Select [Next] at Found New Hardware Wizard. Check [Search for a suitable driver for my device (recommended) ]then select [Next]. - Page 31 Select [Next] to install “3DForce4-MX440 Series, nVIDIA GeForce4 MX 440” driver. Select [Finish] to restart the computer. InstallShield Program: Microsoft Windows® XP detects this new hardware and places appropriate display driver from its system folder automatically, it doesn’t matter you have add a new or change the existing one.
- Page 32 Microsoft InstallShield Wizard has start loading its setup process, please wait until it finished. Click on “Next” to continue the process.
- Page 33 4. Click on “Continue Anyway” to carry through the installation. Otherwise, you may terminate the process right away.
-
Page 34: 3D Lc Shutter Glass
Click on “Finish” to restart your computer, the new display driver will in placed after the Windows boots-up. Notice: We believed that the all steps where mentioned above are the clear and correct procedures for install display driver from manufacturer software’s CD to your operating system, other than these processes are not specified. -
Page 35: Hardware Specification
50(w/o wire) Dimension(cm 62 x36 x12.7 (w/o connector) Certification FCC / CE Patent Applied pending System requirement 3D Acceleration Any chipset from one of the following Card nVIDIA product families: TNT (including any TNT2 and Vanta products) GeForce (including any GeForce256,... -
Page 36: Hardware Installation
Memory 8 MB System Memory. Windows 95/98/Me/XP/2000, with DirectX8 runtime installed. VGA Driver nVIDIA Detonator XP(v22.90 or later) driver installed. Stereoscopic nVIDIA Stereo Driver (StereoE.exe). Driver Games Support Direct3D(D3D) and OpenGL. Photos Support JPS format Hardware Installation Connection... - Page 37 PC monitor G. Bolt Monitor's VGA signal input APEC’s graphic card cable C. VGA-PT synchronizer Graphic card's VGA output signal port D. 15-pin male connector 3D LC shutter glasses 15-pin female connector 3D LC shutter glasses’ plug Glasses jack Steps: Turn off power of the computer.
- Page 38 Connect VGA-PT synchronizer(c) 15-pin male connector (d) to graphic card's VGA output signal port (i). Screw in the bolts(g) solidly. Connect monitor's VGA signal input cable (b) to VGA-PT synchronizer(c) 15-pin female connector (e). Connect 3D LC shutter glasses' plug (k) to VGA-PT synchronizer(c) glasses jack (f).
- Page 39 3D LC shutter glasses will not work unless nVIDIA’s stereoscopic effect is enabled. Do not turn off and on your monitor when using stereo mode. nVIDIA’s stereo signal may be malfunction if monitor’s power is reset. APEC’s LC shutter glasses will detect the stereo signal and stop working automatically if the correct stereo signal is not provided.
-
Page 40: How To Wear Apec's 3D Lc Shutter Glasses
Software Installation It is necessary to install three driver programs, i.e. DirextX 8.0, nVIDIA basic VGA driver (Detonator XP/v22.90 or later) and nVIDIA stereo driver (StereoE.exe) on nVIDIA’s VGA cards. Please follow the instructions and install those three drivers. -
Page 41: You Must Install The Following Drivers According To The Listed Sequence
3D photos with JPS format, DirectX 8.0 - You may click on “DirectX” selectable text from Welcome screen picture. nVIDIA VGA Driver - You may click on “Display Driver” selectable text from Welcome screen as mentioned previously. - Page 42 Some monitors lack auto-sizing features or just do not synchronize properly to the video board output. In some cases, horizontal and vertical display adjustments may be necessary. Use the monitor control panel functions to adjust screen. In other cases, mode type and refresh rate adjustments may be necessary.
- Page 43 There are many reasons to causing the system booting-up with un- appropriated steps. Base on Microsoft support wizard on their WEBsite, there are many technical articles to help users with this subject, such as troubleshooting with VXD errors, virus, Fatal exceptions, etc., more details cover on each issue are descriptive and familiar with, and exclusively further to our support.
-
Page 44: Frequently Asked Questions (Faq)
function properly with virtually every video board and VGA (or SVGA) monitor available. If that is an unsatisfactory solution, you may have to upgrade to a monitor that supports the desired video mode. Some new monitors are also synchronizing this problem because built-in DDC (Data-Digital-Channel) feature. - Page 45 “Rendering Engine” generically applies to the part of the graphics engine that draws 3D primitives, usually triangles. In most implementations, the rendering engine is responsible for interpolation of edges and "filling in" the triangle. Q3 What does the set-up engine do in a graphics controller? Answer A set-up engine allows drivers to pass triangles in the form of raw vertex information;...
- Page 46 their demands. No current CPU or system can perform advanced quality-enhancements (bilinear filtering and alpha blending) in real time. Even general case texture mapping with RGB lighting is too much for the current CPU generation. Q6 What does "software 3D" mean? Answer Software 3D is generally used to mean using non-specific (2D) hardware in conjunction with the CPU to render for 3D applications.
-
Page 47: Pinout And Sync Frequencies
Pinout and Sync Frequencies Analog Color Display Pinouts (DB 15) FUNCTION Red Video 1 Green Video 1 Blue Video 1 Not Used Ground Red Return (ground) Green Return (ground) Blue Return (ground) Vcc (+5v DDC Power) Sync Return (ground) Monitor ID (not used) SDA (DDC support) Horizontal Sync Vertical Sync... -
Page 48: 9-To-15 Pin Conversion Table
match the specifications in Table to work properly with your new card. The adapter cable requires a D-shaped 9 pin female connector and a D-shaped 15 pin male connector. 9-to-15 Pin Conversion Table 9 PIN SIGNALS PIN NO. 15 PIN SIGNALS PIN NO. - Page 49 þ System Information, such as CPU speed, BIOS version, Monitor Specification, etc. þ Description of the problems including any error messages. Telephone: (408) 934-9369 9-5 PST Mon. - Fri. FAX: (408) 942-6699 email: vgasupport@jaton.com Website: www.jaton.com NOTICE The information in this document is subject to change in order to improve reliability, design, or function without prior notice and does not represent a commitment on the part of the company.
- Page 50 CAUTION: Changes or modifications not expressly approved by the Manufacturer could void your authority to operate this equipment in accordance with FCC rules and regulations. SOFTWARE LICENSE AGREEMENT: The Company grants the customer a non-exclusive, non-transferable license to use the software in this package for internal use on a single computer system. No other license of any kind is granted to any part of the product or any of the intellectual property therein.
- Page 51 This product incorporates copyright protection technology that is protected by method claims of certain U.S. patents and other intellectual property rights owned by Macrovision Corporation and other rights owners. Use of this copyright protection technology must be authorized by Macrovision Corporation , and is intended for home and other limited viewing used only unless otherwise authorized by Macrovision Corporation.
-
Page 52: Limited Warranty
Limited Warranty. Manufacturer warrants that the products sold hereunder are free from defects in material and workmanship for a period of two (2) years from manufacturing date. This limited warranty applies only to the original purchaser of Jaton Product and is not transferable. This limited warranty does not apply if failure to the Product Registration, or over thirty (30) days from purchase (original invoice date). -
Page 53: Exclusive Obligation
Exclusive Obligation. This warranty is exclusive. The sole and exclusive obligation of Manufacturer shall repair or replace the defective products in the manner and for the period provided above. Manufacturer shall not have any other obligation with respect to the Products or any part thereof, whether based on contract, tort, and strict liability or otherwise. -
Page 54: Services Agreement
Others: If the products do not conform to this Limited Warranty (as herein above described), Manufacturer should charge services such as repair, replacement whether based on its costs. Shipping and installation of the replacement Products or replacement parts shall be at User’s expanse. -
Page 55: Reducing Warranty Claim Rejections
the remainder shall remain in force and effect. Some states do not allow limitation of implied warranties, or exclusive or limitation on product incidental or consequential damages, so above limitation may not apply to you. This warranty gives you specific legal rights. You may have other rights, which may vary from state to state. - Page 56 We believe it is important for you to know and understand what your warranty coverage provides and what it does not. We also want you to be aware that most hardware warranties only relate to the function of the hardware. In most cases, no assurances are given by the manufacturer that the hardware item will work in conjunction with any other hardware item.
Need help?
Do you have a question about the 3DForce4-MX440 Series and is the answer not in the manual?
Questions and answers