Table of Contents
Advertisement
Advertisement
Table of Contents

Subscribe to Our Youtube Channel
Related Manuals for Samson C01U


Summary of Contents for Samson C01U
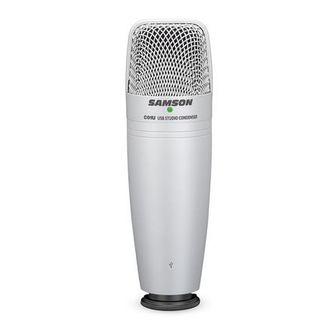
- Page 1 C01U USB Studio Condenser Microphone...
-
Page 2: Table Of Contents
C01U Features Installing the C01U Getting Started with MAC OS X Getting Started with Windows XP Getting Started with Windows 98 Using the C01U Driver Software Setting a Good Level Using the C01U Driver Software Operating the C01U Powering the C01U... -
Page 3: Introduction
In these pages, you’ll find a detailed description of the features of the C01U Studio Condenser Microphone, as well as step-by-step instructions for its setup and use, and full specifications. -
Page 4: Installing The C01U
Installing the C01U is a simple procedure that takes just a few minutes. Since the C01U is USB compliant, you can use either a MAC or PC, connect the included USB cable and plug and play. You will be able to control your C01U using the standard audio interface controls in the MAC or Windows operating system. -
Page 5: Getting Started With Mac Os X
At this point you can begin using your micro- At this point you can begin using your micro- phone, or if you want, you can use the C01U's phone, or if you want, you can use the C01U's expanded software features by loading the C01U driver as described in the following section, Using the C01U Driver Software "... -
Page 6: Getting Started With Windows Xp
Getting Started with Windows XP The following example is for setting up the The following example is for setting up the C01U in Windows XP with Service Pack 2. Other versions may vary slightly. 1. Plug in microphone. The LED will light to... -
Page 7: Getting Started With Windows 98
The following example is for setting up the The following example is for setting up the C01U in Windows 98. Note that the Samson C01U is not fully supported in Windows 98; the gain range is limited. It is still usable, however. - Page 8 6. Windows will then install the other components of the USB device. Follow the same procedure again (figure 2). 7. The C01U is now recognized as a Win- dows audio device by the name USB Audio Device (1). Each additional C01U will have a number added, such as USB Audio De- vice (2), and so on.
-
Page 9: Using The C01U Driver Software
The C01U has a onboard, digitally controlled analog INPUT GAIN stage which is con- trolled by the C01U software Fader. The fader control provides a range of gain from - 62 to +48 dB. The C01U can accept levels from most microphones by using the INPUT GAIN fader. -
Page 10: Using The C01U Driver Software
For a variety of miking and mixing techniques, it may be necessary to invert the sig- nal phase from the source you have plugged into your C01U and MikMaster software. When the PHASE switch is pressed in, the yellow LED will light showing that the... -
Page 11: Operating The C01U
In order to maximize the sound quality, you must pay careful attention to the place- ment of your C01U and how it is positioned for the instrument or vocalist that you are miking. All microphones, especially uni-directional or cardioid microphones, exhibit a phenomenon known as “proximity effect. -
Page 12: Setting Up The Signal Level
A good mic pre, like the C01U software control panel, also will have a LEVEL or CLIP indicators. To set a good level on the mic, set the C01U up in front of the desired sound source and slowly raise the input trim control until you see the CLIP or Peak indicator light up. -
Page 13: Using The Optional Sp01 Shock-Mount
Remove the C01U swivel mount by rotating the threaded collar counter- clockwise as shown in figure 1. • Install the C01U into the SP01 by fitting the microphone into the center of the web, positioning the C01U onto the bot- tom mounting plate. -
Page 14: C01U Specifications
C01U Specifications C01U Specifications Frequency Response 20~18000 HZ Polar pattern Hyper- cardioid Element type Back condenser type Diaphragm thickness 3 microns Sensitivity -33 dB/Pa 136 dB Weight 2 lbs. (30.9 kg) Dimensions Height: 7" (180 mm) Width: 2.125" (54 mm) Depth: 2.125"... -
Page 16: P.o. Box
Samson Technologies Corp. 575 Underhill Blvd. P.O. Box 9031 Syosset, NY 11791-9031 Phone: 1-800-3-SAMSON (1-800-372-6766) Fax: 516-364-3888 www.samsontech.com...
Need help?
Do you have a question about the C01U and is the answer not in the manual?
Questions and answers