Faroudja Native Rate Series Installation And Operation Manual
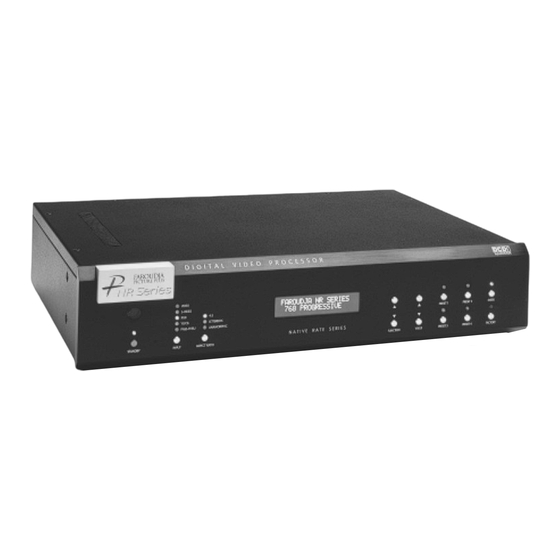
Digital video processor
Hide thumbs
Also See for Native Rate Series:
- Installation and operation manual (16 pages) ,
- Installation and operation manual (46 pages)

Related Manuals for Faroudja Native Rate Series

Summary of Contents for Faroudja Native Rate Series
- Page 1 Native Rate Series Native Rate Series Plus Digital Video Processor Installation and Operations Manual ™...
-
Page 2: Table Of Contents
No part of this document may be copied, photocopied, translated, or reproduced to any electronic medium or machine readable form without prior consent, in writing, from Faroudja Laboratories, Inc. The Faroudja name, logo and Picture Plus are registered trademarks of Faroudja, Inc. Specifications subject to change without notice. All Rights Reserved. -
Page 3: Installation
INSTALLATION UNPACKING REAR PANEL I/O Remove the NR Series unit from the shipping con- Inputs tainer and examine it for any signs of shipping 1. S-Video (4 Pin DIN) damage or missing items (check inventory list below). All shipping materials should be saved if 2. - Page 4 INSTALLATION CONNECTIONS OUTPUTS Because of the high performance of the NR Series 15. D15F connector for use with computer moni- unit it is very important to use the highest quality tors or to a second display device. cables possible, for both input and output signals. 16.
- Page 5 Function selected. Note: Do not activate the CPU Reset without 19. Custom Presets: Four presets per input. first contacting Faroudja technical support or your installer. This will reset all parameters to 10. Enter: Press to store presets or to enter the factory default and may cause compatibility menus.
-
Page 6: System Menu
SETUP • Press the Enter button, the Preset LEDs turn DCDi Mode: Red, the Enter LED turns Green. (Press Enter On (Default)/ Off again to cancel procedure) Should always be On • Press the Preset you want to use and the LED Film Mode: on that Preset will turn green and the LED on the On (Default)/Off... - Page 7 SETUP It is recommended that sizing and blanking adjust- I/R Setup - Press Enter ments be done with the display device controls Use this section to teach learning remotes the first to insure proper settings before using the fol- direct access codes. See the IR Setup section on lowing commands.
- Page 8 OPERATING INSTRUCTIONS IR REMOTE AND OSD OPERATION • Press Menu to recall the main index. There are four ways to control the unit: from the • Press Menu again to remove OSD front panel, with the remote control buttons, using the On-Screen-Display with the remote and via The OSD consists of four index tabs: RS232.
- Page 9 RS232 Pattern PICTURE On/Off Use these commands to fine tune the image Select Brightness Cr Ramp Contrast PLUGE Cb Ramp Tint 100IRE Window Luma Ramp Color Active Boarders 10-step Gray Scale Detail Convergence 100IRE Rev. CB Noise Reduction Blue 100IRE CB NOTE: Adjusting Detail –...
- Page 10 RS232 COMMAND FUNCTION COMMAND FUNCTION HELP Display Help Menu SYSTEM SETUP Report Current Status Power ON ECHO 0=Off, 1=On Power OFF Screen Shape, (0=Wide, 1=4x3, 2=Wide-4:3) Comp Sync 0=Off, 1=On INPUTS Sync on Green 0=Off, 1=On Video Input Output Mode (0-2) (0=RGB, 1=YCrCb, 2=YPrPb) S-Video Input Comp Sync...
- Page 11 IR SETUP COMMANDS IR REMOTE TEACHING FUNCTIONS Use the Function key to locate IR Setup Menu-Press Enter. Use the Value key to select the different com- mands. Each time the Enter button is pressed it “flashes” the commands out through the IR receiver win- dow on the front panel.
-
Page 12: Specifications
NTSC: 31.5KHz, 37.7KHz, 45KHz, or 48KHz- depending on model NTSC: 63KHz - Native Rate Series Plus only PAL: 31.2KHz, 37KHz, 40KHz - depending on model PAL: 53KHz - Native Rate Series Plus only 4.0 vpp TTL Vertical Sync: 60Hz/50Hz, 4.0 vpp TTL Composite Sync : 4.0 vpp TTL... -
Page 13: Warranty
Faroudja’s only liability with respect to products that do not meet the foregoing warranty, and for which appropriate transportation arrangements have been made, will be to repair or, at Faroudja’s option, replace defective products or portions thereof. THE FOREGOING WARRANTY IS IN LIEU OF ALL WARRANTIES EXPRESSED,...
Need help?
Do you have a question about the Native Rate Series and is the answer not in the manual?
Questions and answers