Advertisement
Available languages
Available languages
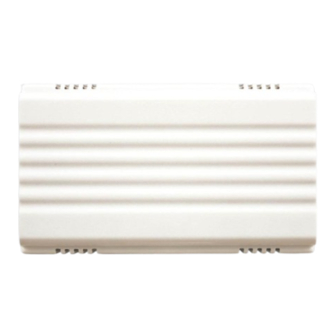
Model 23/M
This package includes (Style of chime may vary from illustration):
• Chime
• Mounting Screws
• Instructions
New installations require:
• Push Button (Non-Lighted)
• 4 - "C" Batteries or 1 - 8/10V Transformer
• #20 AWG Bell Wire (such as Heath
2
1
3
Base
Plate
Figure 1
To Push Button
1
2
3
Figure 2 - Battery Operation
To Push Button
1
2
3
To 8/10V
Transformer
Figure 3 - Transformer
Operation
© 2007 HeathCo LLC
®
/Zenith 196C or 199C)
Chime
MOUNTING THE CHIME
Cover
Position chime at eye level in desired room. Sound
travels farthest with the fewest obstacles. Do not place
over heat source; i.e., radiator, heater, or stove.
At the chosen location drill two small pilot holes
1
3
/
" apart in the vertical plane. The chime cover
4
is a push fi t onto the base. Remove chime cover
to expose base. Position base and mount in place
using screws supplied, key-hole shaped slot at the
top (see Figure 1).
WIRING THE CHIME
A. Battery Operation. Do not use with lighted push
button. Fit (4) "C" batteries noting + or - marked on
the base plate. Alkaline batteries offer longer life.
Batteries are not included.
To connect bell wire from chime to push button, cut
it to required length, strip back outer coating 1/2",
wrap exposed wire around chime terminals #1 and
#2 only and tighten screws. NOTE: No connection
to chime terminal #3 (see Figure 2).
B. For Transformer Operation Only.
WARNING: Turn off housepower before start-
ing installation. Failure to do so may result in
danger from electric shock.
Connect chime terminals #1 and #3 to the low
voltage terminals of an 8V or 10V transformer
®
(Heath
wire (see Figure 3).
Two-Note, Single
Entrance Chime
Battery or Transformer Operated
/Zenith 107C or 125C) using #20AWG bell
598-1134-02
Advertisement
Table of Contents

Related Manuals for Heath Zenith Single Entrance Chime 23/M


Summary of Contents for Heath Zenith Single Entrance Chime 23/M
- Page 1 Model 23/M This package includes (Style of chime may vary from illustration): • Chime • Mounting Screws • Instructions New installations require: • Push Button (Non-Lighted) • 4 - “C” Batteries or 1 - 8/10V Transformer • #20 AWG Bell Wire (such as Heath Chime Cover Base...
- Page 2 “old” chime and connect wires as follows: F to chime terminal #1; R to chime terminal #1 (NOTE: Rear door and front door will both sound the two-note (Ding-Dong) tune when either button is activated.); T to chime terminal #2.
- Page 3 Modelo 23/M Este paquete tiene (El estilo de la campana puede variar de la ilustración): • Timbre • Tornillos de Sujección • Instrucciones Las nuevas instalaciones precisan: • Pulsador de Llamada (No luminoso) • 4 - “C” Pilas Eléctricas ó 1 - Transformador 8/10V •...
- Page 4 Al Pulsador Transformador 8/10V Figura 3 - Funcionando con Transformador Situe el transformador encima de o junto a una caja de empalmes. Se puede situar también en el tablero eléctrico. Se prefi ere que la caja de empalmes se situe en cuarto de máquinas, espacio de baja altura, ó...
- Page 5 Modele 23/M Cet emballage contient (Le style de l’unité du carillon peut varier par rapport à l’illustration): • Carillon • Vis de Fixation • Instructions Les nouvelles installations nécessitent: • Bouton-Poussoir (Non allumé) • 4 - Piles “C” ou 1 - Transformateur 8/10V •...
- Page 6 Vers le Bouton- Poussoir Vers le Transformateur 8/10V Figure 3 - Fontionnement Avec Transformateur Les transformateurs doivent être montés sur ou près d’une boîte de dérivation. Ils peuvent aussi être montés sur le panneau électrique. Il est préférable d’installer les boîtes de dérivation dans les buanderies ou au sous-sol. Evitez, en autant que possible, de les installer au grenier.
- Page 7 NOTES/NOTAS ________________________ _____________________________________ _____________________________________ _____________________________________ _____________________________________ _____________________________________ _____________________________________ _____________________________________ _____________________________________ _____________________________________ _____________________________________ _____________________________________ _____________________________________ _____________________________________ _____________________________________ _____________________________________ _____________________________________ _____________________________________ _____________________________________ _____________________________________ _____________________________________ _____________________________________ _____________________________________ _____________________________________ _____________________________________ _____________________________________ 598-1134-02...
- Page 8 Chime Purchase Information Información de la compra de la campana Renseignements d’achat du carillon Model #: __________________________________ Nº de modelo / N° de modèle Date of Purchase: __________________________ Fecha de compra / Date d’achat Staple Purchase Receipt Here Engrape aquí el recibo de compra Agrafez le reçu d’achat ici Please keep your dated sales receipt, it is required for all warranty requests.
Need help?
Do you have a question about the Single Entrance Chime 23/M and is the answer not in the manual?
Questions and answers