Advertisement
Available languages
Available languages
Quick Links
RANGE
OWNER'S
MANUAL
Model
Numbers:
72471
75481
72478
75488
72691
75581
72695
75585
73281
75586
73288
75588
73481
75691
73485
75695
73488
75696
75381
75698
75388
Safety
Instructions
Anti-Tip
Device
2, 3, 34, 42
Important
Safety Instructions
2-6
Care
& Maintenance
Before You Gait for Service
43-45
Care and Cleaning
27-32
Consumer Services
46, 48
Repair Services
46
Thermostat
Adjustment
19
Warranty
47
Installation
Instructions
Air Adjustment
40, 41
Anti-Tip
Device
34, 42
Connect the Range to Gas
36-38
Caution:
Read and Follow
All Safety Rules
and Operating
Instructions
Before First Use
of ]'his Appliance.
Dimensions
& Clearances
33
Electrical Connections
38, 39
LP
42
Operation
Features of Your Range
7
Baking
t5-18
BroilingtBroiling
Guide
22, 23
Oven Control,
Clock andTimer
1I, 12
Roasting, Roasting Guide
20, 2t
Surface Cooking
9, !0
Sears,
Roebuck
and Co., Hoffman
Estates,
IL 60179 U.S.A.
t83D55gOP055
SR4247-1
3OSCG
PrUned in {_eU_itadSt_bes
Advertisement

Related Manuals for Kenmore 72471


Summary of Contents for Kenmore 72471
- Page 1 RANGE OWNER'S MANUAL Safety Instructions Anti-Tip Device 2, 3, 34, 42 Numbers: Model Important Safety Instructions Caution: 72471 75481 Care & Maintenance Before You Gait for Service 43-45 Read and Follow 72478 75488 Care and Cleaning 27-32 72691 75581 Consumer Services...
- Page 2 Important Safety instructions Read all instructions before using this appliance. IMPORTANT SAFETY NOTICE WARNING: If the information in this manual * The California Safe Drinking Water and Toxic is not followed exactly, a fire or explosion may Enforcement Act requites the Governor result causing property damage, personal...
- Page 3 tLV4ARNING-- • Do not attempt to repair or replace any part your range unless it is specifically recommended All ranges can tip and injury could in this manual. All other servicing should result. To prevent accidental referred to a qualified technician tipping of the range, attach it to the...
- Page 4 important Safety instructions (cont,°°ed) • Never wear loose fitting ( '::9 Surface Cooking ginggarm tswhil Always LITE position (on models with ° use the using the appliance. electric ignition) or the HI position (on models careful when reaching for items stored in cabinets over with...
- Page 5 • Do not use a wok on models with sealed burners * Do not leave any items on the cooktop. The hot ff the wok has a round metal ring that is placed air from the vent may ignite flammable items and over the burner grate to support the wok.
- Page 6 Important Safety Instructions Baking, Broiling Roasting Self-Cleaning Oven = Do not use the oven for a storage area. Items * Do not dean the door gasket. The door gasket is stored in the oven can ignite. essential for a good seal Care should be taken nor to rub, damage...
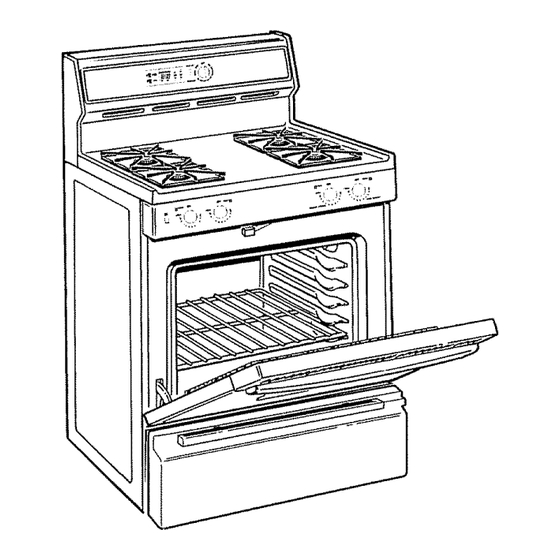
- Page 7 Features of Your Range NOTE: all models have all features. Appearance of features varies. Burner c_p Or_p p_n ¢ ¢ _Bu,oo, ¢ Your range is equipped with one of the two types of surface burners shown above. € © ¢ Feature Index Feature Index See Page...
- Page 8 Surface Cooking Surface Burner Controls Lighting Instructions The toaobs that turn the surface burners on and off are Your surface burners ate lighted by electric ignition, eliminating the need for standing pilots with located on the control panel in front of' the burners.
- Page 9 Select Flame Size To Light a Surface Burner Push the control knob Watch the flame, not the knob, as you reduce heat. and turn it to LITE. You will The flame size on a gas burner should match hear a little clicking noise-- cookwam you ate using.
- Page 10 Surface Cooking (co.t °ued) Top-of-Range Cookware This Way (on models with sealed burners) Aluminum: Medium-weight cookware We recommend that you use recommended because it heats quickly and evenly. a fiat-bottomed wok° They Most foods brown evenly in an aluminum skillet. are available at your local saucepans...
- Page 11 Oven Control, Clock and Timer ( ppo oo o AUTOMATIC OVEN /O.OD- tD.'aD "°°" "" 450" 1. COOK TIME ONtOFF. Press this pad for Timed CLEAN Light. Glows when the oven is in the Baldng operations. self-clean cycle. After the setf2clean cycle, the light will flash.
- Page 12 Oven Control, Clock and Timer (coot,..e ) Automatic Clock of Cycle Tones (on some models) The clock must be set for the automatic oven timing functions to work properly. The time of day cannot The end of cycle tone can be cleared by pressing changed during...
- Page 13 Using Your Oven Oven Vents Before UsingYour Oven Be sure you understand how to set the control The oven is vented through duct openings at the rear properly_ Practice tenaoving and replacing the shelves of the cooktop, See the Features sectiom Do not block these openings...
- Page 14 Using Your Oven (co.t .00 ) Oven Shelves Shelf Positions The shelves are The oven has five shelf' designed with stop- supports for baking locks so, when placed roasting A (bottom), B, C, correctly on the shelf D and E (top). It also has a supports, they will stop...
- Page 15 Baking during Preheating Do not lock the oven door with the latch baking. The latch is used for self-cleaning only. Preheat the oven if the recipe calls for it. Preheat means Your oven temperature is controlled very accurately bringing the oven up to the specified temperature using an oven control system.
- Page 16 aking (continued) Aluminum Foil Cookies Never cover the oven When baking cookies, bottom with aluminum flat cookie sheets foil. (without sides) produce better-looking cooldes. Never entirely cover a Cookies baked in a jelly shelf with aluminum roll pan (short sides all foil.
- Page 17 Timed Baking (on some models) to Set Immediate Start How to Time Bake Automatic Stop Do not lock the oven door with the latch during timed baking. The latch is used for self-deaning To avoid possible burns, place the shelves in the only.
- Page 18 Timed Baking (continued) How to Set Delay Start Turn the Oven Set knob to the desired temperature Automatic Stop [in this example 325°E (163°C.)], The oven is now set to start at 4:00 and cook for Quick Reminder: 3 hour's at a temperature of325°E (163°C.)_ At the...
- Page 19 Adjust the Oven Thermostat--Do It Yourself! To AdJust the Temperature on Models You may Find that your new oven cooks differently than the one it replaced. We recommend that you use with Only an Oven Set Knob your new oven for a few weeks to become more 1.
- Page 20 Roasting Do not lock the oven door with the latch during 3. Turn die Oven Set knob to the desired temperature° roasting. The latch is used for self-cleaning only. See the Roasting Guide for temperatures approximate cooking times. Roasting is cooldng by dry heat.
- Page 21 Roasting Guide Oven Approximate Roasting Time Internal Type Temperature Doneness in Minutes per Pound Temperature 3 to 5 lbs. 6 to 8 lbs. Meat (1.4 to 2.3 kg) (2.7 to 3.6 kg) 18-25 140-150°E (6o-66°C)1 24-35 Tender cuts; rib, 325°E (t63°C) Pare: 25-31...
- Page 22 Broiling of Aluminum Foil Do not lock the oven door with the latch during broiling. The latch is used for self-cleaning only. You can use aluminum Broiling is cooking food by direct heat fiom above the foil to fine your broiler food.
- Page 23 Broiling Guide • When arranging food on the pan, do not let fatty oven door must be closed during broiling, edges hang over the sides because dripping fat could • Always use the broiler pan and grid that comes with soil the oven.
- Page 24 Operating the Self=Cleaning Oven Before a Clean Cycle Do not use abrasives or oven deaners. Clean the top, sides and outside front of the oven door _'e recommend venting with an open window or using with soap and water. a ventilation fan or hood during the first self clean cycle.
- Page 25 Both the O'_qEN ON light and the CLEAN light will to Set the Oven Cleaning flash when the Clean Time is finished. Quick Reminder: After using the dean cycle, the door latch and the Oven Set knob must be returned to their original 1.
- Page 26 Operating the Self=Cleaning Oven (cont,000 ) Questions and Answers to Set Delay Start of Cleaning (on some models) Q. can I use commercial oven cleaners on any part of my self-deaning oven? Quick Reminder: A. No cleaners or coatings should be used around any 1.
- Page 27 Care and Cleaning Burner Heads Proper care and cleaning are important so your range (on sealed burners only) will give you efficient and satisfactmy service. Follow these directions carefully in caring fm it to help assure NOTE: Before removing the burner heads and caps, safe and proper...
- Page 28 Care and Cleaning Burner Caps You should clean the surface burners routinely, (on sealed burners only) especially after bad spillovers, which could clog these holes. Wipe off' surface burners. If" heavy spillover Lift offwhen cool. Wash burner caps in hot, soapy occurs, remove the surface...
- Page 29 Burner Grates Oven Air Vents Lift out when cool Never block the vents (air openings) of the The grates should be range. They provide the air inlet and outlet that are washed regularly and, necessary for the range to operate properly with of course, after...
- Page 30 Care and Cleaning (cont,0oo ) Broiler Pan and Grid Oven Bottom The oven bottom has a After broiling, remove broiler pan fi'om the oven porcelain enamel finish. or broiler compartment To make cleaning easier; (depending on your model). protect the oven bottom "-7"...
- Page 31 Oven Light Replacement To replace the door, make sure the hinges are in the models) (on some specia! stop position. Position the slots in the bottom of the door squarely over the hinges. Then lower the CAUTION: Disconnect electrical power to the door slowly and evenly over both hinges...
- Page 32 Care and Cleaning Removable Kick Panel Removable Storage Drawer (on some models) (on some models) T'he storage drawer is a good place to stole cookware The ldck panel may be removed for cleaning under and bakeware. Do not store plastics and flammable the range.
- Page 33 Installation Instructions FORYOUR IMPORTANT SAFETY Remove all packing material and literature from oven If you smell gas: before connecting gas and elect_ric_ supply to range. 1. Open windows. 2. Don't touch electrical switches. 3. Extinguish any open flame. DIMENSIONS CLEARANCES 4.
- Page 34 Important Safety Instructions • Installation of this range must conform with local • The ventilating hood must be constructed of sheet codes, or in the absence of local codes, with metal not less than 0.0122" (.31 ram) thick. Install National Fuel Gas Code, ANSI Z223.1,...
- Page 35 WARNING PROTECT YOUR FLOOR You: range, like many other household items, is heavy All ranges can tip and injury could and can settle into soft floor' coverings such as result. To prevent accidental tipping cushioned vinyl or' carpeting_ Use care when moving of the range, attach an approved...
- Page 36 Installation Instructions (continued) PREPARATION STEP Connect the Range to Gas • Remove all tape and packaging° Lift up the cooktop (on models with standard twin burners) and remove Shut off' the main gas supply valve before disconnecting any pacldng material under it.
- Page 37 Gas Pipe and Electric Outlet Locations Rigid Pipe Hookup for Models for Models Equipped with Standard Equipped with Sealed Burners Twin Burners This area allows Shortest ._., Pressure for flush range connection ___ j_ Regulator instalfation through-the- with from stub location hard pipe wall connection to range...
- Page 38 installation Instructions ( o0 ,000 ) STEP 1. Install a manual gas line shut-offvalve in the gas line Electrical Connections in an easily accessed location outside of' the range° Make sure everyone operating the range lmows where (on some models) and how to shut off the gas supply to the range.
- Page 39 A: Usage Situations Where Appliance Power Cord B: Usage Situations Where Appliance Power Cord W'dl Be Disconnected infrequently. Will Be Disconnected Frequently. TEMPORARY METHOD Do not use an adapter plug in these situations because (Adapter ptugs not _.-_..__. disconnecting of the power cord places undue strain permitted in Canada) '¢' on the adapter...
- Page 40 Installation Instructions STEP STEP Check Ignition of Surface Burners Check Ignition of Oven Burner Operation of all cooktop and oven burners should Your oven is designed to operate quietly checked after the range and gas supply lines have been automatically. To operate the oven, turn the OVEN...
- Page 41 To remove the oven bottom: 1. Remove the knurled screws holding down rear of the oven bottom. 2. Grasp the oven bottom at finger slots on each side. The shutter for the bottom (oven) burner is neat the 3. Lift the rear of the oven bottom enough to clear the back wall behind...
- Page 42 Installation instructions (co0t,00e ) STEP For cement or concrete construction, you will need a 114" x !_" lag bolt and a 112" O.D. sleeve anchor; Installing the Anti-Tip Device which are not provided. Drill the recommended size hole fbr the hardware. WARNING: Install the sleeve anchor into the drilled hole and then •...
- Page 43 Questions? Before You Call for Service... PROBLEM POSSIBI_ CAUSE BURNERS DO NOT • Make sure electrical plug is plugged into a live power oudet. LIGHT OR DO NOT • Burner holes on the side or around the top of burner may be clogged°...
- Page 44 Questions? .=foreYou Call for Service... PROBLEM POSSIBLE CAUSE CLOCK TIMER • Range electrical plug must be securely seated in a live power outlet. Check DO NOT WORK for blown fuse or tripped circuit breaker. • Check for power outage_ ° Review the Oven Control, Clock...
- Page 45 PROBLEM POSSIBLE CAUSE FOOD DOES - Oven controls not properly set, See the Broiling sectiom BROIL PROPERLY • Oven door and/or broiler drawer not closed, • Impioper shelf position being used, See the Broiling section. • Food is being cooked on a hot pan, •...
- Page 46 For in-home major brand repair service: Call 24 hours a day, 7 days a week 1=800-4-MY-H OM ESM (1-800-469-4663) Para pedir servicio de reparaci6n a domicillo- 1-800-676-5811 In Canada for all your service and parts needs call - 1-800-665-4455 Au Canada pour tout le service ou les pi6ces For the repair or replacement parts you need: Call 7 am - 7 pm, 7 days a week...
- Page 47 FREE-STANDING RANGE WARRANTY ® FULL ONE YEAR WARRANTY ON ALL PARTS If, within one year from the date of installation, any part fails to function properly due to a detectin material or workmanship, Searswill repair or replace it, at our option, free of charge If this product is subjected to other than private family use, the above warrantyis effectivefor only 90 days WARRANTY SERVICE IS AVAILABLE BY CONTACTING THE NEAREST SEARS SERVICE CENTER/DEPARTMENT...
- Page 48 SWARS OWNER'S MANUAL RANGE Model Numbers: 72471 75481 The model number of your gas range is 72478 75488 found on the serial plate fastened to the 72691 75581 front frame behind the broiler" compartment, 72695 75585 73281 75586 storage drawer or kick panel.
- Page 49 Numeros Instrucciones de seguridad los modelos: Precaution: Cuidado y mantenimiento Antes de tlamar para servicio 47-49 Lea y siga todas 72471 75481 Cuidado y limpieza 28-35 Servicios al consumidor 50, 52 72478 75488 reglas de seguridad Servicios de reparacion 72691...
- Page 50 instrucciones importantes de seguridad Lea estas instrucciones antes de usar este aparato, AVISO IMPORTANTE DE SEGURIDAD ADVERTENCIA: Si usted no sigue con • El California Safe Drinking Water and Toxic _ctltud la informaci6n de esta guh, pudiera Enforcement Act (Ley sobre los productos t6xicos causar un incendio o una explosi6n...
- Page 51 los nifios solos * Enchufe su cocina (s61o modelos de ignici6n * No deje a el_ctrica) a una toma de corrlente de pared conectada desatendidos donde cocina caliente o en a tierra de 120 voltios. No quite la punta redonda con conexi6n a tierra de1 enchufe, Si cabe duda de h operaci6n.
- Page 52 Instrucciones importantes de seguridad (continuaci6n) • No Ueve nunca vestidos • No guarde ni use materiales combustibles, desabrochados o ca/dos gasolina u otros vapores o liquidos inflamables ,":. ".. \ al usar el aparato. Tenga cerca de este o cualquier otro aparato.
- Page 53 • No deje ardculos • Nunca obstxuya los w_spiraderos (abermras de aire) pldstico sobre de la cocina. Estas proporcionan la entmda y la salida superficie --se de aire necesarias para que la cocina fimcione pueden adecuadamente con una comhusti6n correcta. Los derretir si se La apariencia...
- Page 54 lnstrucciones importantes de seguridad Horno de auto limpieza Hornear, asar ai fuego directo y asar • No use el homo para guaxdar cosas. Los arrlculos " No limpie la junta de la puerta. La junta de la guardados en el homo se pueden quemar.
- Page 55 Caracter|sticas de su cocina NOTA: No todos los modelos tienen todas las caracteristicas. La apariencia de las caracteristicas varia, Charol_ f_oloct Tapa dDl quemador (on cE_nos m_dolos) Cab_z_ dol qu_mador harola recolectot_ € (on clenosmodolos) Su cocina esrA equipada con uno de los dos tipos de quemadores superficie que se muestran...
- Page 56 Cocinando en la superficie Instrucciones de encendido Controles de los quemadores superficie Sus quemadores se encienden pot ignici6n eldctrica, eliminando asf la necesidad de pilotos permanelites Los botones de mando que encienden y apagan llamas que estdn encendidas de manera colistante.
- Page 57 Cocinando en la superficie de superflcie Despues de encender un quemador (en ciertos modelos) • Despuds de encender et quemador, haga girar el Utilice el interruptor del panel de control para bot6n p_ra ajustar el tamatio de la llama. encender y apagar la luz.
- Page 58 Cocinando en la superficie Cocinando ollas metdlicas Utensilios de cocci6n para ia superficie (tipo "wok") Aluminio= Se recomienda el uso de utensilios de peso (en los modelos con quemadores sellados) mediano, ya que dstos distribuyen el calor r@idamente Recomendamos que use y de manera uniformeo La mayorla...
- Page 59 Control del horno, reloj y contador de tiempo (la apariencia puede variar) )VEN © tAUTOMATIC OVEN PREHEATED 450' 1. COOK TIME ON/OFF (tiempo de cocci6n 7. Luz de CLEAN (luz de limpieza). Se enciende encendido/apagado). Optima este bot6n para cuando el homo esrd en ciclo de auto limpieza, horneado...
- Page 60 Control del horno, reloj y contador de tiempo (continuaci6n) Tonos Reloj Automatico final ciclo (en ciertos modelos) El tono de final de ddo puede quitarse oprimiendo Pata que el retoj funcione apropiadamente, debe de bot6n TIMER ON/OFF (contador encendidoiapagado) ponerse para las funciones autom_ticas de tiempo...
- Page 61 Usar su horno Antes de usar su horno del horno (en ciertos modelos) Ce_ci6rese de que listed sabe c6mo fijar los controles Use el intermptor del panel de control para encender correctamente. Pracdque quitar y coloca:' las parrillas o apagar la luz.
- Page 62 Usar su horno (continuaci6n) Parrillas del horno Posiciones de las parrillas El homo dene cinco Las parrillas est_in Protuberancia soportes de parrillas para disefiadas con topes hornear, asar y asar al fuego parada, de modo que al correctamente colocarlas directo, identificados en esta ilustraci6n...
- Page 63 Hornear Precalentamiento Cuando estd horneando no cierre la puerta del homo con el seguro. El seguro se usa solamente Precaliente el homo si la receta asf lo indica, para la auto limpieza. Precalentar significa hacer que el homo alcance La temperatura de su horno ester controlada en forma...
- Page 64 ornear (0o0u000 i 0) Tortas Colocaci6n bandejas Para que los alJmentos se cocinen de manera tmiforme Para obtener mejore.s resultados, hornee Ins tortas en se doren de rnane_a adecuada, debe haber suficiente bandejas _isperas, de color oscum u opacas, que producen espacio en el horno para que el aire circule.
- Page 65 Horneado automatico (00 d 0 o, COmo cocinar con cocci6n por tiempo COmo fijar el inicio inmediato y el apagado automdtico No cierre con seguro la puerta del homo durante homeado automdtico. El seguro se usa s61o para Para evitar posibles quemaduras, co!oque las partillas...
- Page 66 Horneado automatico C6mo fijar el inicio demorado y el 5. Haga gkar e! bot6n de Oven Set hasta la temperatura deseada [por ejemplo 325°E (163°C.)]. apagado automdtico H horno est,4 programado ahota pala empezar alas Breve recordatorio: 4:00 y cocinar pot 3 horas a una temperatuta 325°E (163°C,),...
- Page 67 Ajuste el termostato del horno..-iHagalo usted mismo! Cooler Hotter (m_s 3. Oprima y mantenga oprimido Usted pudiera encontrar que su nuevo homo cocina el botdn HOTTER (mil de manera diferente al otto que tenla. (m_ls lifo)OFF caliente) caliente) o COOLER (rnil recomendamos que use su homo...
- Page 68 Como asar No cierre la puerta del homo con seguro mlentras Coloque la parritla clue estd asando. El seguro se usa solamente para la en la posici6n B en el auto llmpieza. homo para las carnes pequefias (3 a 5 libias Asar es cocinar con calor seco.
- Page 69 Carnes de asar congeladas Cocinando con dos parrillas I_as carnes de asar congeladas de res, puerco, cordero, etc. Esto permite cocinar m_is de un alimento al mismo pueden empezarse a cocinar sin descongetarlas, pero tiempo. Pot ejemplo, mientras que se est_ asando habrfi que aumentar e! tiempo de cocci6n...
- Page 70 Como asar al fuego directo 6. AI terminar de asar al fuego directo, haga girar e! No cierre la puerta del homo con seguro mientras bot6n de Oven Set (temperatura del homo) hasta que est_ asando al fuego dlrecto. El seguro se usa (apagado).
- Page 71 Guia para asar al fuego directo Si 1o desea, adobe las carnes o polio antes de asarlos La puerta del homo debe estar cerrada durante a! fuego direcm. O ctlbralos con salsa para barbacoa proceso de asar al fuego directo. de 5 a 10 minutos solamente.
- Page 72 Operacion del horno de auto limpieza Tiempo normal de fimpieza: horas y 20 minutes. Antes de un ciclo de limpieza 3. Limpie las salpicaduras o derrames en la pate delantera de la estmctura de! homo y s61o el fil'eaen la puerta del Recomendamos que deje una ventana abierta...
- Page 73 C6mo preparar el horno para la limpieza Despu_s de usar el cido de limpieza, et seguro de la Breve recordatorio: puerta y el bot6n de Oven Set (temperatura del homo) 1, Cierre ta manija del seguro de la puerta. deben volver a ponerse en su posici6n original...
- Page 74 Operacion del horno de auto limpieza (co0t,000d 0) C6mo demorar el inicio de ia limpieza Tanto las luces de OVEN (encendido (en ciertos modelos) horno) y CLEAN (limpieza) se encender_in de modo intermitente cuando el ciclo de limpieza haya Breve recordatorio: terminado.
- Page 75 Preguntas y respuestas R Si el reloj de mi homo no estli puesto en la hora correcta, _puedo aun as_ llevar a cabo la auto P, _Puedo utillzar limpiadores comerciales para limpieza de mi homo? homo en cualquiera parte de mi homo de auto IL Si el reloj no est_ en la hora correcta, no podr_ limpieza?
- Page 76 Cuidado y limpieza Cabezas de los quemadores Et cuidado y la limpieza apropiados son importantes (en los quemado:es seHados solamente) para que su cocina le proporcione un servicio eficiente y satisfactorio. Siga con exactitud estas instrucciones para el cuidado de su cocina, para ayudarle a asegurar NOTA= Antes de quitar...
- Page 77 Tapas de los quemadores Las parrillas de los quemadores quemadores sellados solamente) Levante las parrillas Lev_ntelas cuando estdn fHas. Lave las tapas de los retffelas cuando estdn quemadores con agua jabonosa caliente y enjufiguelas frfas. Las parrillas con agua lirnpia. Las puede restregar con un estropajo...
- Page 78 Cuidado y limpieza Usted debe limpiar los quemadores de supertlde, Ouemadores estandar gemelos (en ciertos mode!os) peri6dicamente, espedalmente despu_s de clue derramamientos, que pudie_an obstruir estos huecos. Limpie los quemadores de supeKicie. Si ocurren PRECAUCION: NO FLAGA FUNCIONAR derramamientos excesivos, quemadores de retire los QUEMADOR...
- Page 79 Superficie de cocciOn respiradores horno bloquee Para evitar que se dafie el acabado de esmalte Nunca los respiraderos (aberturas para la circulaci6n del aire) de su cocina. Estos porcelanizado de la superficie de cocci6n y para proveen la entrada y salida de aire necesarias paia evitar que se tome...
- Page 80 Cuidado y limpieza Las parrillas del homo La bandeja y la rejilla del asador Despu& de asar al fuego directo, saque la bandeja del horno. Retire la rejilla de ta bandeja. Vierta cuidado la grasa de la bandeja en un recipiente apropiado.
- Page 81 Puerta desmontable del horno PARA LIMPIAR LA PUERTA_ (No sumerja la puerta en agua). La puerta del horno H interior de la puerta: desmontable, pero es pesada_ Usted probablemente necesite Como el _rea interior de ta junta herm&ica de la ayuda para quitarla y volver a...
- Page 82 Cuidado y limpieza Reemplazo de la luz del horno Luz superior y arrancador (en ciertos modelos) (en ciertos modelos) D0sei PRECAUCION: Antes de reemplazar la bombiUa, PRECAUCION: No toque Levante desconecte la energ_a el_ctrica de la cocina desde el la bombilla con las manos interruptor principal...
- Page 83 Panel de proteccion desmontable El cajon de almacenamiento (en cier'tos modelos) desmontable (en ciertos modelos) E1 panel de protecci6n puede quitarse para limpiar debajo de la cocina. El caj6n de almacenamiento es un lugar ideal para guaidar los utensilios de cocina y de hornear.
- Page 84 Instrucciones para la instalacion PARA SU SEGURIDAD IMPORTANTE Si detecta olor a gas: Retire del homo todos los materiales impresos y de empaque antes de conectar los suministros del gas y 1. Abra las ventanas. la electricidad a la cocina. 2.
- Page 85 Instrucciones importantes de seguridad • Evite poner gabinetes encima de Ia cocinao Para evitar el peligro que causarJa el tratar de alcanzar objetos • La instalaci6n de esta cocina de gas debe hacerse situados encima de la cocina cuando los quemadores de acuerdo con los cfdigos locales o, si no estdn funcionando,...
- Page 86 Instrucciones para la instalacion ( oo ,o0 d0o) ADVERTENCIA UBICACION Todas las cocinas pueden volcarse y No coloque la cocina en un lugar don& &ta pudiera causar lesiones graves. Para evitar que estar expuesta a corrientes fuertes de aire. Siemp_e la cocina se vuelque accidentalmente,...
- Page 87 PASO 1 MATERIALES ADICIONALES PUDIERA NECESITAR Provea un suministro adecuado de gas • VNvxlla de interrupcidn de la tfnea del gas Su cocina de gas est_ disefiada pare funcionar a una presi6n de 4" (10.2 cm) de columna de ague para gas •...
- Page 88 Instrucciones para la instalacion ( oo ,oo0 ,oo) PASO 2 Ubicaci6n de las tuberias del gas y de la toma de corriente para modelos Conecte la cocina al gas equipados con Quemadores Estandar Cierre la v_vula principa! suministradola de gas antes de desconectar la cocina vieja y ddjela cerrada...
- Page 89 InstalaciOn conector flexible para 1. Instale en la linea del gas una v_vula manual modelos equipados cierre, en la parte exterior de la cocina de gas, en un Quemadores Sellados lugar f_icilmente accesible. Cerci6rese de que todas las personas operando la cocina sepan d6nde y c6mo...
- Page 90 Instrucciones para la instalacion PASO A: Situaciones en las que el cordfn de alimentaci6n del aparato electrodom_sdco serd desconectado Conexiones electricas (en ciertos mode|os) manera infrecuente. Requisitos el_ctricos Un circuito derivado de 120 voltios, 60 hertzios, METODO PROVISIONAL toma de tierra adecuada y protegido por un interruptor (No se permite usar...
- Page 91 PASO B: Situaciones en las que el cord6n de alimentaci6n del aparato electrodom_stico serd desconectado Compruebe la ignici6n frecuencla. quemadores de superficie No use un enchufe adaptador en estas situaciones, F.I funcionamiento de todos los quemadores de la que la desconexi6n de! cord6n de alimentaci6n hace...
- Page 92 lnstrucciones para la instalacion PASO PASO Si fuese necesario ajuste los Compruebe la ignici6n del quemador del homo obturadores ajuste aire quemadores homo y del asador Su horno estll disefiado para operar de manera silenciosa y autom_itica. Para opera:' el horno, haga girar Los obturadores de ajuste del aire para los quemadores...
- Page 93 PASO 8 La llama del quemador superior (asador) deber_ C6mo nivelar la cocina set estable con COHOS 1. Retire el caj6n de almacenamiento o el panel de azules de protecci6n. aproximadamente I" 2. Use una Have espafiola (2.5 cm) y no deber_ o llave de tubo de 3II6"...
- Page 94 Instrucciones para la instalacion PASO Para una construccMn de ceil-lento o concreto, necesirmld un drafondo de i/4" x 1_" (6 mmx 3.8 cm) Cbmo instalar el dispositivo anti- y un manguito de anclaje con un di_.metro exterior volcaduras i/2" (1.3 cm), los cu£es no inclulmos.
- Page 95 i,Preguntas? Antes de que usted llame para pedir servicio de reparaci( n... PROBLEMA CAUSA POSIBLE LOS QUEMADORES ° Cerci6rese de que el enchufe eldctrico est4 conectado en una DE SUPERFICIE toma de corriente activa. ENCIENDEN O NO • Los huecos del quemador en e! lado o alrededor de la superficie...
- Page 96 i,Preguntas? Antes de Ilamar para servicio... (coot noac o.) PROBLEMA CAUSA POSIBLE FUNCIONA_N NI EL • El enchufe el_ctrico de la cocina tiene que estar encajado firmemente en una RELOJ NI EL CONTADOR toma de corriente activa. Compruebe para ver si hay algtfn fusible fundido DE TIEMPO o si el interruptor...
- Page 97 PROBLEMA CAUSA POSIBLE LOS ALIMENTOS NO SE " Los controles det homo no se han fijado de manera adecuada. Vea la secci6n ASAN NI SE HOR2qEAN de Hornear o Asar. CORRECTAMENTE • La posici6n de la parrilta no es la correcta. •...
- Page 98 For in-home major brand repair service: Call 24 hours a day, 7 days a week 1-800-4-MY=H O M EsM (1-8o0-469-4663) Para pedir servicio de reparaci6n a domicillo - 1-800-676-5811 In Canada for all your service and parts needs call - 1-800-665-4455 Au Canada pour tout le service ou les pi_ces For the repair or replacement parts you need:...
- Page 99 GARANT/A PARAUNAESTUFA AUTONOMA ® /_UN ANO COMPLETO DE GARANT|A PARA TODAS LAS PIEZAS S], dentro de un afio a partir de la fecha de instalaci6n, cuaiquier partefunciona indebidamentea causa de un defectoen materiales o fabricaci6n, Sears ta reparard o ta reemplazar_,a nuestradiscreci6n, sin costo alguno para el comprador Si este producto se utiliza para otros fines que no seanel uso familiar privado, las garantfasindicadas arriba s61otendr,tnvigencia durante 90 dfas EL SERVICIO DE GARANTiA ESTA A SU DISPOSICll)N CON SOLO PONERSE EN CONTACTO CON EL CENTRO...
- Page 100 (ESTUFA) DE GAS Nt_meros los modelos: El numero del modelo de su cocina de gas se encuentra en una placa sujetada a la parte 72471 75481 delantera del marco de la cocina detras 72478 75488 72691 75581 caj6n del asador...
Need help?
Do you have a question about the 72471 and is the answer not in the manual?
Questions and answers