Table of Contents
Advertisement
Available languages
Available languages
Quick Links
See also:
Manual
Hardwired Mechanical Chimes
Illustrations may vary from actual chime unit.
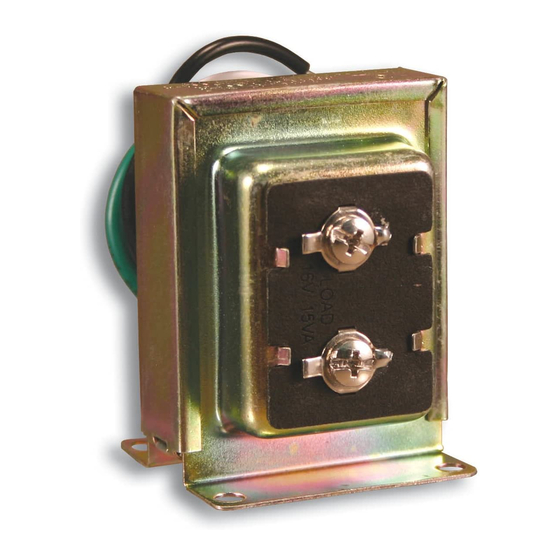
• Power must be supplied from a 16 Volt, 10 Watt transformer or 16 Volt, 15 Watt transformer
(Heath
®
/Zenith models 122C, 121AC, or 125C).
• Mount door chime in a central location so it can be heard throughout the home.
• See actual unit for orientation of base.
• Use wall anchors if not mounting directly to wall stud.
• Use mounting holes located on both sides of base.
• Route wires through wire entrance holes (see Figure 1).
NEW INSTALLATION WIRING
WARNING: Turn power off at fuse or
circuit breaker before installing
transformer. Follow all national and
local codes.
1. Mount Transformer: Transformers
should be mounted on or near a
junction box. They can also be
mounted to the electrical service
panels. Junction boxes in utility
rooms, crawl spaces, or basements
are preferred. Avoid attic locations.
2. Install 16 Volt, 10 Watt transformer
according to the instructions supplied
with transformer. Note: For multiple
mechanical chimes, use a 16 Volt,
15 Watt transformer. Failure to use
a transformer with adequate power
will result in loss of sound or may re-
sult in the system being inoperative.
3. Run two No. 20 AWG or better bell
®
wires (Heath
/Zenith No. 196C or No.
199C accessory wire) to the chime
location. Strip away 1/2" of insulation
from end of wires. Connect each wire
to transformer (see Figure 1).
4. Label Transformer Wires: Using masking tape or wire tags provided on packaging, label one
wire "T" and the other "C".
© 2003 DESA Specialty Products™
P.O. Box 90004
Bowling Green, KY 42102-9004
MOUNTING SUGGESTIONS
Rear Push Button
(If Applicable)
Mounting
Slot
Base Style "A"
Wire Nut
Transformer
Cover Pin
Optional Second Mechanical Chime
Figure 1
Front Push Button
Wire Entrance
Holes
Mounting
Hole
Base Style "B"
598-1112-01
Advertisement
Table of Contents

Related Manuals for Heath Zenith 121AC


Summary of Contents for Heath Zenith 121AC
- Page 1 • Power must be supplied from a 16 Volt, 10 Watt transformer or 16 Volt, 15 Watt transformer (Heath ® /Zenith models 122C, 121AC, or 125C). • Mount door chime in a central location so it can be heard throughout the home. • See actual unit for orientation of base.
-
Page 2: Helpful Hints
5. Mount push button(s) to door frame(s). Run two No. 20 AWG bell wires from push button(s) to the chime location. Strip away 1/2" of insulation from end of wires. Connect each wire to push button(s) (see Figure 1). Label Front Push Button Wires: Using masking tape or wire tags provided on packaging, label one wire “F”... -
Page 3: Troubleshooting
Chime does not sound: • Check Chime: Disconnect wire from terminal marked “TRANS”. Have someone operate push button at front door while you momentarily touch the “TRANS” wire to terminal marked “FRONT”. You will see a small spark if push button, wiring, and transformer are operating properly. Repeat the steps for “REAR”... - Page 4 • La energía debe suministrarse desde un transformador de 16 Voltios, 10 Vatios o desde un transformador de 16 Voltios, 15 Vatios (Modelos 122C, 121AC, ó 125C Heath • Montar la campana de la puerta en una ubicación central de manera que pueda escucharse en toda la casa.
-
Page 5: Consejos Utiles
5. Montar el botón(es) en el marco(s) de la puerta. Tender dos cables de timbre No. 20 AWG desde el botón(es) a la ubicación de la campana. Pelar _ de pulgada de aislamiento desde el extremo de los cables. Conectar cada cable al botón(es) (ver la Figura 1). Rotular los cables del pulsador delantero: Usando cinta adhesiva o los rótulos del cable provistos en el empaque, rotular una cable "F"... -
Page 6: Análisis De Averías
La campana no suena: • Inspeccionar la campana: Desconectar el cable del terminal marcado "TRANS". Hacer que alguien oprima el botón en la puerta delantera mientras usted toca brevemente el cable "TRANS" al terminal marcado "FRONT". Si el botón, cableado, y transformador están operando bien se observa una pequeña chispa. - Page 7 Le carillon peut être différent de l’appareil illustré. • L’alimentation doit être fournie par un transformateur 16 V, 15 W (Heath 121AC ou 125C). • Installez le carillon dans un endroit centralisé de façon qu’on puisse l’entendre à la grandeur de la résidence.
- Page 8 5. Installez les boutons-poussoirs sur les cadres des portes. Faites passer deux fils de carillon 20 AWG des boutons-poussoirs au carillon. Dénudez _ po d’isolant à l’extrémité des fils. Raccordez chaque fil aux boutons-poussoirs (voir la Figure 1). Marquage des fils du bouton-poussoir de l’entrée principale : Au moyen de ruban-cache ou d’étiquettes à...
-
Page 9: Conseils Pratiques
• Les travaux électriques doivent être effectués conformément aux codes électriques na- tional et local en vigueur. En cas de doute, consultez un électricien qualifié. Coupez l’alimentation au niveau du panneau de distribution (fusibles ou disjoncteurs) avant d’installer ou de remplacer le transformateur. •... -
Page 10: Garantie Limitée De 1 An
Il s’agit d’une « Garantie limitée » qui vous confère des droits juridiques spécifiques. Vous pouvez également jouir d’autres droits, variables d’une province à l’autre. Pendant une période de 1 an à compter de la date d’achat, toute anomalie de fonctionnement imputable à un vice de matériau ou de main-d’oeuvre sera corrigée gratuitement. - Page 11 Notes/Notas ___________________________________ _____________________________________________ _____________________________________________ _____________________________________________ _____________________________________________ _____________________________________________ _____________________________________________ _____________________________________________ _____________________________________________ _____________________________________________ _____________________________________________ _____________________________________________ _____________________________________________ _____________________________________________ _____________________________________________ _____________________________________________ _____________________________________________ _____________________________________________ _____________________________________________ _____________________________________________ _____________________________________________ _____________________________________________ _____________________________________________ _____________________________________________ _____________________________________________ _____________________________________________ _____________________________________________ _____________________________________________ _____________________________________________ 598-1112-01 -11-...
- Page 12 Notes/Notas ___________________________________ _____________________________________________ _____________________________________________ _____________________________________________ _____________________________________________ _____________________________________________ _____________________________________________ _____________________________________________ _____________________________________________ _____________________________________________ _____________________________________________ _____________________________________________ _____________________________________________ _____________________________________________ _____________________________________________ _____________________________________________ _____________________________________________ _____________________________________________ _____________________________________________ _____________________________________________ _____________________________________________ _____________________________________________ _____________________________________________ _____________________________________________ _____________________________________________ _____________________________________________ _____________________________________________ _____________________________________________ _____________________________________________ 598-1112-01 -12-...
Need help?
Do you have a question about the 121AC and is the answer not in the manual?
Questions and answers