Yealink VP530 User Manual
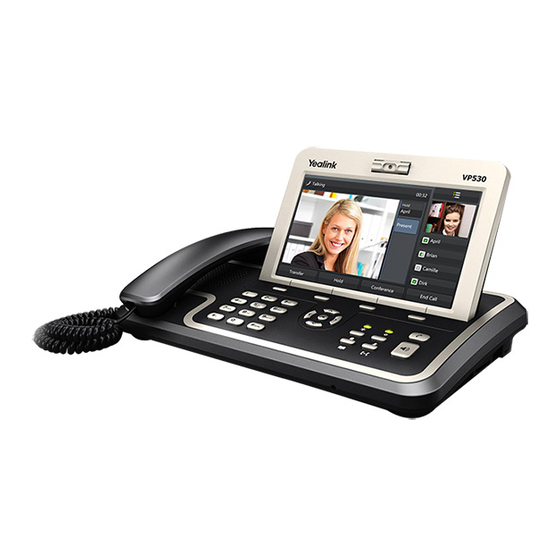
Ip video phone
Hide thumbs
Also See for VP530:
- User manual (114 pages) ,
- Troubleshooting manual (9 pages) ,
- Manual (6 pages)
Table of Contents
Advertisement
Quick Links
VP530 is an H.264 based broadband videophone supporting Video and Voice applications. Its major
functions include IP Telephony, IP Camera Viewer (SIP based) and Photo frame. It can satisfy the
demanding requirements of the next generation of IP broadband communication applications and open
the door to the world of multimedia.
VP530 is an innovative IP media phone equipped with the most advanced video compression
technology. It offers unrivalled super voice and picture quality, innovative functional richness, friendly
user interface, stylish and elegant design, enhancing the instant, face-to-face communication
experience even at low bandwidth.
Meanwhile it supports Voice Mail, Screen Saver, Advertisement, etc. Which make it not only a video
phone but also a media phone for entertainment. It is definitely ideal for multimedia communication,
virtual office and all IP video conversation for business or family users.
In this User Guide, you will find everything you need to quickly use your IP Video Phone. Be sure to
verify with your system administrator that your network is prepared for configuring your IP phone. As
well, be sure to read the Packing List section in this guide before you set up and use the phone.
Declaration of Conformity
Hereby, it's declared that this phone is in conformity with the essential requirements
and other relevant provisions of the CE, FCC.
CE Mark Warning
This is a class A device, in a domestic environment. this product may cause radio interference, in which
case the user may be required to take adequate measures.
About This Guide
Advertisement
Table of Contents

Related Manuals for Yealink VP530


Summary of Contents for Yealink VP530
-
Page 1: About This Guide
About This Guide VP530 is an H.264 based broadband videophone supporting Video and Voice applications. Its major functions include IP Telephony, IP Camera Viewer (SIP based) and Photo frame. It can satisfy the demanding requirements of the next generation of IP broadband communication applications and open the door to the world of multimedia. -
Page 2: Safety Precautions
Safety Precautions General Requirements Before you install and use the device, read these safety precautions carefully and observe them during operation. During storage, transportation, and operation, keep the device dry. During storage, transportation, and operation, avoid collision and crash for the device. ... - Page 3 During lightning whether, stop using the device and disconnect it from the power supply. Unplug the power plug and the Asymmetric Digital Subscriber Line (ADSL) twisted pair (the radio frequency cable) to avoid lightning strike. If the device is not used for a long time, disconnect it from the power supply and unplug the power plug.
-
Page 4: Table Of Contents
Main menu ................................. - 9 - Picture Dial ..............................- 11 - DSS Key ................................- 11 - 5 Configuring VP530 ..........................- 12 - Setting Interface................................. - 12 - Set the Account ..............................- 12 - Set the Network ............................... - 13 - Set the Display .............................. - Page 5 Upgrade Tab Page ............................- 59 - Security Tab Page ............................- 62 - Saving Settings ..............................- 62 - 7 Using VP530 ............................- 63 - Overview ..................................- 63 - Call Type ................................- 63 - Answer Mode ..............................- 63 - Multiple Accounts ............................
- Page 6 BLF Function ................................- 66 - BLF List ..................................- 67 - Check the call statistics ............................. - 67 - 8 Maintaining VP530 ..........................- 68 - Restarting VP530............................... - 68 - Resetting VP530 ................................ - 68 - Firmware upgrade..............................- 68 - Auto Provision ................................
-
Page 7: Getting Started
IP Video Phone Getting Started Getting Started Packing List The following components are included in your package: IP Video Phone VP530 Power Adapter Handset & Handset Cable - 1 -... -
Page 8: Assembling The Phone
IP Video Phone Getting Started Ethernet Cable Quick Installation Guide & Quick Reference CD Content Please unpack the product package with caution. inspect the items closely. If you find any damaged item, please contact your IP Video phone reseller immediately. Also, please keep the box and packing material for future use in the event of future shipments. -
Page 9: Configuration And Registration
IP Video Phone Getting Started Headset is not included in the packing list. Should be purchased separately. Connect Network and Power There are two ways for network and power source connections. You can connect the phone to the AC Power directly using the power adapter or to a PoE compliant switch or hub. -
Page 10: Configuring Via Keypad
IP Video Phone Getting Started Account Settings:Choose Account. Network Settings:Choose Network->Internet Port (WAN). “Account Tab “Network Tab For more information, please refer to Page” and page”. Configuring via keypad Network Settings: Click Setting->WAN Option, enter the password to enter the relating configuration page. Account Settings: Click Setting->Account Option, enter the password to configure the account. -
Page 11: Overview
“LED Instruction”. Indication LED Power Indication Indicates the power supply status. When VP530 is powered on, the indicator is on. When VP530 is powered off, the indicator is off. On the video conversation, open or close the local video. -
Page 12: Led Instruction
IP Video Phone Overview Description Answers an incoming call. On the dialing page or conversation page, press this key to change the conversation mode. Includes four arrow keys (up, down, left, and right), and one <OK> key. Arrow keys: Move the cursor on different pages. In the standby state: press left or right key to switch the standby state. - Page 13 IP Video Phone Overview Icon Description Account register successful or the DSS key set as line, and the line is registered. Account register failed or the DSS key set as line, and the line is unregistered. Missed calls Call in Call out In handset mode In speaker mode...
-
Page 14: Customizing Your Phone
IP Video Phone Customizing Your Phone Customizing Your Phone Powering Up the Video phone Step 1 Plug a Network cable into the network port. Step 2 Plug in power. Step 3 It takes about 2 minutes to boot up the video phone. During this period, please do not touch any keys or turn off the video phone. -
Page 15: Main Menu
IP Video Phone Customizing Your Phone Area Description Use the clock to display the current time,user can use fingers drag this clock, placed it at any position of this interface. Display the Quick function keys. The default is “History”, “Directory”, “Message” and “Setting”. This area is showing the background picture. - Page 16 IP Video Phone Customizing Your Phone Menu Interface Second level submenu Message ---- Play Photo Manager Play Media Video Manager Contact Picture ---- IPCamera01 IP Camera IPCamera02 Application DP 1 Door Phone DP 2 ...
-
Page 17: Picture Dial
For more information, please refer to Dial”. Figure 4-3 Picture Dial DSS Key VP530 provides Direct Station Selection (DSS) keys. You can assign various functions to DSS keys for using these “DSS functions quickly. For more information you can refer to Key”. -
Page 18: Configuring Vp530
IP Video Phone Configuring VP530 Configuring VP530 Setting Interface User can configure many functions, such as: Account, Network, Call Feature, Display, Date & Time, Sound, Security, Personalize, Reset, Reboot and Calibration, To access the Setting page, proceed as follows: Step 1 Press the Left/Right navigation key in the standby state to switch to the Main Menu. -
Page 19: Set The Network
IP address or domain name of the SIP server that is specified by the VoIP service provider. --Port Port number of the SIP server. The default value of VP530 is 5060. Enable STUN Whether to activate the STUN Server. --Server IP address and domain name of the STUN server. -
Page 20: Set The Display
DHCP server for obtaining resources such as the IP address, subnet mask, gateway, and DNS server information. PPPoE If the xDSL modem is used, you can connect VP530 to the network in PPPoE mode. For details about the user name and password, contact the network service provider. -
Page 21: Setting The Ring Tone
Step 4 Select the desired mode. NTP Mode VP530 automatically obtains the Universal Time Coordinated (UTC) time from a dedicated NTP server. User must enter the Time Server in the field. Manual Mode You need to use navigation keys to manually set the time and date. -
Page 22: Manager The Ringtone
IP Video Phone Configuring VP530 Step 5 Click the < Save >. Figure 5-4 Tones and volume Manager the Ringtone Users can make operations including the audition, deletion and import of the ringtone documents, proceed as follows: Step 1 Access the Settings page. -
Page 23: Setting The Password
IP Video Phone Configuring VP530 The phone will ring when the cursor moves to whichever a ringtone document for your convenience. Only within the limits of authority can users delete the uploading ringtones. You can consult your system administrator for more details regarding the allocation of the limits of authority. -
Page 24: Set The Language
IP Video Phone Configuring VP530 Set the Language To configure the Language on the LCD, proceed as follows: Step 1 Access the Settings page. Step 2 Click [ Personalize ] Step 3 Select a required language and click the < Save >. -
Page 25: Reboot
IP Video Phone Configuring VP530 Figure 5-8 Reset to the factory Reboot To reboot the phone, proceed as follows: Step 1 Access the Settings page. Step 2 Click the < More >. Step 3 Click [ Reboot ]. Step 4 Input the administrator password, and then click to confirm the operation. -
Page 26: Screen Calibration
IP Video Phone Configuring VP530 Screen Calibration To Screen Calibration, proceed as follows: Step 1 Access the Settings page. Step 2 Click the < More >. Step 3 Click [ Calibration ]. Step 4 A dialog will be popped up to check whether to begin the calibration. Click to confirm the calibration operation. -
Page 27: Dss Key
Figure 5-11 Call feature DSS Key VP530 provides Direct Station Selection (DSS) keys. You can assign various functions to DSS keys for using these functions quickly. Each DSS key can support 4 functions: line, speed dial, BLF, BLF list. When you set DSS Key as Speed dial, BLF and BLF List function, the DSS Key will turn green or other color. -
Page 28: Parameter Description
IP Video Phone Configuring VP530 Figure 5-13 DSS key setting Table 5-4 The parameter specification chart of each option Parameter Description DSS Key 0X To display the serial number of the DSS Key. Type To choose what function the required DSS key to be set. The default type is “N/A”, namely no function set. -
Page 29: Picture Dial
IP Video Phone Configuring VP530 To set the DSS Key as BLF, proceed as follows: Step 1 Choose “BLF” from the pull-down menu of “Type”. Step 2 Choose the desired line from the pull-down menu of “Line”. If you choose “Auto”, the default account at present is adopted. -
Page 30: Voice Mail
Provision”. Voice Mail The voice mailbox is stored on the Media Resource Server (MRS). You can use VP530 to connect to the server to obtain voice messages. After receiving a new voice message in the standby state, VP530 displays a notification on the screen. If you have configured a voice mailbox access code, click the icon to access the voice mailbox. -
Page 31: Forward
Figure 5-16 Hotline Forward VP530 supports three call forward modes: Always Forward, Busy Forward, and No Answer Forward. If auto-forwarding is under no requirement, you can forward your call to a third party through manual operation. To configure the call forward function, proceed as follows: Step 1 Access the Call Feature page. -
Page 32: Call Waiting
Configuring VP530 Figure 5-17 Forward setting If you enable the automatic forwarding function, the VP530 automatically forwards incoming calls based on the preset forward type. If you enable the manual forwarding function, you can forward an incoming call by clicking entering the forward-to number. -
Page 33: Auto Answer
IP Video Phone Configuring VP530 Figure 5-18 Call waiting Auto Answer Users can answer calls automatically through the set type of Auto Answer. It supports 4 types: Directly, After 5 seconds, after 15 seconds, and After 30 seconds. The phone supports the individual configuration of each distinct account. -
Page 34: Video
IP Video Phone Configuring VP530 Video Users can set the call type through this option, e.g. the default call type is video call or voice call, and whether the Local Video is enabled. The settings include the Bandwidth and Frame Rate. The phone supports the individual configuration of each distinct account. -
Page 35: Setting The Send Key
Figure 5-20 TV output Setting the Send Key VP530 allows you to set a key such as the pound key (#) or start key (*) as the send key. By default, the pound key (#) is used. To configure the key as send function, proceed as follows: Step 1 Access the Call Feature page. -
Page 36: Anonymous Call
Figure 5-22 Anonymous call Directory Address books on VP530 stores contact information. You can add, edit, delete, call, or search for contacts. You can also add, edit or delete the contacts group. To access the Directory page, proceed as follows: Step 1 Press the Left/Right navigation key in the standby state to switch to the Main Menu. -
Page 37: Adding A Contact Group
IP Video Phone Configuring VP530 Adding a Contact Group Users can divide distinct contacts into defined groups in order to be more convenient to find out certain contact or set the group ring. To add a contact group, proceed as follows: Step 1 Access the Directory page. -
Page 38: Deleting A Contact
Please refer to the “Directory” section for the instruction of the remote phonebook. Each VP530 is configured with a local address book. A public address book is required for all phones in an enterprise. After a remote phonebook is enabled, users can access the remote phonebook. When the remote phonebook is set on the phone, click it and the phone will download and display the contact information through the server. -
Page 39: Call History
Configuring VP530 Figure 5-23 LDAP feature Call History Call History on VP530 stores history information. You can delete or clear the history record. To access the Call History page, proceed as follows: Step 1 Press the Left/Right navigation key in the standby state to switch to the Main Menu. -
Page 40: Media
IP Video Phone Configuring VP530 The “Clear” operation is defaulted to clear all the history records in the chosen type. If “All Calls” is chosen to clear the type, then all the history records on the phone will be cleared. -
Page 41: Ip Camera
Door Phone The phone can control the door phone to open the door. When door phone dials the VP530, user can see the video during the conversation, also can press the <Open Door> to open the door. Click [Door Phone] to enter the configuration page. - Page 42 IP Video Phone Configuring VP530 Figure 5-25 Door phone Table 5-7 Parameters about the Door Phone Parameter Description Device Model To select the device model Display Name To set the display name which you want to display. Phone Number To input the phone number of Door Phone. For more information you can consult your system administrator.
-
Page 43: Configuration Using The Web Browser
Connect VP530 and the PC to the same network where they can communicate with each other. You can connect VP530 and the PC to a Hub or a switch. If there is no Hub or switch, connect the PC to the PC port on VP530. -
Page 44: Status Tab Page
Security: changes the password and uploads security certificate for the TLS/SSL client and server. Status Tab Page On the Status tab page, you can view VP530's network and version information, as shown in Figure 6-2. Figure 6-2 Status tab page... -
Page 45: Account Tab Page
Configuration Using the Web Browser Account Tab Page Account On the Account tab page, you can configure information for a VP530's account such as registration and deregistration, as shown in Figure 6-3: Figure 6-3 Account tab page Table 6-2 Parameters on the Account tab page... - Page 46 SIP Server SIP server's IP address or domain name, which is provided by the VoIP service provider. Port Port number of the SIP server. The default value of VP530 is 5060. Whether to enable the outbound proxy server. Enable Outbound Proxy Server IP address or domain name of the outbound proxy server.
- Page 47 Table 6-3 Parameters on the Voice tab page Parameter Description Disable codecs Disabled voice coding types. VP530 supports the following coding types: PCMU, PCMA, G.723, G.729, G.722, GSM, AACLC and iLBC. Enable codecs Enabled voice coding types. The types are listed in descending order of priority.
- Page 48 Table 6-4 Parameters on the Video tab page Parameter Description Disable codecs Disabled video coding types. VP530 supports the following coding types: H264, H263 and mp4v-es. Enable codecs Enabled video coding types. The types are listed in descending order of priority.
- Page 49 Interval for sending UDP messages. For example, 30 seconds. Interval RPort Port through which the server sends a response to VP530. Details about this parameter are specified in RFC 3581. Login Expire If a user does not perform any operations within the period specified by this parameter, logs the user out.Unit: second...
- Page 50 IP Video Phone Configuration Using the Web Browser Parameter Description SIP Session Timer T1 Round trip time (RTT) between the server and the client. If the network latency is long, set it to a greater value. Details about RTT are specified in RFC 3261. Default value: 0.5 SIP Session Timer T2 Interval between the INVITE response receiving and the...
-
Page 51: Network Tab Page
IP Video Phone Configuration Using the Web Browser Parameter Description SRTP Whether to enable or disable Secure Real-time Transport Protocol To input the BLF list server’s URL BLF List URL BLF List Code To input the BLF list feature code. Validity period for the BLF subscription time. - Page 52 --Primary DNS IP address of the secondary DNS server. --Secondary DNS If the xDSL modem is used, you can connect VP530 to the PPPoE network in PPPoE mode. For details about the user name and password, contact the network service provider.
-
Page 53: Phone Tab Page
IP Video Phone Configuration Using the Web Browser Table 6-7 Parameters on the Advanced tab page Description Parameter The value Enabled indicates that the VLAN function is --VLAN enabled for the Internet port. ID of the VLAN where the IP phone belongs to. The network administrator divides the network where the --VID switch resides into multiple VLANs. - Page 54 Server time. Update Interval Interval at which VP530 obtains the UTC time from the NTP server. Choose the idle status If you did not press any digit key on the dial-up status, the phone will turn to which one. (Include DSS Main Desktop Key Desktop、...
- Page 55 Call forward types include Always, Busy, and No Answer. Always Forward Whether to always enable the call forwarding function. If you select On, VP530 forwards all incoming calls to a preset number. Target Number that incoming calls are forwarded to.
- Page 56 IP Video Phone Configuration Using the Web Browser Parameter Description Call Waiting Whether to enable the call waiting function. Hotline Number Hotline number. Hotline Delay (0~10s) Delay of making a call to the hotline number. TV Output Choose manual or auto to use this function. TV Format Set the TV format.
- Page 57 Replace rule: VP530 allows you to replace a complex number with a simple number. For example, after you replace 0123 with 12, VP530 makes a call to 0123 after you enter 12. The phone supports this rule of each distinct account.
- Page 58 Dial-now rule: After you enable this rule, VP530 makes a call as soon as you enter the preset number. For example, if you set Dial-now Rule to 0147, VP530 makes a call to 0147 for the setting time after you enter 0147. The setting time is the value which you input in the “Dial now Delay time (0~2000ms)”...
- Page 59 IP Video Phone Configuration Using the Web Browser Figure 6-13 Dial-now rule Door Phone Figure 6-14 Door phone - 53 -...
- Page 60 IP Video Phone Configuration Using the Web Browser Table 6-12 Parameters on the Door Phone tab page Parameter Description Door Phone List Select a Door Phone which you want to configure in this list. Device Model Select the device model Display Name Set the display name which you want to display.
-
Page 61: Contacts Tab Page
IP Video Phone Configuration Using the Web Browser Parameter Description Access PIN To input the PIN depends on IP Camera. For more information you can consult your system administrator. If the IP Camera hasn’t been set a PIN, user can see the video directly. If the phone has been set a PIN, user must input the PIN at first. - Page 62 Configuration Using the Web Browser Remote PhoneBook Each VP530 is configured with a local address book. A public address book is required for all phones in an enterprise. After a remote address book is enabled, users can access the remote address book.
- Page 63 IP Video Phone Configuration Using the Web Browser Figure 6-18 LDAP page Table 6-14 Parameters on the LDAP tab page Parameter Description LDAP Whether to enable or disable LDAP. LDAP Name To input the LDAP name. LDAP Name Filter Name filter. After you enter a name, the IP phone uses the name filter to search the LDAP server for the contact.
- Page 64 IP Video Phone Configuration Using the Web Browser Parameter Description Server Address IP address or domain name of the LDAP server. Examples are as follows: 192.168.1.100 lday.company.com Port Port number of the LDAP server. Default value: 389 Base Root directory that the IP phone searches. For example, if the value is dc=Redmond, dc=wa, the root directory is wa\Redmond.
-
Page 65: Upgrade Tab Page
LDAP server for the characters that a user dials. Upgrade Tab Page Basic setting On the Basic tab page, you can restart VP530, reset the VP530 to factory and upgrade etc. To reset VP530 to the factory settings, click the Reset To Factory an... - Page 66 IP Video Phone Configuration Using the Web Browser Advanced setting On the Advanced tab page, you can configure the auto provision function, and export/import configure file and export the system log. Figure 6-20 Upgrade advanced page - 60 -...
- Page 67 IP Video Phone Configuration Using the Web Browser Table 6-15 Parameters on the Advanced tab page Parameter Description PNP Active Whether to enable or disable PNP. PNP(Plug and Play) provides a proprietary method to enable "Auto Provisioning". DHCP Active Whether to enable or disable DHCP. Custom A valid Custom Option is from 128 to 254.
-
Page 68: Security Tab Page
IP Video Phone Configuration Using the Web Browser Security Tab Page Password You can change a password in the Password area. To change a password, you need to enter the old password once and the new password twice. Figure 6-21 Password page Trusted Certificates To upload a trusted certificate, proceed as follows: Step 1... -
Page 69: Using Vp530
The <SPK> key is used to switch the headset mode and hands-free mode. Multiple Accounts VP530 supports four independent SIP accounts. If multiple accounts are enabled, corresponding account names are displayed on the standby screen. You can click the account to select an account. After an account is selected, the dial page of the corresponding account will be displayed. -
Page 70: Redialing
Using the IP Address to Make a Call You can use the IP address of VP530 to make a call to an IP address in the same LAN or VPN. For example, you can use 10.10.10.1 to make a call to 10.10.10.2. -
Page 71: Rejecting A Call
You can view these calls in the call record list. Call Transfer You can transfer a call to other extension numbers or mobile numbers. VP530 supports the following call transfer modes: blind transfer, semi-attend transfer, and attend transfer. Step 1 In the conversation with user B, user A clicks the <Transfer>... -
Page 72: Three-Party Conference
After the BLF function is assigned to a key, you can learn about the status of other accounts (idle, ringing, or occupied) on VP530. You can directly press the key assigned with the BLF function to make calls. This requires the support from the server. -
Page 73: Blf List
IP Video Phone Using VP530 BLF List BLF List is a function which uses a group of programmable keys to subscribe to server for the state of each account in some group. The difference between the BLF and BLF list is BLF is to monitor a number which you set, but the BLF List is monitor a number depending on server. -
Page 74: Maintaining Vp530
IP Video Phone Maintaining VP530 Maintaining VP530 Restarting VP530 Users can restart the phone via phone or web interface. Restart the phone via phone interface, please refer to “Reboot”. “Basic setting” Restart the phone via web interface, please refer to on the Upgrade page. - Page 75 IP Video Phone Maintaining VP530 The manual is only for reference, please take the object as the standard. We reserve the right to improve or change the product and the user guide without notice. V1.0 2011-10-06 - 69 -...
Need help?
Do you have a question about the VP530 and is the answer not in the manual?
Questions and answers