Table of Contents
Advertisement
Quick Links
Advertisement
Table of Contents

Related Manuals for Emtec Movie Cube K220


Summary of Contents for Emtec Movie Cube K220
- Page 1 Home Multimedia Center Movie Cube K220 User’s Manual (Version 1.0)
-
Page 2: Table Of Contents
Table of Contents 1. Introduction ......................3 1.1 Preface ......................3 1.2 Packing List ....................3 1.3 Caution ......................4 1.4 Connection ....................6 1.5 First Time Usage ..................9 2. About the Player ....................10 2.1 Remote Control ..................10 2.2 Front Panel .................... -
Page 3: Introduction
We hope that this product will bring you a lot of enjoyment. We are committed to apply multimedia technology in your work, entertainment, family, daily life, car and everywhere! Welcome to Emtec. Thank you again for choosing our product. 1.2 Packing List... -
Page 4: Caution
1.3 Caution This player’s design and manufacture has your safety in mind. In order to safely and effectively use this player, please read the following before usage. 1.3.1 Usage cautions User should not modify this player. If commercial hard disk is being used, the environmental temperature should be within +5 ~ +35 . - Page 5 HDD format etc. Please backup your data. - It is suggested to do defragment after a long period of usage. - Regularly backup the data in the hard disk so that it can be recovered in the event of data corruption or loss.
-
Page 6: Connection
1.4 Connection 1.4.1 Connect to Computer (1) Make sure the player is powered on. (2) Plug in the squarish connector of the USB cable to this player’s USB DEVICE port. (3) Plug in the rectangular connector of the USB cable to computer. 1.4.2 USB Mass Storage Device (like USB Pen Drive, MP3, USB HDD etc.) Connection (1) Make sure the player is powered on. - Page 7 (2) Insert the card by following the arrow pointer in the picture. 1.4.4 TV connection 1.4.4.1 A/V OUT (1) Follow the picture and plug in the 3 color connector to the player’s A/V OUT jack. (2) Follow the picture and plug in the 3 color connector to the TV’s A/V IN jack. In this way, you can enjoy the content in the player on TV or other display devices.
- Page 8 In this way, you can have the highest quality video and audio via a single cable. 1.4.5 Digital Audio Device connection (1) Follow the picture and plug in the Toslink connector of your coaxial cable to the player’s S/PDIF Coaxial jack. Or if you use optical fiber, please plug in the Toslink connector of your optical fiber to the player’s S/PDIF Optical jack (not supplied).
-
Page 9: First Time Usage
1.5 First Time Usage 1. Power on After connecting to power, the POWER button indicator on the front panel will turn on (red light). Press the POWER button to power on the player, then the indicator light will turn blue. 2. -
Page 10: About The Player
2. About the Player 2.1 Remote Control All procedures in this manual can be carried out using the remote control buttons. See the following for details on each button and its function: 1. POWER 2. HOME 3. TV SYS 4. DVD 5. - Page 11 MUTE Press this button to turn on/off mute function REPEAT Setup the repeat mode. AUDIO Switch audio channels. SLIDE Select to set photo+music slide show RETURN Press to go back to the previous screen when navigating menus. NEXT In file list mode, press this button to move to the next file list. In playback mode, press this button to playback the next media file RIGHT Move cursor to the right.
-
Page 12: Front Panel
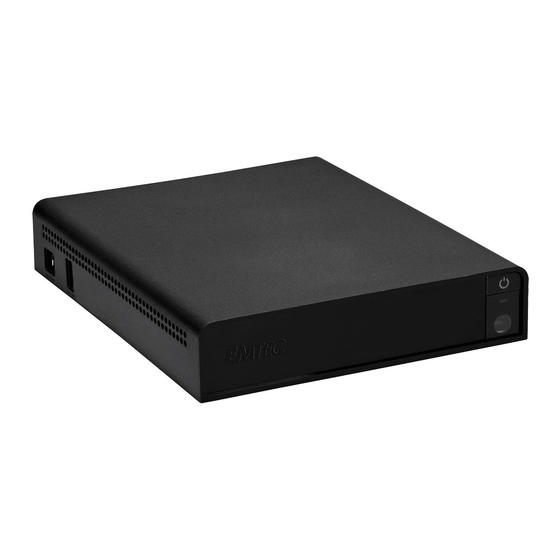
2.2 Front Panel 1. POWER button 2. REC indicator 2.3 Rear Panel 1. DC IN jack 2. HDMI jack 3. S/PDIF OPTICAL jack 4. S/PDIF COAXIAL jack 5. A/V OUT jack 2.4 Side Panel 1. USB DEVICE port (B-Type) 2. USB HOST port (A-Type) 3. -
Page 13: Functions
3. Functions 3.1 Main Interface In the main interface, by default the cursor will stay on the photo function, when the cursor points to another function, the name of that function will be displayed. The main interface contains: PHOTO, MUSIC, MOVIE, BROWSER, DEVICE and SETUP. 3.2 Movie Playback Enter movie interface, only supported video files and folders will be displayed. -
Page 14: Photo Playback
Subtitle: Press to turn on/off the subtitle. OPTION: Press to open tool bar. STOP: Press to stop the playback and return to the video interface. 3.3 Photo Playback Enter photo interface, only supported image files and folder will be displayed. This player only supports JPEG files. -
Page 15: Dvd Playback
Select an audio file to start playback. You can access the following functions during playback: PLAY/PAUSE: Press this button to play/pause the playback FR/FF: Press to fast reverse/fast forward the current playback. Press repeatedly to select speeds(2x/4x/6x/8x/16x/32x) REPEAT: Select to choose between TRACK, FOLDER and ALL. STOP: Press to stop the playback and return to the audio interface OPTION: Press to open tool bar. -
Page 16: Storage Device
OPTION: Press to activate/hide the tool bar during playback. PREV/NEXT: Press to go to previous/next chapter. STOP: Press to stop the playback. You can switch the audio languages, subtitle, etc… thanks to the buttons in the tool bar. Note: The VIDEO_TS and AUDIO_TS directories must be copied together to one same folder on the HDD. - Page 17 OSD language To select and change the system language. It supports English, French, German, Italian, Spanish, etc. Encoding Select to set text encoding. Slide time Select to set the interval time of photo slide show: 5S, 10S, or 15S. Slide mode Select to set the transitional effect of photo slide show.
- Page 18 Interval time 5 Sec, 10 Sec, 15 Sec, 30 Sec, 1 Min, 3 Min, Off Transition effect Select to set the transition effect for photo slide show. Show type Fit Screen, Full Screen Color tone Normal, Black & White, Classic Browse Thumbnail, File Manager 3.7.4 Custom setup...
-
Page 19: Upgrading The Firmware
Photo ON, OFF Music ON, OFF Movie ON, OFF 4. Upgrading the Firmware The firmware is the operating system (OS) installed on the device. Firmware upgrades can bring new features, improvements and bug fixes. Download the latest firmware from our official website. Step 1: Prepare the Memory Card You will need a Memory Card for firmware upgrade. -
Page 20: Appendixes
5. Appendixes 5.1 Specifications Technical Specifications Format: AVI, VOB, MPG,DAT, MP4, TS Codec: MPEG-1, MPEG-2 Video Resolution: Up to 720x576 (PAL), 720x480 (NTSC) Subtitle: SRT, SSA, SMI Format: MP3, WMA, OGG (DRM, Pro and Advanced Profile not supported) Audio Codec: MP2, MP3, PCM, LPCM Compression rate: MP3: 32 Kbps~320 Kbps;... -
Page 21: Frequently Asked Questions
5.2 Frequently Asked Questions Question 1. My computer does not recognize my player. Answer: (1) Make sure the player is powered on. If it is off, the computer will not be able to find the player. (2) Make sure the player is connected to computer. (Refer to 1.4.1 for connecting player to computer). -
Page 22: Copyrights And Trademarks
filtered views such as Photos, Music, or Movies. Question 6. Why do some supported photo formats, can not be shown in the photo function? Answer: In the JPEG format there are different modes. The player doesn’t support all the modes. So you have to change your photo format first as follow: (1) Use Photoshop to open the photo. -
Page 23: License Information
- Loss of customer’s software, firmware, information, or memory data. - Improper handling or installation. For complete information regarding EMTEC Movie Cube warranty and customer support please visit our website: www.emtec-international.com 6. License information libjpeg is distributed with this product. This software is copyright (C) 1991-1998, Thomas G. - Page 24 this License and to the absence of any warranty; and give any other recipients of the Program a copy of this License along with the Program. You may charge a fee for the physical act of transferring a copy, and you may at your option offer warranty protection in exchange for a fee.
- Page 25 a) Accompany it with the complete corresponding machine-readable source code, which must be distributed under the terms of Sections 1 and 2 above on a medium customarily used for software interchange; or, b) Accompany it with a written offer, valid for at least three years, to give any third party, for a charge no more than your cost of physically performing source distribution, a complete machine-readable copy of the corresponding source code, to be distributed under the terms of Sections 1 and 2 above on a medium customarily used for software interchange;...
- Page 26 the recipients' exercise of the rights granted herein. You are not responsible for enforcing compliance by third parties to this License. 7. If, as a consequence of a court judgment or allegation of patent infringement or for any other reason (not limited to patent issues), conditions are imposed on you (whether by court order, agreement or otherwise) that contradict the conditions of this License, they do not excuse you from the conditions of this License.
- Page 27 10. If you wish to incorporate parts of the Program into other free programs whose distribution conditions are different, write to the author to ask for permission. For software which is copyrighted by the Free Software Foundation, write to the Free Software Foundation; we sometimes make exceptions for this.
Need help?
Do you have a question about the Movie Cube K220 and is the answer not in the manual?
Questions and answers