Table of Contents
Advertisement
Teton Grill Company – 3880 Fourth Avenue East – Shakopee, Minnesota, 55379
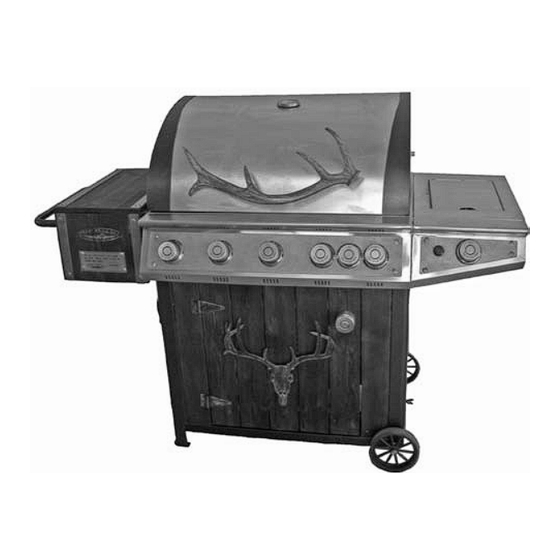
Stainless Steel Gas Grill
Use and Care Guide
Model: Heritage Grill
WARNING:
All barbecues and carts are designed for outdoor use only and cannot be installed in or on boats.
This barbecue is not intended to be installed in or on recreational vehicles. All barbecues are not intended for
commercial use.
Owner: Read this Owner's Manual carefully and be certain that your gas grill is properly assembled, installed and
maintained. Failure to follow these instructions could result in serious bodily injury and/or property damage.
Note to Installer:
Leave this Owner's Manual with the consumer after delivery and/or installation.
Note to Consumer:
Leave this Owner's Manual in a convenient place for future reference.
Customer Service Helpline:
about assembly or grill operation, or if there are damaged
or missing parts when you unpack the grill from the
shipping box, call us Monday-Friday, 9:00am to 4:30pm,
If you have questions
CST, at: 877-508-3866
1
Advertisement
Table of Contents

Related Manuals for Teton Grill Stainless Steel Gas Grill


Summary of Contents for Teton Grill Stainless Steel Gas Grill
- Page 1 Teton Grill Company – 3880 Fourth Avenue East – Shakopee, Minnesota, 55379 Stainless Steel Gas Grill Use and Care Guide Model: Heritage Grill WARNING: All barbecues and carts are designed for outdoor use only and cannot be installed in or on boats.
-
Page 2: Table Of Contents
Thank you for buying a Teton Classic grill. We know that there are many grilling options available. Our unique designs have been developed to combine the best grilling performance with work of art details. We hope that this combination will enable you to join us in an outdoor lifestyle that allows “LIVING AT ITS PEAK”. -
Page 3: Safety Information
SAFETY INFORMATION TO AVOID PERSONAL INJURY • When properly cared for, your grill will Grease is flammable. Let hot provide safe and reliable service for many grease cool before attempting to years. Abiding by the following safety handle it. Clean the bottom of the instructions can greatly reduce the risk of grill’s firebox often, and do not allow accidents. - Page 4 SAFETY INFORMATION - continued • using this appliance. Some synthetic Do not use briquettes of any kind fabrics are highly flammable and in the grill. This grill is designed for should not be worn while cooking. use without briquettes. Do not place briquettes on the radiant as this will •...
- Page 5 SAFETY INFORMATION - continued Note: LP Gas Cylinder (supplied by others) must be fitted with Overfill Protection Device (OPD). TESTED IN ACCORDANCE WITH ANSI Z21.58A STANDARD FOR OUTDOOR COOKING GAS APPLIANCES. THIS GRILL IS FOR OUTDOOR USE ONLY. Check your local building codes for the proper method of installation. In the absence of local codes, use either the National Fuel Gas Code, ANSI Z223.1/NFPA 54.
-
Page 6: Lighting Precautions
LIGHTING PRECAUTIONS CAUTION WARNING To protect yourself against the risk of electric Always keep your face and body as far away shock, connect to properly grounded outlets from the burner as possible when lighting. only and keep the extension cord dry and off the ground. -
Page 7: Assembly Instructions
ASSEMBLY INSTRUCTIONS Assembly of the grill should take 15 to 30 minutes and will require the use of a Phillips screwdriver and one AA battery (not included). PLEASE READ THESE INSTRUCTIONS COMPLETELY BEFORE STARTING ANY ASSEMBLY. COMPLETE THIS ASSEMBLY BEFORE INSTALLING ANY LP GAS TANK (supplied by others) TO THE GRILL. - Page 8 ASSEMBLY INSTRUCTIONS- continued 2. Attach control panel to shelf unit with 2 screws. Insert nozzle at end of gas valve into cast iron burner. 3. Turn over the assembly and attach end of black wire that is fixed to a ceramic piece by the burner to the male attachment clip at top of gas valve on control panel.
- Page 9 ASSEMBLY INSTRUCTIONS – continued 7. Attach hose from main grill burner gas bar to side burner threaded outlet as shown and tighten. Attach hose with regulator to side burner threaded outlet and tighten. Regulator is attached to LP gas tank for use. WOOD SHELF AND HANDLE ASSEMBLY 1.
-
Page 10: Grill Assembly
DRIP TRAY ASSEMBLY 1. Insert drip tray collection pan into drip tray as shown below. GRILL ASSEMBLY 1. Remove the cast iron Cooking Grates. 2. Install the 4 steel Flame Tamers in the grill, above the burners, as shown in below. Make sure the flame tamers rest securely on the locating pins. -
Page 11: Rotisserie Assembly
CONTROL KNOB INSTALLATION BE SURE GAS IS NOT CONNECTED WHEN INSTALLING CONTROL KNOBS 1. Install the left Control Knob first. Using the supplied 2mm allen wrench, loosen the set screw so that nothing shows on the inside of the stem slot. Put the knob over the left valve stem. Push the knob down and turn 90 degrees to the left. -
Page 12: Gas Hook-Up
GAS HOOK-UP Total gas consumption (per hour) of the Teton Heritage grill with main burners “IGNITE/HI”: 60,000 btu/hr LP GAS HOOK-UP: Side Burner: 12,500 btu/hr Ensure that the black plastic grommets on the LP cylinder valve are in place and that Rear Burner: 10,000 btu/hr the hose does not come into contact with the grease tray or the grill head. -
Page 13: Gas Tank Precautions
GAS TANK PRECAUTIONS • The maximum size LP tank you should use is Only use the regulator and the hose approximately 12 inches in diameter by 18- assembly supplied with your gas grill. 1/2 inches high. You must use an OPD gas Replacement regulators and hose tank which offers an Overfill Prevention assemblies must be those specified in... -
Page 14: Leak Testing
! Warning ! A strong gas smell or the hissing sound of gas indicates a serious problem with your grill or the LP gas tank. Failure to immediately follow the steps below could result in a fire or explosion that could cause serious property damage, personal injury, or death. -
Page 15: Operating Instructions
OPERATING INSTRUCTIONS NOTE: The grill is designed to grill efficiently General use of the grill without the use of lava rocks or briquettes of any kind. Heat is radiated by the steel flame Each main burner is rated at 12,000 BTU/hr. tamers positioned above each burner. - Page 16 OPERATING INSTRUCTIONS – continued USING THE ROTISSERIE / REAR BURNER A rotisserie is mostly used to cook large pieces of meat or poultry to assure slow, even cooking. The constant turning provides a self basting action, making food cooked on a rotisserie moist and juicy. SAFETY INFORMATION When using and electrical appliance, basic safety precautions should always be used, including the following:...
-
Page 17: Operating Instructions
OPERATING INSTRUCTIONS – continued USING ACCESSORY HOLDERS Along the right edge of the Side Burner Shelf are three (3) screws with a decorative finish. These screws can be used to hold grilling accessories like a fork, spatula, tongs or a grill brush. Simply unscrew as required to hold the strap on the accessory. -
Page 19: Lighting Instructions
LIGHTING INSTRUCTIONS ! WARNING ! TO LIGHT THE GRILL BY MATCH: To light your gas grill by match, open the lid BEFORE LIGHTING… and light a match. Place the lit match on the match holder as shown in Figure A. Turn the Do not attempt to light the grill if odor of right main burner control knob to the HI gas is present. - Page 20 LIGHTING INSTRUCTIONS - continued FLAME CHARACTERISTICS Check for proper flame height. Each burner is adjusted prior to shipment; however, variations in the local gas supply may take minor adjustments necessary. Burner flames should be next to the burner, blue and stable with no yellow tips, excessive noise, or lifting. Visually check the burner flames prior to each use.
-
Page 21: Care And Maintenance
CARE AND MAINTENANCE Stainless Steel Grill Burner Cleaning Many of the grill components are made with Ensure the gas supply is off and the knobs non-rusting and non-magnetic stainless steel. are in the OFF position. Make sure the grill is There are many different stainless steel cool. -
Page 22: Care And Maintenance
CARE AND MAINTENANCE- continued HOW TO REPLACE THE MAIN BURNER 1. Remove the burner by removing the one hold down screw and lifting burner out. 2. Examine the open end of the new burner. There is a shutter around the outside of the open end held in place with one screw that controls the air used by the burner. -
Page 23: Troubleshooting
TROUBLESHOOTING A list of common problems and solutions is located on the proceeding pages. PROBLEM SOLUTION When I light the grill it does not -- Make sure the gas is turned ON. immediately ignite. -- Make sure there is a spark while trying to ignite the burner. -- Push in and hold for approximately 5 seconds before turning the knob. - Page 24 The grill takes a long time to -- It normally takes about 10 minutes in order for your grill to preheat. reach a pre-heating temperature of 480°F. Cold weather and wind may effect your preheat time. -- If you are using volcanic rock or briquettes, it can increase the preheat time and maximum temperature.
-
Page 27: Teton Heritage Gas Grill Parts List
Teton Heritage Gas Grill Parts List Item Description Item Description 1 Lid 34 Rear Burner Ignition 2 Thermometer 35 Side Burner Control Panel 3 Side Panel for Lid 36 Side Burner Valve 4 Handle 37 Side Burner Bezel 5 Accent Panel for Side Shelf 38 Side Burner Control Knob Accent for Side Burner Control 6 Side Shelf Wooden Table... -
Page 28: Grilling Hints
GRILLING HINTS The doneness of meat, whether rare, medium, or well done, is affected to a large degree by the thickness of the cut. Expert chefs say it is impossible to cook rare a thin cut of meat. The cooking time is affected by the kind of meat, the size and shape of the cut, the temperature of the meat when cooking begins, and the degree of doneness desired. -
Page 29: Limited Warranty
Center at (877) 508-3866 or email us at contact@tetongrills.com. If Teton Grill Company confirms the defect and approves the claim, then Teton Grill Company will elect to replace such part without charge. Parts returned to Teton Grill Company must be sent freight... -
Page 32: Warranty Registration Card
|__|__|__|__|__|__|__|__|__|__|__|__|__|__|__|__|__|__|__|__|__|__|__|__|__|__| Address |__|__|__|__|__|__|__|__|__|__|__|__|__|__|__|__|__|__|__|__|__|__|__|__|__|__| City State Zip Code |__|__|__|__|__|__|__|__|__|__|__|__|__|__|__|__|__|__|__|__|__|__|__|__|__|__| Email Address |__|__|__|__|__|__|__|__|__|__|__|__|__|__|__|__|__|__|__|__|__|__|__|__|__|__| Phone Number Date of Purchase |__|__|__| - |__|__|__| - |__|__|__|__| |__|__|/|__|__|/|__|__|__|__| Serial Number |__|__|__|__|__|__|__|__|__|__|__|__|__|__|__|__|__|__|__|__|__|__|__|__|__|__| Model Number |__|__|__|__|__|__|__|__|__|__|__|__|__|__|__|__|__|__|__|__|__|__|__|__|__|__| Mail to: Teton Grill Company 3880 Fourth Avenue East Shakopee, MN 55379...
Need help?
Do you have a question about the Stainless Steel Gas Grill and is the answer not in the manual?
Questions and answers